
Remember our last tutorial on making AI song covers using the RVC WebUI? If not, you can check it out here. Well, since that time, a new contender has entered the arena when it comes to neat GUIs that can make creating AI vocal covers much easier. The AICoverGen project makes creating RVC model based song covers locally on your system even easier than before! Want to know how to use it? Then let’s jump straight into the guide.
Here is another way of making AI vocal covers explained in our previous tutorial: RVC WebUI How To – Make AI Song Covers in Minutes! (Voice Conversion Guide)
How To Install The AICoverGen WebUI?
Step 1: Install The Required Dependencies
Let’s get to the installation process which should take you about a few minutes total. Here is what you will need for the AICoverGen WebUI to work:
- An NVIDIA graphics card (for now AMD GPUs are not officially supported)
- Python 3.9 (other versions might not work correctly).
- Git (if you don’t already have it).
- ffmpeg (a required set of audio/video libraries, remember to add it to PATH after installing),
- SoX (Sound eXchange for Python audio processing).
All the links lead to official sources for each of the required dependencies. All you need to do is to install them on your system, and then proceed with the next step.
Step 2: Clone The AICoverGen Repository Onto Your System
Now, after you’ve got all the dependencies installed on your system, you need to clone the AICoverGen repository into the folder you want to install it in, by using git commands.
Simply go into the directory you want the AICoverGen to be installed in, open a system terminal in this folder and use the following commands:
git clone https://github.com/SociallyIneptWeeb/AICoverGen
cd AICoverGen
pip install -r requirements.txt
This will copy all the AICoverGen files from its official GitHub repository and automatically install all the missing dependencies that the program needs to run. Now that the files are all downloaded onto your system we can continue.
Step 3: Download The Models That AICoverGen Requires To Work
Now, run the following command:
python src/download_models.pyThis will initiate the download process for additional models that the AICoverGen WebUI needs to do its work.
Step 4: All Done! Run The AICoverGen WebUI
After the additional models are finished downloading (this may take a while depending on your network connection), you can run the WebUI. The installation process is finished!
To run the AICoverGen GUI, simply run the command you can see below. Remember that you need to be in the directory the webui.py file is located in.
python src/webui.pyNow the Gradio WebUI should start with no problems. Once it loads, it will be visible under the default URL http://127.0.0.1:7860
Paste the URL in your browser and you can start creating your AI vocal covers right away!
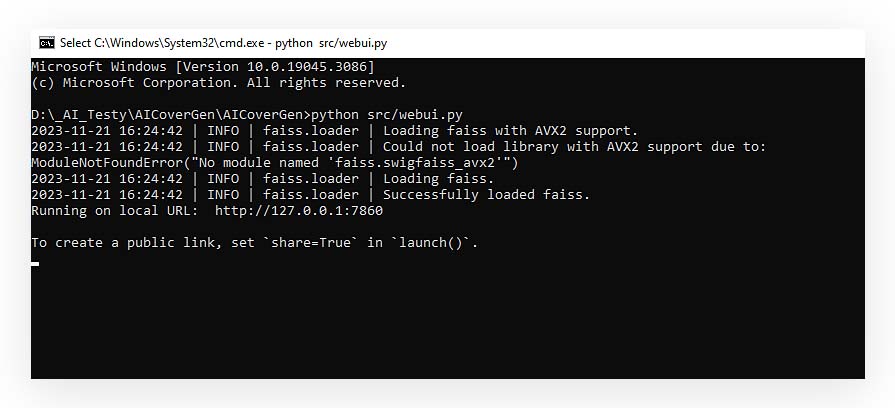
If the WebUI refuses to run, first check if there are any console errors present, then, make sure that all of the dependencies are installed correctly. If there are no errors on launch and you have all the dependencies on your system, the software should start without any problems.
How To Generate AI Voice Covers Using AICoverGen WebUI – In 4 Steps
The UI is extremely simple to use. With AICoverGen you don’t have to provide separate vocal acapella file like you would when using the RVC WebUI. In fact, you don’t even have to have the song you’d like to make the cover of downloaded on your PC!
You just need a link to a YouTube video with the song of your choice, and the whole process including separating the vocals from the instrumental, removing unwanted reverb from the acapella and the selected RVC voice model inference will be done automatically. This is great news for all of you looking for a simple one click solution to making your own custom AI vocal covers.
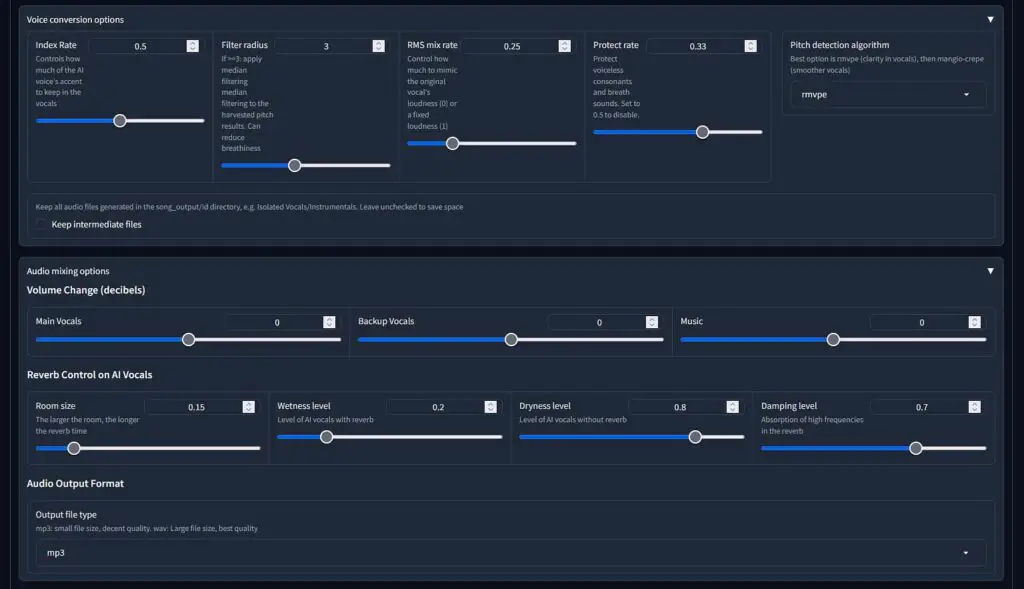
The AICoverGen UI is much easier to use than the RVC WebUI we covered previously, albeit it also has a little bit less settings you can change to further tweak for better voice conversion quality. Despite that, it’s one of the best ways to quickly generate AI vocal covers as of now.
Now, let’s go through the exact steps you need to take to generate your first cover.
Step 1: Download Your Chosen RVC Voice Model
To begin, you need an RVC voice model file of the voice you’d like to substitute for the main singer voice in the song of your choice. RVC models are available in many places online, including rvc-models.com.
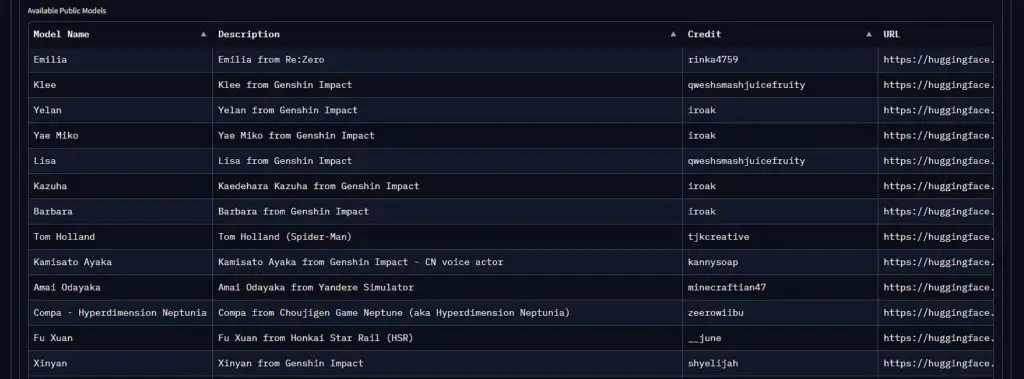
You can also download RVC models straight from the AICoverGen WebUI. To do this, simply move to the Download Model tab on top of the user interface and click it.
Then, paste a download link to the .zip file containing an RVC model and an .index file. You can find download links for many different RVC voice models for instance on rvc-models.com which we’ve already linked above.
Click the Download button, and once you see a message indicating a successful download you’re all done. Your new voice model should now appear in the models list in the Generate tab upon clicking the Refresh Models button.
If you have some of your favorite RVC voice models already on your computer, you can also upload them directly to the WebUI. To do this, simply paste the folder with the model files inside the “rvc_models” folder in the AICoverGen WebUI main directory.
In that folder there should be both the .pth model file, and the .index file. After clicking the Refresh Models button in the WebUI, your imported models should appear on the model list.
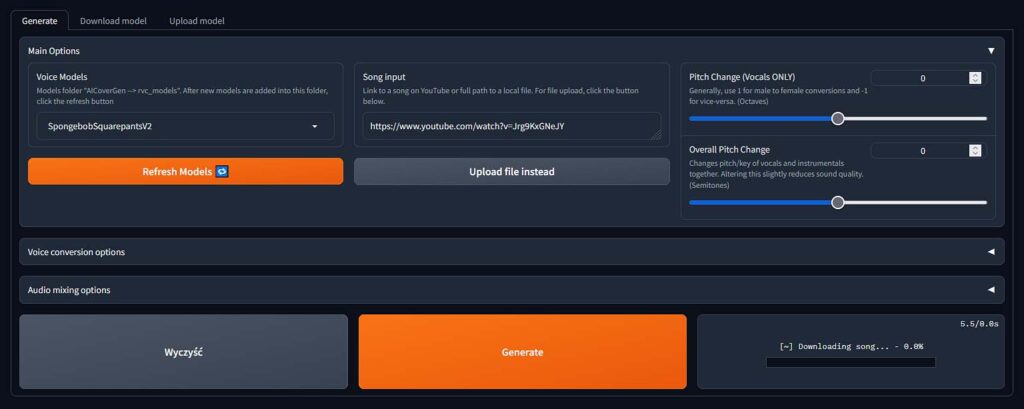
Step 2: Choose The Song You Want To Make a Cover Of
Here you have two options: either paste a YouTube link to a song that you want to cover, or upload the .mp3 file with the song from your hard drive.
If you went the YouTube way, the WebUI will download the song in the first part of the cover creation process.
Step 3: Begin The Automated Process
Once you’re finished choosing your base voice model and the song to cover you can press the orange “Generate” button and let the software do its work. This might take a while so sit back and relax!
Step 4: Enjoy! All Done!
That’s all! After a while, your newly generated AI cover should be now visible in the bottom left part of the WebUI window, and you can play it right inside your browser right away to evaluate its quality. It will also be saved in the default output directory as an .mp3 file.
If the quality isn’t quite what you expected, you can always tweak a few of the available generation settings and start the inference process again. Depending on the characteristics of the input material and the quality of the RVC voice model you’ve chosen, the overall quality of the cover can get pretty high!
A Word Of Appreciation
If you enjoy using the AICoverGen UI, consider following its creator on his social media, GitHub and YouTube. Much work has gone into streamlining the otherwise not-so-beginner-friendly process of making AI song covers and making the program free and open-source.