AllTalk TTS is one of the best freely available open-source voice cloning programs I’ve used to this day. Here is how you can quickly set it up, in a matter of around 10 minutes total! Using this software you can clone any voice you’d like and then use it as a regular TTS voice with text input – in 16 different languages. Let’s begin!
Once you’re done, you might want to check this out: How To Clone And Add a Custom Voice To AllTalk TTS?
What Are The Requirements?
If you want to get AllTalkTTS running on your system, there are only a few things you’ll need:
- Python installed on your system.
- C++ Development Tools For Windows (can be downloaded using the free Visual Studio Community Edition installer).
- AllTalk TTS files downloaded from the official GitHub repository.
I’ll show you how to download and install all of these in less than 10 minutes!
By the way, this software is confirmed to work on 8GB VRAM cards without any trouble, and with low VRAM mode enabled it should also be able to run on GPUs with 4GB of video memory. When making this guide, I’ve been using my older RTX 2070 Super 8GB.
Installing AllTalk TTS – In 5 Short Steps
Here are the exact steps you need to follow to install AllTalk TTS on your PC. This will work exactly the same both on Windows 10 and 11.
Step 1 – Install Python On Your System

As I’ve already mentioned, the two requirements that are needed to run AllTalk TTS (at least the ones you need to install manually) are Python and the C++ Development Tools For Windows, which we’ll install in the next step.
First, if you don’t have Python installed on your system, head over to the official Python website here, and pick the latest Python installer.
Run the installer and during the installation process check the “Use admin privileges when installing py.exe” and “Add python.exe to PATH”.
Click on the “Install Now” button, and after the installation is finished, you’re done with this step.
Step 2 – Install The C++ Development Tools For Windows
Another key dependency for AllTalk are the C++ dev tools for Windows, which you can get using the Visual Studio Community installer. The good news is that you don’t have to install all the Visual Studio components, nor run the Visual Studio software to finish this step.
We will just use the VSC installer to get the files we need on our system. Follow through like this:
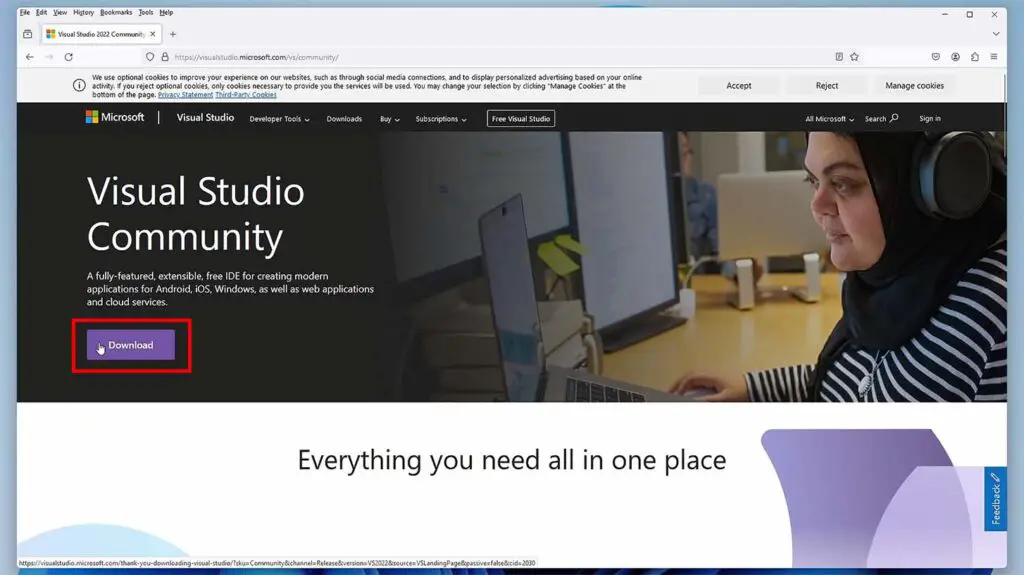
Download the Visual Studio Community installer from the official Microsoft website here, and then run the installer.
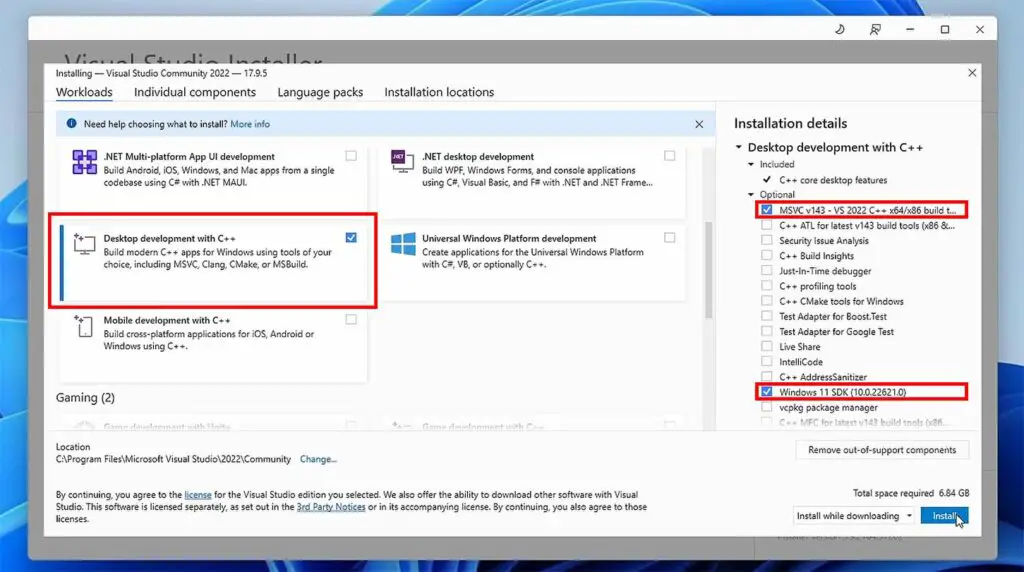
Within the installer, select only the “Desktop development with C++” option, and then look at the right side. You do want to uncheck the components we don’t need, mainly to save up on disk space.
Uncheck all the optional components besides the Microsoft Visual C++ Build Tools (which will be called something like “MSVC v143 – VS 2022 C++ x64/x86 build tools…”), and the Windows 10/11 Software Development Kit (which should be called “Windows 10/11 SDK (10.0.22621.0)”). Refer to the image above.
After only these two options are selected in the Optional section, click the Install button, and wait for the installation process to finish. Now you can proceed to the next step.
Step 3 – Download & Unpack The AllTalk TTS Files
If you know how to use git and have it installed on your system, you can use that to clone the AllTalk TTS files onto your system. If not, here is another way you can do this which I’m about to show you.
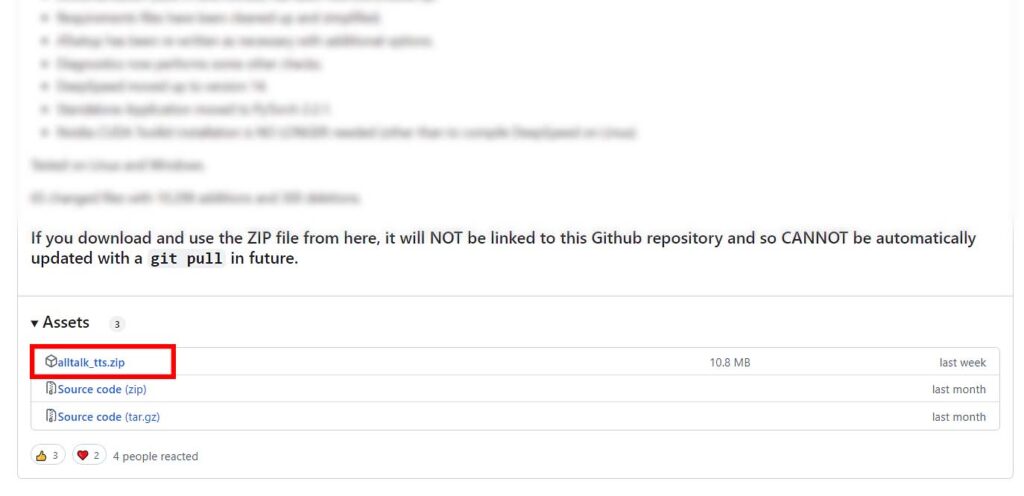
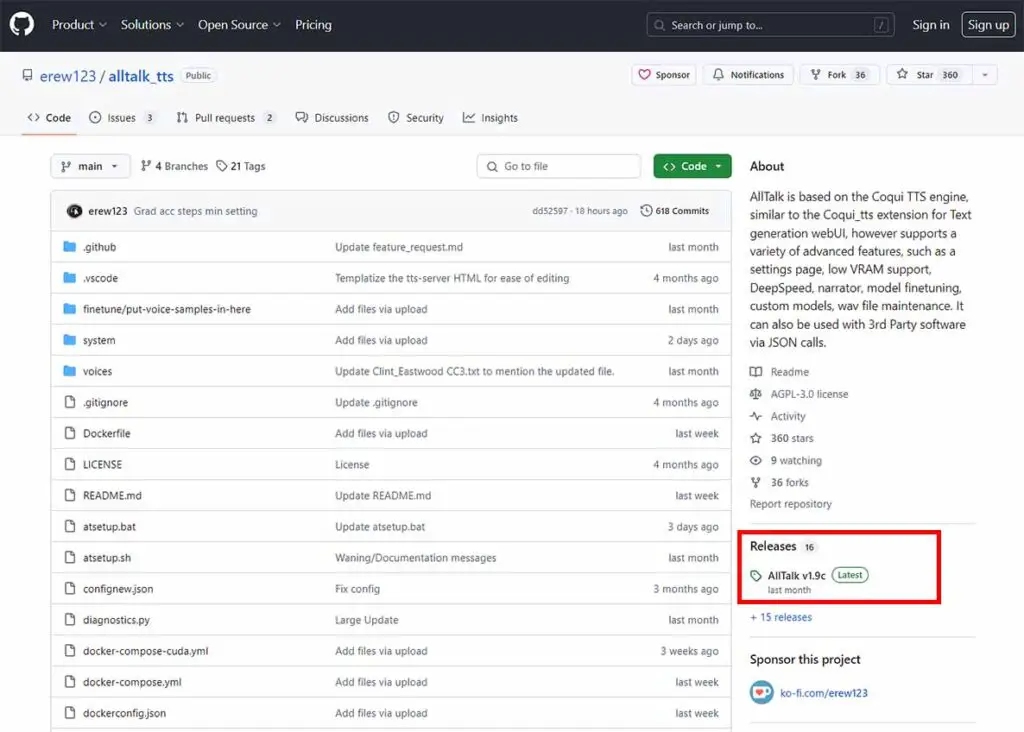
Go to the official AllTalk TTS GitHub repository here, and in the Releases section, download the .zip file with the latest release of the software.
Once the file is downloaded, extract it. Now, the program still needs to be installed and configured during the first launch.
Sourcing the program like this will only make the updating process a little bit different, and really has no other downsides.
Step 4 – Run The atsetup.bat Installation File
Once all the files are extracted, simply locate the atsetup.bat file and then double click it to run it. A Windows Microsoft Defender prompt should pop up, click on Run Anyway to let the installer start.
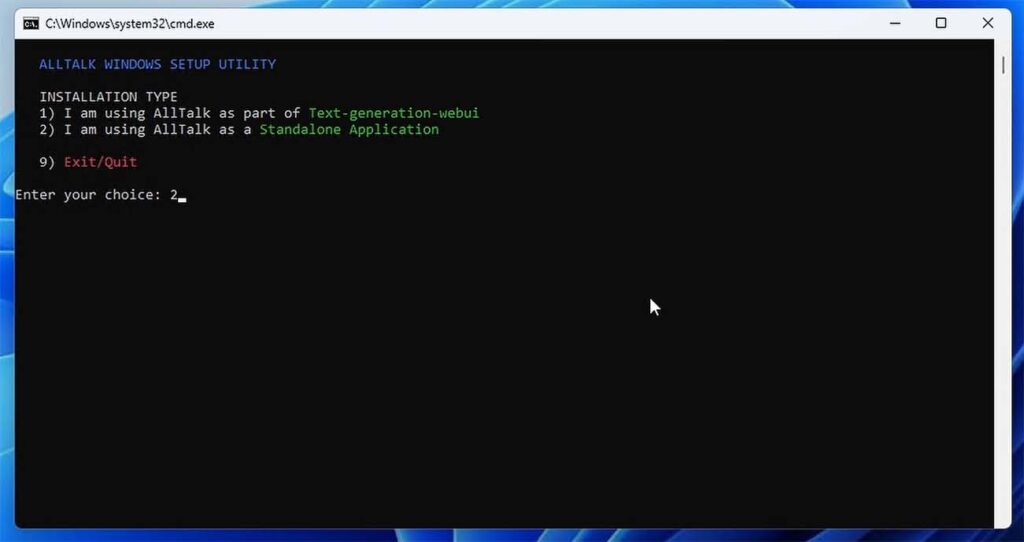
Once you do that, a terminal window should open, and the installation process will begin. You will be asked to choose whether you’re going to be using AllTalk TTS alongside the text generation WebUI, or as a standalone program. In our case, we will select the second option – enter the number 2 into the terminal, and then press the enter key to confirm your choice.
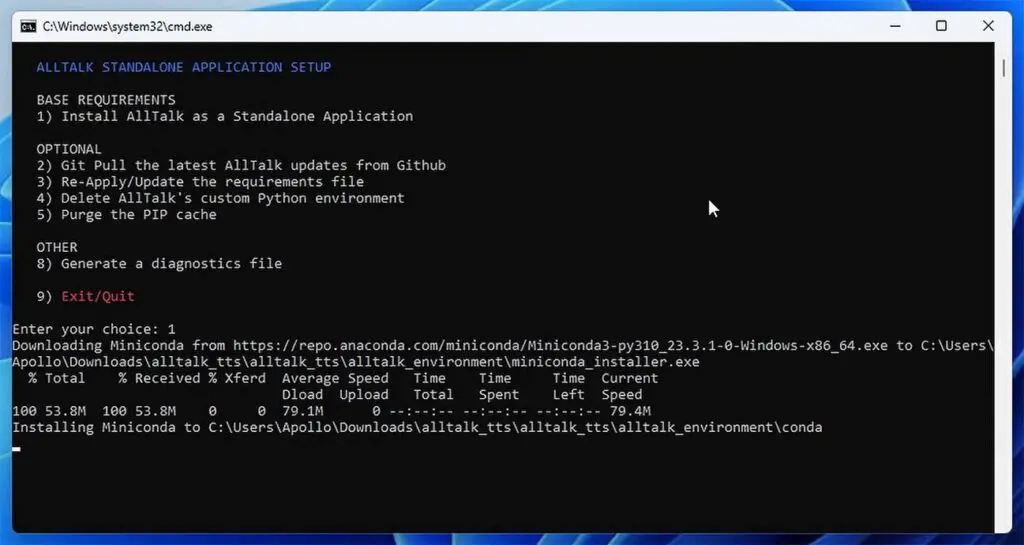
Then, on the second screen you need to select the first option: Install AllTalk as a Standalone Application. The rest of the options are meant for updating the program, and for debugging purposes.
Now sit back and relax – the installer will prepare an environment for the program to run in and download all of the remaining dependencies for the software automatically. It shouldn’t take more than a few minutes, but it will depend on your network connection speed and quality.
Step 5 – Start Up The AllTalk TTS WebUI
After the installation process is finished, you will be notified about the existence of 3 new files: start_alltalk.bat, start_finetune.bat, start_environment.bat.
From these three, you’ll want to use the first one to start the WebUI. Right click it and select Run as Administrator.
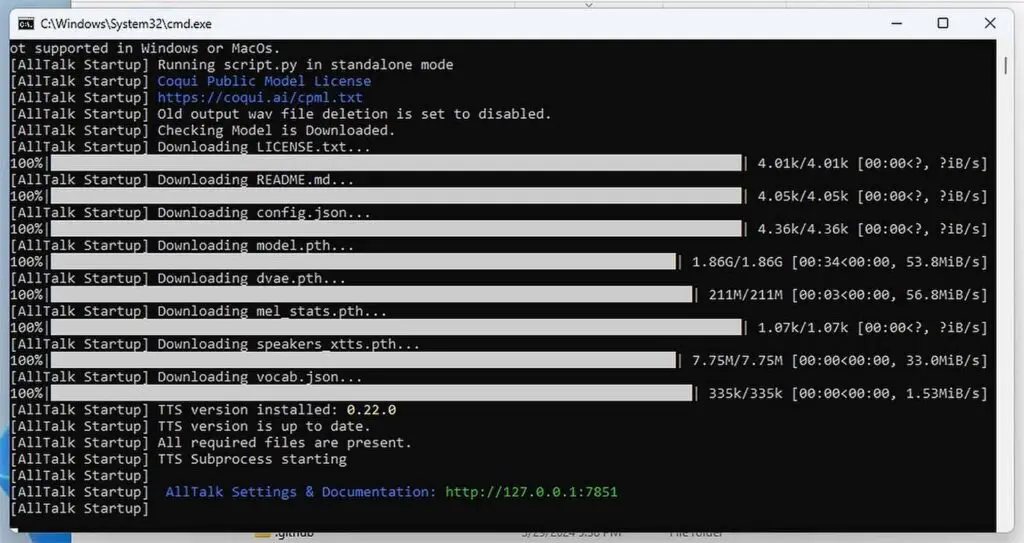
A terminal window will open. Don’t close it at any point before you wish to exit the program. Before AllTalk starts, it will actually also need to download the voice models it will use for voice cloning. Just be patient, it can take another few minutes or so.
Once that is done, you will finally be able to enter the WebUI and begin using the program. The Gradio WebUI will be hosted under a local IP address that will be shown inside the terminal window. Simply copy over this address to a web browser of your choice, and hit enter.
Important note: The way it works right now, is that the message showing you the localhost address under which the WebUI is available actually shows before the WebUI itself is initialized. If upon trying to connect to the said address you see an error, wait a little bit until the base voice model is loaded into memory. It can take from a few seconds up to 1-2 minutes.
All done! The next time you want to use the WebUI, simply run the start_alltalk.bat file again!
For Starters: There Are Two Main Views in AllTalkTTS
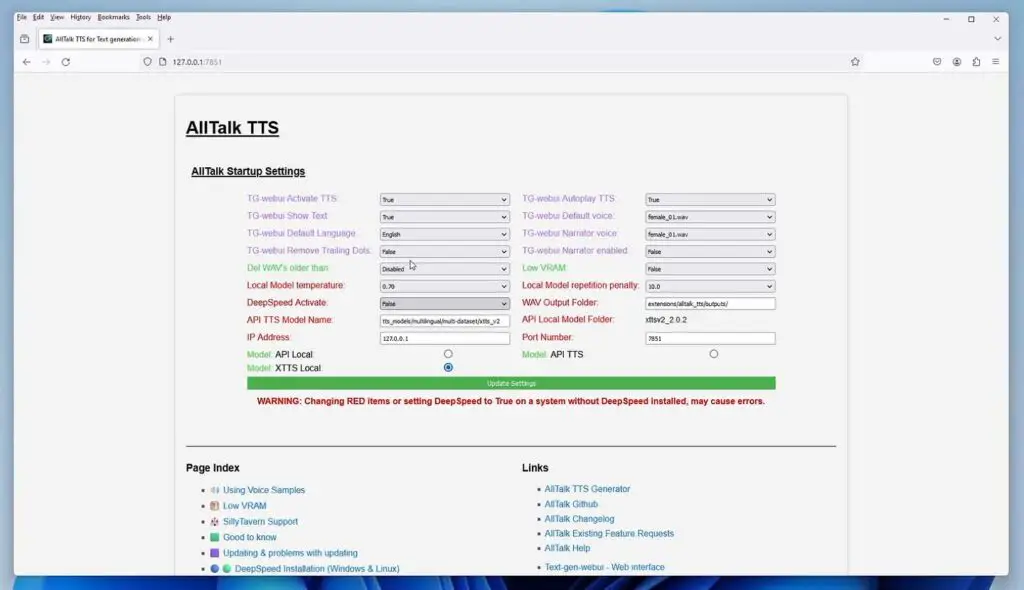
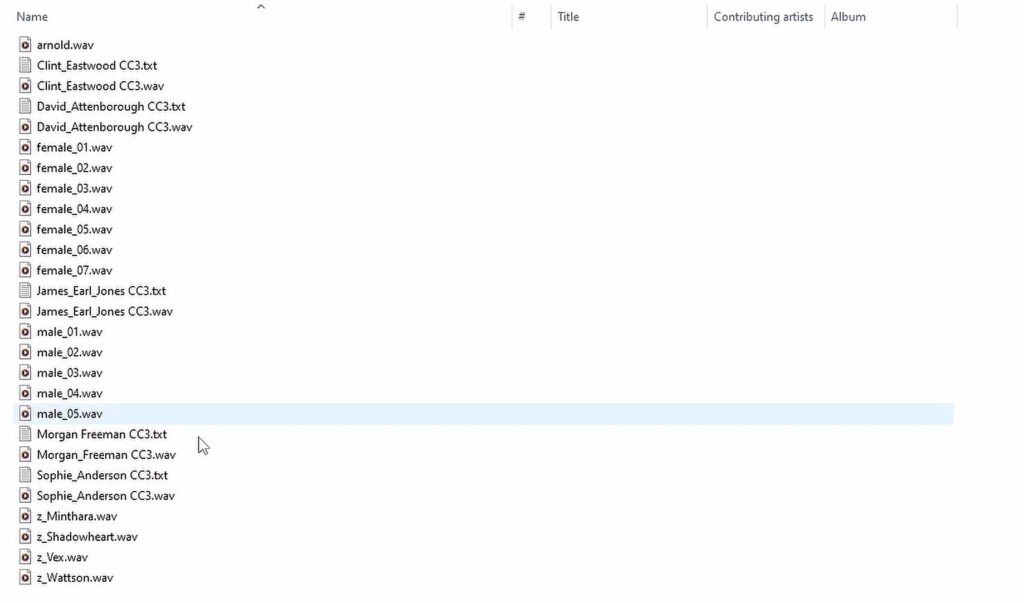
Once you connect to the mentioned address under which the WebUI is hosted, you will be taken to the main webview which contains all of the project’s documentation, quite a few settings that you can tweak, and a neat tool in which you can try out all of the pre-loaded voices. And there are quite a few of them.
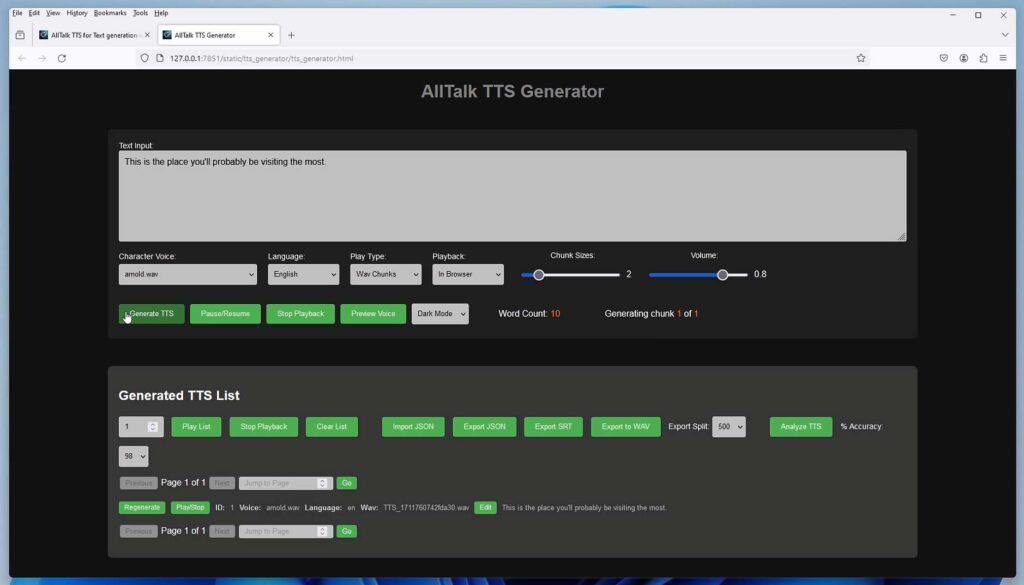
However, there is also a second view, much more convenient than the first one once you get started. To enter it, in the main WebUI window locate the Links section. It should be on the right, beneath the settings menu. In this section, click on the AllTalk TTS Generator, and it should take you right to the main TTS generator window. You’ll most probably spend most of your time within this software in here.
If you want to learn how to add your own custom voice to AllTalk TTS WebUI, check out this quick guide here! – How To Clone And Add a Custom Voice To AllTalk TTS? – It’s really simple, and you need just about 8-12 seconds of your chosen character’s or person’s voice!
You might also be interested in this! – Where To Get Audio Samples For AI Voice Cloning? – My Best Sources
AllTalk TTS Text Generation WebUI Integration
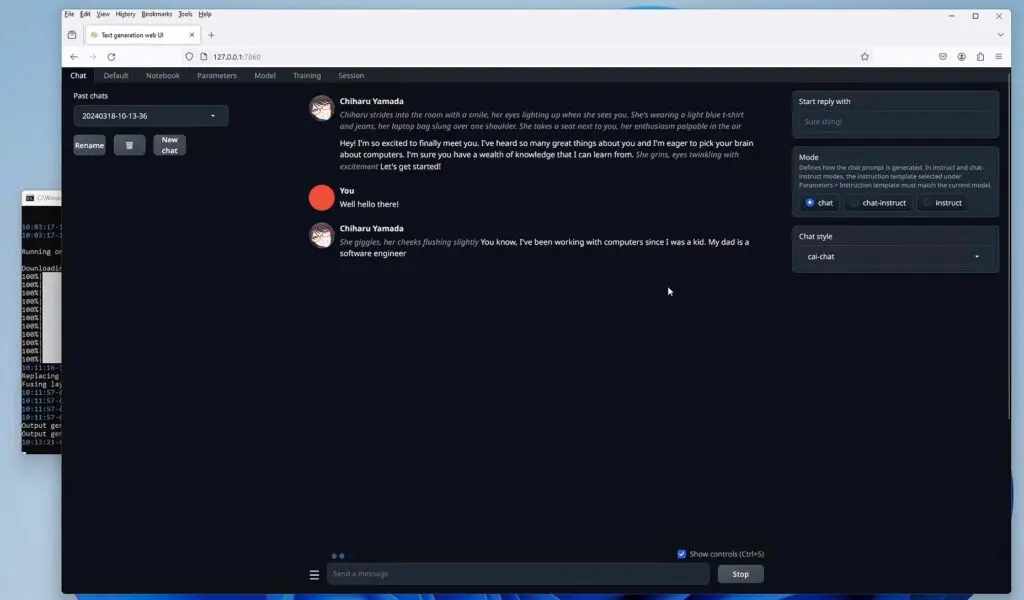
AllTalk TTS is compatible with the OobaBooga text generation WebUI and with the use of the official extension which allows you to give your AI character voices which you’ll be able to hear during your chat conversations.
The way this works is that upon activating the AllTalk TTS extension within the text gen WebUI you will be able to run both the programs together, and after OobaBooga generates your character’s chat response for you it will be sent straight to the AI TTS engine and then in the audio form back to the chat window for you to hear.
Beware though, although this works really well and can even differentiate between the character’s and narrator’s voice, it requires a sufficient amount of VRAM to run both the LLM model for the OobaBooga WebUI, and the smaller TTS model for the AllTalkTTS. Setting this up with 8GB of VRAM might be quite challenging, if not impossible with larger text generation models.
Lastly, Don’t Forget To Support The Developer!
If you like this software, and you’d like to reward the developer for his hard work, consider making a small donation here.
I review many different projects that are available for free and are distributed as open source programs, and people often underestimate how much time can development of this kind of software take!
With that said, I hope I was able to help you! Until next time!