
After you’ve successfully installed the AllTalk TTS WebUI, it’s time to clone some character voices! Luckily, this software makes this extremely simple. Here is how to create and add custom character voices to AllTalkTTS and use them as regular TTS voices with user text input. Make your favorite characters say anything you want!
Check out the full starter guide for AllTalk TTS here: How To Install And Use AllTalk TTS – My Best Guide
Where Is The Voices Folder In AllTalk TTS?
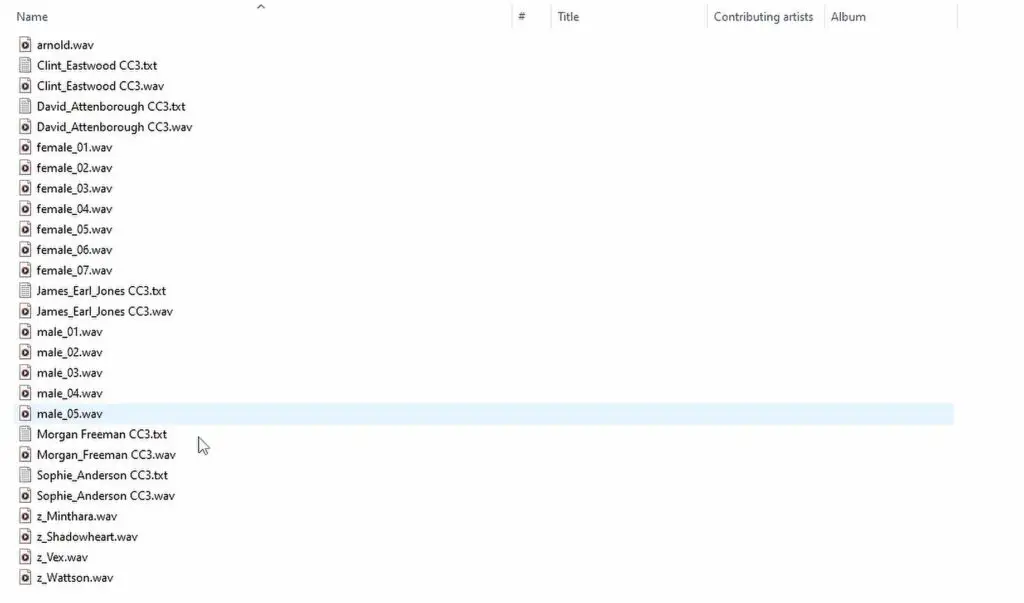
The default folder containing all the voice samples in AllTalk TTS is located under: “C:\alltalk_tts\alltalk_tts\voices”. The drive letter and the beginning of the directory path might be different for you, depending on your operating system, and where you have installed the software.
In a short while, after preparing your 6-30 second sample of high quality character audio, we’ll put it in this exact directory to make it visible for the AllTalk WebUI and to be able to use it later on.
Now let’s get to how you should format your voice sample for it to work correctly.
Creating Your Character Voice Sample For AllTalk
The exact requirements for the input audio samples for voice cloning are included in the AllTalk TTS documentation, but I’m going to quickly give you the most important things you should know.
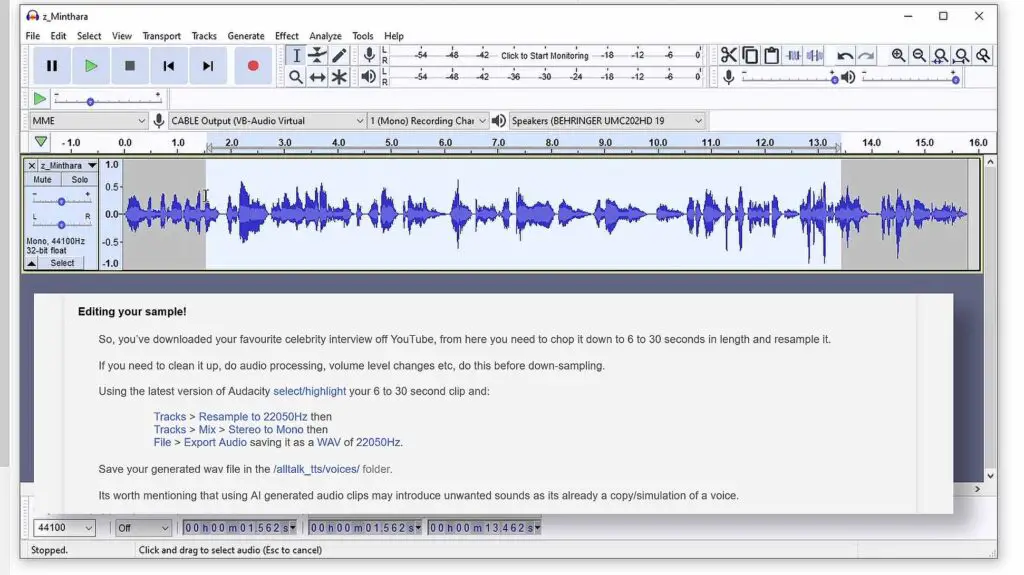
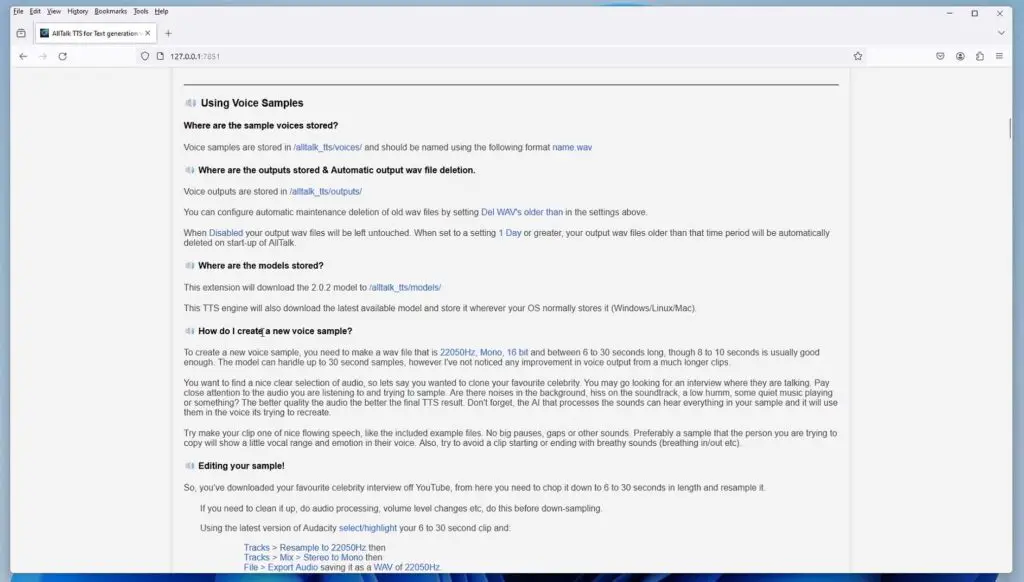
You can do all of the needed editing using the Audacity software, which is a popular freeware audio editor. In the list below, there are instructions on where to access all the options needed in the process within the software.
To clone your chosen character’s or person’s voice, you need an 6 to 30 seconds clip of clean speech audio. For the best results the vocal sample should be:
- Of high quality – and that is, without any background noise, and without any or any other time-based effects (like for example reverb) applied.
- With as little silence in between voice lines as possible – and additionally, without any silence or breath-like sounds at the very beginning of the sample (roughly in the first second of the sample).
- Resampled to 22050Hz – You can do that using the “Tracks -> Resample” feature in Audacity.
- Mixed down to mono – This can be done in the “Tracks -> Mix -> Stereo to Mono” menu.
- Exported as WAV in 22050Hz – Using the “File -> Export Audio” option.
After exporting an audio clip formatted in such a way, you need to place it in the voices folder, which path is mentioned in the previous paragraph. Once you’ve done that, restart the AllTalk TTS WebUI, and the new voices should be visible in the available character voices list. All done!
Remember that in general, the higher quality vocal sample you’ll give to the software, the better the output voice quality will be. In most cases though, the length of the clip doesn’t really matter much past 10 seconds or so, and I’ve been formatting all my samples to be around 8-12 seconds total getting very good results.
In general, some voices which are very expressive in nature, very unusual, or, for another matter, rely on various audio effects for their character might really be hit or miss. Make sure you always try a few different audio samples consisting of different voice lines before giving up, if you’re not getting the results you want right away.
If nothing works, you can always try to fine-tune the main XTTS model which the program relies on for voice cloning. Once you download the AllTalk TTS software, the fine-tuning utility tool will be available to you alongside the instructions on how exactly to do it.
Which Languages Are Supported?
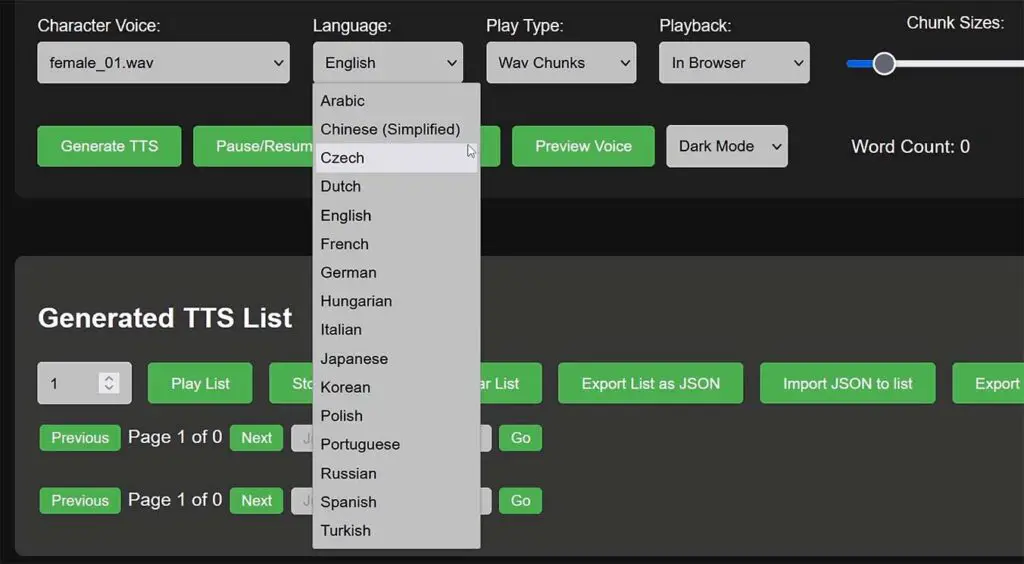
AllTalk TTS supports 16 different languages including English, German, Japanese, Korean, Spanish, Turkish, Russian and even Arabic and Simplified Chinese!
It’s really cool to hear characters with English voice actors speak your own native language! And as a native speaker I can confirm that Polish voices can get just as realistic as English ones in the right configuration. It would be interesting to hear how realistic other languages can get, so if you test some out, let me know in the comments!
Where You Can Get More Voices For AllTalk TTS?
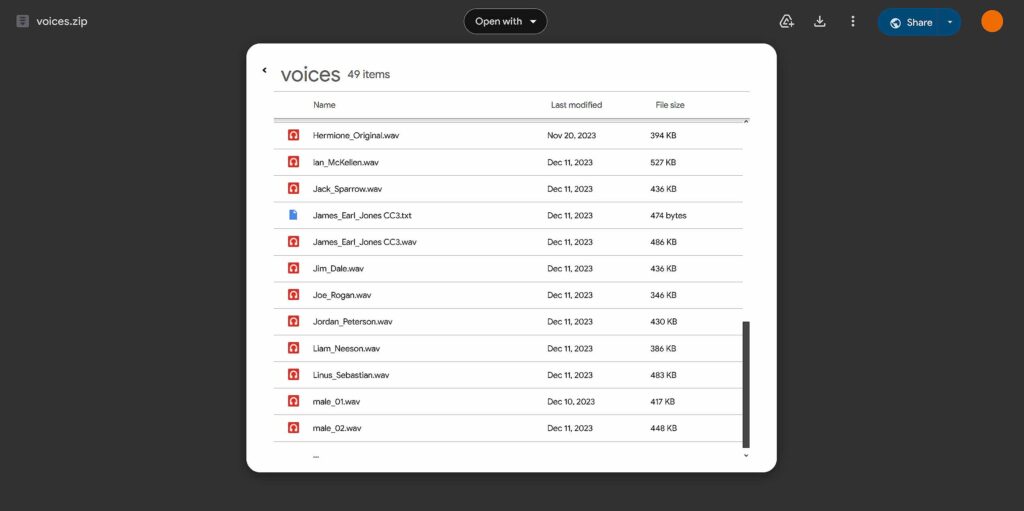
There are quite a few places online where you can either get pre-made voice samples you can just import straight into the AllTalk voices folder and use right away, or source high-quality voice lines of many different characters.
Some of these places are the Aiartes voice samples collection, the official AllTalk TTS bonus voice samples you can see on the image above, or The Sounds Resource library which contains hundreds of different game character voice audio samples ready for you to use.
You can find links to all of these resources alongside with a short description of each one of them here: Where To Get Audio Samples For AI Voice Cloning? – My Best Sources
You Can Also Fine-Tune The Main Voice Model
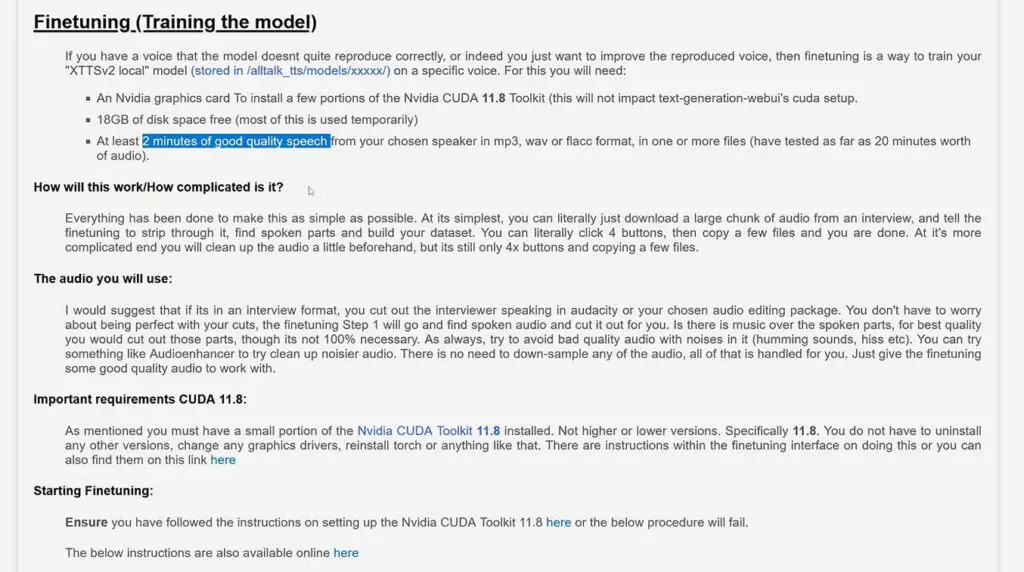
Another, more advanced option of getting a character’s voice cloned using AllTalk is fine-tuning the main XTTSv2 model which is used for voice cloning by the software.
While for simply cloning a voice using a short audio sample you need approximately 6-30 seconds of high quality audio, for fine-tuning the main model you’ll need from 2-20 minutes of audio in mp3, wav, or flacc format.
For that, you can use the built-in training utility accessible using the start_finetune.bat file. The exact training process is explained in more detail in the official AllTalk documentation.
Preparing audio material for fine-tuning is very similar to preparing samples for cloning, however you will need a larger amount of data if you want to get good results.
The general rule of thumb is that you might want to resort to fine-tuning the model if you can’t get the desired output quality or character of your custom cloned voices after trying to use a few different high quality samples. Then, fine-tuning the XTTS model could likely bring you better results.