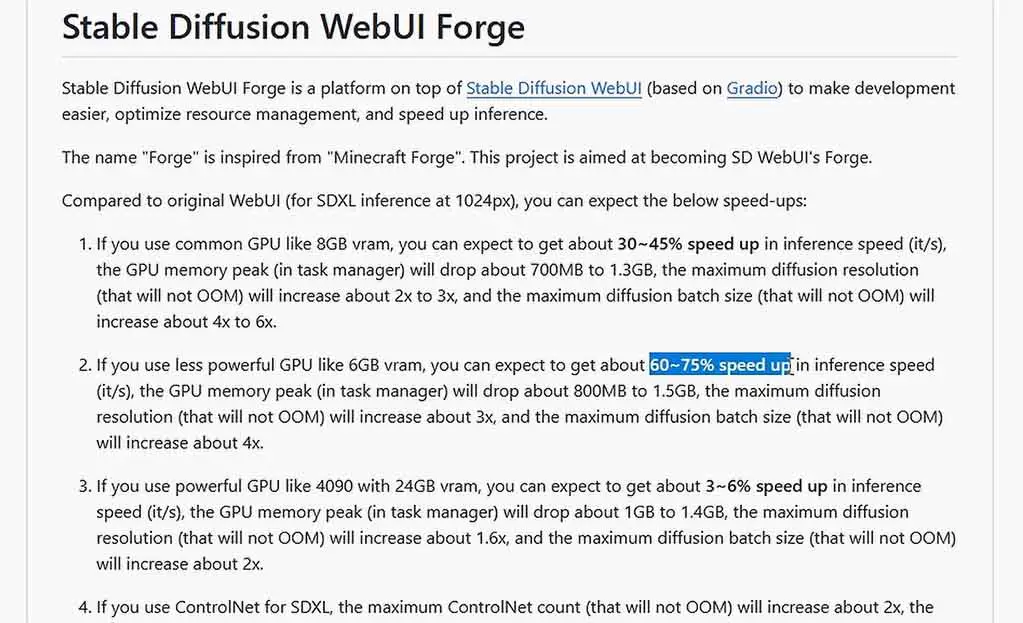
Installing Stable Diffusion WebUI Forge on Windows In 3 Minutes – Quick How To. SD Forge is essentially a substantial upgrade of the original Automatic1111 WebUI offering quite a few improvements, the most important one being substantial image generation speed-ups on graphics cards with less than 8 GB of VRAM, including SDXL model generations. We’re talking 60-75% faster generations in some cases! Let’s see how to quickly set it up!
Looking for installation instructions for the original Automatic1111 WebUI? – Check out this: How To Install Automatic1111 On Windows – Easier & Quicker Way
How To Install Stable Diffusion WebUI Forge on Windows
Here is the easiest way to install and run the SD Forge WebUI on your Windows 10 and 11 system, and the whole process can be finished in just about a few minutes. Of course you could also install the software using git, but this short guide assumes that you don’t have git installed on your system. Let’s begin!
Step 1: Download The WebUI Files
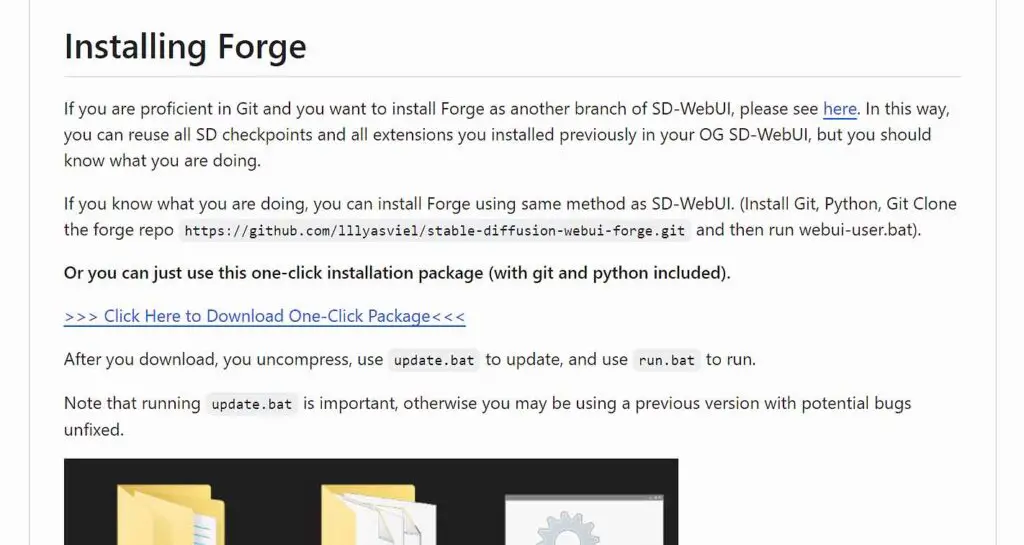
First, head over to the official SD Forge GitHub repository here. Scroll down to the “Installing Forge” section and click on the One Click Package Download Button.
After you do that, extract the downloaded files, and you should notice 3 main files in the folder: run.bat, update.bat and environment.bat. We will just use the first two.
Step 2: Update and Run the Installer
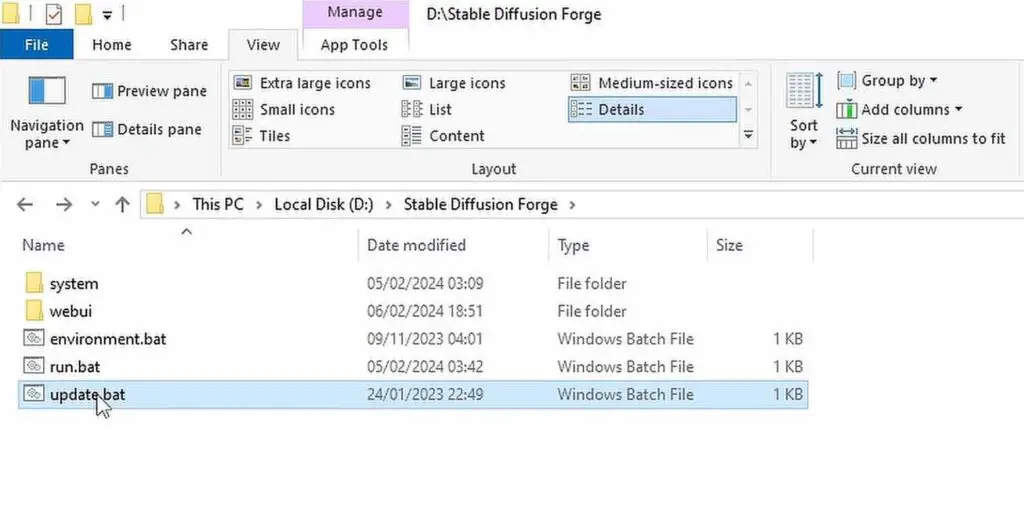
Now comes the very important step. Run the update.bat file first. If you don’t, you risk running an older and outdated version of the WebUI. After a few seconds, once the update script finishes its work, you can close the terminal window and now finally run the run.bat file. This will initiate the main installation process.
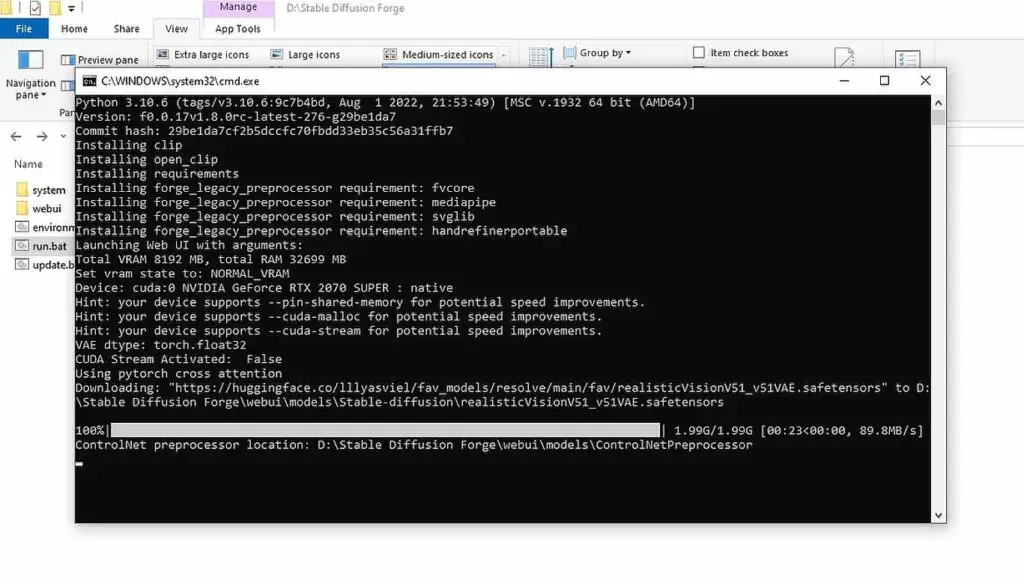
This might take a while, depending on your network connection quality and speed. The installation script will automatically download all of the dependencies required for the Stable Diffusion Forge to work, and the base RealisticVision model which is used as a default model in the WebUI. By the way, this checkpoint is of very high quality!
Step 4: Run The SD Forge WebUI
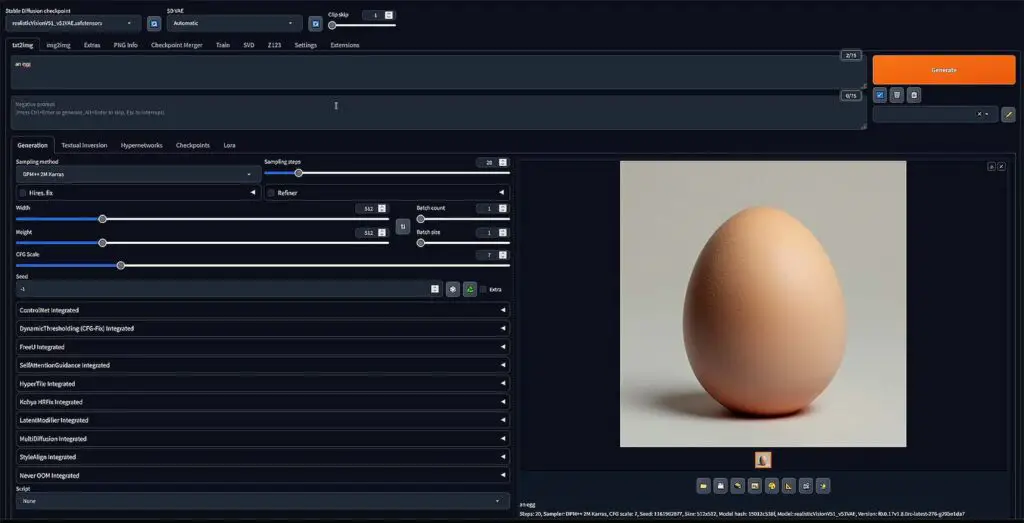
Once the installation process is done, the WebUI should open automatically. Do not close the terminal console window – if you do, the program will terminate. From now on, you can use the program just like you would use the regular Automatic1111 WebUI, with much faster generation speeds right from the get-go.
And now, one more important thing: if you click the Generate button, and nothing seems to happen for a veeery long time, don’t give up just yet. It’s just that loading your chosen model/checkpoint from your drive to the video memory, which happens only before the first generation or upon model change, may take quite some time, even if you’re loading it from an fast SSD drive. Just wait up to a few minutes (in the worst case) for your first image, and the remaining generations will be much, much faster.
If you ever want to run the Stable Diffusion Forge again, simply run the run.bat file again. That’s it!
And also, if you don’t know much about Stable Diffusion in general yet, check out this guide: Stable Diffusion WebUI Settings Explained – Beginners Guide. I explain all of the ins and outs of the Automatic1111 (and the Forge fork) web interface image generation settings here!
The Stable Diffusion Video Extension
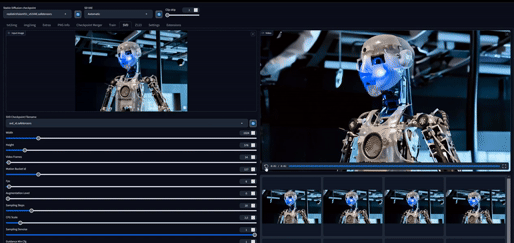
So, what can you do now? Well, for one, you could generate short videos from your photos. This I have to say, I’ve played around with quite a lot. The Stable Diffusion Forge WebUI has the SVD (or Stable Diffusion Video) extension built-in and present in one of its main tabs.
Using it, you can input an image, just like you would in the img2img section, and then after modifying some settings, receive an output which is a short few second video based on your given picture input. You can get very interesting results here, but it does require some experimentation to get into. The larger you want the output video to be when it comes to resolution, and the higher the framerate, the more time it will take to generate.
I’m very happy to say that Stable Diffusion Video works on my pretty old RTX 2070 Super, and while I can’t really say that it’s fast per se, I had no trouble playing around with the tool and not waiting half a day for the video to complete generating. It was more like around 2 minutes for a lower framerate low res video preview, if I recall correctly.
There is also a Z123 extension integration built into the Forge WebUI which allows you to generate images of a given object from different sides, however in my honest opinion it still needs some work to be done when it comes to the average output quality.
Other than that, the SD WebUI Forge supports all of the extensions that work with the original Automatic1111 version of the WebUI. This is certainly great news.
That’s all from me for now. Until next time!
Already done? Check out this short guide here to get you started! – Stable Diffusion WebUI Settings Explained – Beginners Guide