Here is how to quickly install ffmpeg and add it to the PATH system environment variables on both Windows 10 and 11. I’ll quickly go through the whole process and the verification of a successful install. It won’t take you more than 3 minutes in total. There is also a quick tutorial video available if you’d prefer to watch that!
Step 1 – Download The ffmpeg Files
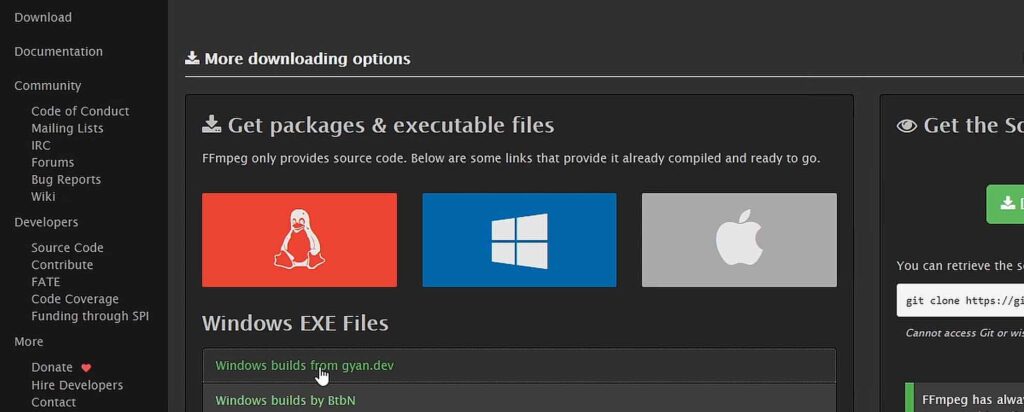
First, go onto the official ffmpeg website here, and under the Windows tab on the download page, select the “Windows builds from gyan.dev” option.
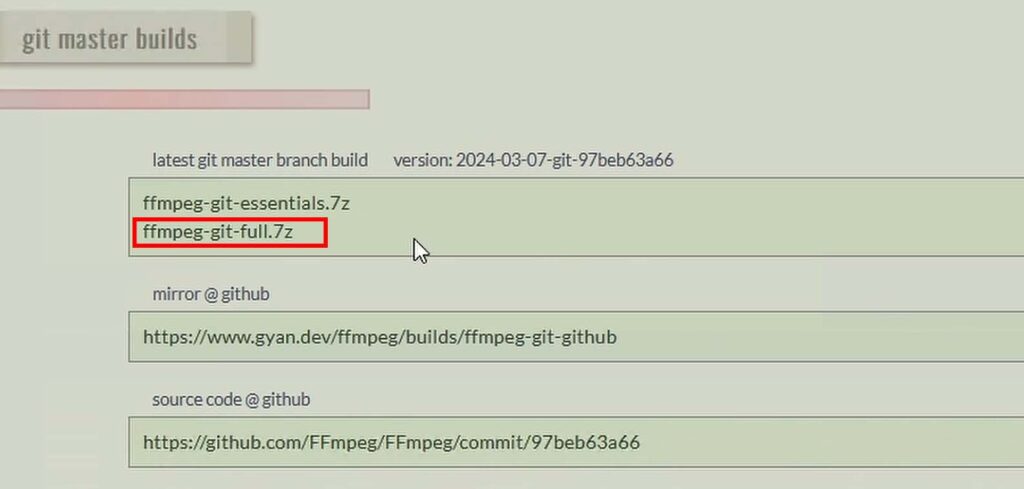
A site will open, with quite a few different ffmpeg packages available for download. If you don’t know which one to choose for your particular use case, pick the one called “ffmpeg-git-full.7z”, which should be the second option.
This is an always-up-to-date latest version of the master build of ffmpeg which contains all of the files you might need, for virtually any use case.
Step 2 – Extract & Rename The Main Folder
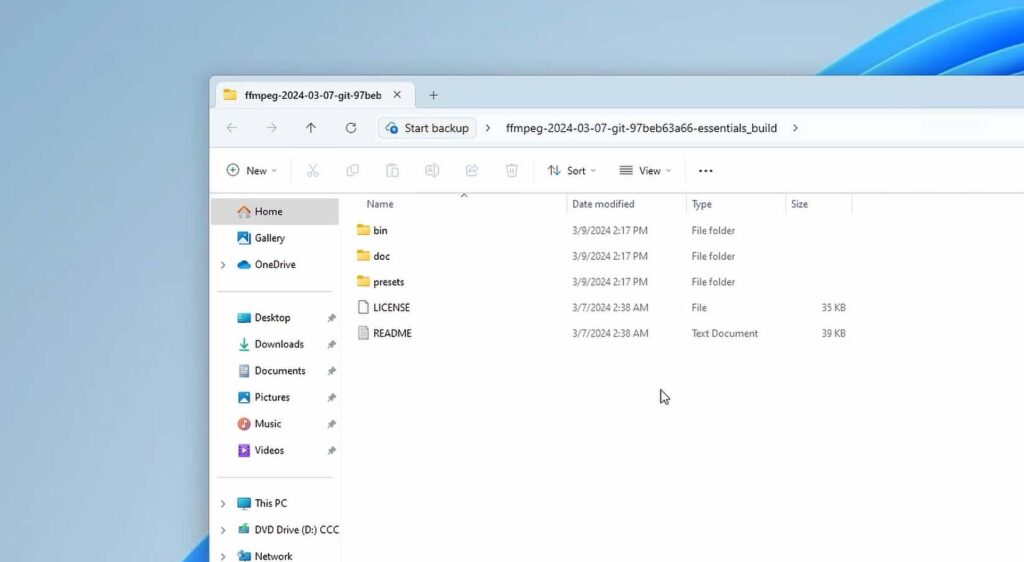
Once the package is downloaded, extract it. On Windows, you can do that by right clicking it, and selecting the “Extract All” option, or dragging the files out of the archive folder to a new location.
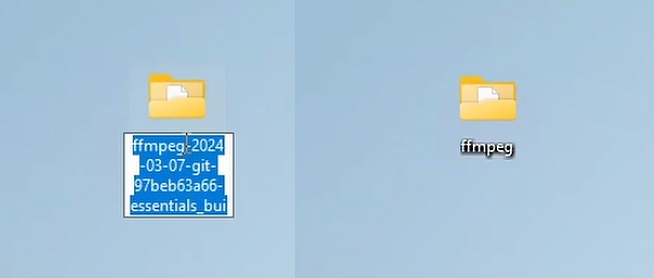
Now, you need to rename the folder you have extracted to “ffmpeg”. This is very important. Just cut away all of the version details and leave the name of the folder as “ffmpeg”. Once you’ve done that, you can proceed.
Step 3 – Move The ffmpeg Folder To Your Main Drive
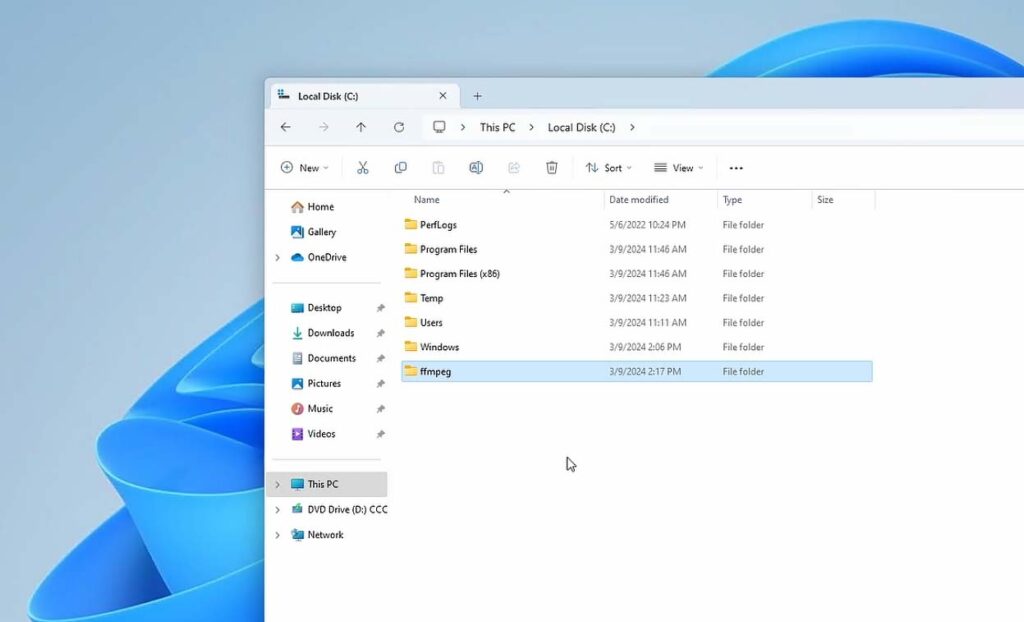
Drag and drop the ffmpeg folder onto your main system drive. The folder should be in the root directory of the drive. For me, it’s going to be the “C:\” directory.
You can also place the folder in another place, however keep in mind that if you do so, you need to adjust the PATH variable entry in the next step accordingly.
Step 4 – Add ffmpeg To PATH

Without completing this step correctly, ffmpeg won’t be usable for Windows at all, and you won’t be able to use it as a dependency for any software. Be sure to follow the instructions here!
Enter the OS environment variables editor by searching it up in the start menu with the query “Edit the system environment variables” and firing it up.
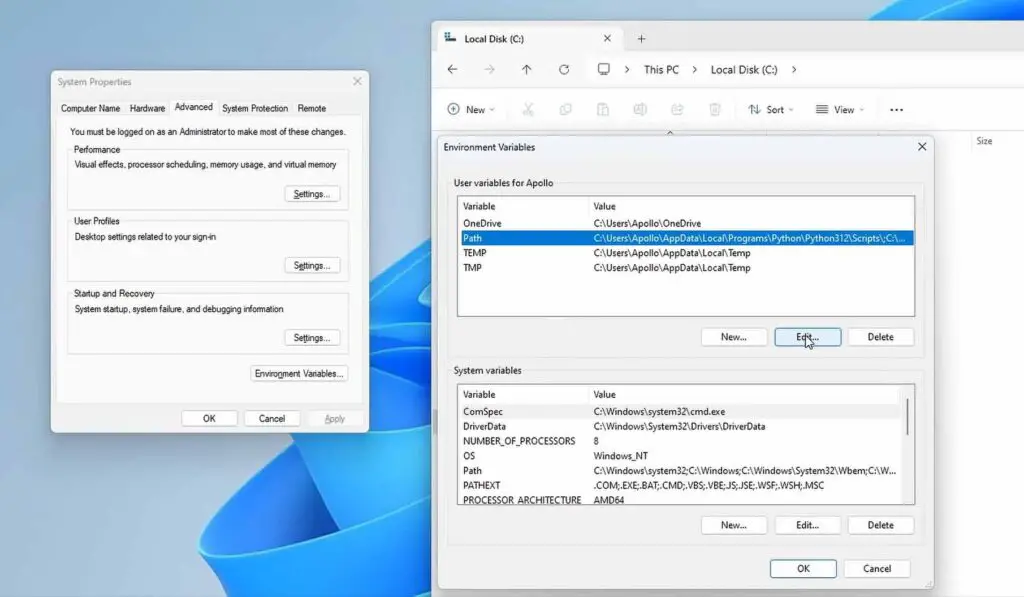
Then, in the “Advanced” tab, click on the “Environment Variables” button. In the “user variables for [your user name]”, make sure that the “PATH” variable is selected, and then click on “New”.
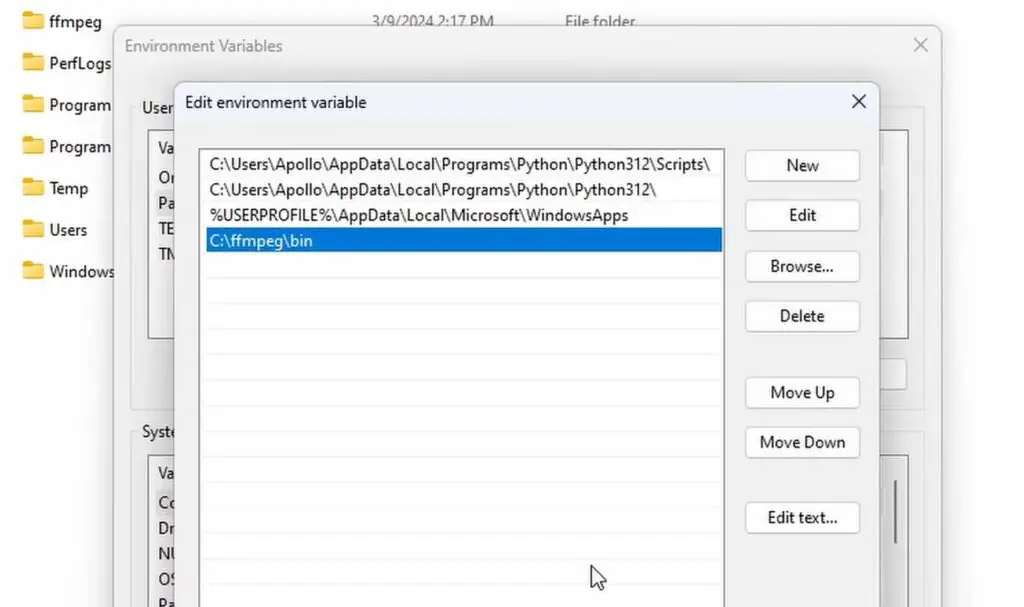
Now, you have to enter the exact path to the ffmpeg “bin” folder inside the folder you’ve just moved over to your main system drive. Again, make sure that you don’t make a mistake typing in the folder path! Check for typos and forward slashes used instead of backslashes. In my case (and if you’ve done everything just like me, and your main system drive has a letter “C” assigned, in yours too), the path I need to add is “C:\ffmpeg\bin”.
Confirm the addition of the new variable, and now it should instantly display, added to the Value field of the Path row in the User Variables section.
You can now click “OK” and leave the editor. ffmpeg should now be successfully installed on your PC and added to PATH!
How To Verify If ffmpeg is Installed Correctly on Windows?
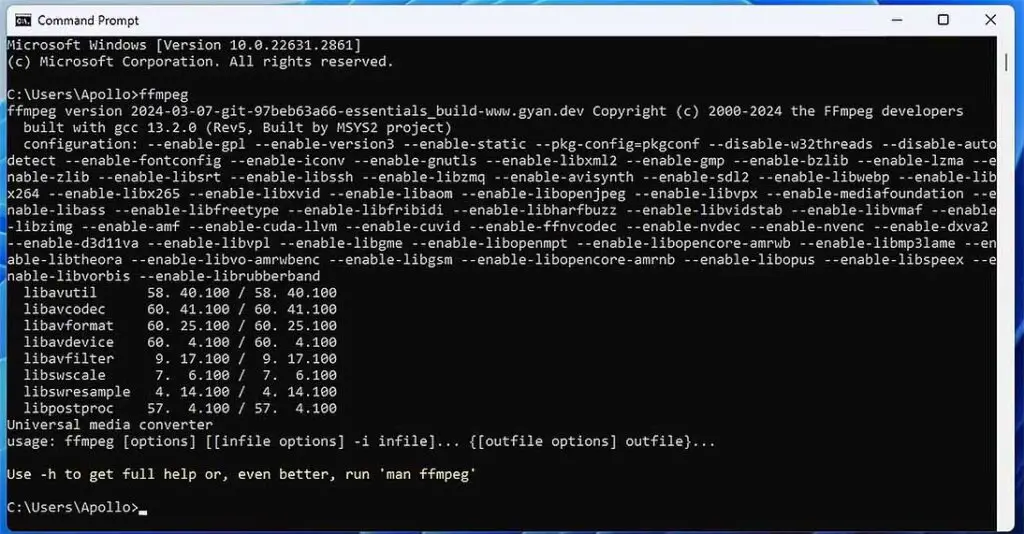
This, fortunately, is extremely simple. Open the system command prompt and type in “ffmpeg”. Then, press enter. If the command isn’t recognizable, ffmpeg either isn’t anywhere to be found on your system, or it’s not added to PATH correctly, you will see an output saying “‘ffmpeg’ is not recognized as an internal or external command, operable program or batch file”.
Without it, some software may not work at all, and some, like Audacity, may throw an “ffmpeg not found at path” error. If that’s the case for you, refer to the Step 4 of this tutorial once again.
If the installation and PATH editing was successful, upon entering the ffmpeg command into the terminal, you will get a pretty lengthy output with your installed ffmpeg version details, and its basic console commands.