
Can OBS act as a voice changer software for Discord? Sure it can, especially with its built-in VST plugin support! In this short guide we will show you exactly how to use VST effects in OBS studio software to apply different FX to your voice live and route the audio straight to Discord to surprise your friends in your next call! Let’s get to it!
- Things You Need First
- The VST Plugin Support In OBS
- How To Add & Use VST Effects In OBS – 3 Steps
- Last Thing To Do: Routing Audio From OBS To Discord
- A VST Doesn’t Work / Doesn’t Affect The Sound In OBS – Troubleshooting
Check out also: How To Route OBS Audio To Discord – Quick Tutorial
Things You Need First
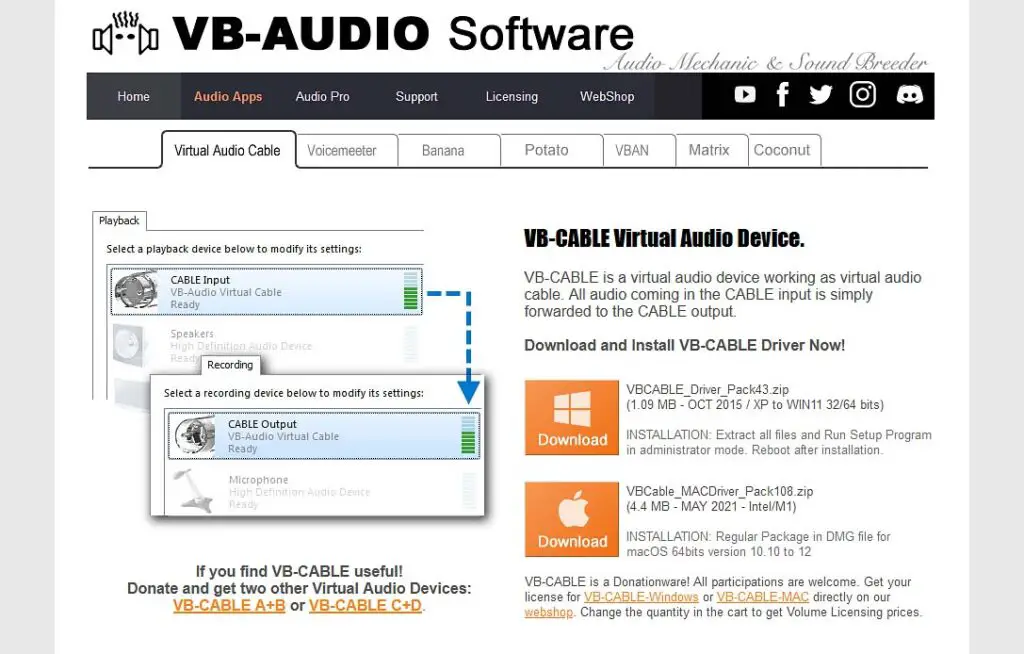
For this method to work with Discord (or any other VoIP application), the only extra thing you’ll need is the free Virtual Audio Cable software from VB-audio. We use this neat piece of freeware in lots of our tutorials and it always does a great job of virtualizing audio connections between apps.
Here we’ll use it to route the audio from OBS to the Discord app at the end of the process so at the end you’ll be able to use VST effects during your live calls!
So if you don’t have it on your system yet, follow the installation instructions and then you can proceed with the tutorial!
Want to know more about virtual audio cables? – Take a look at this: How To Install & Use The Virtual Audio Cable – VB-Audio For Windows
The VST Plugin Support In OBS
There are a few important things to address about the OBS VST plugin support before we start.
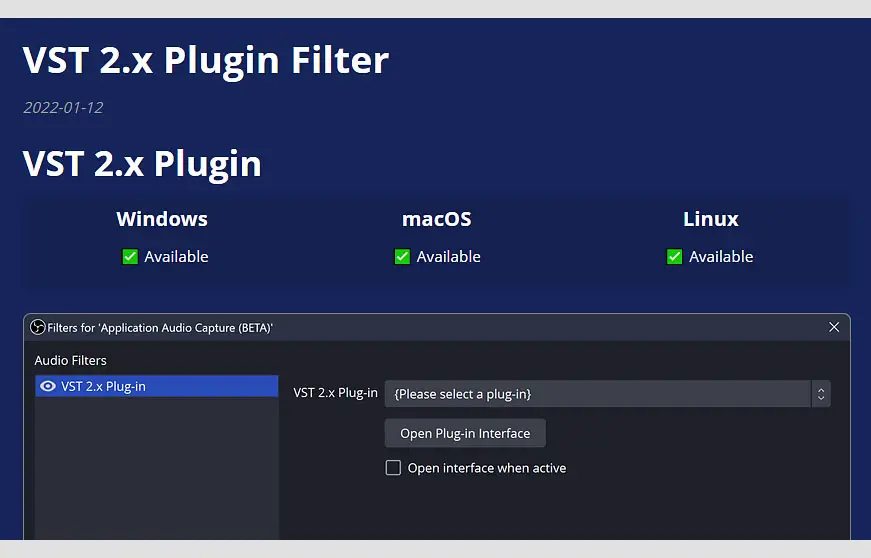
OBS has great support for most VST2 plugins, however:
- It doesn’t support VST1 or VST3 plugins, shell VSTs, as well as MIDI inputs or outputs in VST2 plugins.
- No MIDI input/output support means that you’re not able to send MIDI control commands directly to the plugins during use, or use any kind of MIDI instrument plugins within OBS.
- The current lack of official VST3 technology support means that some of the newer plugins you many plan to use with the software might not work inside OBS. Keep that in mind.
- With some VSTs, the support might be hit or miss, most of the popular free VST effects that we tested however, worked just fine.
- Many bigger VST plugins, especially multi-effects can take a huge toll on your CPU. Mind this if you face performance issues, a VST plugin running in the background might be the culprit.
How To Add & Use VST Effects In OBS – 2 Steps
Let’s get to work. The whole process should take no more than 5 minutes in total, provided you have one or two VST effects already on hand. If not, you can find literally hundreds of freeware VSTs all over the internet. Go on a quick Google search if you haven’t done that already!
Remember one thing though: if you decide to use a 64-bit VST plugin for handling your effects, you will have to use it with a 64-bit version of OBS. Same with 32-bit plugins. Otherwise, your imported plugins might not work, or even not show up in the software at all.
Step 1: Add Your VST Effects To OBS
Once you have your VST plugins downloaded and on your PC, it’s time to make OBS see them so that they are visible in the software.
OBS will after software restart automatically detect plugins in most popular plugin first-install locations such as “C:/Program Files/VSTPlugins/” on Windows, “/Library/Audio/Plug-Ins/VST/” on MAC, or “/usr/lib/vst/” on Linux systems and much more.
The full list of directories that OBS searches through when scanning for VSTs, visit the VST 2.x Plugin Filter help page on the OBS project community site. Sadly for now you cannot setup a custom filepath for your own VST folder.
The first thing you need to to is to move your VST plugin files to one of the default locations listed above, depending on the operating system you’re on (or any other chosen location from the full list). If your VST plugin folder doesn’t exist, simply create it on one of the listed paths.
Most VSTs will have just one .dll extension file that will have to be moved into that directory. Some VST plugins however, might require to be installed. If that’s the case with your plugins, simply point the installer to your VST plugin folder and install your chosen plugin there.
All the plugins you put into one of the folders that OBS searches through on startup will be visible in a drop-down list in the next step. Let’s move on!
Step 2: Set Up “Audio Filters” On The Microphone Input In OBS
All the audio and video effects you can use in the OBS software are simply called “Filters”.
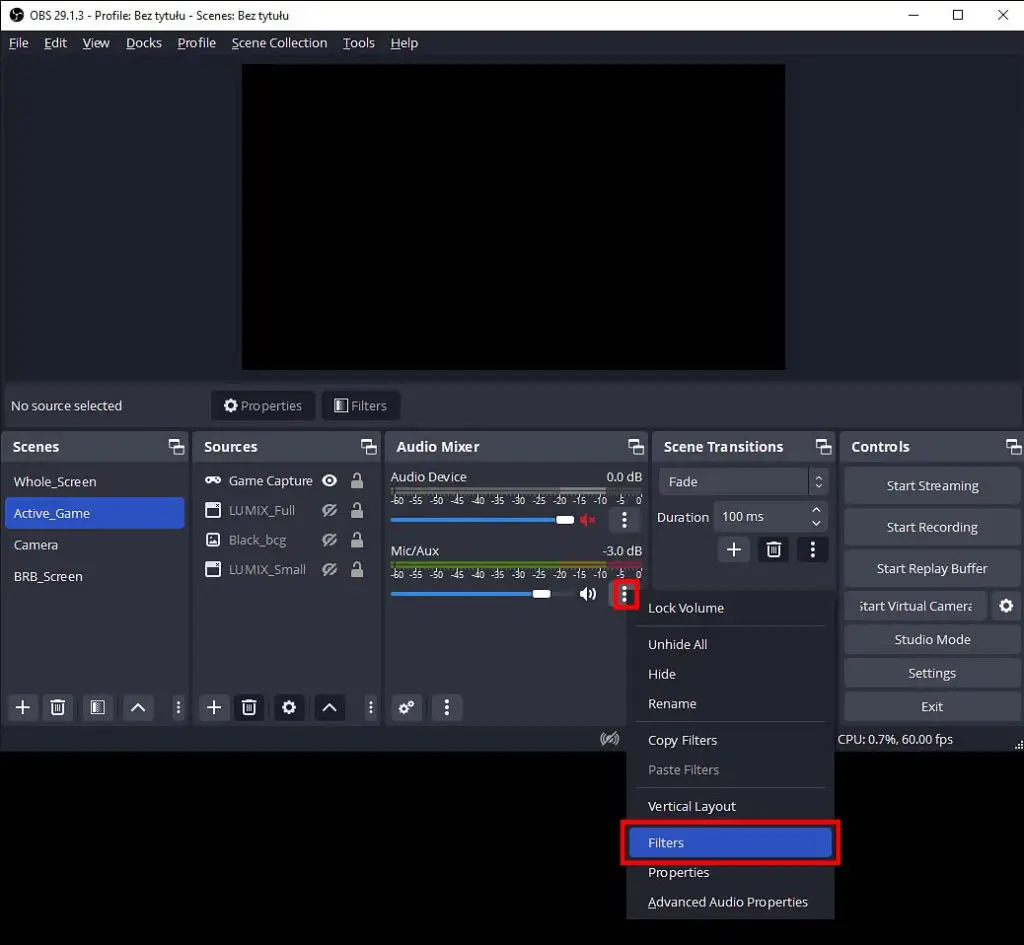
To apply a filter to one of your audio channels, right click the chosen channel or click the small three dot menu next to it and then select the Filters option.
Here for the sake of an example we’re adding an additional filter to our microphone audio device effect chain.
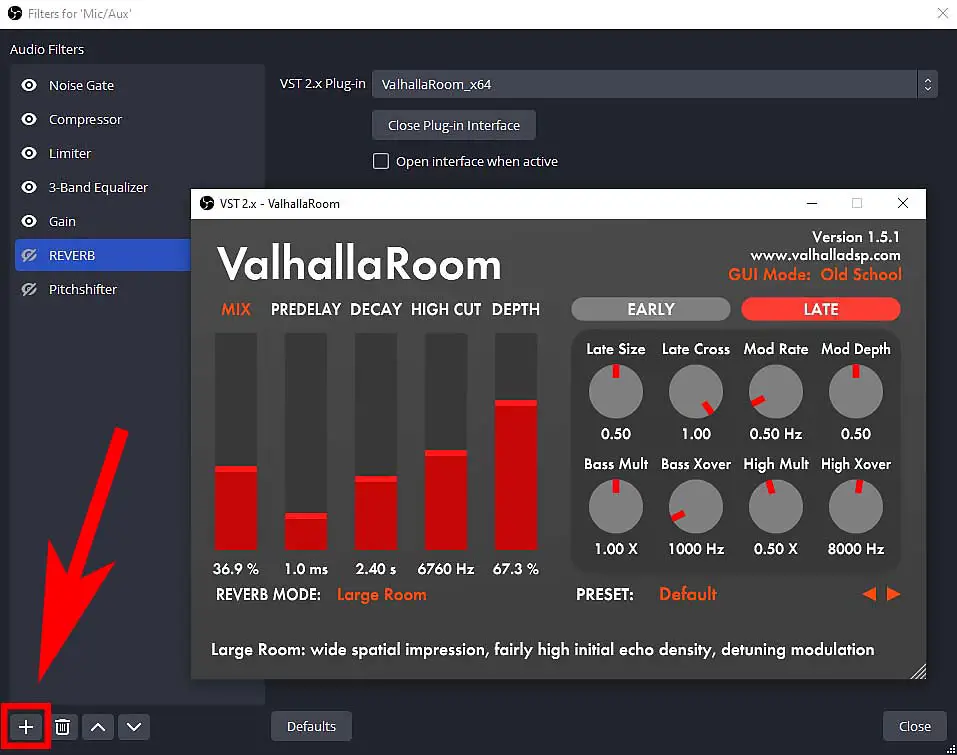
Once you’re in the filters menu, click the small plus button in the bottom left corner of the window to add a new filter to the audio source.
Then, click on the VST 2.x Plug-in dropdown menu. All of the VST plugins that you’ve moved to the directories that OBS scans should now be visible in here. If they are not, first make sure that the plugin files are in the right folders, and then restart the OBS software.
Choose a plugin from the list and that’s it! Now the plugin should affect your audio channel audio output. You can tweak the plugin’s settings by pressing the Open Plug-in Interface button.
The optional step here is to add a hotkey on your keyboard (numpad is usually the best for this) to activate and deactivate your chosen VST audio FX without going into the OBS settings.
You have to do that with the help of the OBS Filter Hotkeys Extension, as by default OBS does not support hotkey setup for audio or video filters.
Last Thing To Do: Routing Audio From OBS To Discord
Now, when you have all your VST effects setup and you’ve tested out that they work and affect your microphone input you can proceed with setting up the OBS-Discord audio connection to route your audio from the OBS studio app to the Discord App.
For this part you will need the free virtual audio cable software we mentioned earlier. We will use it to make a virtual audio tunnel which will send the audio affected by the effects from OBS straight to the Discord app.
As we’ve already written a short guide for this, so we won’t repeat the process here. Luckily the process is very easy and it involves just 3 steps as well.
Here are the exact instructions: How To Route OBS Audio To Discord – In 3 Steps
A VST Doesn’t Work / Doesn’t Affect The Sound In OBS – Troubleshooting
There are quite a few reasons why after adding a filter with a VST effect plugin to your OBS audio channel effect chain its output sound might remain unaffected. A thing that may happen equally often is the VST plugin simply muting the output sound of the channel.
Here is a list of things you need to check if that’s the case for you:
- Ensure that the audio source you’re using the VST filter on is unmuted in the OBS audio mixer and that the sound input is coming through (you can see that on the sound meter in the mixer).
- Check if the little eye icon next to the name of your VST plugin in the filters menu is not grey and crossed out. If it is, click on it to activate the effect.
- Make sure that if your VST plugin has a wet/dry knob in its interface, it’s set at least to 50%. This knob control how much of the input sound is affected by the plugin and if it’s all the way at 0%, the sound will remain unchanged.
- Last things last, the case might simply be that your chosen VST plugin doesn’t work well with OBS (or doesn’t work at all). While many VST2 plugins are supported by the software, and we tested at least a dozen of the most popular ones, there are still some VSTs that will refuse to work here. Not much can be done about that unfortunately.
We hope we were able to help and that now you can enjoy all the benefits of using VST effects in your Discord calls with the help of OBS. Until next time!
An AI voice changer you can use with Discord – for free! – Okada AI Live Voice Changer Client RVC How To – Tutorial