
Set up a private unfiltered uncensored local AI roleplay assistant in 5 minutes, on an average spec system. It’s way easier than it used to be! Sounds good enough? Then read on! In this quick guide I’ll show you exactly how to install the OobaBooga WebUI and import an open-source LLM model which will run on your machine without trouble. Let’s get straight into the tutorial!
Pretty much the same guide, but for live voice conversion. Sounds interesting? Click here! – Okada AI Live Voice Changer Client RVC How To – Tutorial
Or… check out a similar tutorial for the GPT4ALL framework – it’s very similar to this one! – How To Run Gpt4All Locally For Free – Local GPT-Like LLM Models Quick Guide
The OobaBooga WebUI Simplifies Things Quite a Bit
Setting all this up would be much more complicated a few months back. You’d have to connect a few different pieces of software, each installed separately, with different requirements and dependencies, and you would have no guarantee that the hard work will pay off in the end. With the aid of the OobaBooga ecosystem it’s easier, and way faster than it was before.
The OobaBooga Text Generation WebUI is striving to become a goto free to use open-source solution for local AI text generation using open-source large language models, just as the Automatic1111 WebUI is now pretty much a standard for generating images locally using Stable Diffusion.
The project grows very quickly with frequent feature updates, performance optimizations and fixes, and in my eyes is currently one of the best ways to get started with hours of fun with locally hosted LLM models be it roleplay or science!
How To Install The OobaBooga WebUI – In 3 Steps
Here is the exact install process which on average will take about 5-10 minutes depending on your internet speed and computer specs.
The one-click installer automatically sets up a Conda environment for the program using Miniconda, and streamlines the whole process making it extremely simple for the end user. See for yourself!
Step 1 – Download The WebUI Files On Your System
In short: if you have git installed on your system and know how to use it, simply clone the official OobaBooga repository onto your system. If you don’t, no worries, simply download the zip file with the latest release from here.
Unpack the .zip archive in a directory you want to install the WebUI in. Then, move onto the next step.
Step 2 – Run The Installation Script
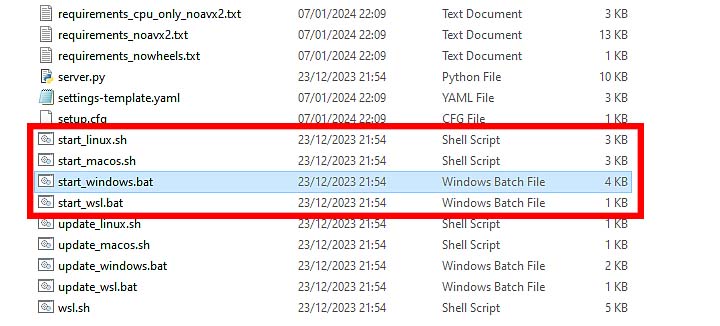
After you’ve unpacked the downloaded archive containing the WebUI files, you need to run the installation/startup script. The script choice will depend on the operating system you’re using.
start_linux.sh– if you’re on Linux.start_windows.bat– if you’re using Windows.start_macos.sh– if you’re on a MAC.start_wsl.bat– if you’re using WSL.
A system terminal should open, and the installation process should start. Now the only thing that’s left to do is to supply the installer with some additional information. When an appropriate prompt displays in the console, select your graphics card vendor from the list. As I have an NVIDIA RTX GPU in my testing rig, I’ll go with NVIDIA here.
Once the installation process is done, you can now access the WebUI. Here is how.
Step 3 – Open Up The WebUI
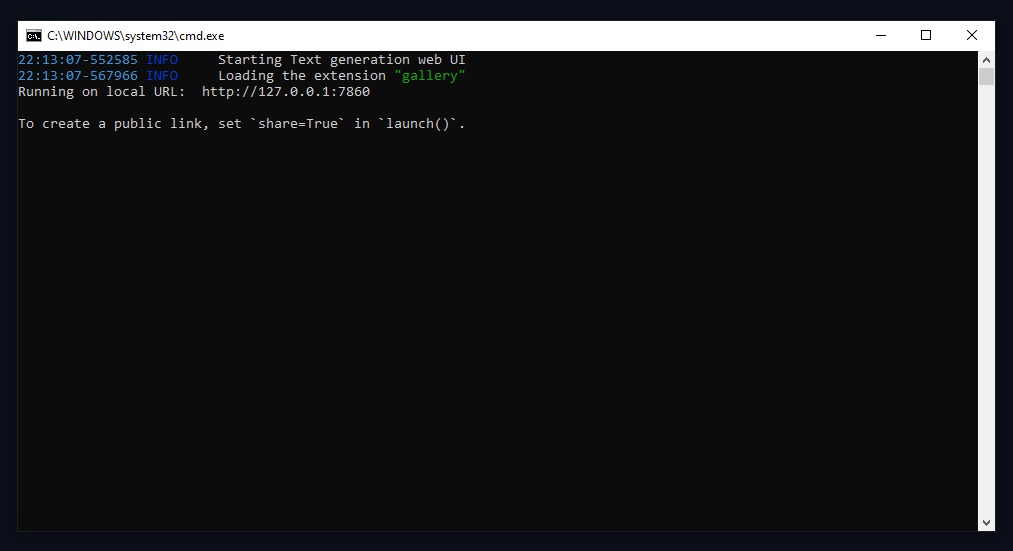
After the installation process finishes, the WebUI should automatically start. If it doesn’t, just run the start file again.
If you don’t have any other Gradio-based WebUI application currently running on your system, the app will be accessible on localhost under the address http://localhost:7860
If you’ve already got a Gradio-based app running somewhere in the background, the Text Generation WebUI will open under the address http://localhost:7861, so one port above the first open application based on Gradio.
If you want to force the WebUI to open in dark mode (Gradio automatically inherits default theme settings from your browser), you can pass the dark mode argument to the app in the URL like so http://localhost:7860/?__theme=dark.
Do not close the terminal window, if you do, the WebUI will shut down. When you’re done you can safely close it and the program will stop working. Next time you want to open it, use the very same startup script you used to install it. This time it will start in a few seconds!
Which Model To Use First? – Where To Get Your Models?
By default, the OobaBooga Text Gen WebUI comes without any LLM models. There are most likely two reasons for that, first one being that the model choice is largely dependent on the user’s hardware capabilities and preferences, the second – to minimize the overall WebUI download size.
Your model choice should be dictated first by the amount of VRAM you have on your GPU (or amount of RAM you can spare if you want to go with CPU inference), and second by your preferences when it comes to the output type/quality.
There are hundreds of models optimized for different tasks like roleplaying, AI assistant conversations, programming and more (many of them distributed via the TheBloke huggingface acc – kudos!).
What you should know is that there is a direct correlation between the model size and the required amount of RAM (in case of models for CPU inference), or VRAM (in case of models meant to be used with your GPU). You don’t want a model that’s size is very close or past your limit of said resources. With that said, let’s move on!
To find out which type of model you may want to use, check out resources such as this one to learn more, or scroll down to our recommendations for beginners!
GPU vs. CPU Inference
If you have a sufficiently powerful graphics card with enough VRAM, you 100% want to use it for generating text instead of your CPU. If you’re having problems with GPU inference and it doesn’t work at all, or works painfully slow, you can try out CPU inference with appropriate compatible models.
Be aware that in most cases, CPU inference is in most cases extremely slow, as in the process the data is transported between the CPU and the RAM, which is substantially slower than data transport between your GPU and its own internal VRAM memory. Once again, use CPU inference only if your graphics card is incapable of efficient text generation even after further optimization and performance setting tweaks.
How To Import and Load a Model In OobaBooga WebUI
How To Load Models In Oobabooga, And Not Run Out Of VRAM? Well, let’s quickly take a closer look at that.
Step 1 – Downloading and Importing The Model
To import a model, you first need to download it. In our example I will be downloading an AWQ compressed Dolphin 2.1 Mistral 7B model.
While you can download your models directly from the WebUI interface, I will be using a manual download as I actually find it a bit easier.
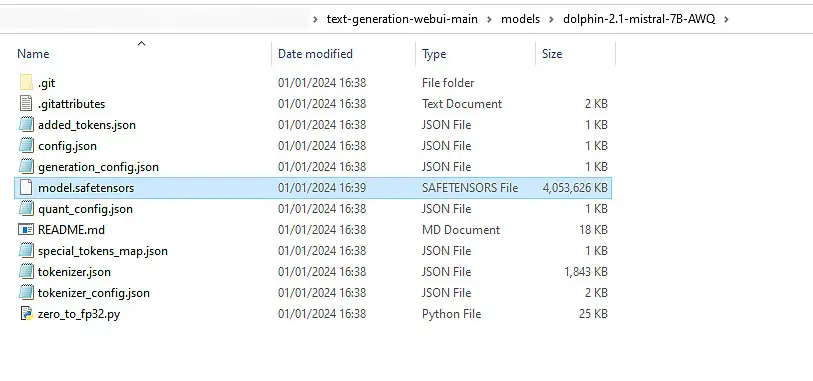
Once you open the huggingface repository with the model linked above and enter the “Files and versions” tab, you will see all the files you need. Yes – it’s not just a single model file with this model format.
The first thing you need to do is to get all the files you see inside a folder inside the “C:\text-generation-webui-main\models” directory. You can name the folder anything you want, but it’s best to name it after the model you have downloaded. You can either download all the model files manually, or clone them over to your system using git.
When you have all the files from the repository inside a folder within the models directory, you can continue with the next step.
Step 2 – Loading The Model Inside The WebUI
Once you have the all the model files downloaded and placed inside the models folder in your OobaBooga installation directory you can go ahead and fire up the WebUI.
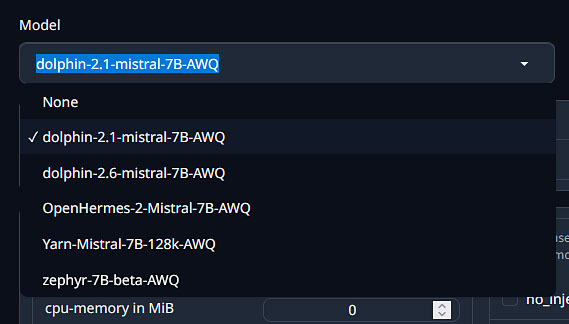
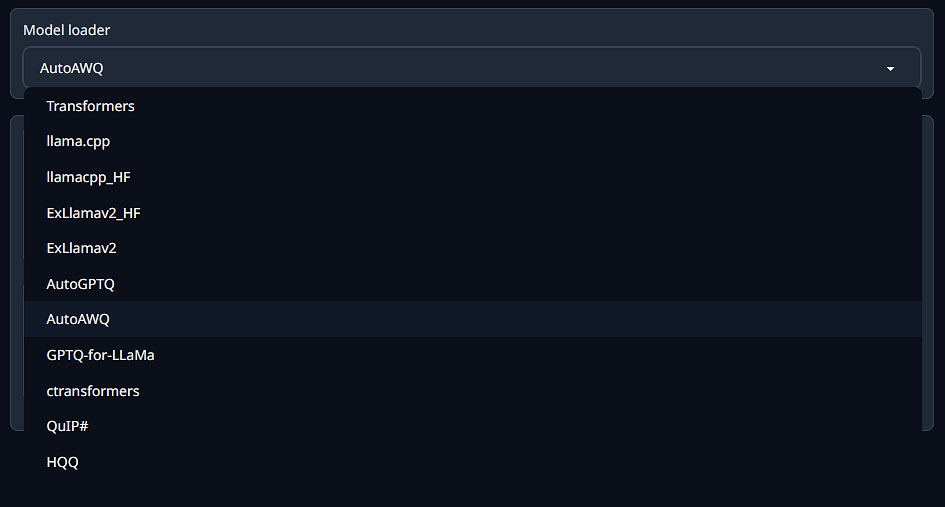
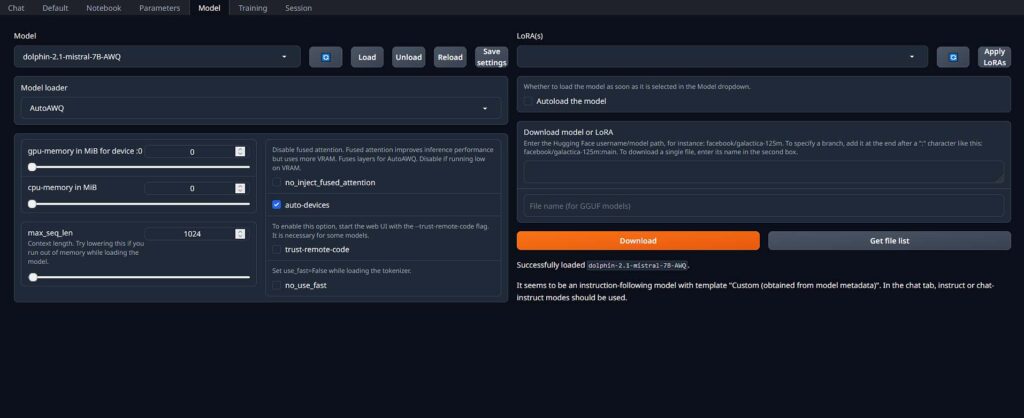
Then, navigate to the “Model” tab and select your desired one from the dropdown menu. If you have placed the model in the folder when the WebUI was on, you need to press the refresh button for it to appear on the list. Now, the model loader should get selected automatically in the field below.
Next, you can tick the “auto-devices” box to make the WebUI offload the model parameters that won’t be able to fit inside the GPU VRAM to your main system memory.
For starters, the “max_seq_len” parameter is the only one you should be wary of upon model load, at least for now. It defines the context length of the model during runtime. The longer the context, the longer conversations you’ll be able to have with the model, however it will also eat up more VRAM so keep that in mind.
The last step here is to click the load button next to the model list and wait until the profess finishes. From here you can proceed to your very first chat with the default virtual assistant!
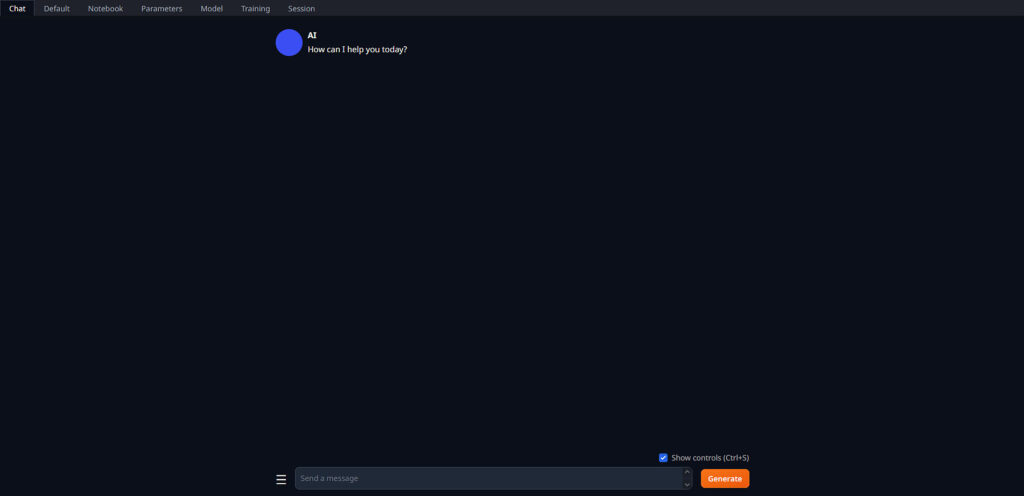
Finally – The First Chat!
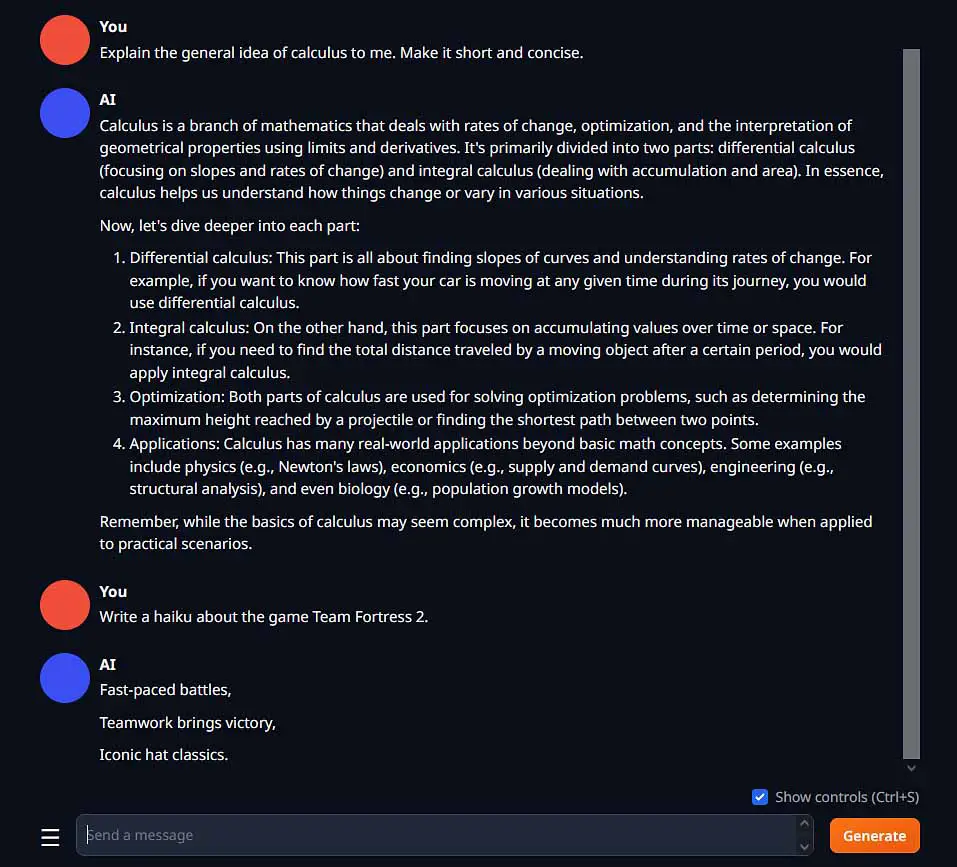
And there we are! Now you can enter any prompt you want, and you should get a reply in a relatively short time. Depending on the model you have loaded (and the generation settings) the quality of the output will vary. Keep that in mind and try out different models to find out which one is best for your needs!
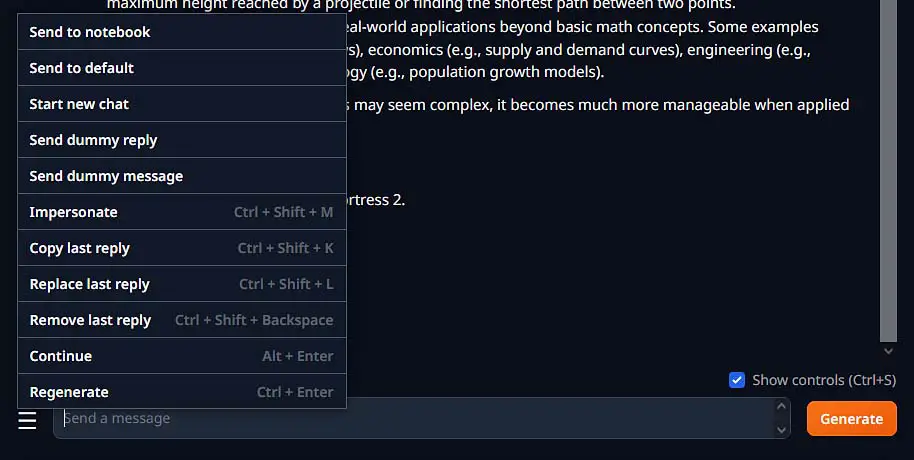
The WebUI grants you access to the most important tools for manipulating and editing both your replies and the replies on of the AI assistant, as well as the capability to regenerate the last message generated by the model. When you begin to explore the program you will also find a notebook mode if you want to use the imported model as a writing assistant. Neat!
OobaBooga Generates Text Painfully Slow? – Here is One Fix!
The inference (text generation) speed will depend on quite a few factors, but in general the most common thing that can make your loaded model generate responses really slow is the fact that the webUI can offload the model data to your main system RAM when you run out of VRAM on your GPU.
On the image below you can see the ideal situation in which the model is loaded fully into VRAM with just a little bit of headroom. Take a closer look at the Shared GPU Memory indicator, which shows the amount of data that is supposed to be allocated in VRAM, but does not fit and is offloaded to RAM. The small value of 0.1 GB of data doesn’t signify that any model data is loaded into the system RAM instead of the GPU memory. If there was, you would see a sudden rise of the shared memory value at the end of the model load.
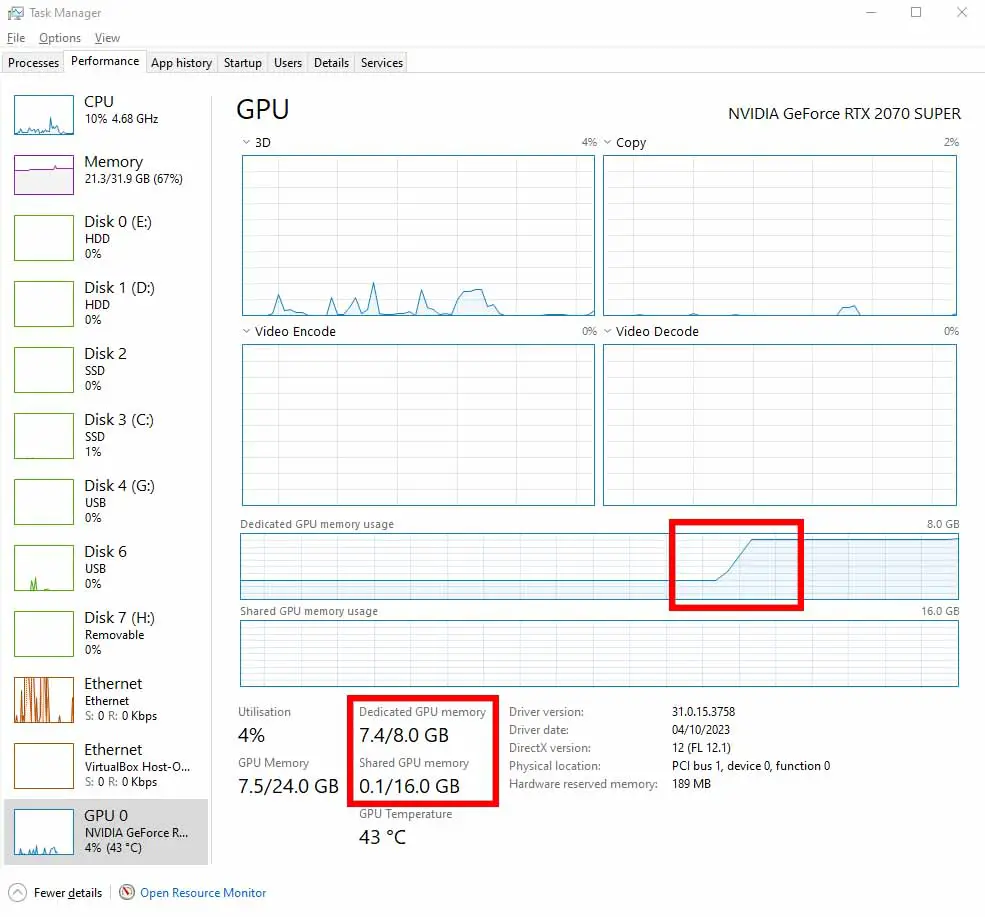
If you want fast generation with models meant for GPU inference, make sure that no data is being offloaded from VRAM to your system RAM. If even a few megabytes of loaded model data don’t fit inside your VRAM, you will experience extreme slowdowns during inference – with one short message generating even for up to a minute (and sometimes much longer).
Need a better GPU for local LLM AI roleplaying? Check my curated list of the latest graphics cards here: The Very Best GPUs For Local LLMs This Year (My Top Picks!)
Offloading can happen either if you try to load a model file that’s larger than the amount of VRAM you have on your graphics card (that has more parameters than your VRAM can fit on runtime), or if you attempt to load a model with too high of a context length value set.
Your VRAM is much faster than the main system memory and is located right inside your GPU, so calculations on the data that can fit within it in their entirety can be done much faster than if your system attempted to offload a part of this data to your system RAM. And that’s exactly what happens when the VRAM memory on your GPU cannot fit all the data that is needed during the inference process.
To prevent that from happening and to ensure that you won’t run out of VRAM, make sure that:
- As a rule of thumb make sure that you’re using a compatible LLM model that is smaller in size than your overall amount of GPU VRAM (or the amount of free VRAM you can spare for loading the model for generation). If you have a GPU with 8 GB of VRAM like many people do, you might want to search for a model with a size of around 4 GB. Note that your system and open system apps and software will also use some amount of your total VRAM during generation.
- Make sure that before loading your model you have set the context length parameter accordingly. The larger the context length is, the longer conversations you will be able to have with the model (and the model will remember the whole context of the convo). If you’re low on VRAM you might want to set your context length even as low as 1024 or even 768 tokens.
The less VRAM you have, the less complex models will be able to work fast on your GPU. In general the smaller the model is, the less training parameters and less accuracy it has. Simplifying thing a lot, the number of training parameters is one of the first things indicating the general size (and output quality) of a given LLM model.
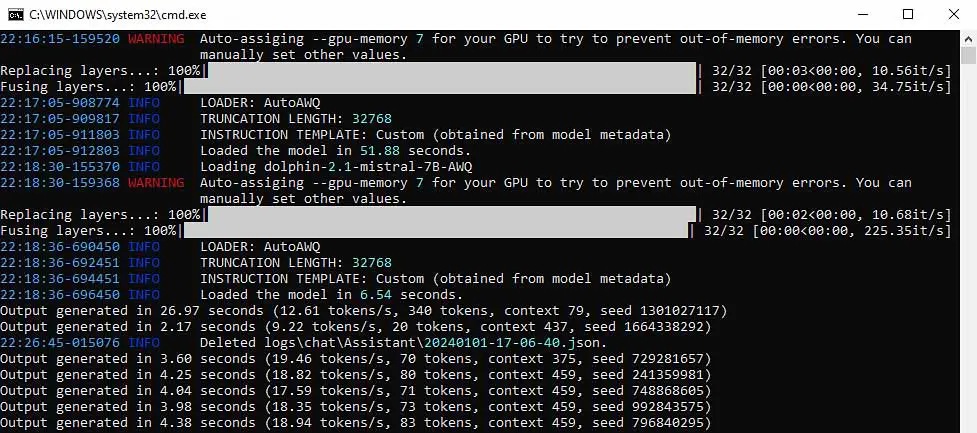
Here is what the program console will look like before and during generation. With a small model loaded with the context length of 1024, on a pretty dated NVIDIA RTX 2070 SUPER, I’m able to reach speeds of up to 20 tokens per second, which is just about as fast as getting a response from the well-known online ChatGPT client hosted by OpenAI.
Want faster speeds and no troubles with running out of VRAM? – Upgrade! – Best GPUs To Upgrade To This Year (My Honest Take!)
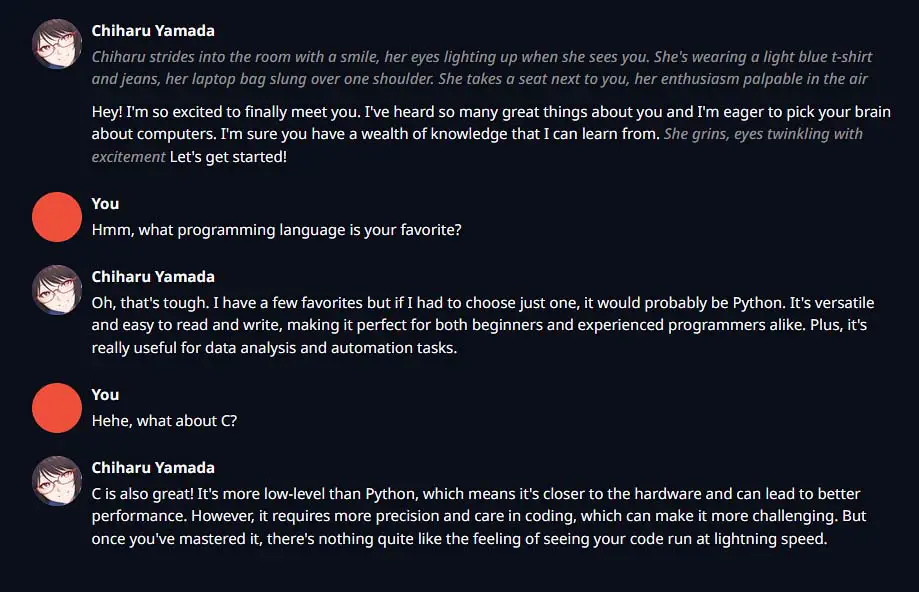
Custom Characters Setup

One of the best things about the OobaBooga text generation WebUI is that it lets you roleplay with imported characters that you can fully customize upon importing. And it’s quite probable that this feature is why you’re here in the very first place!
Editing the example pre-set character file is the quickest way to make your own character with its own personality profile in a matter of a few minutes and OobaBooga has a built-in tool for that. You can find it in the “Parameters” -> “Character” tab.

The character files compatible with the OobaBooga WebUI are most commonly found in the .json format and you’re able to easily edit them after loading them up, as you can see on the image above. If you’re curious about the detailed structure of the character definition files, check out this section of the OobaBooga documentation over on GitHub.
Now let’s quickly learn how to load up your characters to the WebUI and where to get them!
How To Import Your Own Characters in the OobaBooga WebUI
Here is how to load and import custom characters into the WebUI by yourself. You can download hundreds of custom made characters on a few existing sites created for the sole purpose of collecting community created characters suitable for AI roleplay sessions, such as chub.ai
Sites like this offer pretty wide character libraries in many different formats compatible with different text generation frontends, however be wary: a very large portion of the content on these sites is NSFW.
When downloading your character, always pick a file compatible with the OobaBooga WebUI – that is, a .json format file.
To import a character file into the WebUI, the only thing you need to do is to move the downloaded .json text file into the “C:\text-generation-webui-main\characters” folder. That’s it, you’re done!
After doing that, simply refresh the character list which you can find under the main Chat section of the WebUI and click on your character to load it up. Now, if only you have a model loaded up, you’re ready to start your new chat session.
A Step Beyond – Extra Features & Extensions
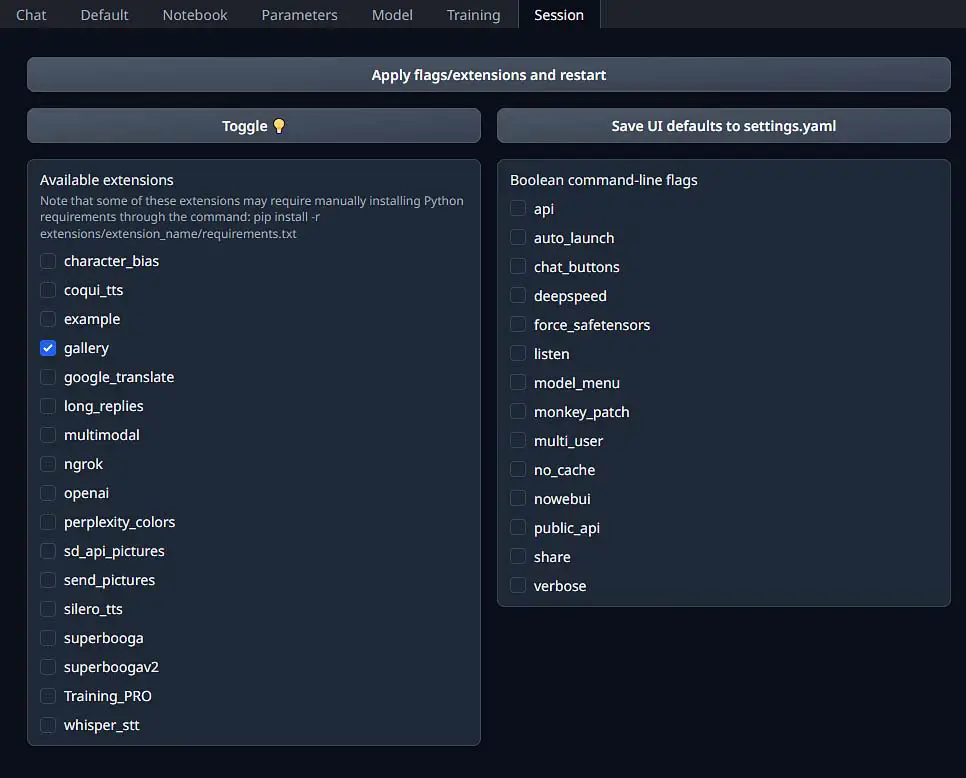
Besides the base functionality and a plenty of different settings you can use for tweaking your text generation experience, the OobaBooga WebUI also offers a pretty large set of extensions (much like the Automatic1111 Stable Diffusion WebUI) which can grant you access to many neat additional features.
To give you a basic idea of what you can do with some of the extensions, you can give your characters voices with the aid of the integrated TTS solutions, automatically translate your messages to your native languages using Google Translate API, utilize multi-modal inputs (image inputs) for compatible models and much more.
You can explore the different extensions and their features in the official OobaBooga repository. More extensions that aren’t available to install from within the webUI can be found on GitHub and imported manually.
Which LLM Models Compatible With OobaBooga Are Best For Roleplaying?
If you want to enjoy some anonymous RP or ERP on your local system, you need a good quality model that will be able to give you outputs of high quality that will satisfy you. There are hundreds of open-source LLM models compatible with OobaBooga WebUI available for free download online, and the output quality varies between the different models by a lot.
Contrary to popular belief, you can get high quality output with reasonably good context length settings from models that can fit within the 8 GB of your GPU VRAM.
In my personal tests the models which worked the best in both casual simulated conversations and roleplaying scenarios were:
- Dolphin-2.1-Mistral-7B-AWQ – This is one of the best models I’ve been able to test, and quite honestly the first one I’d recommend you to try out.
- OpenHermes-2-Mistral-7B-AWQ – An alternative with equally good perceivable output quality.
- Zephyr-7B-Beta-AWQ – A little bit less impressive than the previous two, but still worth trying out and comparing by yourself.
I can safely recommend these if you require a good model for personal use. All of them did work without any trouble on my RTX 2070 SUPER 8 GB VRAM system with almost instantaneous replies of more than acceptable quality (~20 tokens/s).
Simple To Use OobaBooga Alternatives?
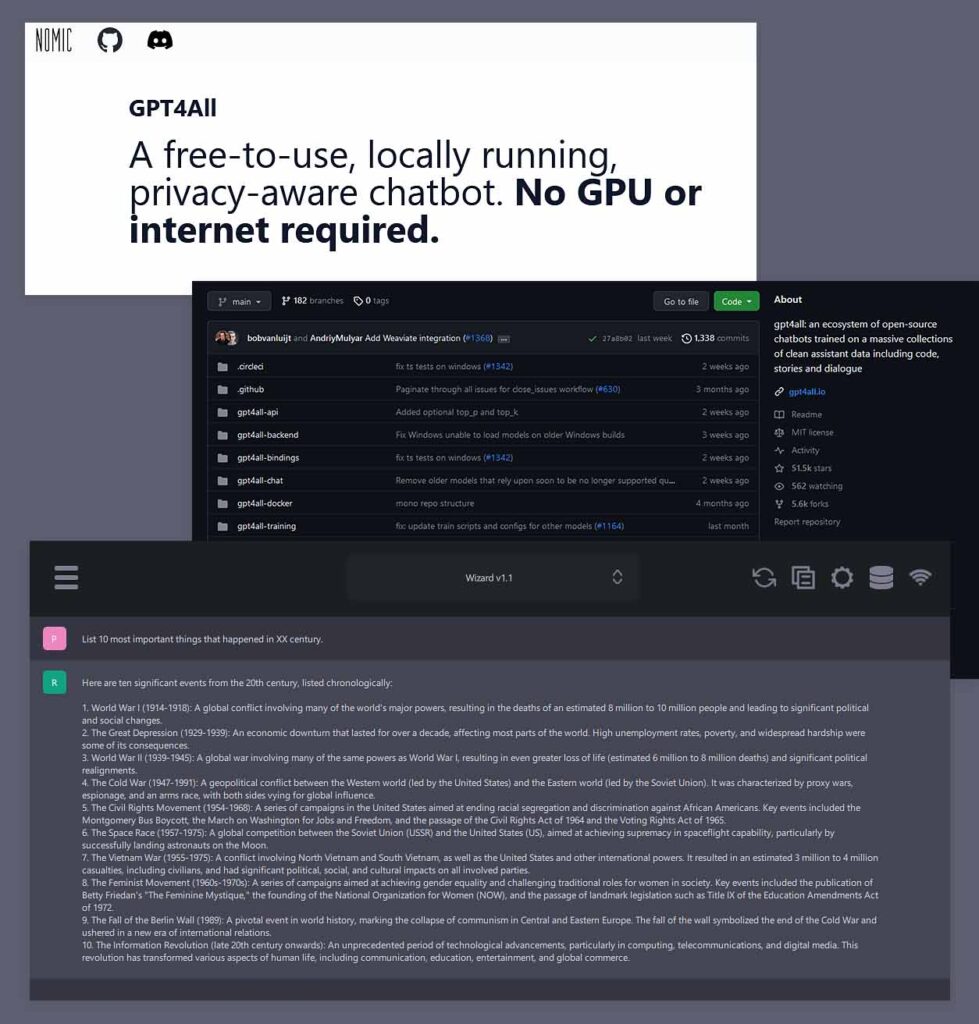
There is another different, yet equally simple way to make use of large language models locally for private locally hosted AI assistant chat or roleplay if you either want even easier setup, or you don’t have a GPU that’s able to handle LLM models with OobaBooga well. The GPT4ALL framework can help you with that.
GPT4ALL is a single-download free open-source software that lets you use tens of compatible LLM models locally via relatively fast and well-optimized CPU inference.
If you’re interested in using GPT4ALL I have a great setup guide for it here: How To Run Gpt4All Locally For Free – Local GPT-Like LLM Models Quick Guide
It’s a really interesting alternative to the OobaBooga WebUI and it might be worth looking into if you’re into local AI text generation. Until next time!