

Want to make your own AI song covers quick? Need to clone a voice and apply it to a speech or a song and make it sound realistic? Here is where the Retrieval based Voice Conversion WebUI by RVC-Project comes in handy! In this guide for beginners you will learn step-by-step how to train your first cloned voice model and convert one voice to another using AI with ease. Ready? Let’s begin the tutorial!
This guide is divided into three main parts – installing the RVC WebUI, training a voice model (cloning a voice), and model inference (converting one voice to another). You can use the table of contents above to skip between different sections!
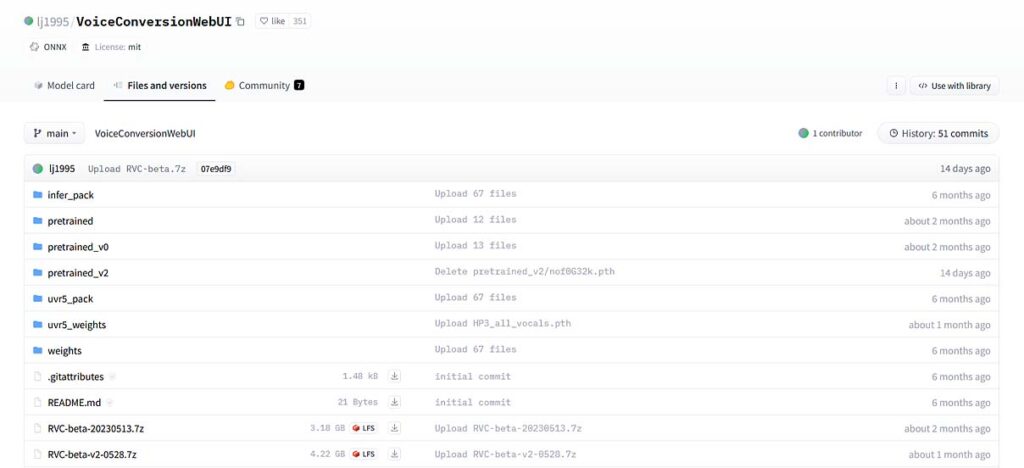
Retrieval based Voice Conversion WebUI is an amazing tool made available by RVC-Project that we will be using in this tutorial. The software is available for free under the MIT software license, and you can download it either from their official GitHub repository, or from their Hugging Face repository. It’s still actively updated, with the latest 2.3 release adding support for RTX 50 series cards, a new FCPE pitch extraction method and the option to stop and resume training.
Looking for a different way to make AI vocal covers? – Check out my second tutorial here: How To Install And Use AICoverGen – AI Vocal Covers From YouTube Videos
How To Install The RVC WebUI? – The Quickest Way
There are basically two ways of installing the Retrieval based Voice Conversion WebUI: downloading the ready-made package, which is the easiest option, or installing it manually from GitHub. RVC is officially supported on Windows and Linux, and there are no guarantees that it will work on macOS without further tweaks.
The easier & quicker way – the ready-made package:
Go to the RVC WebUI releases page and download the package that matches your graphics card. When I last checked, the newest release was 2.3, with three versions: Nvidia for NVIDIA cards older than the RTX 50 series, Nvidia50x0 for RTX 50 series cards, and AMD_Intel for AMD and Intel GPUs. These archives are big (around 5.5 to 8 GB), as they contain everything the WebUI needs, including the required model files.
Extract the downloaded .7z file into the directory of your choice, and double click the go-webui.bat file to start the WebUI. The package comes with its own Python, so there’s nothing else to install. After a short while, the WebUI will open in your browser.
Second method – manual install from GitHub: this one is for people who are comfortable with the command line. You will need Python 3.12 (64-bit) and Git installed. If you’re on Windows, you’ll also need ffmpeg (the official guide asks you to put ffmpeg.exe and ffprobe.exe right in the RVC folder).
Open a terminal in the location you want to install the RVC WebUI in, and run these commands to download the files and create a virtual environment for them:
git clone https://github.com/RVC-Project/Retrieval-based-Voice-Conversion-WebUI
cd Retrieval-based-Voice-Conversion-WebUI
python -m venv .venv
Then activate the virtual environment and install the requirements file that matches your hardware. Yes, the file names really are spelled “requirments”: requirments_cu118_py312.txt for GTX and RTX 20, 30 and 40 series cards, requirments_cu128_py312.txt for the RTX 50 series, and requirments_cpu_py312.txt for AMD, Intel or CPU-only setups. On Windows, with an RTX 40 series card, that looks like this:
.venv\Scripts\activate
pip install -r requirments_cu118_py312.txt
After that, you need the additional model files that the RVC WebUI uses for training and voice conversion: hubert_base, rmvpe and the pretrained_v2 models. They’re available in the RVC WebUI Hugging Face repository, and the official installation guide lists the exact download commands and where each file goes. Once they’re in place, start the WebUI with python webui.py.
How To Train a Voice Model Using The RVC WebUI – 3 Step Guide
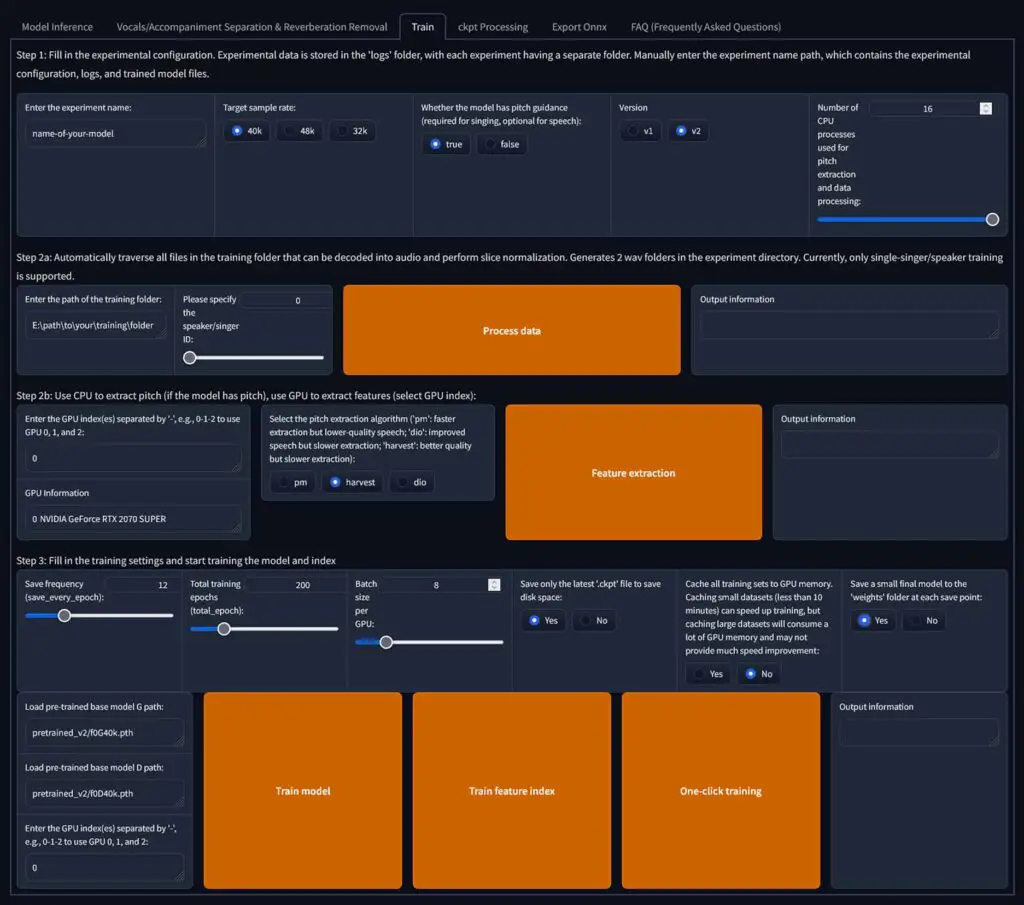
Let’s now go over all the steps necessary to get through the training process from start to finish and create and train a model based on your chosen recorded acapella vocals.
Step 1: Enter the initial settings
First, enter the name you want to choose for the model that you’re about to train in the “Enter the experiment name” field on the top left of the main RVC WebUI screen.
Then, click on the following settings (these are the settings I found best for a good starting point):
- Target sample rate: 40k
- Pitch guidance: True
- Model architecture: v2
- Number of CPU processes: The max amount you can choose on your system (if you’re facing crashes during initial processing, you can lower this number).
Step 2: Load and process the training audio data
In the field labeled “Enter the path of the training folder”, enter the path to the directory with the voice audio sample/samples that you wish to use for training. The folder with the training audio should contain only the audio files that you want to use to train your new voice model. It can contain multiple audio files, or single long audio file – it doesn’t really matter.
If you want a shortcut for getting the current directory path in the default Windows system file browser, simply right click the address bar in the top of the file browser window, and choose the option “Copy address as text”.
Now, click the large “Process data” button. This process will take a short while.
Once the data processing finishes, it’s time to move on to the automatic feature extraction.
Select the “rmvpe” pitch extraction algorithm (the newest versions only offer rmvpe and pm for training, and rmvpe is the better one), then click the “Feature extraction” button and wait until the process finishes.
Time for the very last step – the actual model training process!
Step 3: Train your very first voice model
Now, a few final settings before we hit that training button.
Set the “Save frequency (save_every_epoch)” to 12.
Then comes the time for setting the number of training epochs in the “Total training epochs (total_epoch)” field. In general, if your audio training material is of lower quality and features some minimal background noise, you should go for a lower amount of epochs (like 15-20 epochs).
If on the other hand you’re certain that your audio source material used for training is of high quality, you can set the number of epochs as high as 200.
A good starting value for quality source vocal samples is anywhere from 150-200 epochs. In my case, I used 150 epochs.
The more epochs in the training process, the longer the training process will take – naturally.
Next setting, the “Batch size per GPU” setting is an important one. The higher the number is, the more VRAM the training process will consume and the faster the training process will be.
To which value you set your batch size, depends on how much GPU memory you can spare without the training process ending abruptly while throwing a “CUDA out of memory”, or any kind of GPU memory limit error.
With 8GB of VRAM, try setting the batch size to around 8, and see if you’re able to train your model without any memory errors. In some cases you will be able to go higher, in some, you will have to lower this number to finish your training successfully. With more VRAM to spare, you can train your models with larger batch sizes. Once again, experimentation is key.
“Save only the latest ‘.ckpt’ file to save disk space” should be set to “yes”, and “Cache all training sets to GPU memory” to “no”.
Last things last, set the “Save a small final model to the ‘weights’ folder at each save point” setting to “yes”.
Now you’re done tweaking all of the most important settings! Click the “Train feature index” button to train the feature index before beginning the model training process (you can also do this afterwards if you want to). Once the process finishes, you can finally train your model.
Simply click the large “Train model” button to begin the model training process. There’s also a “One-click training” button, but running the steps one by one makes it much easier to see where something went wrong, if it does.
Sit back and relax, while your GPU does the work for you. After the training process is finished (this will be indicated in the terminal window), your model file should be available in the assets\weights folder inside your RVC folder, as [your-model-name].pth.
If you’re curious how long the process can take, move on to the next paragraph!
Note: Because of how the RVC WebUI works, the program will save model checkpoint files at set time intervals, so as to help you counter model overfitting and allow you to recover the partial training checkpoints made throughout the training process. These files can quickly add up in size when you train lots of different models, so be sure to remove them after you get your desired voice model, if you’re positive that you don’t need them anymore!
How To Convert One Voice Into Another (Model Inference)
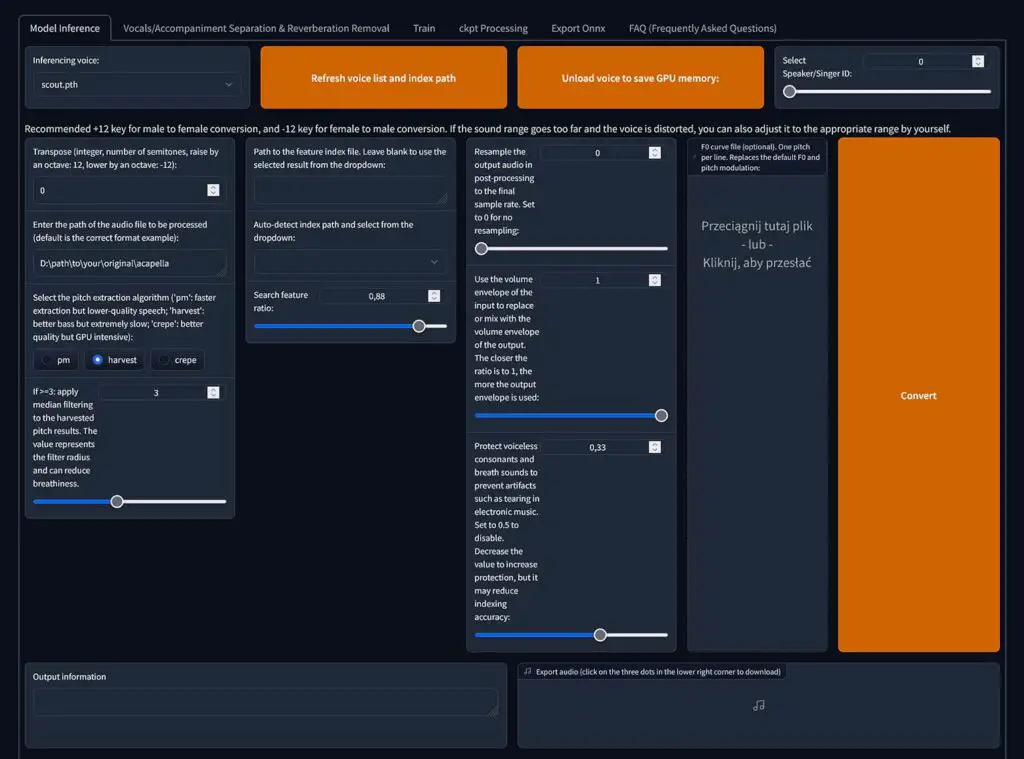
Now, finally, comes the model inference process, so in more beginner-friendly language, swapping voices, or converting one voice into another. For this, you will need your trained model, as well as a clear audio file with voice recording you wish to change into your trained voice.
The quality requirements for the voice audio file used for inference are pretty much the same as for the training audio, except you can use an audio file of any duration here.
The only important thing here, is that you cannot use an audio file containing any kind of background noise or instrumental parts here.
When it comes to speech, you will need a clear and high quality audio file, and when it comes to songs, a clear acapella without reverb or delay FX applied, and preferably with no vocal harmony going on.
This is a much faster process than the training we just went through, and on most modern hardware it can be almost instantaneous when it comes to shorter audio files. Here is how it goes.
Step 1: Load an RVC voice model of your choice
First, go to the “Model inference” tab, and click the “Refresh voice list” button.
Now, your freshly trained model should show up in the drop-down list on the left side of the window. Click on it to select it.
Then, upload the audio file with acapella vocals, or a clean, noiseless voice recording you want to convert into your chosen voice. You can drag and drop it right into the audio upload field, or click the field to pick the file.
Note: If you’re attempting to convert a trained voice that is naturally high, to a lower voice, play around with the “transpose” setting to shift the inferred voice up and down in terms of pitch.
Step 2: Enter the settings and convert the voice
Select the “rmvpe” pitch extraction algorithm (fcpe is a faster alternative). The matching .index file is selected for you automatically after you pick a model, but you can still change it in the feature index field (if you don’t have one, you can proceed without it).
You can leave all the other settings as default for now, but feel free to experiment with them later on, if you’d like to further tweak the inference process to get even better results.
Click on the “Convert” button, and sit back until the inference process is finished (typically around a minute or two).
All done! You can now save your audio file output by right clicking on the little audio player that should appear in the WebUI and saving the file in a directory of your choice.
What If I Don’t Have An Acapella File?
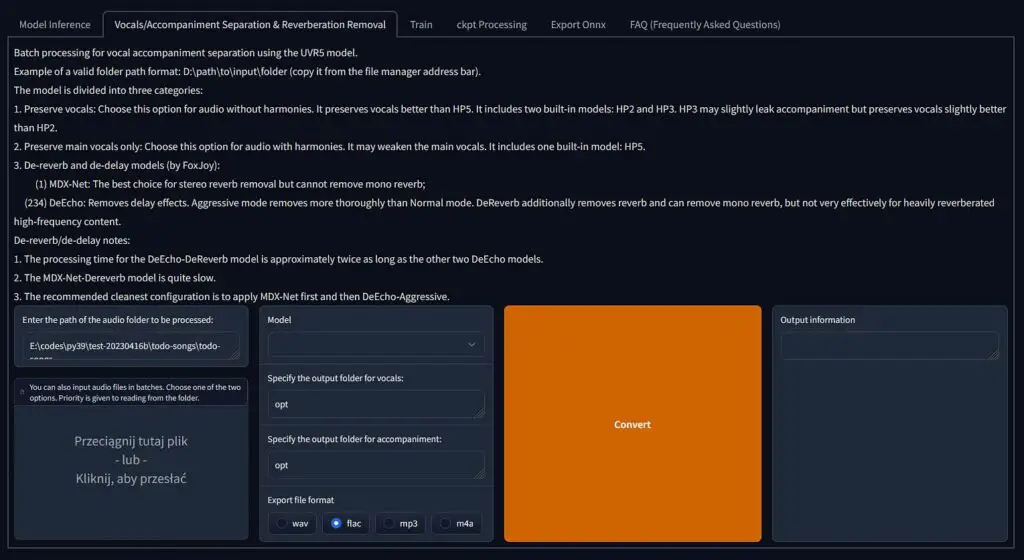
If you don’t have a vocal-only file of the song you want to make an AI voice cover for, your best bet is to either search for a studio acapella for the song online and then use it, or make your own acapella using AI audio isolation tool of your choice.
For making your own acapellas using AI quick and without much trouble, I recommend either using the Ultimate Vocal Remover GUI which is relatively fast and super simple to use, or using the in-built vocal isolation utility which is actually available right inside the RVC WebUI under the “Vocals/Accompaniment Separation & Dereverberation” tab.
I have a full guide for UVR available here! – Ultimate Vocal Remover (UVR) – How To Setup & Use
Attempting to use music audio files with any kind of instruments with them either for training or for inference will result in nonsensical audio output so keep that in mind!
Well, Can I See Some Examples Then? – AI Covers
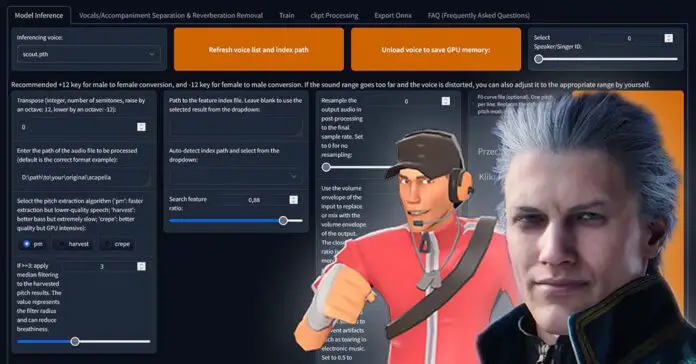
Certainly! As hinted by the article thumbnail image, here is a short snippet of Scout from TF2 (Nathan Vetterlein) singing “Bury the light” by Casey Edwards.
As you can hear – not great, not terrible – this is the exact voice output I got out of training my model using the process mentioned above.
I used the freeware Audacity software to add the raw generated acapella vocals to the instrumental file I had on hand.
The vocals go out of tune here and there throughout the whole song, and both the training and inference process could use further settings tweaking, but for my first trained voice, the result is pretty good.
The voice was trained with around 10 minutes of Scout voicelines taken out of Team Fortress 2 sound files.
How To Import Downloaded Voice Models Into RVC?
It’s really easy actually. When you download a custom voice model, you will usually get two files: the model weights, and the feature index file.
Many RVC voice models are also freely available on websites such as voice-models.com.
Keep in mind that you can only use models that are compatible with RVC/trained using RVC to clone voices using the “Model inference” tab.
To import your downloaded voice model and use it in RVC, you simply need to put the weights file (with .pth extension) into the assets\weights folder, and the index file (with the .index extension) into the assets\indices folder. Then click “Refresh voice list”. That’s it!
After doing this, you’ll be able to use your imported voices in the RVC WebUI, in the exact same way you’d use your own trained voices. Enjoy!
How Much Voice Audio Do You Need for Voice Training / Cloning?
When it comes to the RVC WebUI, you will need anywhere from around 10 minutes to 1 hour of high quality clear voice recordings. Shorter vocal datasets can generally yield less satisfying results.
Of course, you can attempt to use less the recommended amount, or way more (which in some cases is not worth it). There is no golden mean here, so feel free to experiment!
The vocal samples used for training should not have any kind of reverb/delay/echo effect applied to them. If they do, you won’t be able to train your chosen voice accurately.
In my case, I used around 12 minutes of high quality isolated vocals to train my first model, and it came out pretty good (you can hear it in the example above).
Where can you find some clean and high quality vocals for testing the voice cloning capabilities of the RVC WebUI? – you might ask. So, here is my answer.
In general, one of the best sources for this kind of data are collections of game character voicelines from various video games, which you can find all over the internet. These can prove themselves very useful if you don’t want, or simply can’t record your own vocal samples to experiment with.
In the next paragraph, I’ll explain what kind of recordings you can and cannot use for efficient voice training using RVC.
Preparing The Vocal Training Dataset
RVC WebUI takes in .wav or .mp3 audio files to source the data for the training process. You supply them to the WebUI by entering the path to the folder with your prepared audio files.
The audio files supplied for the training process should be clear and high quality voice recordings (singing voice or speech), that do not contain any instrumental content, don’t feature any kind of background noise, and do not have excessive audio FX applied to them.
Do you have to split up a long audio file before training? No, this is not necessary when using the RVC WebUI. Long audio files will simply get automatically cut up into 4 second samples during processing.
Here are some very important things regarding the input material / your training data:
- Ensure that the voice that you’re trying to clone doesn’t have any kind of reverb, delay or echo effect applied to it.
- Remove any kind of background noise from your training audio. This is very important.
- Cut out prolonged silent parts from the training audio file (a second or two seconds of silence in between voice lines is usually fine).
- If you’re taking acapella vocals from a song, keep in mind that solo vocals work best. If the vocals are harmonized (or there is more than 1 recorded voice audible at the time), your chances of training a quality model get lower.
- The quality of your chosen voice samples is almost always more important than their quantity. A good quality 15 minute vocal recording is better than low quality unchecked 1 hour long voice audio dump.
If you adhere to these rules, you will get the best results provided you get all the remaining settings right. With your dataset ready, you can go back to the training steps above.
How Long Does It Take To Clone a Voice Using the RVC WebUI?
The length of the training process depends both on the amount of training material used, set number of epochs and the capability of your GPU.
On my system rocking the now not-so-new RTX 2070 SUPER with an efficient 3-fan design, training a model with around 10 minutes of training voice data and 150 epochs took somewhere around 1 hour total.
The less epochs you set, the shorter the training process will be, although at some point while lowering the number of training epochs you may naturally start to lose quality and get worse output.
The larger your batch size, the faster the training process gets, but setting the batch size too high may result in out-of-memory errors if you don’t have enough VRAM (GPU memory) available.
When it comes to model inference, on most modern graphic cards the process can take anywhere from a few seconds for short voicelines, to up to a minute or two for longer audio files.
And That’s It – All Done!
And that’s it – you’ve created your very first cloned voice model and used it to make your very first AI song cover. There is much more to voice cloning than this though!
Keep in mind that this is a basic, bare-bones guide which doesn’t really include any further training and inference optimization, and only offers you starting settings to get you started as quickly as possible.
Want to use your RVC voices live? The RVC package includes its own real-time voice changer (the go-realtime_gui.bat file), and the newest release adds a VST plugin for audio software. You can also load the very same models into the Okada live voice changer, which is what I use for Discord and games.
If you’d like a different interface for the same RVC models, Applio is the most popular alternative, although it’s now in maintenance mode and only gets occasional fixes.
I hope I was able to help. If you have any questions, don’t hesitate to ask in the comments below. Until next time!