

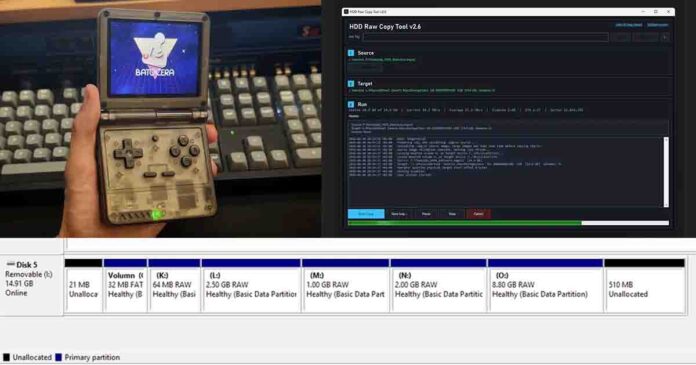
Here is how to create a restorable sector-level image of an entire retro handheld microSD card using the free HDD Raw Copy Tool for Windows.
This type of backup preserves the partition table, boot records, hidden partitions, system files, games, saves, and unused space. It works with stock OS cards, Batocera cards, ArkOS cards, and other layouts that Windows cannot read in File Explorer. Let’s get to it.
Related: R36S Setup Guide: Clone Check, dArkOSRE, SD Cards and Charging
Our Example and Multi-Partition Backups
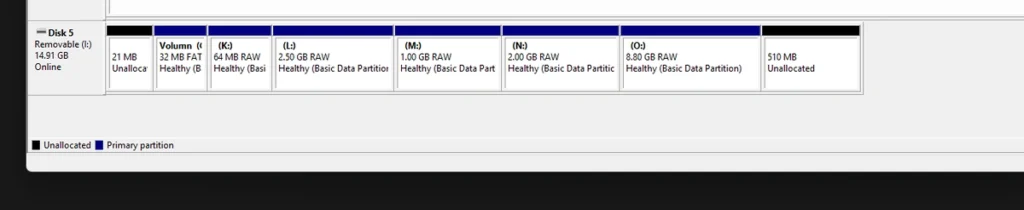
For this tutorial I’ve decided to use a microSD containing the Batocera installation from my Powkiddy V90S.
Batocera is a Linux-based operating system. Windows shows this card as a set of FAT and RAW partitions, since it cannot read most of the Linux filesystems used here.
Backing up this microSD by hand would not be practical. The RAW partitions are not accessible through File Explorer, and the partition layout forms part of the bootable Batocera installation.
A restorable backup has to preserve that layout, not only the visible files.
Why Is a Full Image Backup Better Than Copying Files?
The Batocera card I have on hand is a good example. A normal file copy misses its Linux partitions, boot records, hidden data, and exact partition boundaries.
The same rule applies to many other retro handheld OS cards. A full image is almost always the safest choice whenever you need a complete copy of the original setup.
Full-card images are best for full disaster recovery (for instance when your microSD dies), while separate file-level backups can of course still be useful for saves, ROMs, and configuration files.
You can restore the image to another microSD card with an equal or larger real capacity.
You can restore the image to a target card that’s larger than your original card, but remember that the restored partitions will keep their original sizes. The extra capacity will remain unallocated until the operating system expands it or you resize the right partition with a compatible partition editor.
What You Need Before Starting
- A Windows 10 or Windows 11 PC.
- A working microSD card reader.
- Your original retro handheld microSD card.
- Free PC storage equal to at least the full capacity of the source card.
- A replacement microSD with an equal or larger real capacity for the restore.
Important: Windows can ask you to format one or more partitions after you connect a Linux-based handheld card. Cancel every such prompt. Formatting the card at this stage can destroy the data you are trying to back up.
My Chosen Free Software for Easy Backups
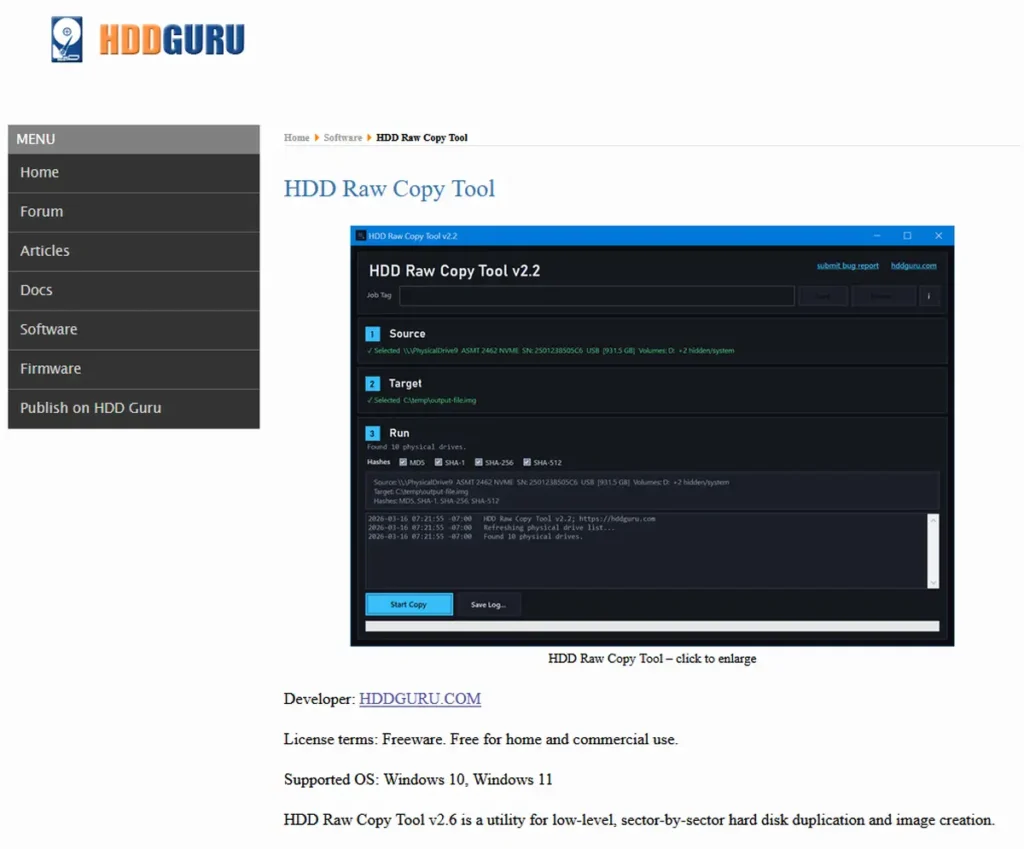
The free HDD Raw Copy Tool, despite its name, works with hard drives, SSDs, USB drives, SD cards, and microSD cards connected through a card reader.
The software supports both Windows 10 and Windows 11. You can either install it or download the portable executable. Remember to run it as Administrator when working with a physical card.
HDD Raw Copy Tool copies the storage device sector by sector, so the source filesystem does not need to be readable by Windows for you to be able to back it up. The tool offers plain .img files and resumable .imgcv2 image containers.
We will use an .imgcv2 file for the workflow shown here, but you can also choose the .img file format if you have a reason to do that. The one real advantage of using it is that it can be used for restoration by virtually any third-party data recovery or virtualization tool without additional file conversion.
A similar free disk imaging program alternative that you could use is DiskGenius. This tutorial however, focuses solely on HDD Raw Copy Tool.
How To Create an Image Backup of Your MicroSD Card
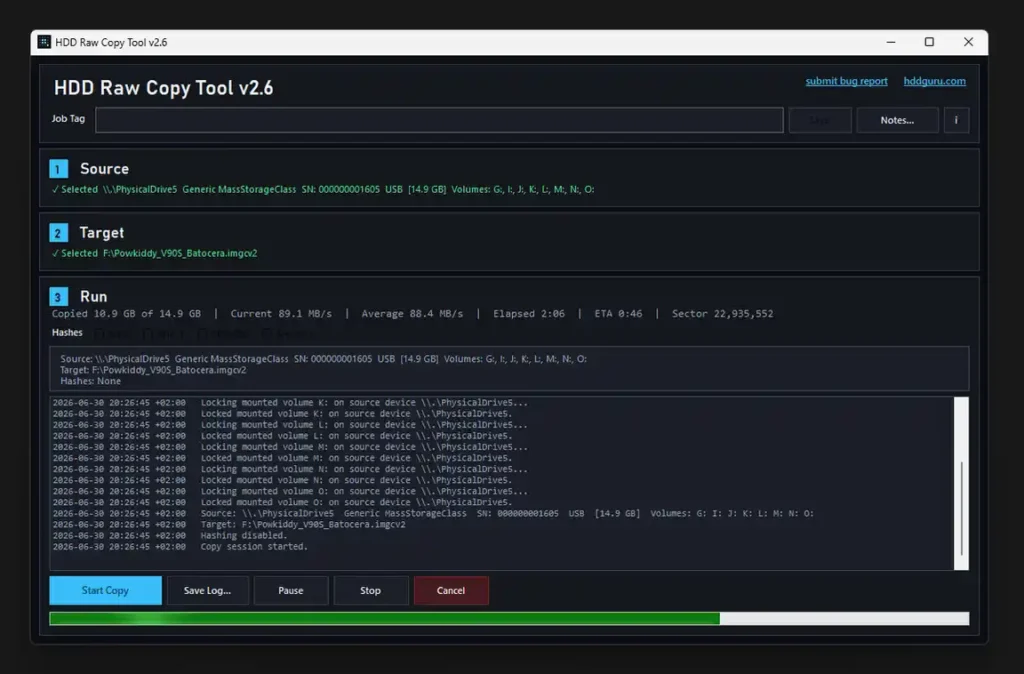
Connect the original card, open HDD Raw Copy Tool as Administrator, and follow the steps below.
Step 1 – Select the Source MicroSD Card
Select the physical microSD card in the Source section. Check its listed capacity, drive letters, and device name before moving on.
Every storage device connected to your computer will appear in this list. That includes internal drives, USB flash drives, and other memory cards.
Picking the wrong source will not pose any risk of erasing your data, but it will create a useless image and can waste you some time. Take a few seconds to confirm the chosen microSD capacity to make sure that you’re copying the right card.
Step 2 – Select a Backup File as the Target
In the Target section, select a file rather than another physical drive. Choose a folder on your PC, enter a clear filename, and save it with the .imgcv2 extension.
Do not select a physical drive as the target here. Disk-to-disk mode writes over the chosen target device and IT WILL destroy the existing partition layout and files alongside all your data.
Give the backup a useful name. Including the device name, OS, and date in the image filename can make it easier to identify later.
The destination drive needs free space based on the full source-card capacity, not only the size of the visible files. A 16GB source card requires room for a full 16GB-class image.
Step 3 – Start the Copy and Wait for Completion
Review the source and target one final time, then start the copy. Leave the card reader connected and keep the PC awake until the job finishes.
Copy time depends on the card capacity, card reader, USB port, and source-card speed. My 16GB test card took about three minutes in the run shown above.
Wait for the program to report that the copy is complete. Now you have a full backup of your card on hand.
How To Restore the MicroSD Card Image
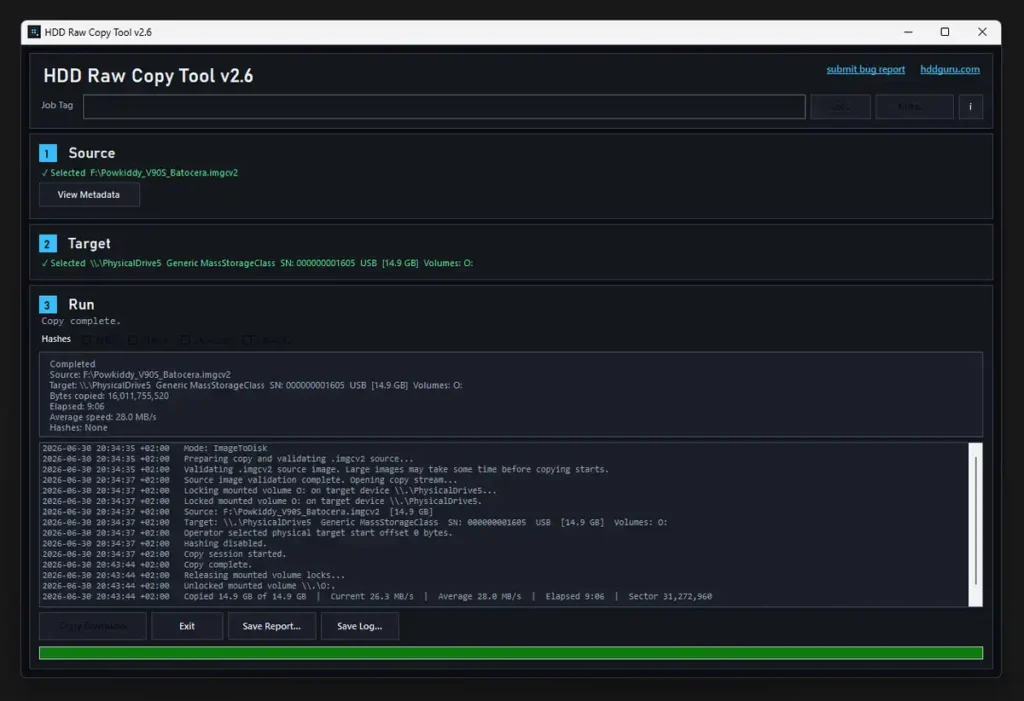
Restoring your image to the same or a new card works in a very simple way. The image file becomes the source, and the physical microSD becomes the target.
WARNING: Everything on the target microSD card will be overwritten, and ALL of your data from the target card WILL BE LOST. Always confirm the target device by capacity and drive letters before starting the restore.
Step 1 – Select the IMGCV2 Backup as the Source
Open HDD Raw Copy Tool as Administrator. In the Source section, select your .imgcv2 file created during the backup.
When you use the .imgcv2 format instead of an .img, the program will validate the image container before copying. Stop at this point if it reports a damaged or incomplete source image.
Step 2 – Select the Replacement MicroSD as the Target
Connect the replacement card to your computer and select it in the Target section. Remember to always check the capacity and drive letters twice, to make sure you’re choosing the right device.
The target needs at least as many addressable bytes as the original source card. A larger card can be used, provided the handheld supports its capacity and the target contains at least as many addressable bytes as the source. A slightly smaller card is likely to fail, even when both labels show the same advertised capacity.
Step 3 – Leave the Target Start Offset at 0
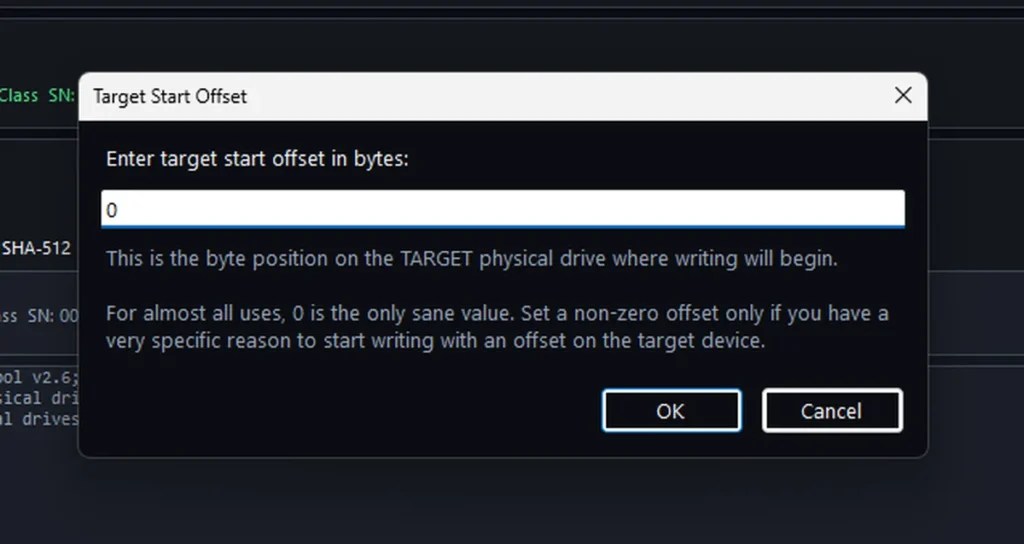
HDD Raw Copy Tool, after initiating the restore will ask you where writing should begin on the target device. This setting is irrelevant for us for a simple data restore. Leave this value at 0, then confirm it.
A non-zero offset would simply write the image farther into the physical device and would not recreate the original card layout at the start of the card.
Step 4 – Start the Restore
Review the selected source image and physical target, then start the copy. Do not remove the card or card reader during the write.
Wait for the green progress bar and the copy-complete message. When the restore is complete, close the program, safely eject the card, and place it back into your handheld.
Step 5 – Boot the Handheld and Check Your Data
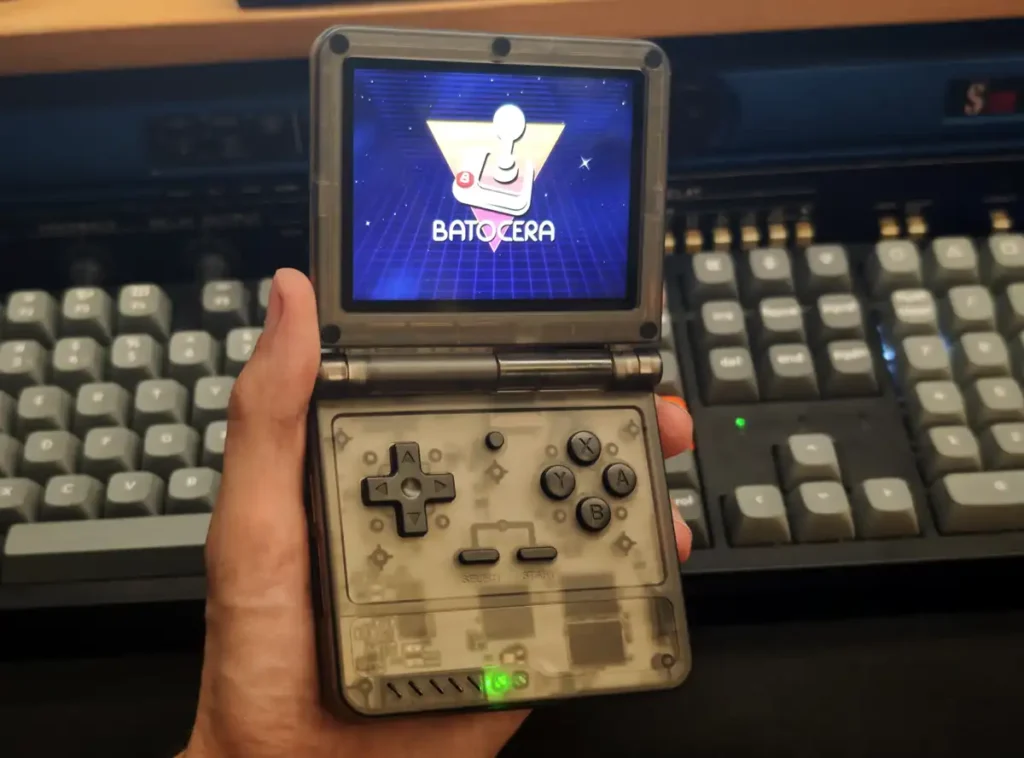
My V90S successfully booted from the restored card with the original Batocera partitions back in place. I have also used this method to back up and restore many of my other handhelds such as the R36S (with a dual microSD setup) and the Miyoo Mini with Onion OS installed.
Of course, it’s always good to check your games, save files, settings, and any custom files before treating the backup as confirmed. A good practice is to keep the original image on more than one storage device, if you know you’re still going to need it in the future. A local PC copy plus a second external-drive copy gives you protection if one drive fails.
The Legacy HDD Raw Copy Tool v1.20
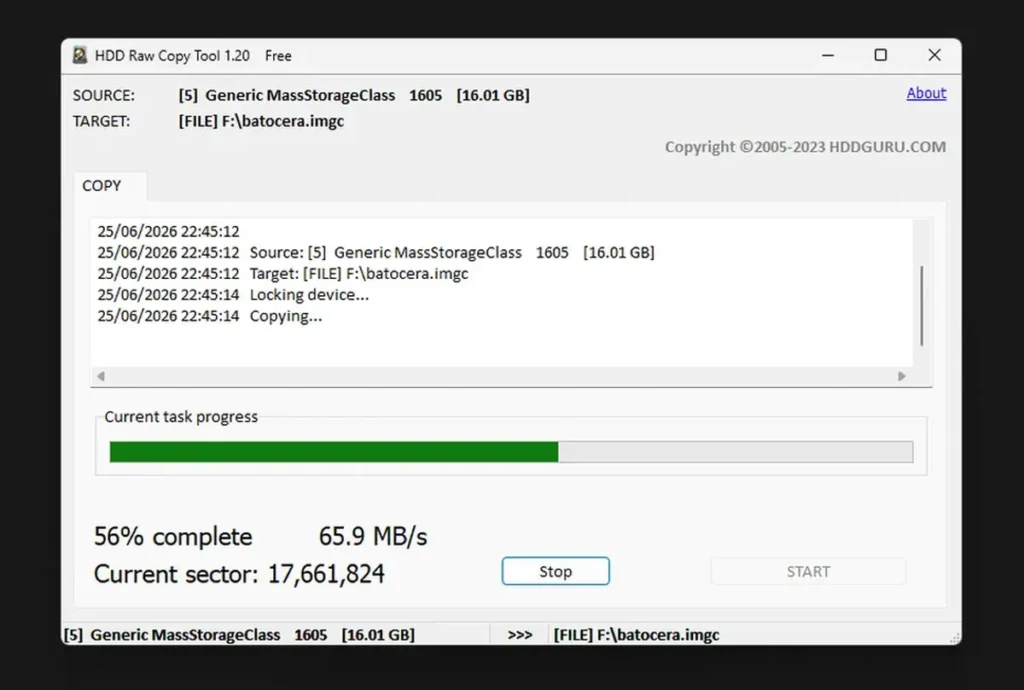
HDDGURU still provides the archival v1.20 release that you might have seen in some older guides. Its interface is different, and it uses the legacy .imgc format shown in the screenshot above.
Use the newest version of the software for new backups on Windows 10 and Windows 11. Keep v1.20 only for older Windows systems or an existing workflow built around legacy IMGC files.
Once the image has passed a real restore test, label it clearly and store it somewhere safe. You now have a complete copy of the card that can bring the handheld back to its saved state. Over and out!
You might also like: Miyoo Mini Setup Guide: V1-V4 and Plus, Onion UI, Settings and Battery