
Learn how to run Anima locally in ComfyUI, where to place the model files, which workflows to use, and which prompts and settings work best.
Anima by circlestone-labs with almost one million downloads in the last month is one of the latest anime/digital illustration style models. It’s also one of the main alternatives to SDXL-based models such as Illustrious XL and all of its popular fine-tunes. The whole setup should take more or less 10 minutes of your time. In fact, it’s simple enough that you can do it in 3 short steps total. Let me show you how.
You might also like: Beginner’s Guide To Local AI Image Generation Software – How To Start This Year
License note: Anima model weights and derivative models are covered by the CircleStone Labs Non-Commercial License. The model itself and derivatives are limited to non-commercial use, while generated outputs are treated separately under the license. Please do read the license before using Anima in any production or commercial workflow.
How Is Anima Different From SDXL-Based Models?
Anima isn’t a Stable Diffusion XL-based model, and in fact, is based on a completely different architecture.
While anime-style checkpoints such as Illustrious, WAI, or NoobAI are based on the SDXL architecture which makes use of U-Net for image generation and CLIP for text encoding, Anima is based on the much more recent NVIDIA Cosmos architecture (more precisely Cosmos-Predict2-2B-Text2Image), which makes use of transformers.
Because of that, Anima is able to do quite a few things that SDXL anime-style fine-tunes could not.
These include:
- Processing natural language prompts – Thanks to the Qwen-3 0.6B text encoder used in the architecture, Anima handles natural-language descriptions better than many CLIP-era SDXL anime checkpoints, though it still benefits from clear, specific prompts.
- Mixing phrasing styles – The use of a transformer-based text encoder paired with the fact that the model was trained both with natural language and tag-based image labels lets you combine descriptive English sentences seamlessly with traditional booru tags in your prompts.
- Maintaining clearer illustration style – Anima was trained on several million anime-style images and about 800,000 non-anime artistic images. These additional non-anime datasets were specifically filtered to exclude photos.
- Replicating more recent aesthetics – With “knowledge cutoff” on September 2025 (with version 1.0) Anima “knows” a lot of popular characters and styles, and is able to replicate them really well. You can use tools such as Animadex to browse through the whole database of easily replicable characters.
These are the main practical differences that make Anima stand apart from many SDXL-era anime fine-tunes. It’s also why it’s very compelling to think about as a successor to Illustrious as a new baseline model for anime and illustration-style image generation.
What Do You Need?
The main things you need are ComfyUI installed on your system, the three Anima model files, and a compatible Anima workflow file.
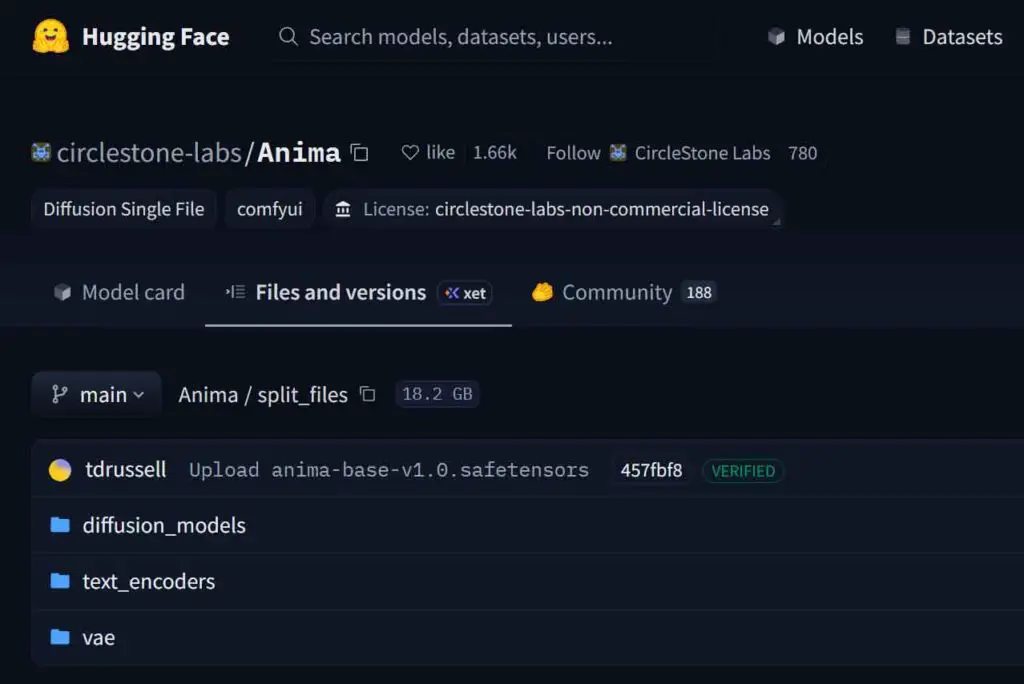
Anima, as a model, doesn’t come in an “all-in-one” package like for instance Qwen-Image-Edit. Instead, you need to download three different model files from the Anima repository on Hugging Face. The files you need are:
- The model itself (located at split_files/diffusion_models) – pick the latest model version available.
- The Qwen text encoder (split_files/text_encoders) – qwen_3_06b_base.safetensors
- The variational autoencoder (VAE) (split_files/vae) – qwen_image_vae.safetensors
All the file paths listed above refer to the official circlestone-labs Hugging Face repository.
The full model package alongside the text encoder and VAE can easily fit and be run on a 6-8GB VRAM GPU.
You might also like: Illustrious XL ComfyUI SDXL Anime Beginners Guide
Anima In ComfyUI – In 3 Short Steps
Here are the exact steps you need to take to make use of Anima in ComfyUI locally on your own PC. The full setup shouldn’t take you more than 10 minutes total depending on your internet connection.
Step 1 – Download The Model Files & Install ComfyUI
The first thing you need to do is download the Anima model files. Head over to the Anima Hugging Face repository and select the files that we’ve listed above. You need three files total.
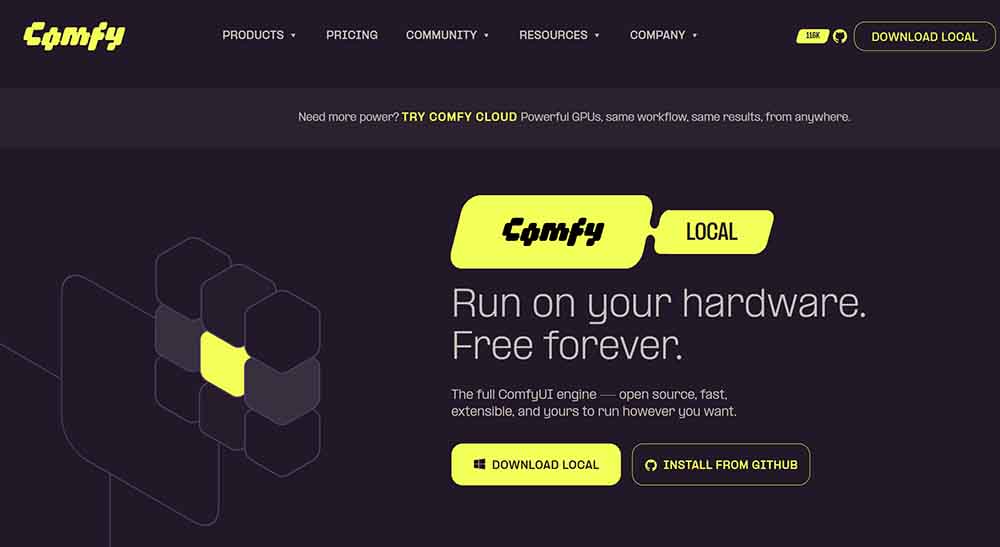
Your next step is to install ComfyUI on your system. You can find the “one-click” installer for the desktop version of Comfy that you’re going to need here, on the official website.
During the installation process, select an installation directory of your choice. Once you have the model files on hand and ComfyUI installed, you can proceed to the next step.
Step 2 – Put The Model Files In The Right Folders
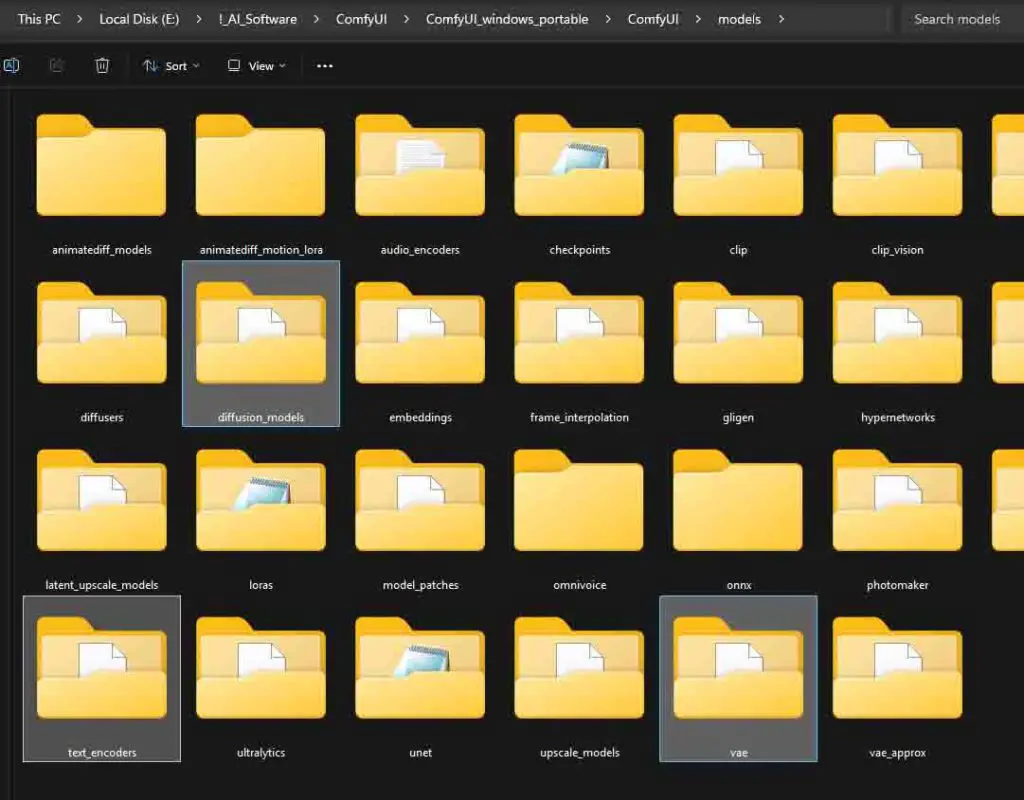
For ComfyUI to be able to recognize all of the files we’ve just downloaded, they have to be put in the right directories according to their type.
Put your downloaded model files in these specific folders within the ComfyUI directory that you specified during the installation.
- The model file, (e.g. anima-base-v1.0.safetensors) -> ComfyUI/models/diffusion_models/
- The text encoder (qwen_3_06b_base.safetensors) -> ComfyUI/models/text_encoders/
- VAE (qwen_image_vae.safetensors) -> ComfyUI/models/vae/
Once you’ve done that, we can proceed.
Step 3 – Import The Anima ComfyUI Workflow
The model files alone are not enough. To generate images, you still need a compatible ComfyUI workflow or template that loads the diffusion model, Qwen text encoder, and VAE correctly.
Luckily, there are quite a few ComfyUI workflows tailored specifically for Anima out there.
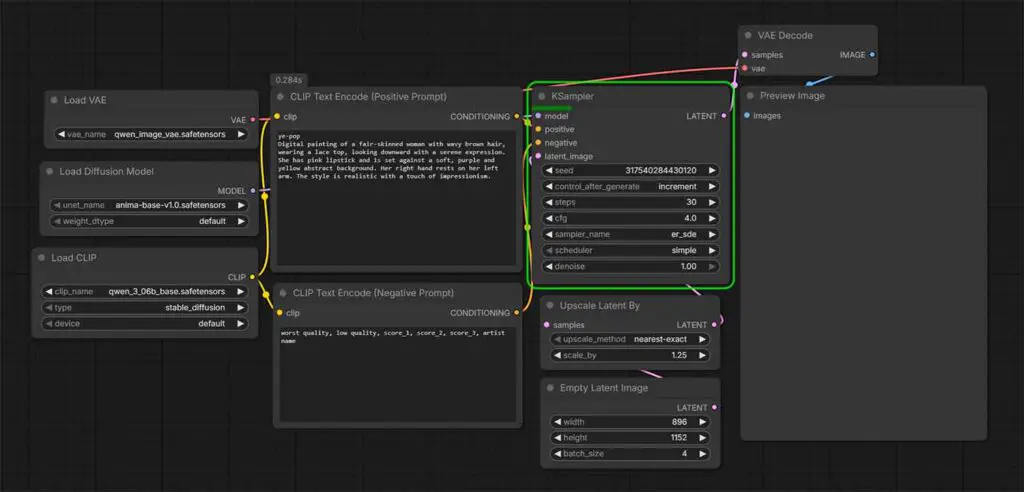
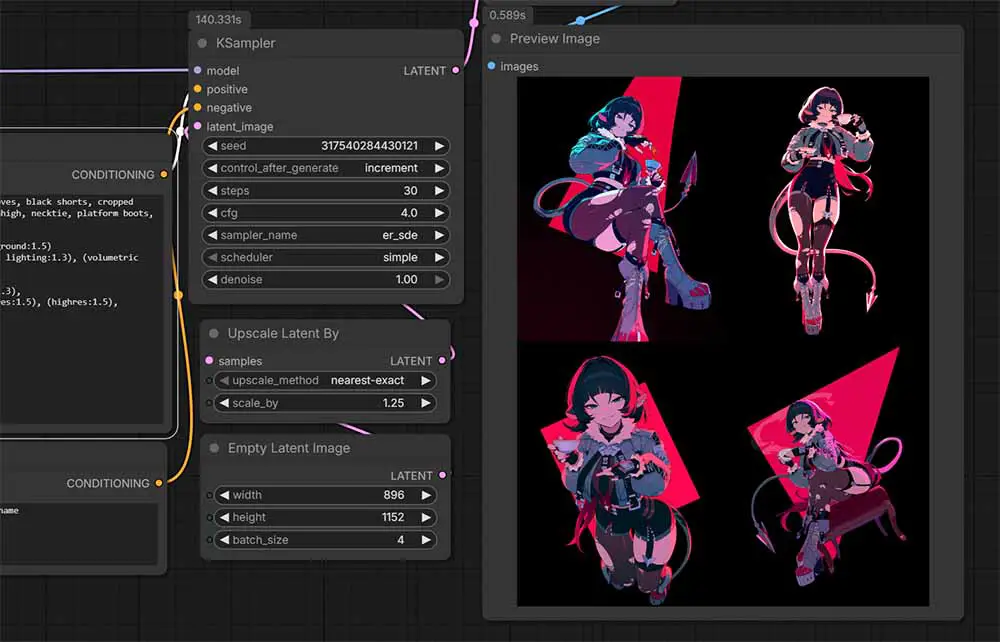
If you want to go the simplest route possible, I’ve prepared a simple plug-and-play workflow for you that you can use to quickly get started with simple image generations. You can see one version of it in the image above, and download the .json file from this Google Drive folder.
While it’s very bare bones, it lets you tweak the most important generation settings, as well as generate more than one image at a time by tweaking the batch size setting in the Empty Latent Image node.
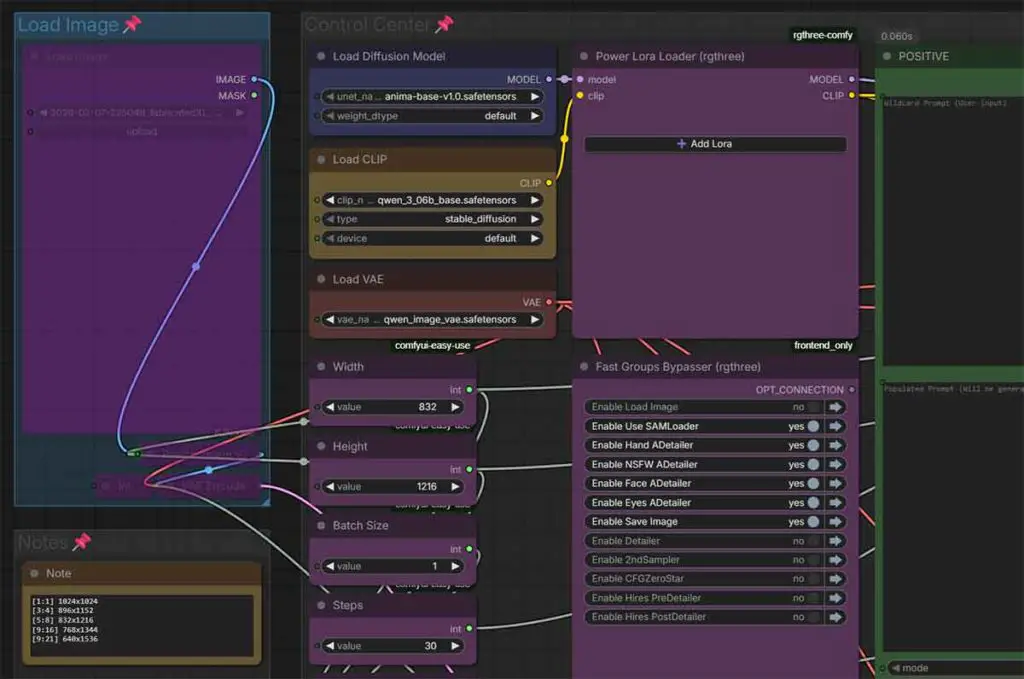
If you want a more advanced workflow which is essentially a full-on Anima playground with image-to-image capabilities, automatic detailer node switches and a few other gizmos at hand, I highly recommend this advanced Anima workflow by Legendaer. When it comes to its basic functionality, you don’t have to download any other additional files for it to work.
In both cases, after you download the .json file with the workflow, you can import it to Comfy simply by dragging and dropping the file onto the open ComfyUI web interface window in your browser.
Once you’ve imported your workflow, there is one more thing you might need to do.
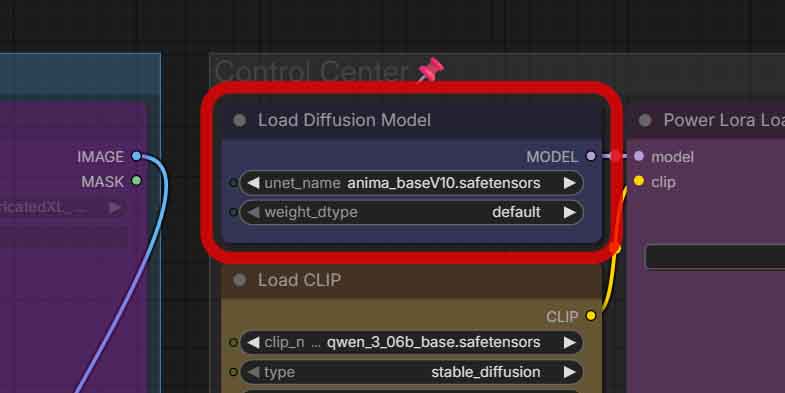
Even though ComfyUI can see your models when they are put in the right folders, some older workflows might have the model-loading nodes still point to the older versions of Anima, such as the early previews, or other names of the same checkpoint version.
If this is an issue in your case, to fix this, locate the “Load Model” node in your workflow, and make sure that it’s set to the Anima checkpoint that you’ve downloaded, and not to any other version of the model.
Missing Nodes Solution
After importing your chosen workflow into ComfyUI, especially a more complex one like the one by Legendaer, you might notice a warning telling you that some of the nodes used in it are missing. Without them, you won’t be able to start the image generation process.
ComfyUI, via its native ComfyUI Manager extension is able to automatically detect and download missing custom nodes for your projects. Simply open the Manager by clicking on its icon, selecting Install Missing Custom Nodes, then install the missing node packs listed for the workflow. There, you can manually install all of the missing nodes.
Note: If you already had the portable version of ComfyUI installed (which is different from the desktop version), you might not have the ComfyUI-Manager extension enabled. Here is how to do it in a few short steps.
If you haven’t faced any errors up to this point, you’re ready to generate your very first image.
Generating Your First Image With Anima
As Anima is different from SDXL-based models like Illustrious that you might be familiar with, the prompting strategies differ here as well.
Here is how you should construct your prompts with Anima according to the official guidelines and my own extensive testing.
Prompting the Model
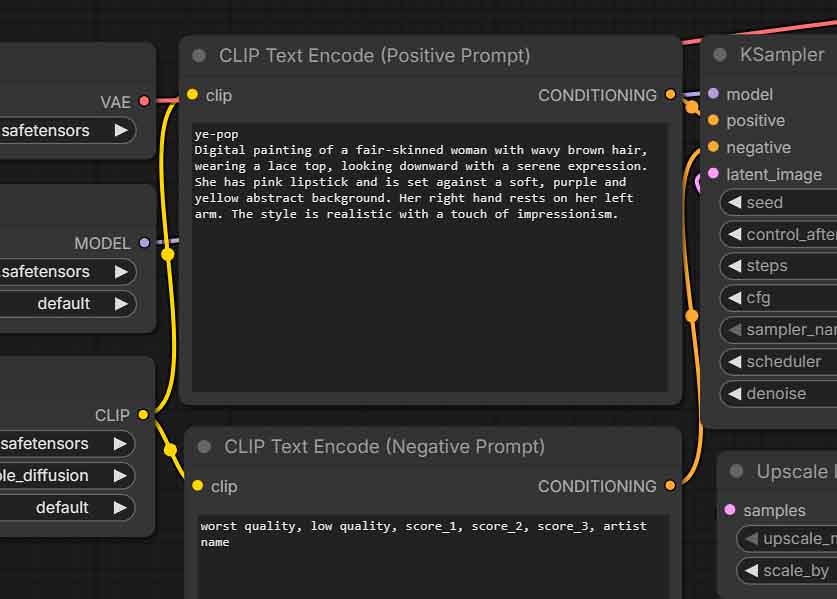
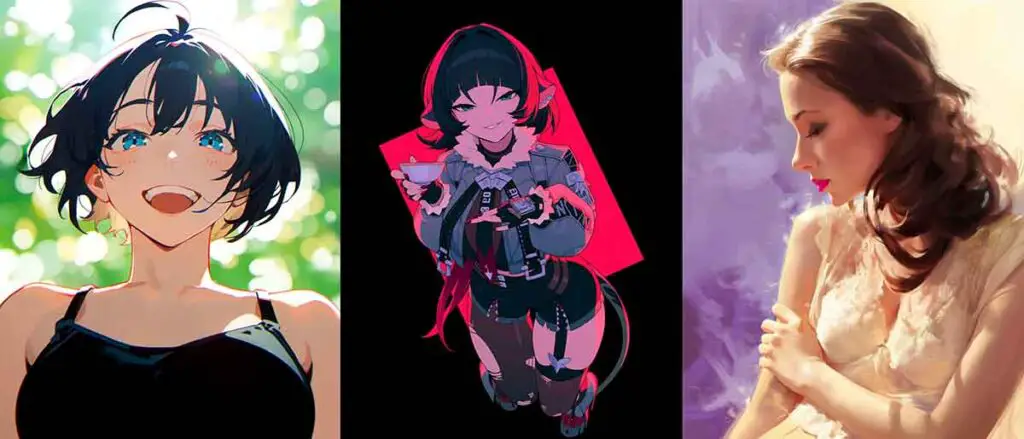
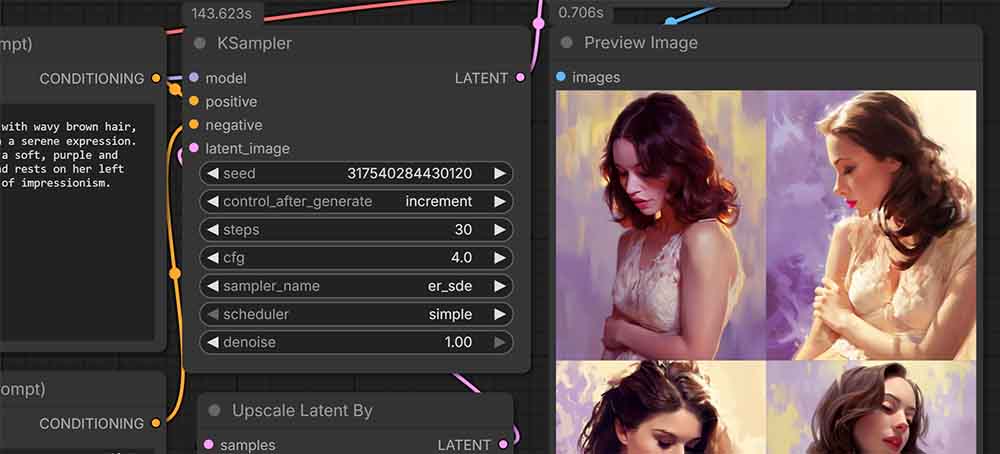
As Anima makes use of a transformer-based text encoder instead of CLIP, you can use natural-language when prompting it, as you can see in the example above (prompt source here).
Still, it’s helpful to write visually specific descriptions rather than broad chat-style instructions like you would use for instance with ChatGPT or Grok connected image generators.
Of course, as Anima is orders of magnitude smaller than the SOTA models available online, your prompts will have to be much more specific than single short sentences (although these might work too from time to time).
Another huge advantage that Anima gives you is that it was trained not only using full sentences in natural language, but also the ever-present booru tags that you might already be familiar with if you’ve dabbled in SDXL-based models in the past.
If you don’t know what booru tags are, it is worth catching up. These are pretty much essential to use if you want to get the best quality outputs out of models trained on anime-dominant datasets: Booru-Style Tagging, and How and When To Use It In Your Anime Prompts
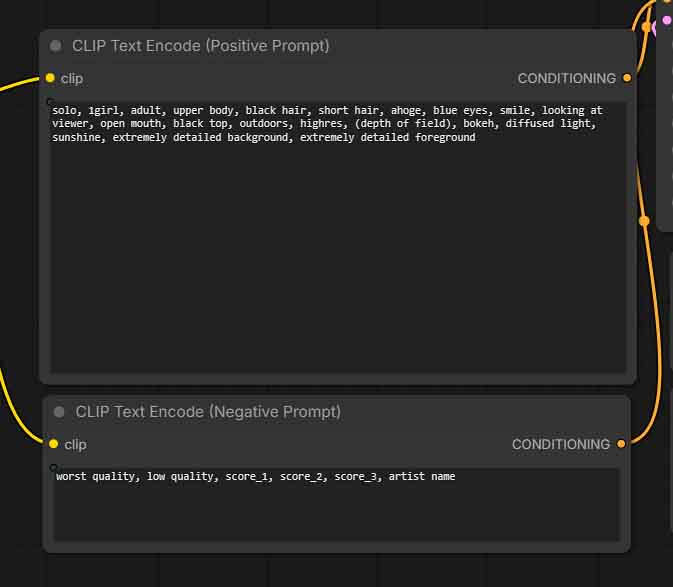
The official Anima prompting guide also reveals that the model does make use of quality tags that you should also include in your prompts. Graded image quality scores such as score_7 can be used in the positive prefix, and score_1, score_2, and score_3 in the negative prompt if you want to push away low-quality outputs.
The general prompting rules with Anima are:
- Use lowercase for tags.
- Use spaces instead of underscores, except with the aforementioned score tags.
- Recommended positive prompt prefix:
masterpiece, best quality, score_7, safe,Recommended negative prompt core:worst quality, low quality, score_1, score_2, score_3, artist name - Use
@artist namefor artist tags with the @ symbol at the beginning. - Recommended tag order: quality/meta/year/safety -> subject count -> character -> series -> artist -> general tags.
From my testing, tag-heavy prompts often work best when they are shorter and more focused. For natural-language dominant prompts, the official guidance recommends being descriptive and aiming for at least two sentences.
Keep in mind that because of the way most diffusion-based image generation models work, the more distinct data you put in your prompt, the more each concept you mention will blend with one another. You can observe this just as well when figuring out the optimal captions for your custom-trained LoRA models.
Removing keywords or ideas from an essay-like image description is much more tedious, because of how overlaying concepts and tags can affect one another in unpredictable ways.
With Anima, you can also use much more sophisticated prompting techniques, such as basic natural-language spatial descriptions without using image masks. As the model processes your input prompt using a transformer model, it’s able to understand, to some degree, spatial relationships much better than models powered by CLIP.
Try out prompts including more than one character or object that describe relationships between characters. While the results will of course not always be perfect, it’s a huge step up from most SDXL anime-style fine-tunes.
Settings You Should Know About
As Anima is a diffusion-based model, the settings you might want to tweak once you get started to get even better results are very similar, or in fact almost identical to those you might know from SDXL workflows.
When it comes to the exact setting values you might want to try out first, here are some recommended defaults for the model based both on my experience, and the official repository guidelines. In short:
- Steps: 30–50. 30 can already give you good results, and you can use higher step values for cleaner final images.
- Sampler: The default er_sde will in most cases be the best option. euler_a and dpmpp_2m_sde_gpu are also valid options to explore.
- Scheduler: Default/simple is safest. From my testing, Simple and SGM Uniform are also strong general scheduler choices for Anima.
- CFG: Start with 4–5. Higher values can make images look distorted.
- Denoise ratio: Use 1.0 for regular text-to-image, 0.5–0.6 for small image edits, and 0.75-0.85 for treating the input image as a creative base for the output material.
- Resolution: Anima was trained on images between 512×512 and 1024×1024 pixels. As per the official recommendations, it should work best with images between 512×512 and 1536×1536 pixels, in various aspect ratios.
- Seed: As usual, keep the same seed to repeat or fine-tune a result. Change it to create a new variation.
For more information on settings that matter when using diffusion-based image generation models, you can check out my Automatic1111 Stable Diffusion WebUI settings guide. These are close to the same in most similar software such as ComfyUI.
Anima and Compatible LoRAs
There are only a few things you should know about using LoRA models with Anima:
- You can’t use LoRAs made for SDXL-based models with Anima – the model architectures don’t match.
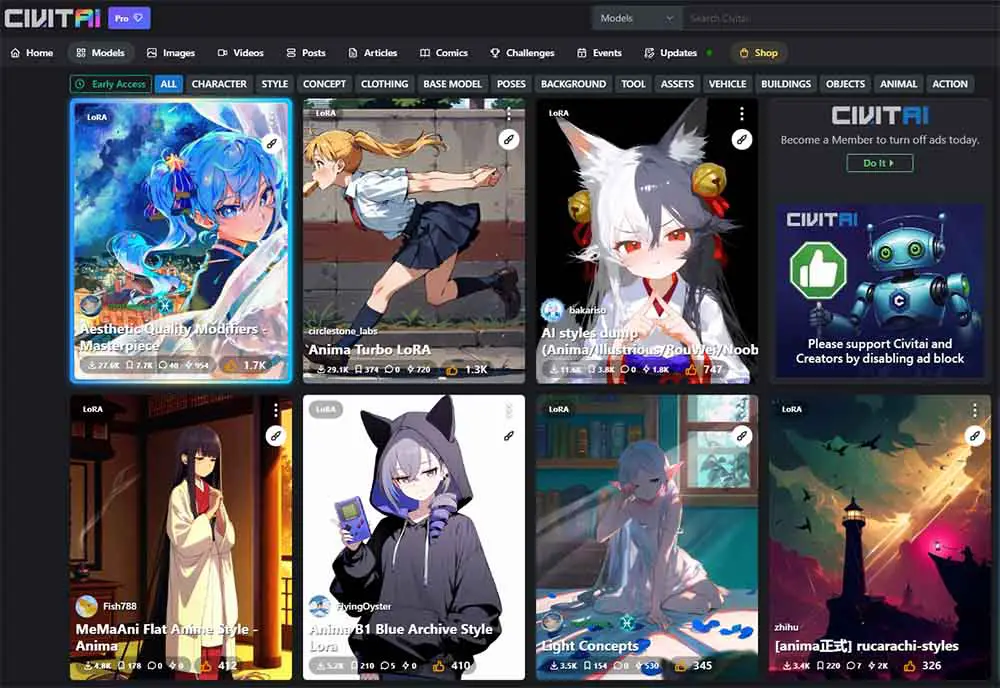
- There already exist quite a few quality LoRAs for Anima that you can find for instance over on Civitai.
- In Comfy, LoRAs should go in ComfyUI/models/loras/ directory, just like with SDXL.
- You can rather easily train your own LoRAs for Anima using software such as Anima-TrainFlow, or anima_lora.
Other than that, the way you use LoRAs with Anima in software like ComfyUI in practice works almost exactly the same as with older SDXL-based models, and you can use many of the standard LoRA loader nodes for that such as the LoraManager node, or the Power Lora Loader by rgthree.
You might also like: 6 Sites Like Civitai – Best Alternatives Available
Image-to-Image Workflows With Anima
While you could construct a simple image-to-image workflow yourself, I recommend that you use the one available in the already-mentioned advanced Anima workflow from Legendaer.
Within this workflow, the only thing you need to do to access the img2img capabilities is to find and toggle the “Load Image” switch next to the prompt boxes.
Once you do that, the image import window will activate, and you will be able to upload an image, tweak the denoise setting to your liking, and use your chosen visual content as the base of your new image generation.
Where To Go From Here?
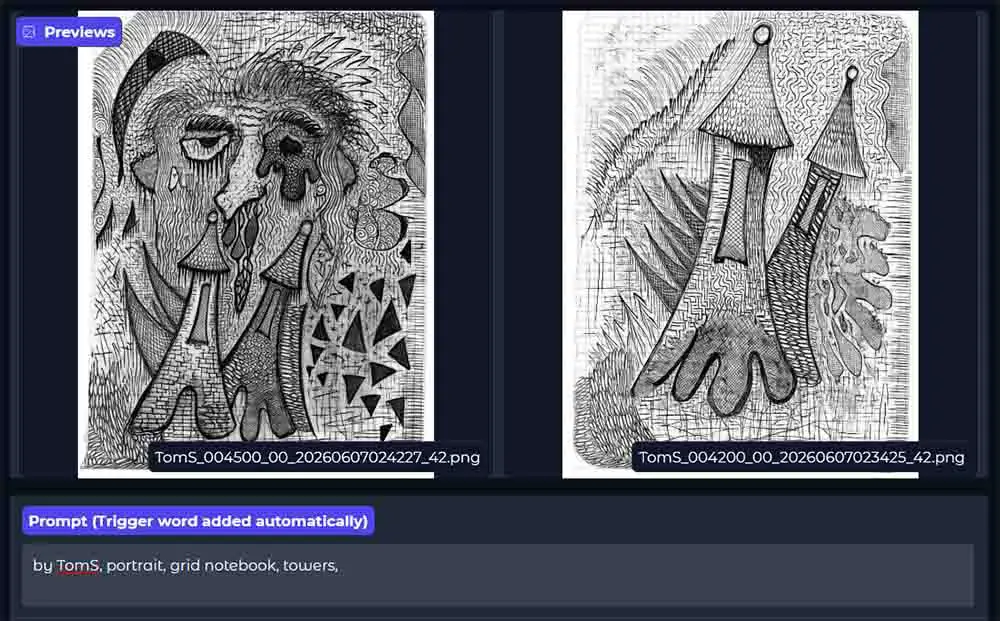
Anima is one of the most promising new local diffusion models that can work not only with anime-style images, but also many illustration styles. When experimenting with training LoRAs for it I found that it works exceptionally well not only for anime content, but also for a lot of different image looks, even when it comes to my own, rather complex drawing style, as you can see in the image above.
In comparison to SDXL-based models, Anima and the architecture it’s both relatively easily steerable both when it comes to prompting, and fine-tuning. Even with Flux, Chroma, ZiT, Qwen-Image-Edit, and other major players in the local diffusion space, it’s a very interesting project with a lot of potential. And it’s certainly not the last time you’ll hear about it here on Tech Tactician. Thanks for tuning in!
Interested in budget GPUs for local AI that can make your image generation process much faster? This might be of interest to you: Top 11 Best Budget GPUs for AI & LLM Workflows This Year