
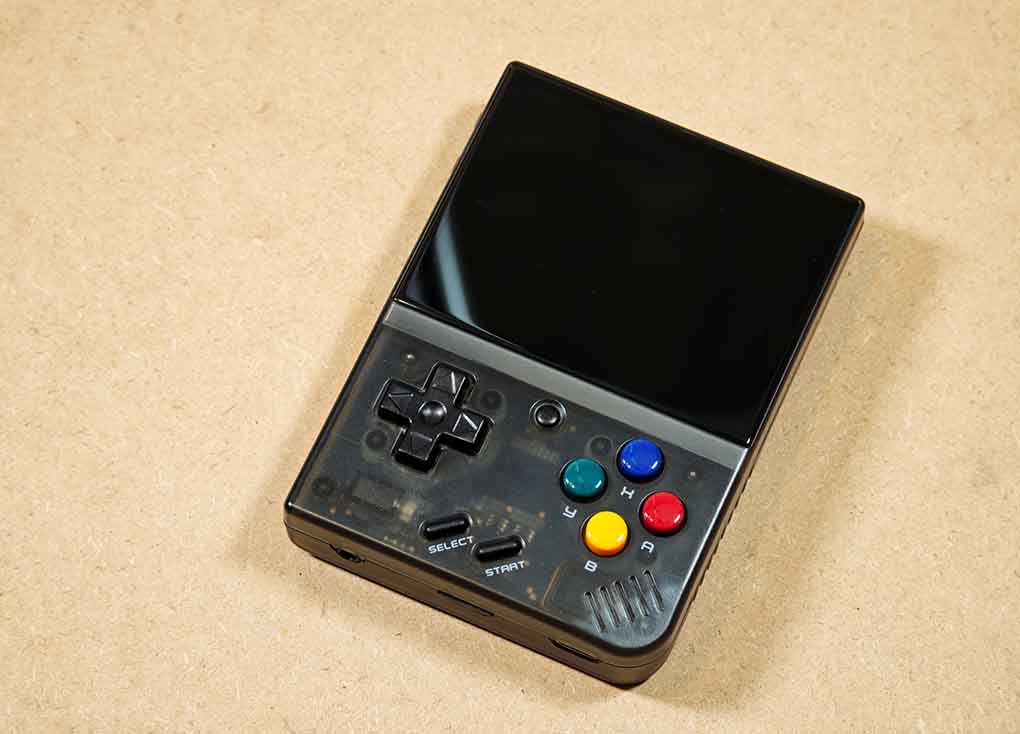
This Miyoo Mini setup guide covers the regular Miyoo Mini V1-V4 and the Miyoo Mini Plus, with a focus on the things that actually matter after unboxing: checking your stock OS version, replacing the stock microSD card, deciding whether you need a stock firmware update, installing Onion OS, adding BIOS files and game ROMs, setting up Wi-Fi on the Mini Plus, and replacing the battery if needed. Use the table of contents below to jump to the sections that you’re looking for!
If you haven’t decided on getting a Miyoo Mini handheld yet, you can find my full review of it here: Miyoo Mini Plus Handheld Emulator Console Hands-On Review
This website is reader-supported and is a part of the AliExpress Partner Program, Amazon Services LLC Associates Program and the eBay Partner Network. When you buy using links on our site, we may earn an affiliate commission.
Miyoo Mini V1, V2/V3, V4 and Plus – The Differences
There are a few main revisions of the Miyoo Mini handheld, as well as the Miyoo Mini Plus (also referred to as MMP or MM+), which is simply a larger and updated version of the original design (with close to the same emulation performance and some additional features). All of the devices listed here are official Miyoo devices, and as of now there exist little to no direct clones of the Miyoo handhelds.
The main available versions of Miyoo Mini are as follows:
- Miyoo Mini V1 (2021) – The very first Miyoo Mini handheld, with a smaller phone-style slot battery (EB645247LU), a 2.8-inch 640×480 display, and just two color options: white and beige.
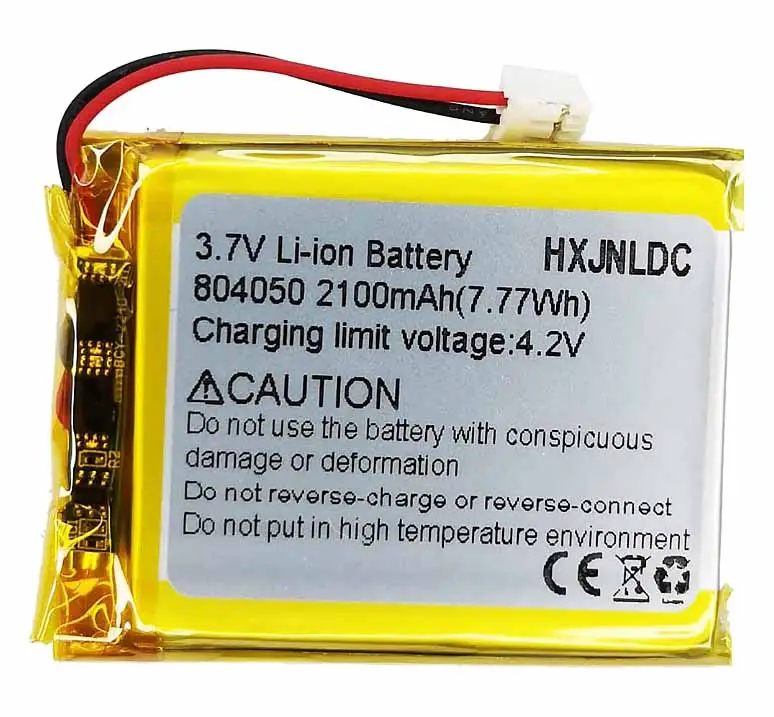
- Miyoo Mini V2/V3 (2022) – The first revision with the same 2.8-inch 640×480 screen, but a larger battery (804050, 3.7V) with a JST connector cable, improved button quality, and more color options available.
- Miyoo Mini V4 (2023) – The latest edition of the base Miyoo Mini with an upgraded, higher resolution 752×560 display (still 2.8-inch), the exact same battery as the V2/V3, and unlike the previous models supporting limited USB-C to USB-C Power Delivery charging for some chargers.
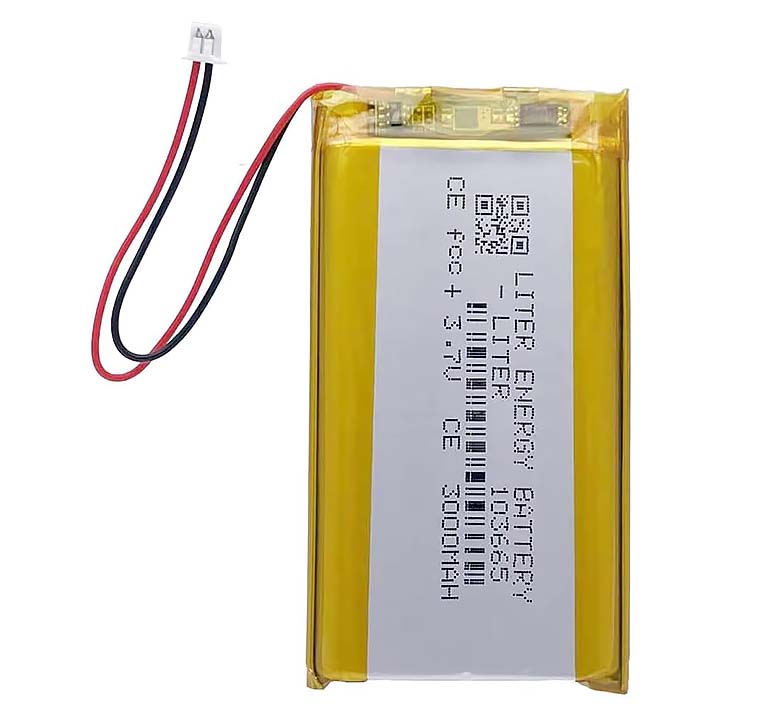
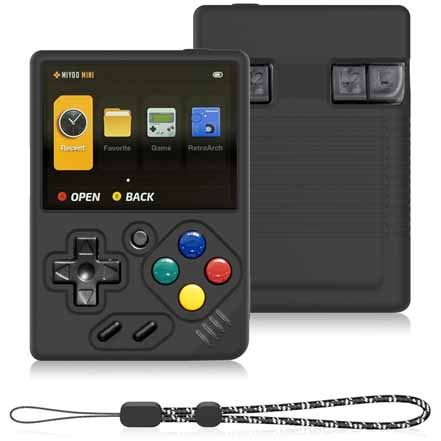
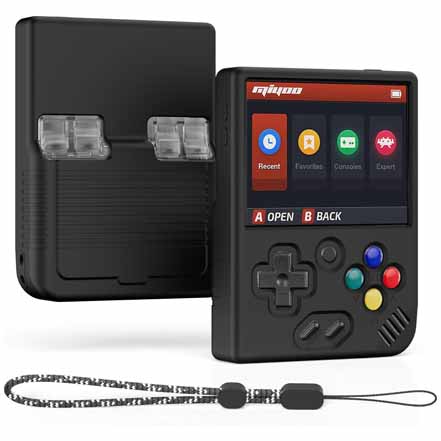
- Miyoo Mini Plus (2023) – A physically larger Miyoo with a 3.5-inch 640×480 display, a larger 3000 mAh battery (103665, 3.7V), built-in Wi-Fi, and four main color options. It keeps the same overall design as the Mini, but in a larger shell. Some newer MMP revisions come with a Real Time Clock (RTC) on board.
There also exists a Miyoo Mini Flip which is a clamshell design similar to the Powkiddy V90S. As it’s a device of a different form factor (and with different custom firmware options), it’s not mentioned a whole lot in this guide that revolves around all of the “mainline” Miyoos that you can see in the table above.
You might also like: Powkiddy V90S Clamshell Hands-On Review
First Things To Do After Your Handheld Arrives
- Turn on your handheld and test it out for a bit without any changes – before you start loading your own games and customizing your Miyoo it’s always best to check if everything is working properly in the default configuration.
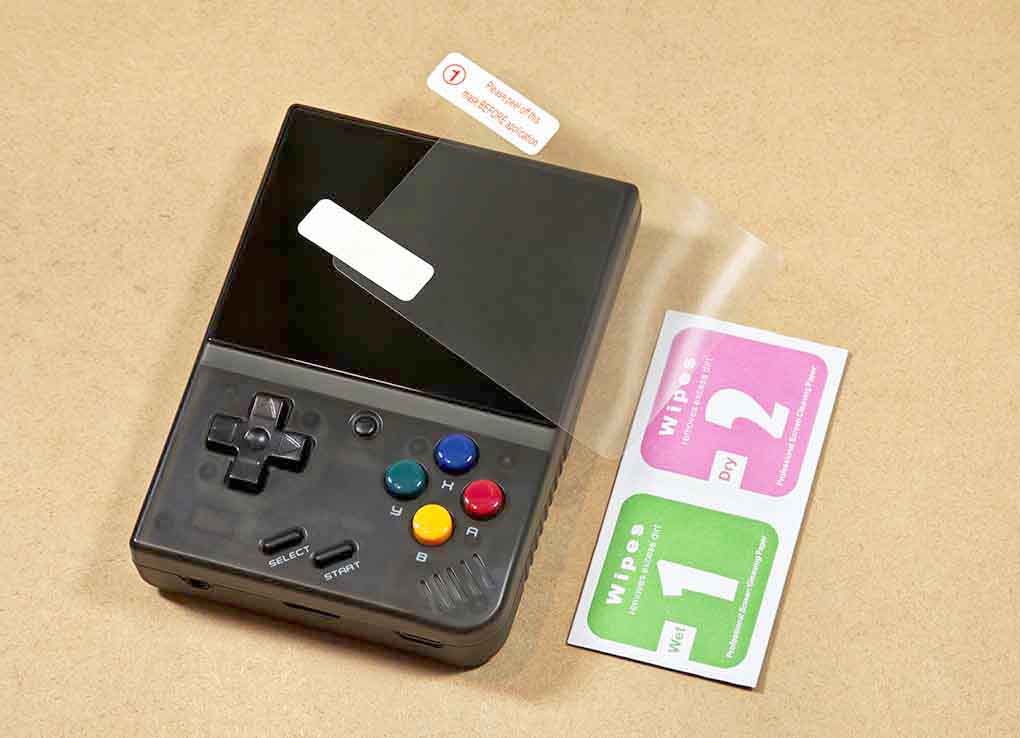
- Apply the screen protector on the display if it came bundled with your handheld – one of the easiest ways to apply it is the hinge method shown here. If your handheld came without one, don’t worry, for now just avoid throwing it loose into a bag with other items.
- Back up the included microSD card, then put it aside – the default microSD card that the Miyoo Mini comes with is usually low quality, and is one of the most common failure points of this device. You can easily replace it and use a new one like this instead.
- Install the Onion OS/UI – optional but highly recommended and very easy. You will get access to tons of new useful quality-of-life features that will make your experience with the Miyoo Mini even better. More information below.
Back Up and Replace the Stock microSD Card
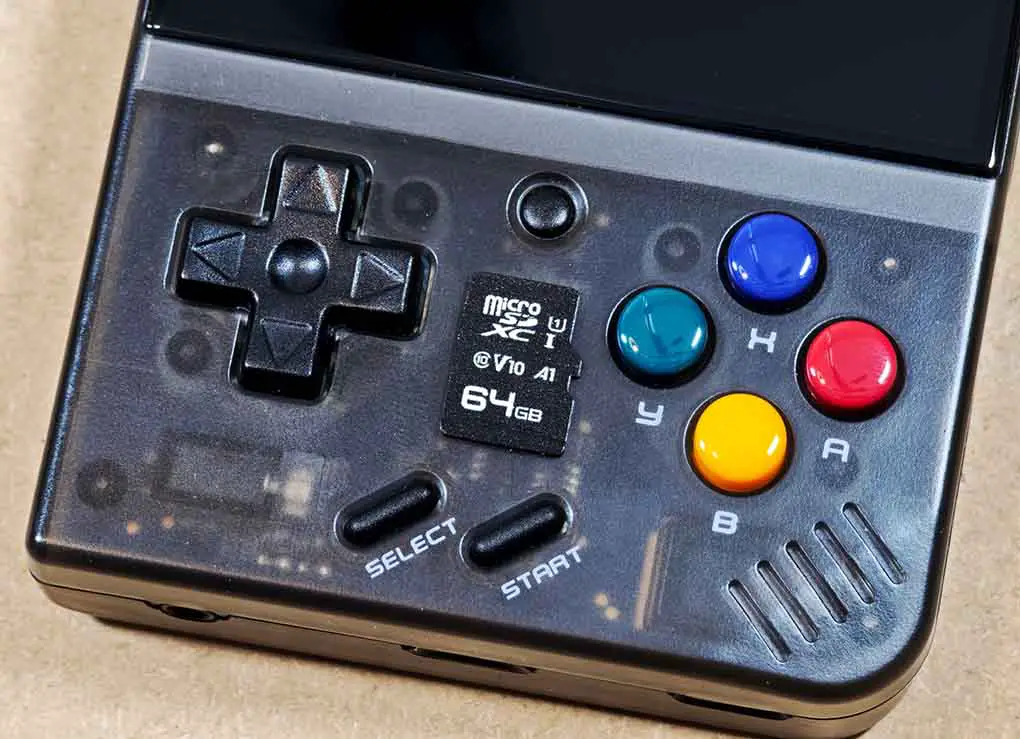
All of the Miyoo Minis come with a single-microSD card setup in which your game ROMs will reside on a single card, and your stock OS files will sit in the Miyoo’s internal memory.
The cards bundled with the Miyoos are still considered to be on average very low quality, with slow read/write speeds, and prone to errors and data corruption. The reason for that is as always in most cases cost-cutting measures taken by the sellers (cheap microSD cards are dirt cheap, medium-to-high quality ones can get very expensive).
The bottom line is: if you don’t want your games to load slower than they should and your save data to get corrupted and lost at some point, it’s best not to take any chances. In most cases even a cheap microSD card from your local Walmart will be much more reliable than what you’re given with the handheld by default.
So, it’s best to copy the entire contents of the original card to your PC before you do anything else, if you want to preserve its contents. After that, move to a new, branded card of your choice. All of the cards used with the Miyoos have to be formatted as FAT32.
Now let’s talk a bit about the stock OS (the one that is stored in the Miyoo Mini’s internal memory).
Updating the Stock OS – And When Not To Do It
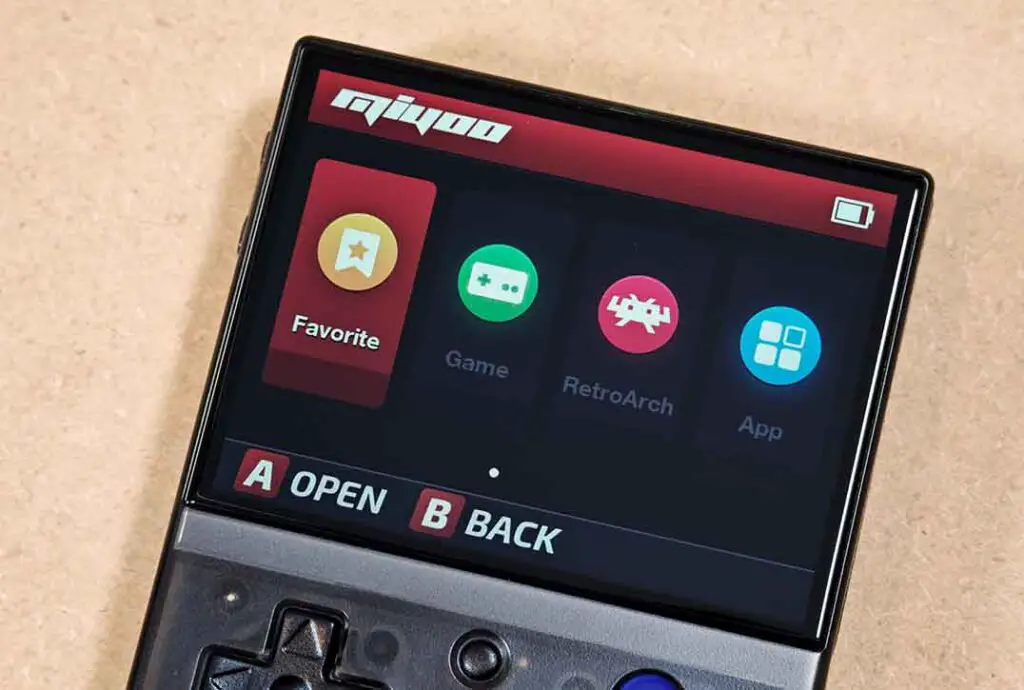
To set things straight, the situation is as follows: the stock operating system / firmware on each of the Minis, usually just called stock OS or MainUI, resides in the small internal memory of the handheld, which is not directly accessible by the user.
It is completely separate from the microSD card that you put into the device, import your game files onto, and store custom system overlays like the Onion “OS”. In fact, your device will boot without any trouble even without any card inserted.
Your Miyoo Mini will come with a certain version of that stock firmware already installed. In most cases there is little to no reason to attempt to update the stock OS, as its newer versions don’t really bring that many new features to the table, and if you’re using custom system overlays like the Onion UI, they will handle all of the quality-of-life upgrades for you.
Updating the stock OS (unlike updating custom system overlays like Onion UI) carries a small but real risk of bricking your device, especially if you would decide to use a low quality microSD card that usually come with the Miyoos to store the system image file during the update.
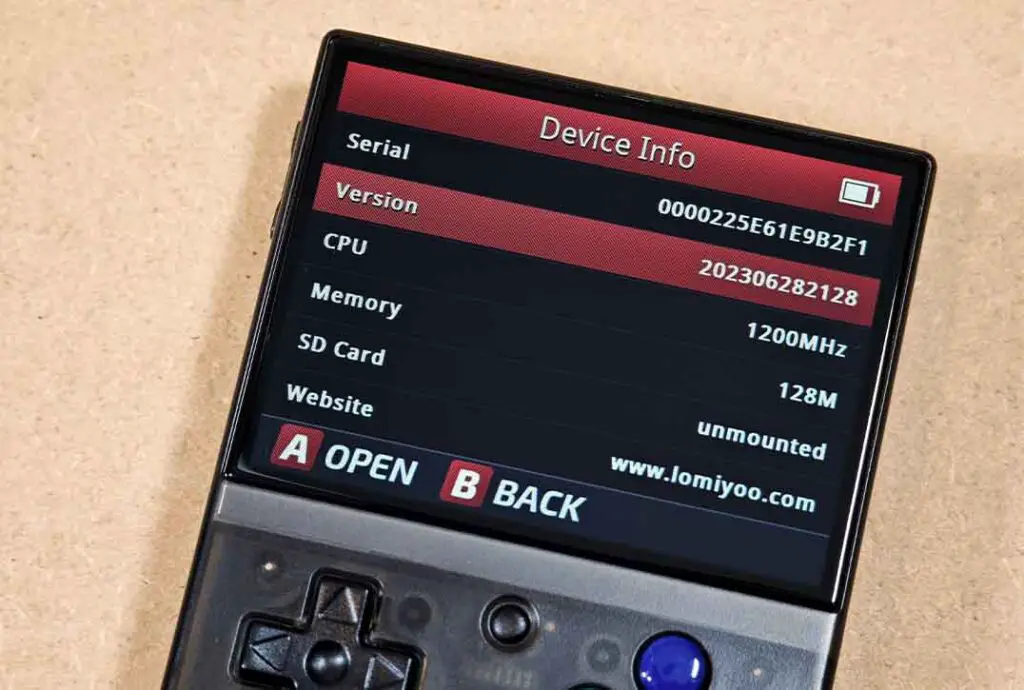
"Settings -> Device Info -> Version" menu.If the card breaks during the update or throws read errors, or for whatever reason the handheld loses access to the update files during the process, for instance because your handheld turns off midway, you might end up with a bricked device.
In some cases unbricking your device is theoretically possible, but it is very much case-dependent and not a given. It’s best to keep the risk to a minimum, as mentioned before, the benefits of using a newer stock OS firmware version if you don’t need it are minimal.
For most users there are pretty much only two situations in which you can benefit from the Stock OS firmware update, and they are as follows:
- You want to install Onion UI, and you’ve got a Miyoo Mini with an older version of the stock OS that doesn’t play well with Onion. You can find the up-to-date list of stock firmware versions compatible with Onion over on the Onion UI wiki Installation page.
- You absolutely want to be on the newest version of the stock firmware for any feature you need that was introduced later on, after your device was manufactured, updated and shipped.
System overlays such as Onion, Allium, Koriki and others, will take care of all the features you might need from the handheld utilizing many clever hacks. And the best thing about them is that they live fully on your microSD card unlike the Miyoo’s actual firmware, so installing them doesn’t come with a high risk of ruining your device.
First things first, on the stock Miyoo OS you can check your current firmware version under "Settings -> Device Info -> Version"
Now, if you’ve decided that you want to update to the latest version of the firmware available regardless of the risks, you can find the required files over on the official Miyoo website here (Miyoo Mini Plus and V4 only).
The full stock firmware upgrade process is explained in the short guide linked on the Onion UI wiki. It basically consists of a few short steps: downloading the right .img file with the firmware for your device and putting it on a microSD card, inserting the card into the Miyoo, plugging it into a charger to initiate the update, waiting for the update to finish, and then removing the microSD and deleting the .img update file so that the console can boot normally.
Another place aside from the Onion UI wiki that describes the Stock OS update process in detail is in the TriForceX MiyooCFW repository.
The Custom Firmware Options
All of the current “custom firmware / custom OS” options for the Miyoo Mini are better understood as SD-card-based custom software stacks, as they are not a replacement for the handheld’s internal firmware, but rather overlays built on top of it.
All of the options linked below are installed simply by copying their files aimed at your particular Miyoo version onto your microSD card, and then booting your Miyoo Mini and waiting for the setup process to finish. That’s it. It’s a very low-risk process in comparison to messing with the internal firmware discussed above.
When it comes to the custom firmware (CFW), your options on the Miyoo Mini are as follows:
| Firmware | What it is | Latest Release Link |
|---|---|---|
| OnionOS | Main current pick for most Miyoo Mini and Mini+ owners; feature-rich, mature, and the best-known custom OS overhaul. |
|
| Allium | Active alternative launcher with RetroArch, box art, and support across Miyoo Mini, Mini+, and Flip. |

|
| Koriki | Feature-heavy alternative/custom firmware update for the full Miyoo Mini family, including v1/v2/v3/v4, Plus, and Flip. |

|
| MinUI (legacy) | Minimalist launcher/front-end. Current MinUI package still includes Miyoo Mini / Mini Plus legacy support. |

|
| MyMinUI | Actively updated MinUI fork with extra features, more systems, and ongoing Miyoo Mini / Mini+ support. |

|
| MiniUI (legacy) | Archived original Miyoo Mini-only MiniUI branch. Legacy option for people who specifically want the old dedicated build. |

|
With that said, perhaps the most popular and most mature project for Miyoo devices (except for the Flip), is the Onion OS (better known as the Onion UI). It offers a ton of great features and for me, makes using the handheld much more enjoyable than just utilizing the stock OS / MainUI that comes pre-installed on Miyoo devices. Let’s take a quick look at how it works.
The Onion “OS” – And Why You Should Use It
As already mentioned, Onion OS is not really an OS, and its wiki pages do remind you of that. At the time of writing this article, Onion has been downloaded hundreds of thousands of times, and has a very active online community built around it (and of course around the Miyoo devices it’s compatible with).
It brings many great quality-of-life features to the table, such as:
- Game Switcher for quickly resuming games that you’ve recently played.
- Activity Tracker that tells you how much time you’ve spent in each game.
- A neat GUI Package Manager utility for installing dedicated Onion OS tools, apps and emulators.
- Great search functionality.
- Custom theme support with a lot of community themes available.
- Extras like screen recording, guest mode, and random game picker.
- On Miyoo Mini Plus, Wi-Fi features like OTA updates, netplay, SSH, FTP, and cover scraping.
- …and much more.
You can learn much more about fun Onion OS tricks in my dedicated article, if you’re not convinced yet: 16 Miyoo Mini Tricks, Features & Button Shortcuts (Onion OS)
When it comes to the exact installation instructions for the Onion UI, the Onion wiki has a great quickstart guide that you can use to set up your Miyoo Mini in just a few minutes.
If you’d like to get the gist of the Onion UI installation without heading over to the wiki, here is a quick overview of the whole process:
- First, check your current stock firmware version in
Settings -> Device Info -> Version. If you already have Onion installed, you can also check it underSettings -> About device -> Firmware version. - Make sure your firmware is new enough for Onion. For the regular Miyoo Mini V1/V2/V3, you need at least
20220419****. For the Miyoo Mini Plus, you need at least20230505****. For the Miyoo Mini V4, you ideally want202310271401or newer, as this is the firmware that lets the V4 properly use its 752×560 screen resolution with Onion 4.3 and newer. - If your stock firmware is already new enough, do not update it just for the sake of updating. Onion lives on the microSD card, while the stock firmware lives inside the handheld itself, so firmware flashing is the riskier part of the whole process.
- Back up the original microSD card to your PC, then put it aside. Use a new, reliable microSD card instead of the bundled one.
- Format the new microSD card as
FAT32. Do not useexFAT. You can use Rufus for this step. - Download the latest stable Onion OS release from the official Onion GitHub page. For a first-time setup, avoid beta/pre-release builds unless you specifically know that you need them. Use a stable release instead.
- Extract the Onion ZIP file, enable viewing hidden files in the extracted folder, then copy all the contents of the ZIP file to the root of your freshly formatted microSD card. In other words, the Onion folders should sit directly on the card, not inside another folder.
- Insert the microSD card into your Miyoo Mini and turn the handheld on. Onion should start its installation process automatically.
- After the first successful boot, use the Package Manager to choose the systems, emulators, apps, and tools you want to enable following the on-screen instructions.
The important thing to remember is that Onion itself is a microSD-card-based frontend, not a replacement for the internal Miyoo firmware. In the unlikely case in which anything goes wrong with the Onion installation process, don’t worry! If you face a black screen or any errors you can simply delete the Onion files from the microSD, re-format the card, and start the whole process again.
The only real risk of bricking your device comes with attempting to update the stock OS, which resides in the Miyoo’s internal memory, rather than on the microSD. None of the stock Miyoo firmware files are ever modified by Onion itself during the installation, and when you’re using the handheld later on.
Where to Put Your Games & BIOS Files (Onion UI)
As the Miyoo Mini handhelds make use of a single-microSD setup, all of your games will reside on the memory card. Here, I will assume that you have the Onion UI already set up.
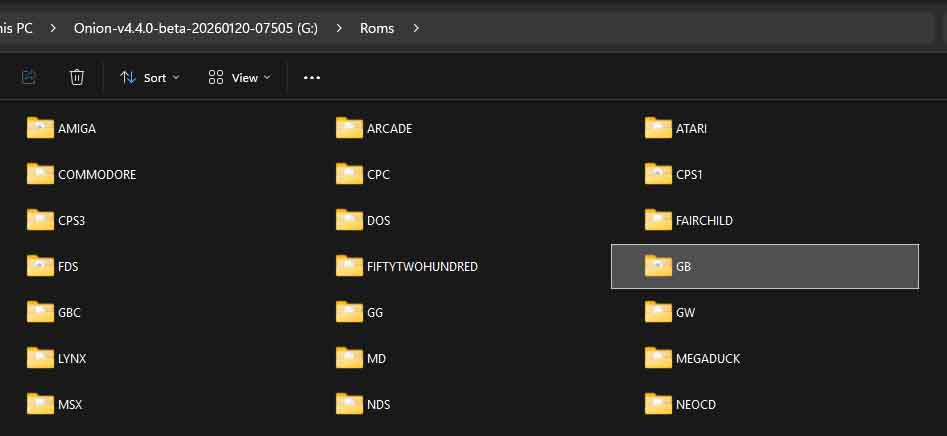
Your games go in Roms/SYSTEM_NAME folders. Each system has its own game folder. You can check the folder names in the table below. You can move your games into subfolders to categorize them, but these should only be one-level deep (e.g Roms/GB/Modded).
Your BIOS files (which some of the console emulators need to work) go in the root BIOS folder. Onion should then automatically detect those files and associate them with the correct systems.
There is one more thing you need to do to make your games appear in the Onion UI after you have the ROM files already on the microSD card.
After you move your game files to the correct folders, boot the handheld and go to the Games tab. Then press Select, and choose the Refresh all roms option. This will force a reindex and make your newly added games show up properly.
Onion also has a native way of handling multi-disc games. In short, you put your split game files with supported filenames in the corresponding system ROM folders, and then use the tool that you can find under Apps -> Tweaks -> Tools -> "Generate M3U files for multi-disc games" menu to generate .m3u playlists for the games to be able to play them.
Remember that Onion’s ROM folder naming does not always match the naming on the stock Miyoo card, so just copying the stock Roms folder from the original microSD won’t work.
Onion ROM Folders Cheat Sheet
Here are all of the different Onion ROM folder names and their corresponding systems. Note that all of these are case-sensitive, so NEOGEO is not the same as, for instance, NeoGeo, and your games won’t be detected in the second folder. BIOS filenames and extensions are also case-sensitive so keep that in mind.
Updating Onion UI
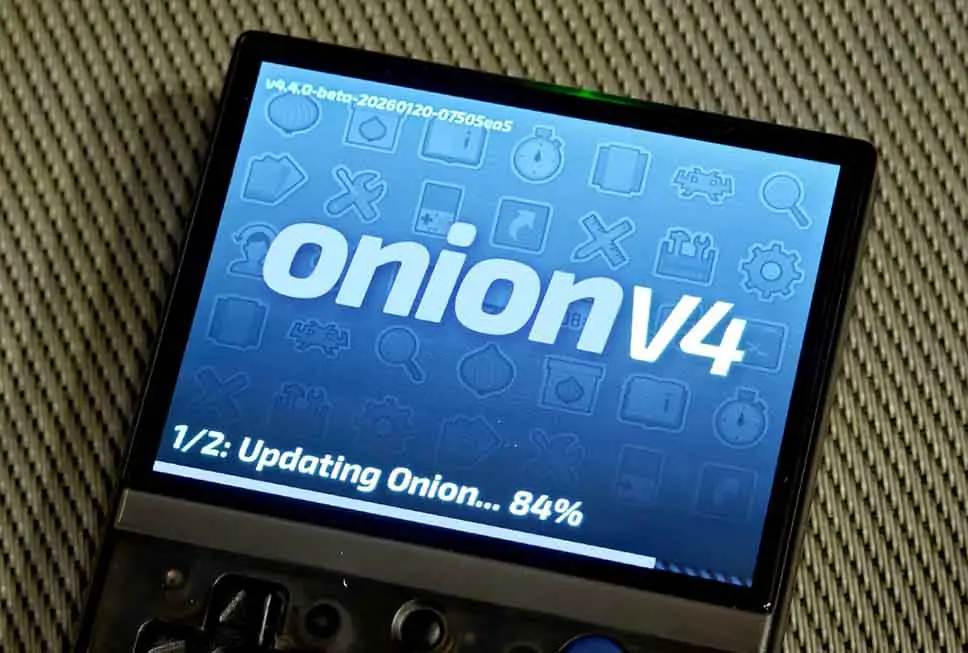
If you are already on Onion, updating simply means downloading the updated files from the official Onion website or GitHub repository, then copying them to the root of your microSD card selecting “copy and replace” when prompted.
Once you’ve done that, put the microSD back into your Miyoo Mini, make sure that the device is charged, and boot it up. The update process will begin starting with the Onion UI, and ending with RetroArch cores. This whole process can take up to a few minutes total.
All of your ROMs, BIOS files, in-game saves, save states, and configs will carry over, and although it never happened for me, there is supposedly an ever so slight chance that save states for some systems may not always remain compatible after an update.
If you want to be absolutely sure that you don’t lose progress, you can make normal in-game saves too, instead of relying solely on the RetroArch save state files.
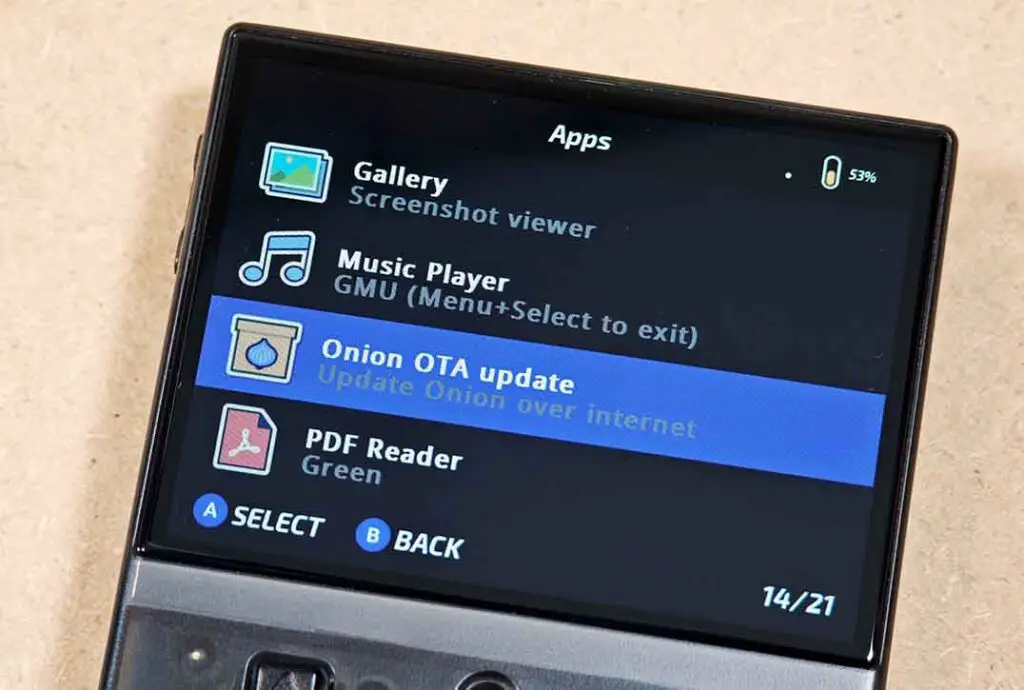
On the Mini Plus, you have an additional, much easier way of updating the system. As the handheld has a built-in wireless chip, you can use the built-in OTA Update app over Wi-Fi (accessible from the Apps menu after enabling it inside the Package Manager).
Customizing Onion UI Themes
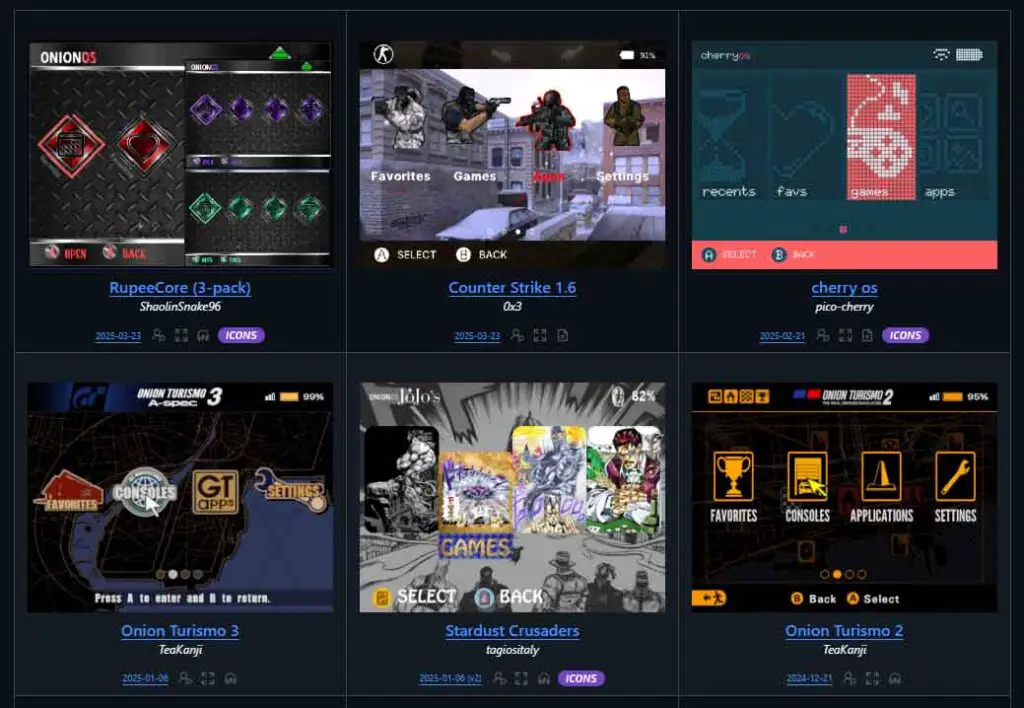
Theme customization on Onion is very simple. Download a theme to the Themes folder on your microSD card, then apply it through the Theme Switcher app available in the Apps -> Themes menu.
If you want to go one step further, Tweaks also lets you swap icon packs separately under Tweaks -> Appearance -> Icons packs.
You can browse through tens of different creative themes and icon packs in the Onion UI Themes GitHub repository here.
Using The In-game Overlays and Filters
One of the fun things you can do on your Miyoo Mini is utilizing video filters and on-screen overlays in your games. Since Onion OS utilizes RetroArch as the backend for the vast majority of its emulators, you do have access to a massive library of visual tweaks right out of the box.
Video filters can accurately recreate the classic dot-matrix display look of the original Game Boy, while on-screen overlays (often called bezels) can add artificial scanlines or fill the empty black bars on the sides of the 4:3 screen when playing systems with different aspect ratios (like the Game Boy Advance).
You can access overlays from the RetroArch Quick Menu while in-game. Simply use the Menu + Select button combo, and then select On-screen Overlay -> Display Overlay -> On. Then in the very same menu, you can use the Overlay Preset -> [Name of your console/system] -> [Your chosen overlay preset] setting to select the overlay or bezel that you want. As there are no previews available, you’ll have to browse through a few different ones until you find one you like.
Video filters and color palettes are separate visual options, so the exact menu path can vary by core/system. If you want to browse more custom bezels and overlays, you can also check out this great community discussion on recommended Onion overlays.
Safe Charging & Battery Replacement
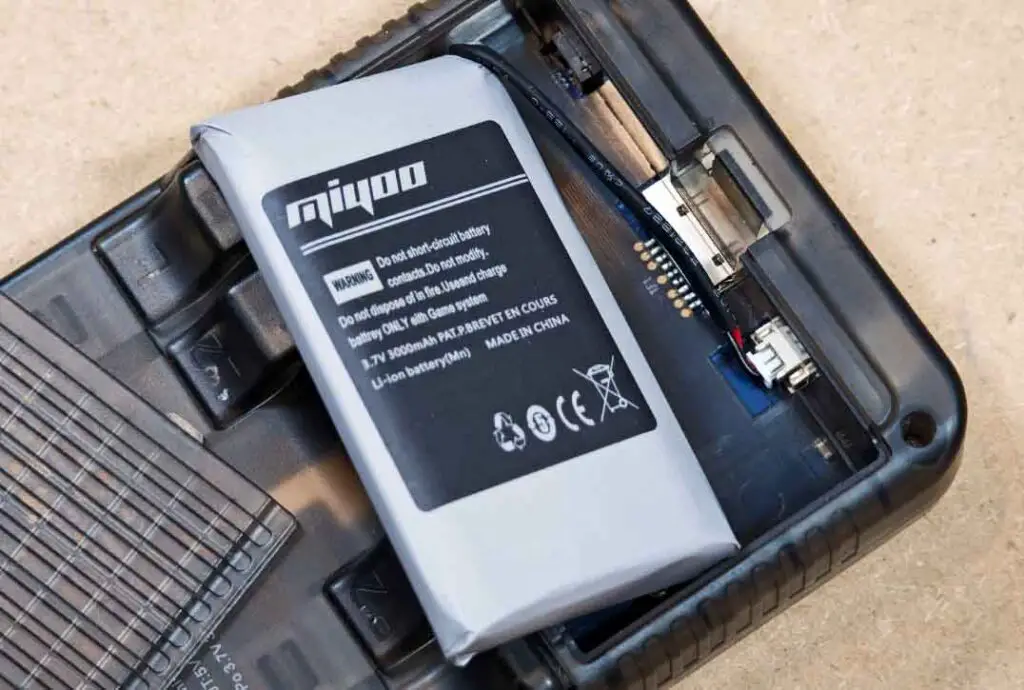
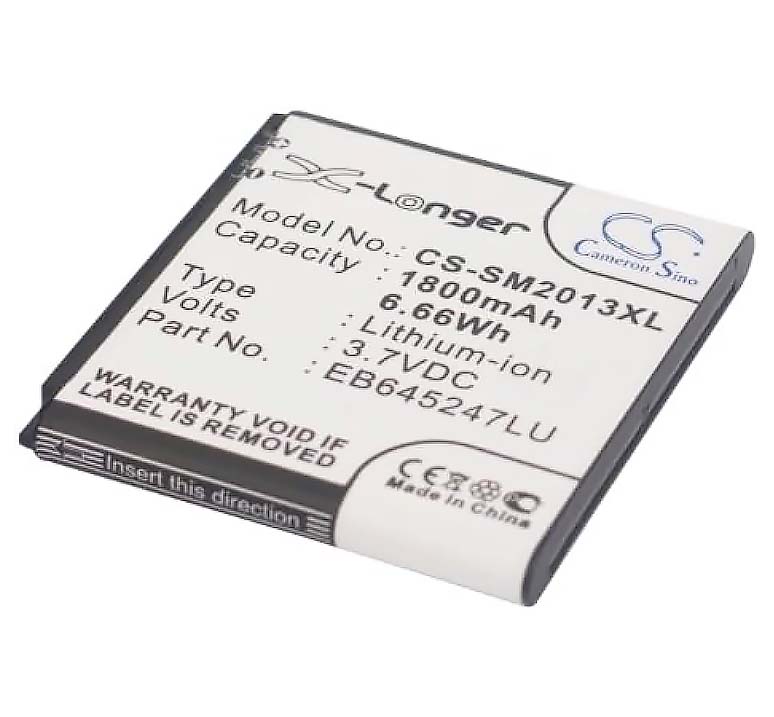
The battery type the Miyoo Mini uses differs between different versions of the handheld. Only the very first Miyoo Mini V1 makes use of a battery without a connection cable that can be replaced without fiddling around with the JST plug. This, however, isn’t as hard as it sounds.
Here is a quick summary of the battery types each Miyoo Mini model/version uses:
| Image | Model | Battery Used | Amazon Link |
|---|---|---|---|
|
Miyoo Mini V1 | 3.7V EB645247LU battery | See on Amazon |
|
Miyoo Mini V2 / V3 / V4 | 3.7V 804050 battery – 1.25mm JST plug | See on Amazon |
|
Miyoo Mini Plus | 3.7V 103665 battery – 1.25mm JST plug (usually 2000 or 3000mAh) | See on Amazon |
If you’d like to know more about the exact battery replacement process on all versions of the Miyoo Mini, I’ve got a full tutorial for that available here: Miyoo Mini/Plus Battery Replacement Guide – All Models
Much like with handhelds like the R36S, a recommended charging power brick for the Miyoo Mini is a standard 5V 1A. Miyoo Mini V1-V3 are safest with USB-A to USB-C charging and generally do not support USB-C to USB-C charging. The V4 and Miyoo Mini Plus have limited USB-C to USB-C support, but some fast chargers still may refuse to charge them.
A basic 5V USB charger is always safest here. Higher-current chargers can be fine only if they can properly negotiate standard 5V output.
When it comes to the battery percentage meter in Onion UI, don’t panic if the readings are not exactly accurate. The battery meter on both the original stock OS and Onion is a software estimation rather than direct measurement, as the handheld has no real Battery Management System in place. The measurements should get better with time.
Battery Saving Tips
Some of the most power-hungry components on the Miyoo Mini are the display, the Wi-Fi module, and the built-in speaker.
The power saving tips on the Miyoo are really not different than on most other handhelds like this. Lowering your screen brightness below 70%, using your headphones instead of relying on the speaker, and not having the Wi-Fi module working in the background at all times are all the usual best practices that you will also find on the Onion OS community FAQ pages.
Connecting to Wi-Fi (Miyoo Mini Plus Only)
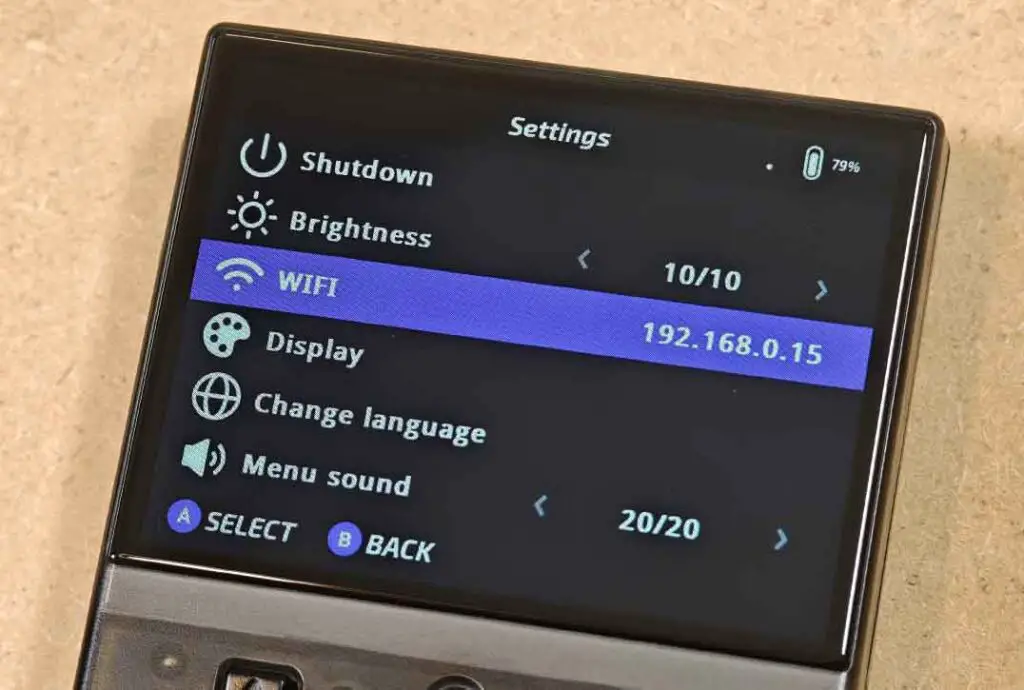
If you own the Miyoo Mini Plus, connecting to Wi-Fi unlocks a whole new tier of functionality that the older models lack. To enable the wireless network connection, navigate to the Settings tab, toggle on Wi-Fi, and enter your home network login info.
Note: The Miyoo Mini Plus only supports 2.4GHz networks, so ensure your router isn’t forcing a 5GHz-only connection. Also, any special characters in your network name can cause troubles with the initial connection.
With that said, on the regular Miyoo Mini V1-V4, you cannot make use of the Wi-Fi connection. These models don’t feature a built-in Wi-Fi chip, and the USB ports on them can only be used for charging, not for data transfer, so using an external Wi-Fi dongle is not possible on them.
Once you are online, you can do a few different things. For one, you can download Over-The-Air (OTA) Onion OS updates without removing your SD card, automatically sync your time and date for supported games, play multiplayer wirelessly via Netplay or transfer games directly onto the handheld using FTP (keep in mind that this method can be very slow).
You can also link your RetroAchievements account with Onion and all of its emulators. If you do that, keep in mind that it does require your Wi-Fi connection to be on while you’re gaming, which will result in higher battery usage.
Scraping Game Art Without Using Your PC (Miyoo Mini Plus Only)
If you are using the Miyoo Mini Plus, having a built-in Wi-Fi chip means that you can scrape game box arts without having to rely on third-party software, and without removing your microSD from the handheld.
Onion OS comes with a built-in Scraper app that can help you automatically pull cover art for your games.
Once you’re connected to the internet, go to one of your games from the game selection menu, press the Y button, and select the Scraper option. Then, you will be able to choose whether you want to scrape box art for one game only, or all of your ROMs.
Taking Advantage of The Auto-Resume Setting
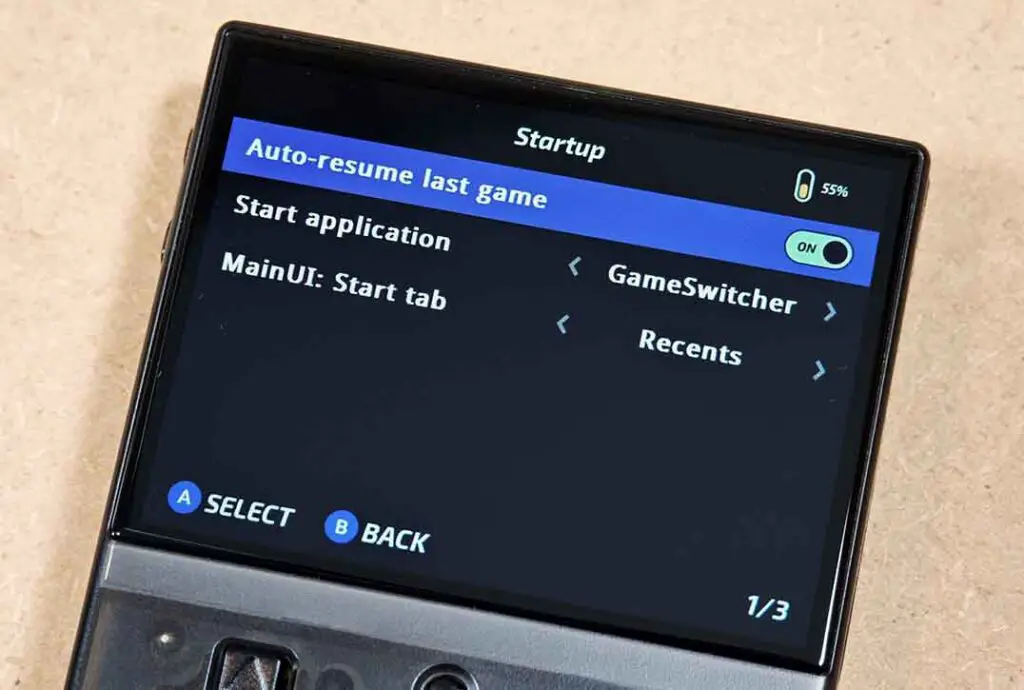
As the auto-save and auto-load RetroArch settings are already enabled for you on Onion, the only thing you need to make full use of them is for your handheld to automatically resume the game you were last playing on startup.
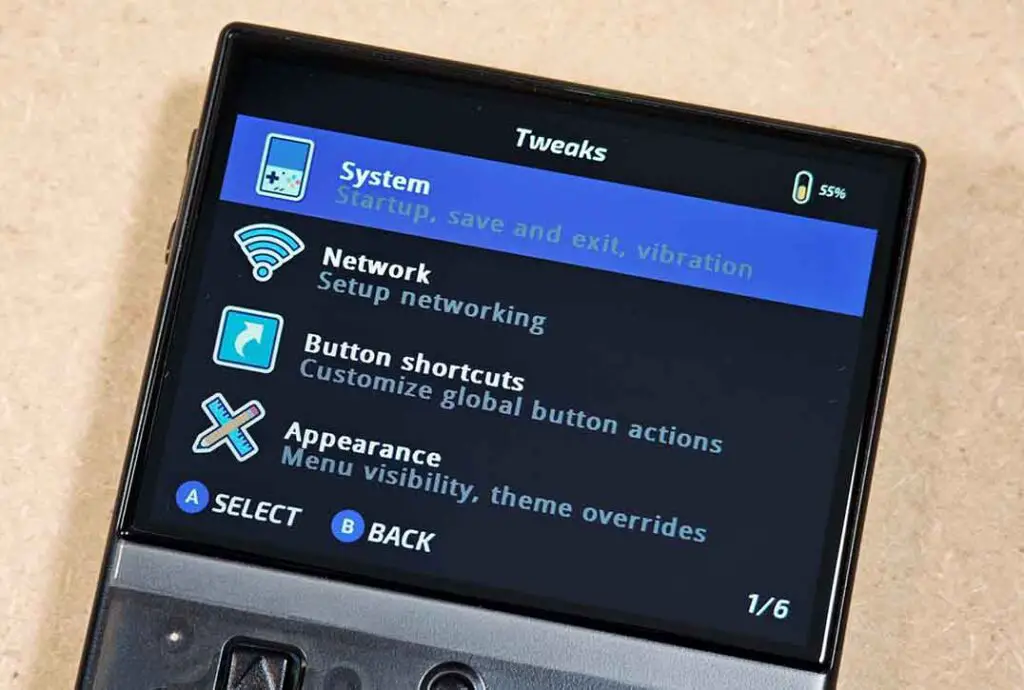
This behavior can be enabled in a few clicks under Apps -> Tweaks -> System -> Startup -> Auto-resume last game.
Onion OS Miyoo Mini Hotkeys and Button Shortcuts
Note: You can browse through the whole updated list of Onion hotkeys and button shortcuts in the official docs, but here are my absolute favorite, most useful combinations which are great to memorize right away:
One shortcut that you want to know right away is quick brightness adjustment. Here is how to do it on both the original Miyoos and the Plus model.
- Miyoo Mini V1-V4: hold
Selectand pressL2 / R2to lower or raise brightness. - Miyoo Mini Plus: hold
Menuand pressVOL- / VOL+to lower or raise brightness.
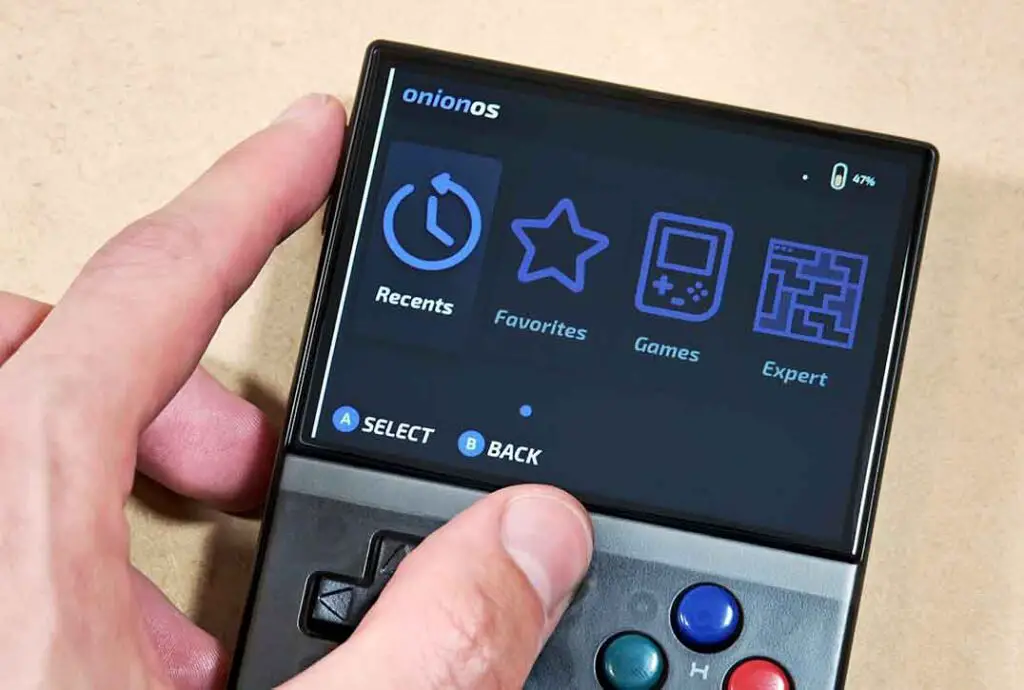
The most important button to understand is the Menu key, which is the small round key in the very middle of the device. By default, it’s used for enabling GameSwitcher, and as a base hotkey for many button combos.
With a single press of the Menu button, you will be taken to the GameSwitcher view with all of your recently played titles alongside the screengrab of the moment you last left each game, and your total playtime. You can scroll through this menu and select the game you want to quickly get back in.
If you’ve enabled the Apps -> Tweaks -> System -> Startup -> Start application menu, you can also ensure that the handheld will always start in the GameSwitcher view, rather than displaying the main menu.
Here are a few other RetroArch key combinations that you need to know:
- Menu + Select: Opens the RetroArch Quick Menu. Here you can change pretty much all emulation settings you want, and change the default cores for your selected consoles in the
Overridesmenu. - Menu + R2 / L2: Instantly Save (R2) or Load (L2) a game save state.
- Menu + Start: Change the game aspect ratio and stretching method.
- Menu + R: Toggles Fast Forward.
- Menu + D-pad left/right: Change the currently selected save slot. Onion creates new save files in subsequent slots always keeping the last 10 save states, so that you can revert to your previous save file if you’ve created a new one in a bad place by accident.
- Menu double press: Quickly switch to the game you’ve been playing last (and back).
- Menu + X: Toggle the FPS counter.
- R2/L2 (in original GameBoy games): Switch through different color palettes in classic Game Boy games.
Most of these shortcuts can also be configured and further customized from the Apps -> Tweaks -> Button shortcuts menu.
Note that on some systems that are not emulated using RetroArch, like the PICO-8, these hotkeys might not work.
Once again, these are the shortcuts that work in Onion OS. In the stock OS / MainUI the button combinations for similar actions will be different.
Overclocking The Miyoo Mini
While the Miyoo Mini is generally quite a capable device for its size, you can occasionally experience some minor audio stuttering or slowdowns on some harder-to-run SNES titles, PlayStation 1 games, or complex GBA ROM hacks. This is where overclocking can come in handy, and luckily it’s really easy to do on Onion.
“Overclocking” as such can sound intimidating, and usually for all the right reasons. On Onion OS however, this process is incredibly straightforward and easily reversible.
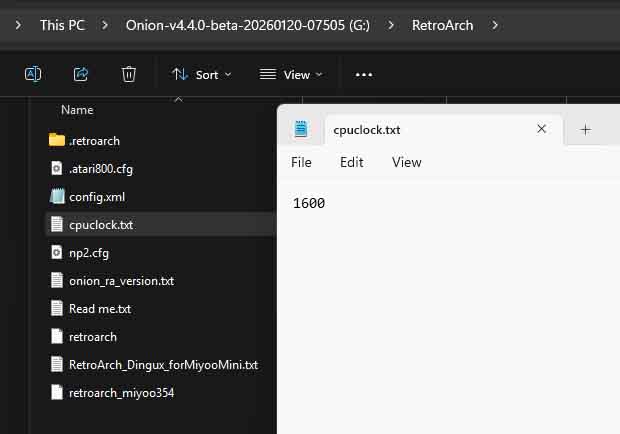
The basic method of overclocking your Miyoo Mini involves creating a text file named cpuclock.txt in the RetroArch directory on your microSD card. Inside this file, you just type your desired four-digit frequency, typically 1600 for the original Mini or up to 1800 for the Plus model (a solid bump from the stock 1200 MHz).
Going above 1700 MHz for V1-V4 models and above 1900 MHz for the MMP is not recommended, and can affect stability or risk damaging your device.
Once you save the file to your device and boot it up, Onion OS will automatically read the value from the file and boost your CPU speed. It takes less than two minutes to do, requires no complex software hacking or in-depth tinkering, and can easily smooth out frame drops in more demanding SNES, GBA and PS1 titles.
Check out my full simple overclocking guide for Onion OS for full instructions to learn how to safely boost your clock speeds, apply changes on a per-game or per-system basis, and avoid draining your battery too quickly. There you can also learn how to overclock specific cores, and the non-RetroArch DS emulator (the method is a bit different).
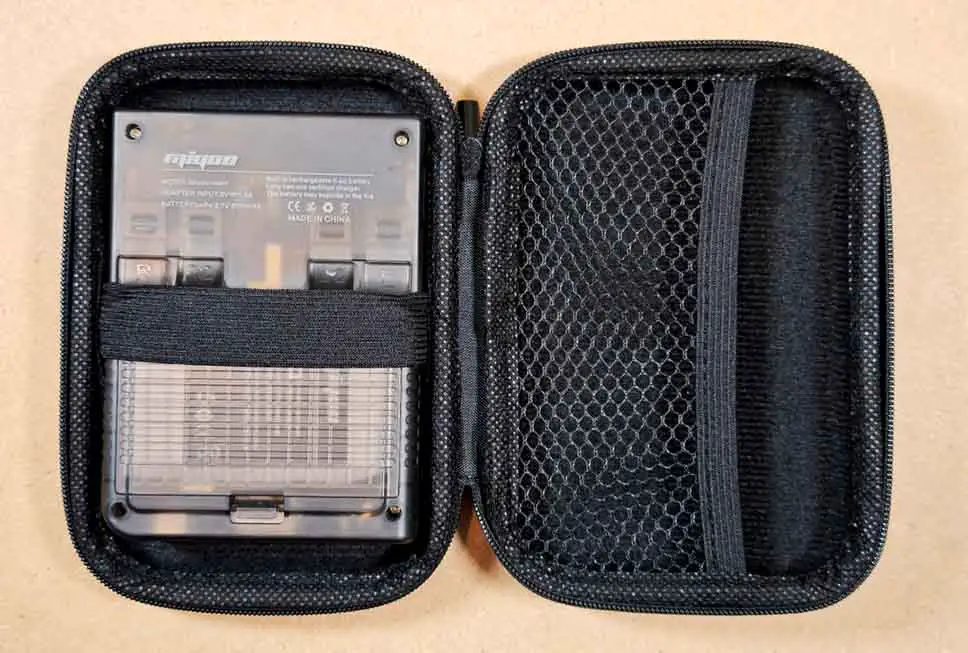
Best Miyoo Mini Plus Accessories (and Cases)
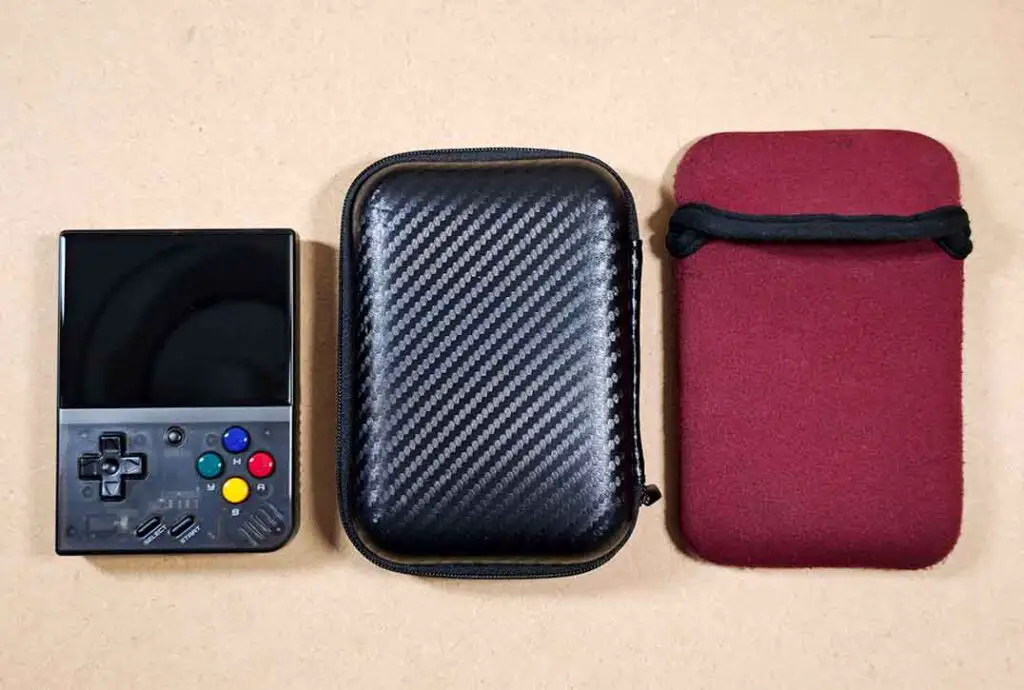
The Miyoo Mini family has, as most handhelds in this price range, relatively fragile screens with practically zero bezel protection. A solid silicone shell case with a screen protector, or at least a simple travel case like this can be good to have on hand before you throw your Miyoo in your bag or backpack.
Remember that the Miyoo Mini V1-V4 are smaller than the MMP showcased on the images here, so for it you either have to pick a smaller case (these are a bit harder to come by), or just live with the extra space inside of one of the traditional hard drive style cases.
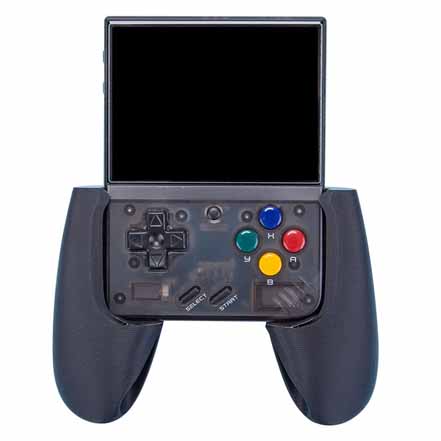
Beyond simple protection, upgrading the ergonomics and aesthetics of your device is a massive part of the hobby. If you find your hands cramping during long play sessions, an ergonomic grip like this can help.
|
Silicone Case for Miyoo Mini v1-v4 | See on Amazon |
|
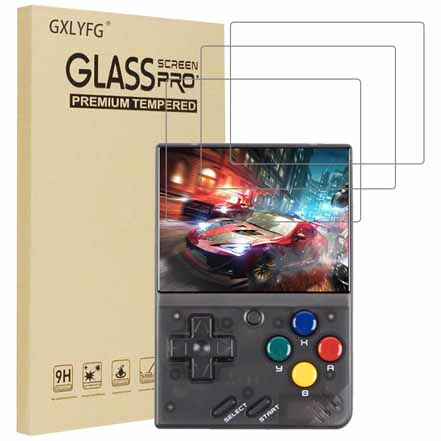
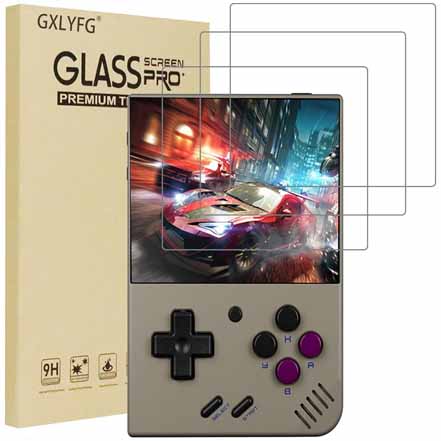
Tempered Glass Screen Protector for Miyoo Mini v4 | See on Amazon |
|
Silicone Case for Miyoo Mini Plus | See on Amazon |
|
Tempered Glass Screen Protector for Miyoo Mini Plus | See on Amazon |
|
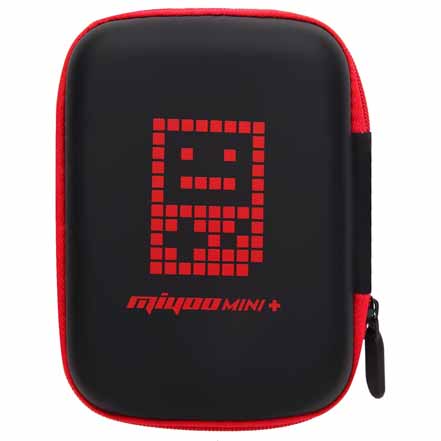
Miyoo Mini Plus Carrying Case | See on Amazon |
|
Miyoo Mini Plus Grip | See on Amazon |
To further personalize your Miyoo, the community offers incredible aftermarket parts, swapping in custom-colored buttons or decals. There are many customization options here, and you can find many of them over on Etsy.
There are also several community-made downloadable 3D print accessory templates available for the Miyoo handhelds, such as this neat “dock”-style stand here. There are a lot of creative gadgets to choose from.
What You Can Do From Here
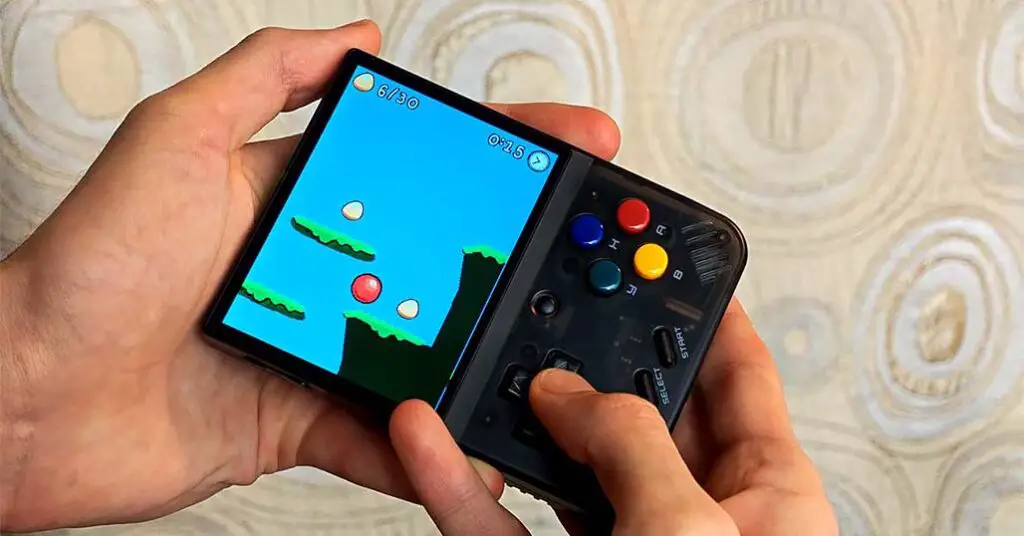
Now that your Miyoo Mini is fully set up with Onion OS, all of your games are already on the device and you know all the button shortcuts you need, the only thing left is to enjoy your pocket emulator handheld!
My honest advice with the Miyoo Minis, and with other devices like this is: instead of attempting to play a lot of different games at the same time and getting lost in the sauce, choose at most 5 to 10 titles that interest you, and go from there. It’s really easy to get overwhelmed by the large number of retro classics you can now emulate on a device smaller than your smartphone.
That’s it! I hope this guide was helpful to you, and if you liked it you can check out my other articles on pocket retro handhelds and emulation. Until next time!
You might also like:
– How To Play Old Mobile Java Games on Miyoo Mini – In 4 Short Steps
– R36S Setup Guide: Clone Check, dArkOSRE, SD Cards & Charging