
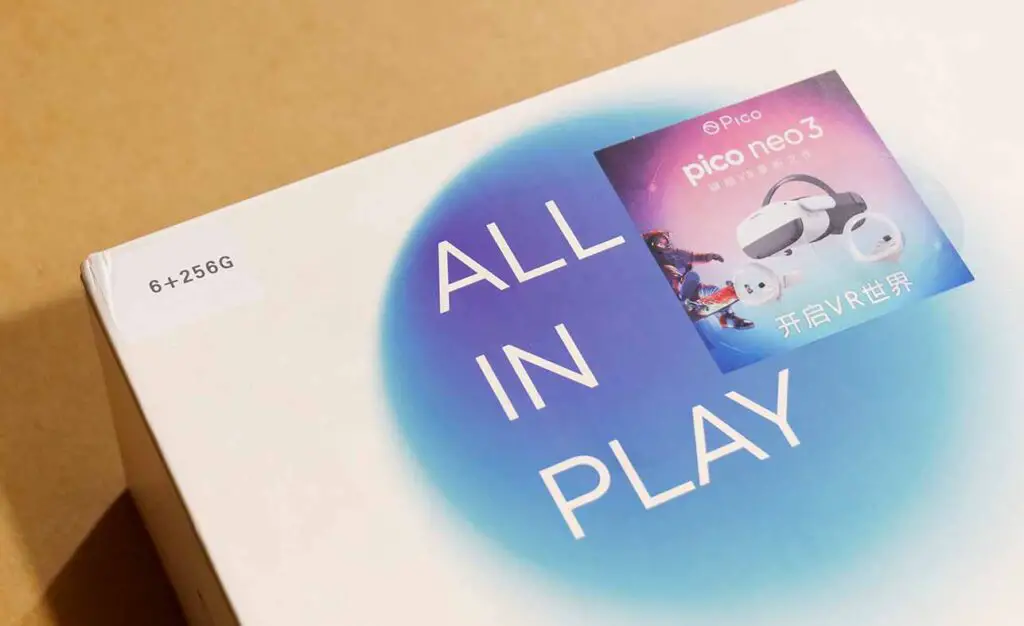
The Pico Neo 3 is here, and it’s honestly quite impressive. I’ve already tested the device in-depth and I’m ready to share with you all the good and bad sides of this neat budget VR headset, as well as compare it to the Meta Quest 2 which still seems to be its main rival in this price range. We also get to the Link version of the headset, so read on if you want to know more!
Why you can trust us: We test all of our products according to the techtactician consumer usability benchmark methodology which evaluates all of the product characteristics that matter to the user in day to day use. Enjoy the review!
This web portal is reader-supported, and is a part of the Aliexpress Partner Program, Amazon Services LLC Associates Program and the eBay Partner Network. When you buy using links on our site, we may earn an affiliate commission!
Check out also: Meta Quest 2 – My First-Contact Hands On Review
First, The Spec Sheet
| Device: | Pico Neo 3 VR Headset |
|---|---|
| Photo: | 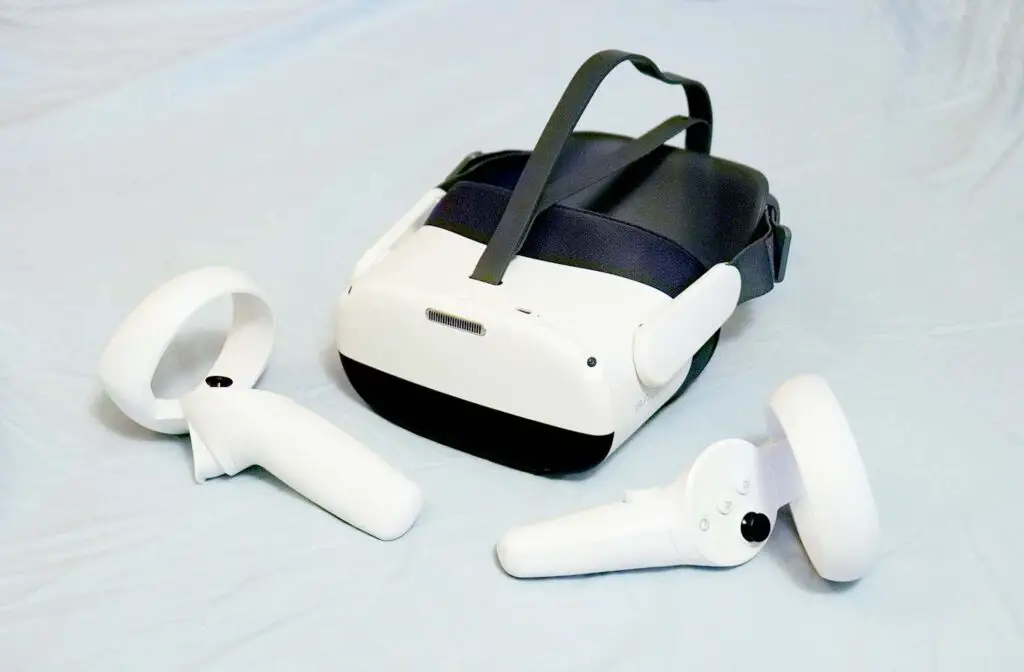 |
| Price & availability: | Check on Amazon | Check on Ebay | Check on Aliexpress |
| Display specs: | Single LCD panel, 3664x1920px, 1832x1920px per eye, 90hz refresh rate |
| Visible FOV: | 98° horizontal, 90° vertical |
| Tracking type: | 6 DoF Inside-out tracking, 4 tracking cameras |
| CPU | GPU | RAM: | Qualcomm Snapdragon XR2, Octa-core Kryo 585 (1×2.84 GHz, 3×2.42 GHz, 4×1.8 GHz) | Adreno 650 | 6 GB LPDDR4X RAM |
| Storage options: | 128 GB, 256 GB |
| IPD settings: | 58mm / 63.5mm / 69mm presets, manual adjustment |
| Weight: | 380g w/o headstrap / 610g with headstrap |
| Battery: | 5300 mAh battery / around 3 hours of use depending on type of content | Controller batteries: 2xAA for each controller |
| Passthrough type: | Black & white passthrough |
| PCVR capabilities: | USB 3.0 Type-C streaming, WiFi 6 streaming |
| Audio outputs: | In-built integrated 3D audio headphone system, 3.5mm headphone jack connection, Bluetooth headphones support |
First Experience, And Comparison To The Quest 2
As I’ve already tested the Meta Quest 2, I have quite a lot data for comparison here. So here is my experience when first putting on the Pico Neo 3 headset.
Setting up the playspace, navigating the OS menu and the overall user experience was pretty much identical to the one on the Quest 2. The user interfaces do differ here and there, although these are mainly small cosmetic differences, as the Pico ecosystem is pretty much based on the Meta VR software.
After setting up my Pico account (which is necessary to use the Pico App Store), I started browsing the games library, downloading some apps and sideloading some testing tools and files onto the headset. No slowdowns and no “what-is-where” confusion, plus the great ergonomics of the headset have made this experience pretty enjoyable.
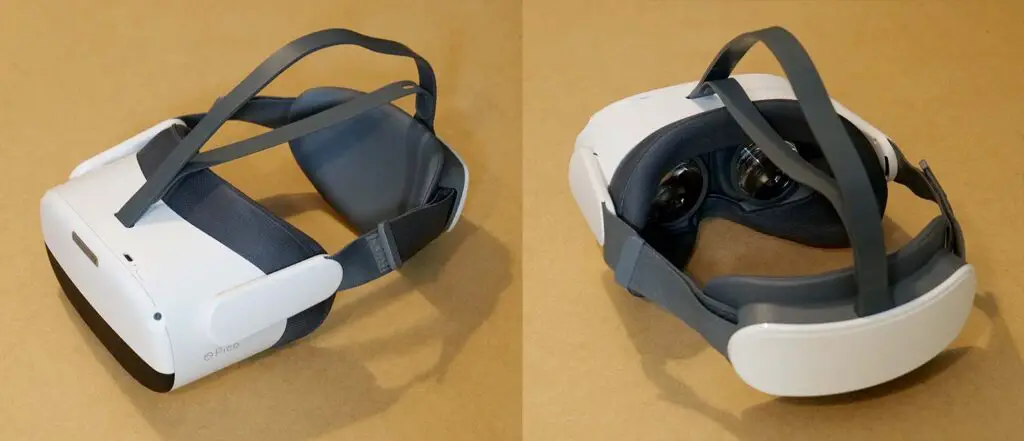
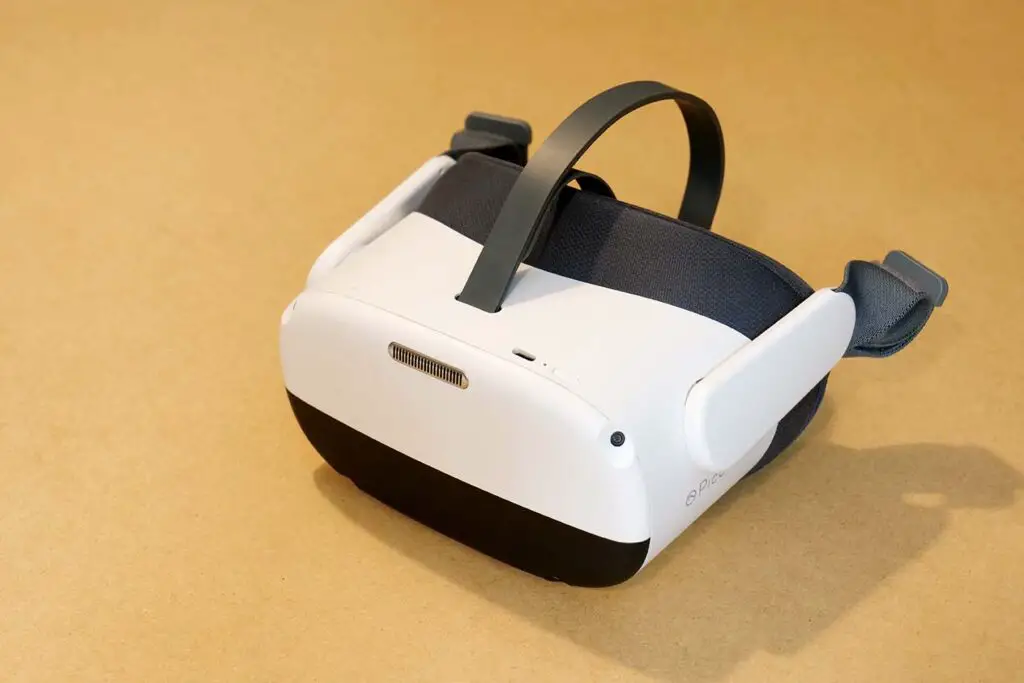
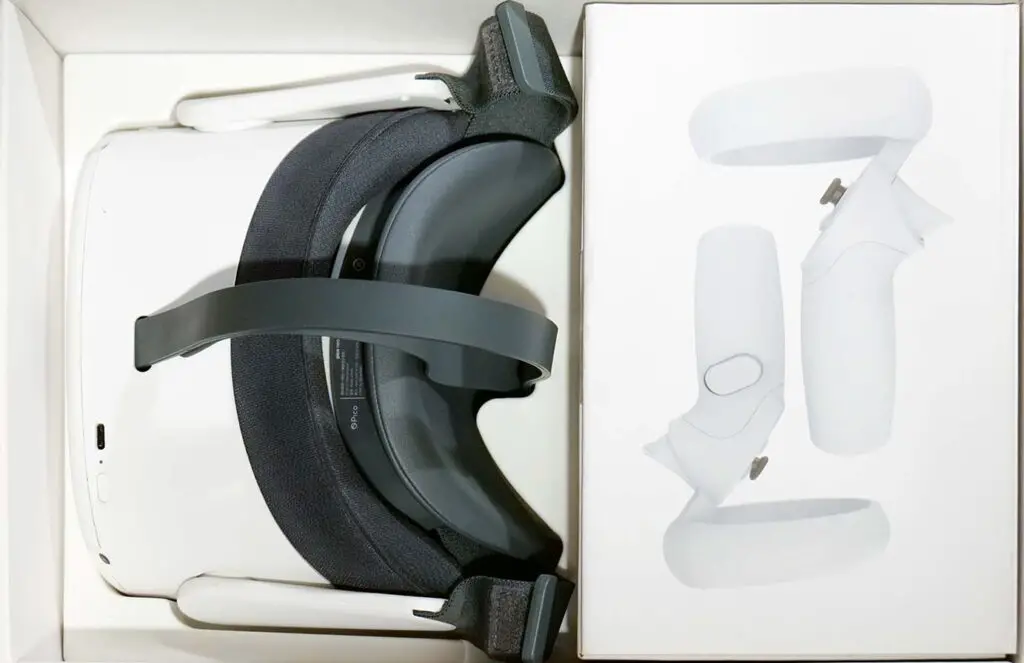
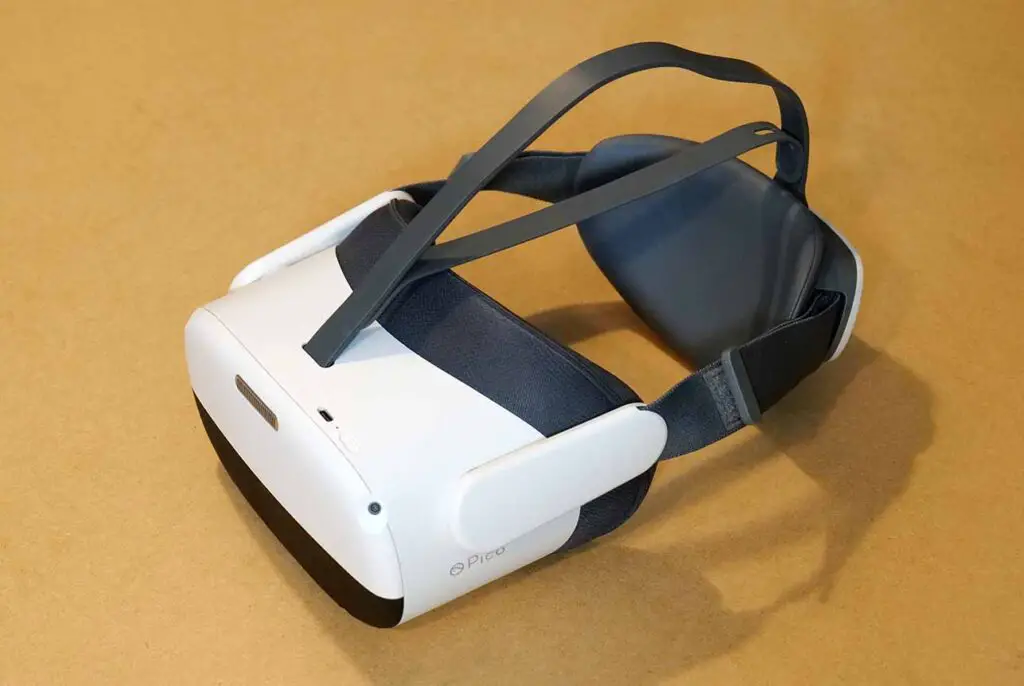
The rear-mounted battery makes the headset much more comfortable to wear for longer periods of time compared to the Quest 2. Overall, after a few hours of use, I find the Pico Neo 3 design to be more friendly for users who enjoy longer VR sessions. The back counterweight can be easily retracted and put inside the goggles to protect the lenses in storage as you can see on the photo down below. This is a very neat design choice.
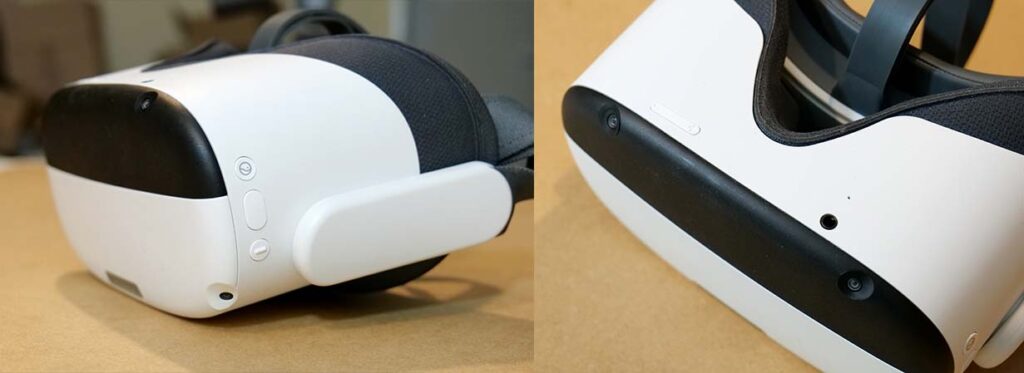
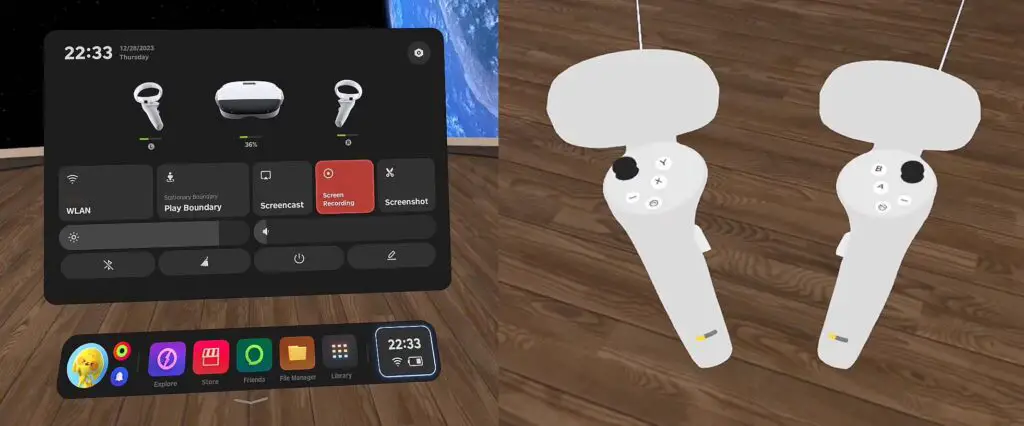
The device exterior is pretty standard with 4 tracking cameras, an on/off button next to the USB-C port used for wired VR image streaming and charging the headset, volume up and down buttons and a 3.5 mm headphone jack on the bottom of the device, a bulit-in microphone, and 3 side buttons which can be used for navigating through the headset’s UI without using the controllers, among other things.
The front of the device has a small vent used for cooling. Overall the design ergonomics are very well thought out here.
And yes, the headset does use active cooling. Although the fan is really quiet and it has a very neutral pleasant soft hum to it which is almost inaudible during use. It’s also worth mentioning that it comes in only when the headset is under heavy load.
Two things I want to point out right away are as follows. First, in the beginning the headset didn’t really want to connect to my hidden Wi-Fi network, despite doing all the possible tweaks to make this possible. I had to make the network SSID visible, and only then I was able to proceed.
Second, I was pretty surprised that the default Pico VR home environment which greets you each time you boot up the headset wasn’t quite as crisp and sharp as I expected. However, as it turned out in a second, everything beside it, including games, experiences and PCVR streamed image was of top quality, and I would really advise Pico to update and upscale their home environment skybox and model textures to make the very first seconds a new user spends in virtual reality much more impactful.
The headset comes packed with two controllers we’re going to talk about a little bit more in a bit, and a dedicated 5V 2A charger.
The Display Quality
The display resolution of the Pico Neo 3 is 3664×1920 px, which gives us exactly 1832×1920 pixels per-eye, or 7.03 million pixels in total. But enough numbers, what does it look like in practice?
Well, honestly I was pleased to find out that the final image quality on the Pico Neo 3 was almost exactly the same as the one on the Meta Quest 2 which comes with 1920×1832 pixels per one eye.
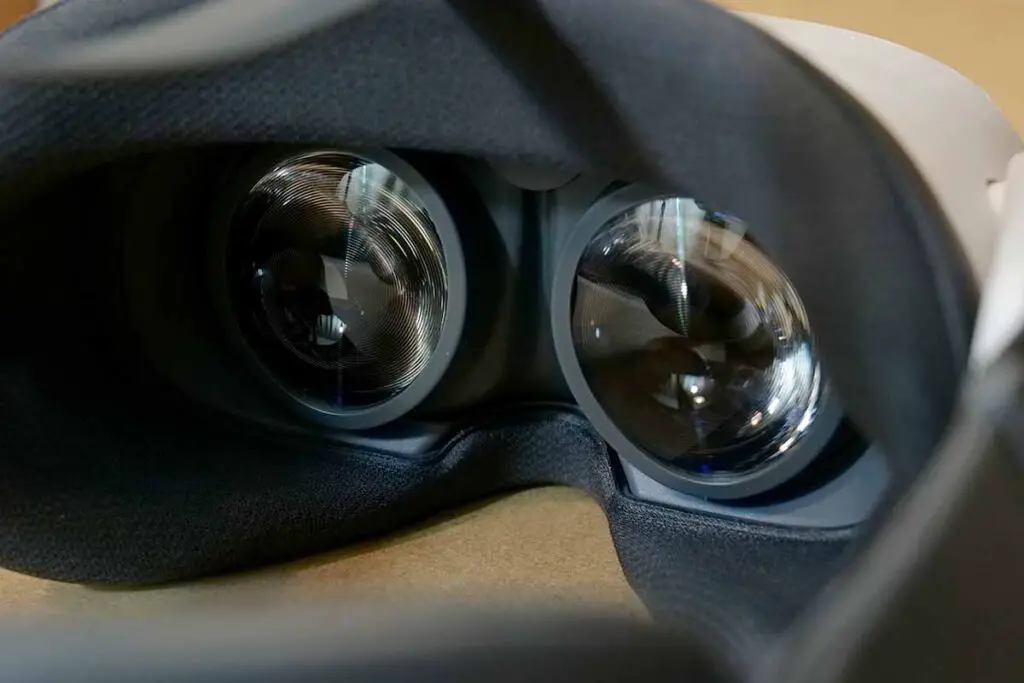
Sharp image with easy to read menu text in the UI and vibrant colors. Nothing much to say here other than you won’t be disappointed with the quality, and that there is no screen-door effect present. The Fresnel lenses offer pretty much the same sweet-spot that you can experience on the Quest 2 – and for me that’s more than good enough.
If you don’t know what’s the difference between Fresnel and Pancake lenses in VR headsets, this is the best time to quickly learn: Fresnel vs. Pancake Lenses For VR – Which Ones Are Better?
When it comes to the actual perceived image quality, I couldn’t really find any major disadvantages here, but that was pretty much to be expected. As the Pico Neo 3 is a ByteDance response for the Quest 2 headset from Meta, the overall quality of the devices is very much similar. However, there are more differences coming up, as you will see in a while.
Pico Neo 3 Through The Lens
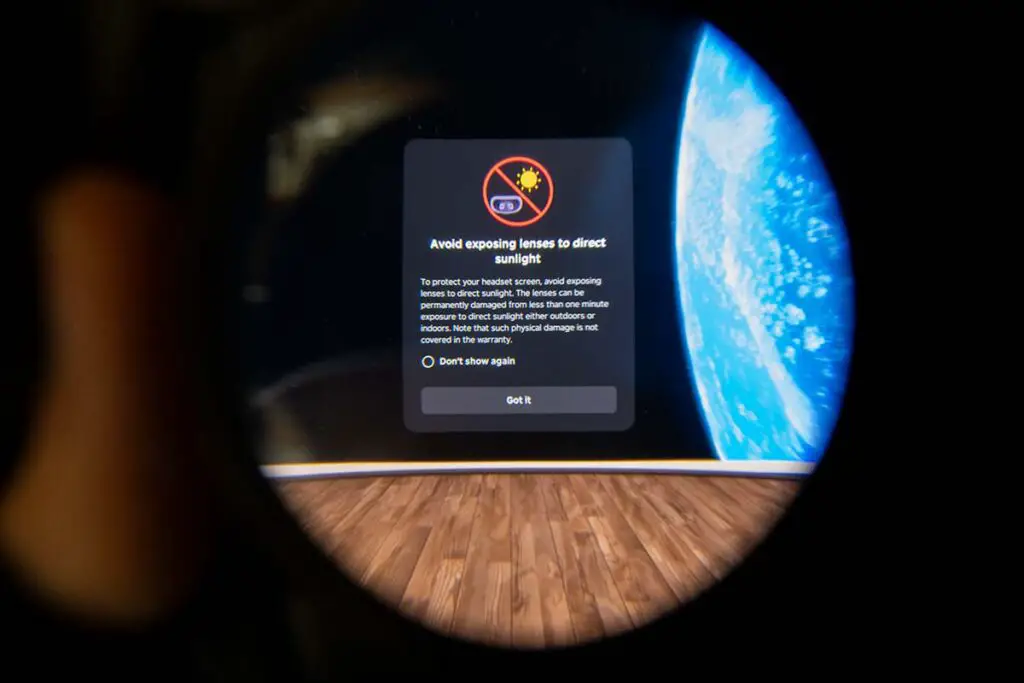
Here are some of the pictures I’ve taken through the Pico Neo 3 headset lenses. The images are taken with different magnification settings of a 20-60 kit lens of a Lumix S5 mirorrless camera. Click the images for their full resolution versions hosted on Google Drive, and keep in mind that their quality may be influenced by both the high ISO and lower shutter speeds used when taking the photos. The grain caused by the high light sensitivity camera settings is not visible in real life.
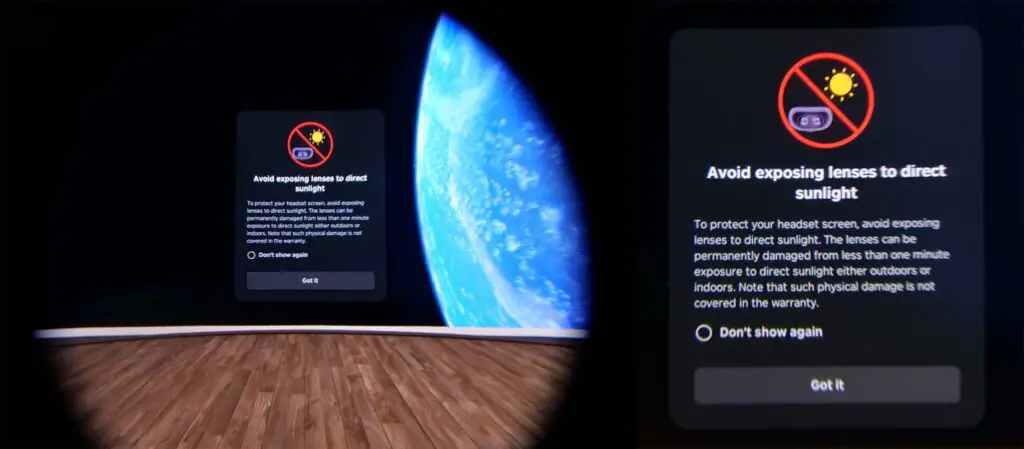
The important thing to note about all of the “through the lens” photos and videos taken from up close with a magnification lens, is that during normal use you won’t be able to see half of the details (and pixels) that are visible when the image is captured on camera.
While I did my best to capture the image through the Pico Neo 3 headset lenses with a high-end mirrorless camera with various lens magnification levels, keep in mind that with the naked eye, the pixels are simply not visible to the extent they can be seen on these highly zoomed in pictures, and quite obviously, there is no grain/noise present.
Anyway, onto the FOV experience, which I know is one of the most important topics for many of you!
FOV Experience & IPD Setting Presets
When it comes to the visible FOV, the Pico Neo 3 is very much similar to the Quest 2. According to my tests, the field of view can reach around 98-100 degrees horizontal and 90-91 degrees vertical with the default configuration, although as always this also depends on your chosen compatible IPD setting and a few other factors.
All in all, the FOV experience is in my personal point of view (sic!), up to standards and comparable to the headsets like the Quest 2, but a little bit less impressive than the one of the Pico 4 headset.
With that said it was more than enough for me to get completely immersed in both standalone and PCVR experiences and forget about the scuba-mask effect after about 2 minutes of gameplay.
As I’ve already mentioned the interpupillary distance settings, there are 3 main IPD presets available on the Pico Neo 3 (58mm, 63.5mm and 69mm), and you can switch between them by physically moving the lenses closer or farther apart from each other.
Once moved, the lenses will neatly snap into place, and unfortunately there is no way to set the IPD to anything in between like on the Pico 4. Just be sure not to dirty the lenses by accident during the manual adjustment!

The Controllers
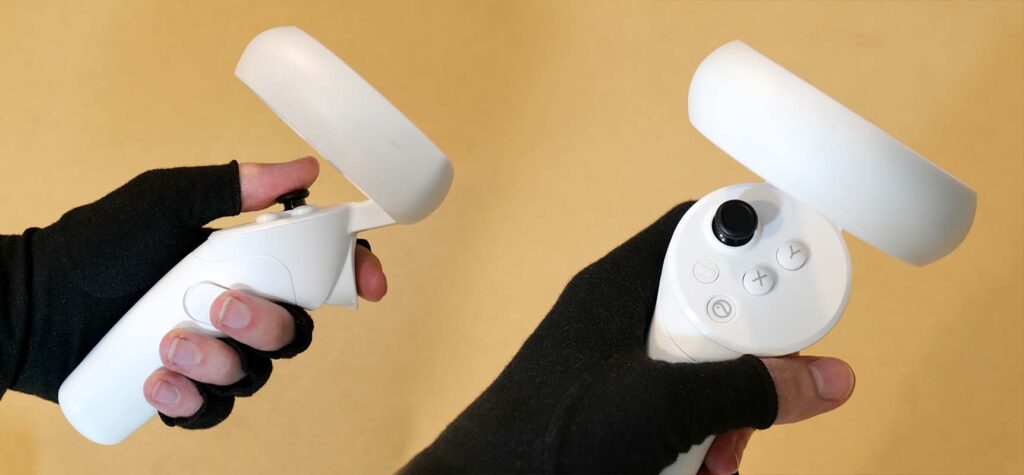
The Pico Neo 3 headset comes with two dedicated controllers, which are pretty similar to the controllers of the Quest 2. There are some notable differences here though.
The top part of the controllers isn’t completely rounded, and their shape is a little bit different overall. Moreover, the Pico Neo 3 controllers do not come with safety straps attached, and there is no hoop to attach your own straps on them. I don’t really mind that, as I usually use my headsets without the straps anyway.
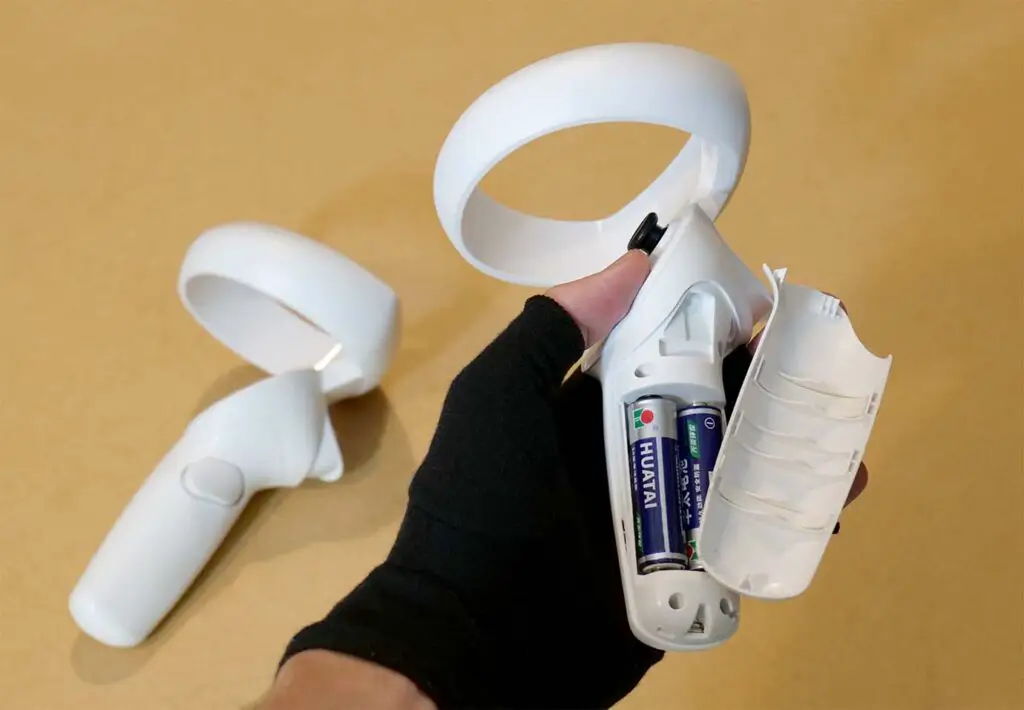
The controllers are powered with two standard AA batteries each, and they last for a very long time, which is to be expected. With one of the recent Pico OS software updates came the new “high accuracy mode” which can be enabled to further reduce the already unnoticeable tracking delay in certain scenarios at the cost of using a little bit more power. Although I’ve enabled this mode quite a long time ago, I still didn’t notice any substantial changes in the controller battery drain.
Overall the tracking works really well, and once again, I didn’t notice any huge differences when comparing it to the Quest 2. The only scenarios in which a little bit of tracking latency was introduced was when I was enjoying PCVR experiences with the use of Pico Streaming Assistant and SteamVR. Even then, it wasn’t disturbing my gameplay and it was pretty much negligible.
The controllers feature all the usual controls including an analog stick with no drifting issues in my model, and comfortable trigger and grip controls. That’s pretty much it!
Pass-Through & Play Area Boundary Setting
The play space safe-boundary setting experience was pretty much the same as on the Quest 2, beginning with the interface, play area settings and drawing custom boundary lines using the controllers.
When you (or rather your head) begins to exit the play area, the real world will become visible within the headset, with the help of the pass through cameras and you won’t risk straying away from your set play space.
If only one of your controllers does leave the play space, the passthrough doesn’t activate, and instead you see an indicator showing you the constraints of your set play area until you move your hand back inside the border lines.
As on the Meta Quest 2, there are options for making use of a round pre-set sitting or standing playspace, or a custom drawn play area. The ground level can be easily re-adjusted after the initial automatic floor level setting kick in.
A neat feature which you can turn on in the headset settings gives you the ability to double tap the side of the headset to activate a temporary full pass-through view mode. This is pretty neat if you need to move your playspace a bit, but don’t want to take the headset off. While this is quite cool feature to have, I found it pretty tricky to quickly give the side of the Pico 3 a tap when already holding a controller in hand.
The pass-through image quality is sufficient, nothing revolutionary, but perfectly usable. The low-res black and white image is enough for making quick adjustments to your playspace and not bumping into things when moving with the headset on. Let’s now get to the battery life. This is a standalone headset after all!
Battery Life In Practice
This won’t be a long paragraph. The Pico Neo 3 battery life, at least after 5-6 battery cycles is around 2.5-3 hours of use depending on what you’re using the headset for. The advertised 3 hours of headset use are a pretty good estimate to give you an idea what you should expect from the device. The battery is positioned in the rear, so compared to the Quest 2, I found the overall balance of the headset to be much better.
You can check the battery level of both the headset and the controllers in the Pico pop-up menu which you can quickly enter anytime during the gameplay, and in the main Pico home lobby the battery life indicators for the controllers are displayed on them in the virtual world.
Of course it goes without saying that when playing more demanding games the battery life will tend to be just a little bit lower, and when simply enjoying a movie in the built-in Pico VR theater mode you’ll most likely be able to stick around in the VR world a little bit longer.
The headset can be charged either from a compatible power bank or using the dedicated charger, even during use. This can substantially slow down the battery drain during use, although at least for now I didn’t find it necessary to do it.
The Games Collection – And Sideloading Apps!
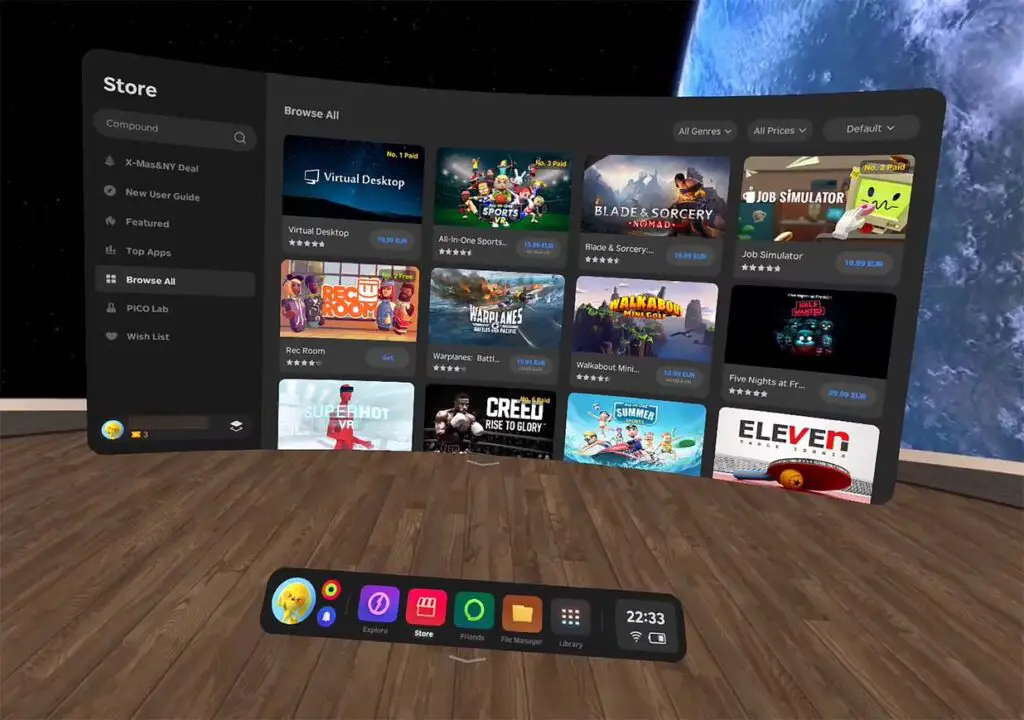
As many of you might already know, the game collection available for the Pico ecosystem is a little bit smaller than the one that’s accessible for the Meta headset users. With that said, there are still hundreds of games, apps and experiences available on the Pico store, and the library overlap between the Meta and Pico stores is pretty large. Understandably, you won’t find any games exclusive to the Meta Quest ecosystem here.
It’s important to note here, that creating a Pico account is necessary to use the in-built Pico games & experiences store on the device. Luckily for that you only need your email and a password and no mobile verification is required.
And yes, sideloading apps is possible, and in fact it only boils down to copying the appropriate .apk and .obb files onto the headset and installing them. Of course, there are measures against piracy implemented in the system. Third party apps which are not signed, will not start up after install, or will turn off and refuse to work after a short while. Other kinds of 3rd party applications which do not require a valid signature, should work without any trouble.
Pico Neo 3 has no problem with supporting USB storage devices through a USB-C connection and copying files over to the headset is a matter of few clicks within the system UI. You can also play movies or browse photos directly from a USB-C flash drive for example. Just be sure not to break it off by accident!
Wireless PCVR With Pico Streaming Assistant
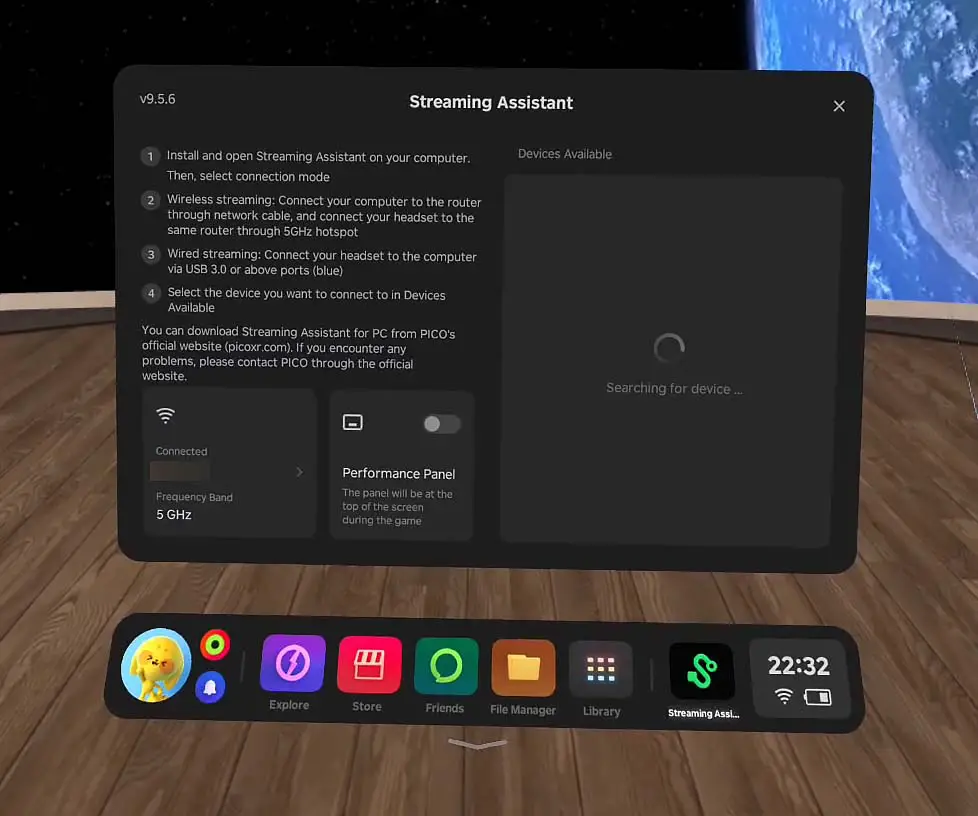
As I wanted to get as close to the no-settings-tweaking vanilla Pico Neo 3 experience as I could, I decided to test the headset’s PCVR capabilities by using the native Pico Streaming Assistant app, which needs to be installed both on the headset and on your PC to connect the two and allow you to enjoy any chosen PCVR experience. The only thing you need for that is a fast and stable 5Ghz Wi-Fi connection with a strong signal.
The only issue I came across during the tests was the error with mismatched Pico Streaming Assistant software versions on the PC and on the headset. While on the desktop side the software was updated to the latest version, the Pico headset for some reason was not able to download this latest update even after updating the whole OS.
I was able to fix the problem by downloading the Streaming Assistant version for my PC that matched the version on the headset, but I hope it will be patched in some future update.
The testing rig used an i9-9900k CPU and a RTX 2070 SUPER GPU with 8GB of VRAM, and the 5Ghz Wi-Fi access point was positioned right next to the playspace for the best connection quality.
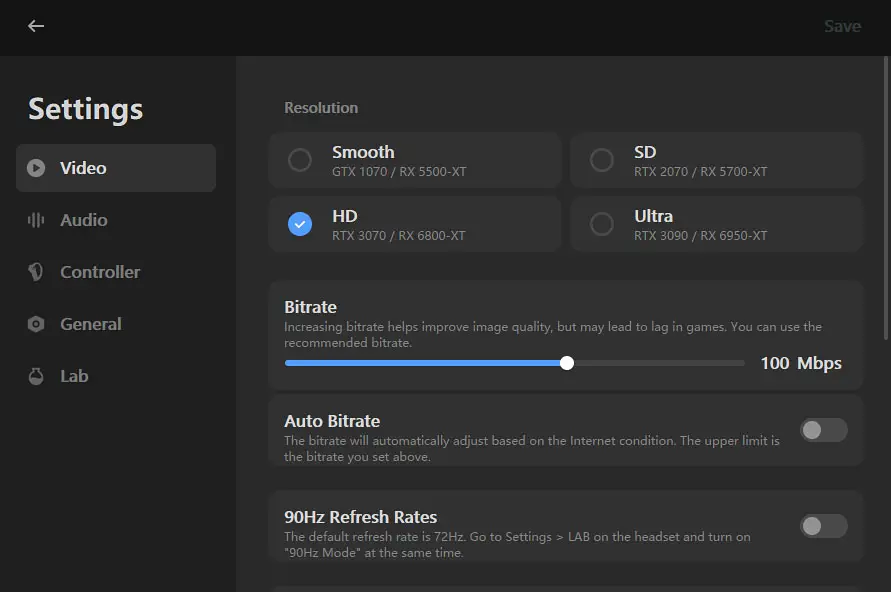
After finally connecting the headset with my testing rig using the HD quality preset, 100 Mbps bitrate and 60hz refresh rate I was able to jump straight into the SteamVR ecosystem, and then to a few desktop VR experiences like the NVIDIA VR Funhouse. The movement was very smooth even without enabling the higher, 90hz display mode in the software settings.
Honestly, I was pretty amazed by the image quality and I didn’t notice any compression artifacts which could disturb the experience. The only noticeable thing was a very slight delay when moving the controllers, which I forgot about a few minutes into the gameplay.
I’m sure that with a better rig and 3rd party streaming software like Virtual Desktop you could up both the image quality and lower the latency even further. No complaints here.
Chinese and Global Headset Versions
When trying to buy your headset from Aliexpress, you might find two different types of offers there. The Pico Neo 3 and Neo 3 Link headsets may be sold in model versions available for the Chinese and the “Global” market separately.
The difference between those is generally the system locale set to Mainland China, rather than to the Global setting. Between these locales there are a few differences when it comes to the set of games available in the Pico store, and the store payment methods available.
Doing a region transfer, while not always necessary can be rather easily done following a chosen tutorial available online. While the headsets meant for the Chinese market are most often cheaper than these set up for the “Global” use, if you want to avoid tinkering with your device, I’d advise you to go for the Global version when making your purchase.
My Personal Comfort Rating
This is important, so I may as well dedicate a whole paragraph to it. For me personally, the comfort factor on the Pico Neo 3 was way higher than on the Quest 2. It might be because of the battery positioned in the rear and acting as a counterweight as I mentioned before, or maybe because of the slight design differences between the two devices. Anyway, I enjoyed the Pico Neo 3 more in that regard.
After something close to 1.5 hours of gameplay, naturally the first thing to start bothering me a bit was the rubber piece pressing down on my nose, which is pretty much common with all VR headsets out there. Other than that, the Pico Neo 3 was pretty comfortable to wear all throughout the tests and did not feel as awkward as the Quest 2 with all its weight placed in the front of your head. There were also no noticeable light leaks, although that may just be because of my perfectly shaped face 🙂
Pros & Cons – And Final Verdict
If you’re not patient enough to read through all of this, here are the most important things I have to say about the Pico Neo 3, in a neat pros and cons list!
Pros:
- Overall quality comparable if not better than that of the Meta Quest 2.
- A cheaper alternative to the Meta VR ecosystem.
- Great quality image both in Standalone mode and with PCVR via the in-built Pico Streaming Assistant.
- In my experience much more comfortable to use than the Quest 2.
- The software is still being actively updated with new features.
Cons:
- A little bit less games in the library compared to the Meta store, and obviously no Quest exclusives.
- No safety straps on the controllers.
- Small issues with some pieces of the Pico software (mentioned in the review).
Hand Tracking, Eye Tracking?
Pico Neo 3 with the newest version of Pico OS finally does support hand tracking. Although the feature is currently in the phase of beta-testing, you can enable it inside the system settings menu, and it’s very similar to the hand tracking on the Quest 2, using the same gestures to get around the system and navigate through VR experiences which support it. A neat addition to the already impressive feature set.
There is not eye-tracking functionality on the headset, which is pretty much obvious, as the device doesn’t have hardware to support such a feature. If you’re interested in eye-tracking, you should check out some more advanced VR headsets, such as the Meta Quest Pro.
Is The Pico Neo 3 Still Worth Getting?
For me it’s almost a 100% yes, mainly because of the model’s price and quality comparable (if in places not better), than the Meta Quest 2 itself.
In terms of the display specs, ergonomics and general user experience, I have almost no complaints. When it comes to the software though, although it is very user friendly and really doesn’t have any major shortcomings, the game library of the Pico ecosystem understandably is a little bit smaller than the one available for the Meta devices, and some things (like the Pico Streaming assistant version mismatch) do require official fixes.
When it comes to PCVR, both Quest 2 and Pico Neo 3 were equally reliable with their default wireless streaming apps, although as you saw, I needed just a little bit of tinkering to get the Pico software to work for the first time.
Overall, if you’re considering getting yourself a brand new Pico Neo 3, the only thing to give some thought is if you don’t want to get the Pico Neo 3 Link – a device which while having virtually the same parameters as the Pico Neo 3, also allows for higher quality wired PCVR streaming using an USB-C/DisplayPort cable. It’s also a little bit more expensive.
Pico Neo 3 vs. Pico Neo 3 Link

If you’re still here, hear me out, because this is very important. For all of you who are more knowledgeable when it comes to the whole subject of PCVR and using your VR headset connected to your PC, you might want that additional DisplayPort over USB-C functionality in your headset. Well, the base Pico Neo 3 doesn’t have it.
You can (and you really should) read more about this here: Pico Neo 3 vs. Pico Neo 3 Link (Don’t Make a Mistake!)
The thing is, while the Pico Neo 3 Link does have that feature (and has an available dedicated high quality cable accessory sold separately), the regular Pico Neo 3 does not. If you care for this one, it’s relatively easy to make a mistake and purchase the regular version instead of the Link, as the names are pretty similar. It may become even harder when browsing through hundreds of different Aliexpress auctions in the search for the best deal.
So if you want the whole package, with the lossless DP over USB connection support you’ll want to purchase the Pico Neo 3 Link, instead of the Pico Neo 3. Note that the Pico Neo 3 can still be used for wired PCVR using a compatible USB-C data transfer cable and it works perfectly well. It just won’t be able to support the higher quality direct DisplayPort connection to the headset.