
I had the chance to test the Meta Quest 2 standalone VR headset myself again long after its initial release. And honestly, there were quite a few things that surprised me here! Here is a full long review of the Quest 2 based on my personal experience with the device, which was simultaneously my very first contact with this rather interesting piece of tech. So, is the Meta Quest 2 still worth it this year? Should you still buy it? Let’s get straight into the news!
This web portal is reader-supported, and is a part of the Amazon Services LLC Associates Program and the eBay Partner Network. When you buy using links on our site, we may earn an affiliate commission!
First Things First – The Spec Sheet
| Model: | Meta Quest 2 |
|---|---|
| Photo: | 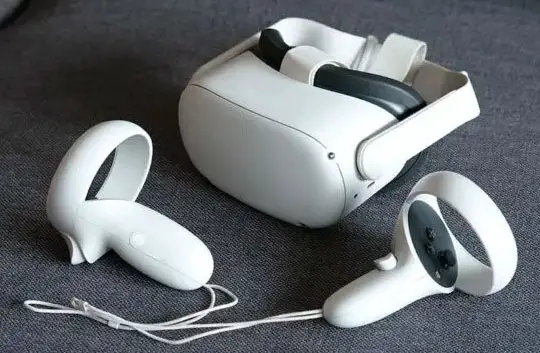 |
| Price: | Amazon | Ebay |
| Display resolution: | 1832 x 1920 – 1 eye | 3664 x 1920 – total |
| Refresh Rate: | up to 120 Hz |
| Lenses type: | Fresnel |
| Field of View: | up to ~96° |
| IPD adjustment options: | 3 fixed IPD presets – 58, 63, 68 mm |
| RAM: | 6 GB |
| Memory options: | 128 GB / 256 GB |
| CPU: | Octa-core Qualcomm Snapdragon XR2 |
| Tracking: | 6DOF Inside out tracking with 4 cameras. |
| Weight (with headstrap): | ~1.10 lbs (~500 g) |
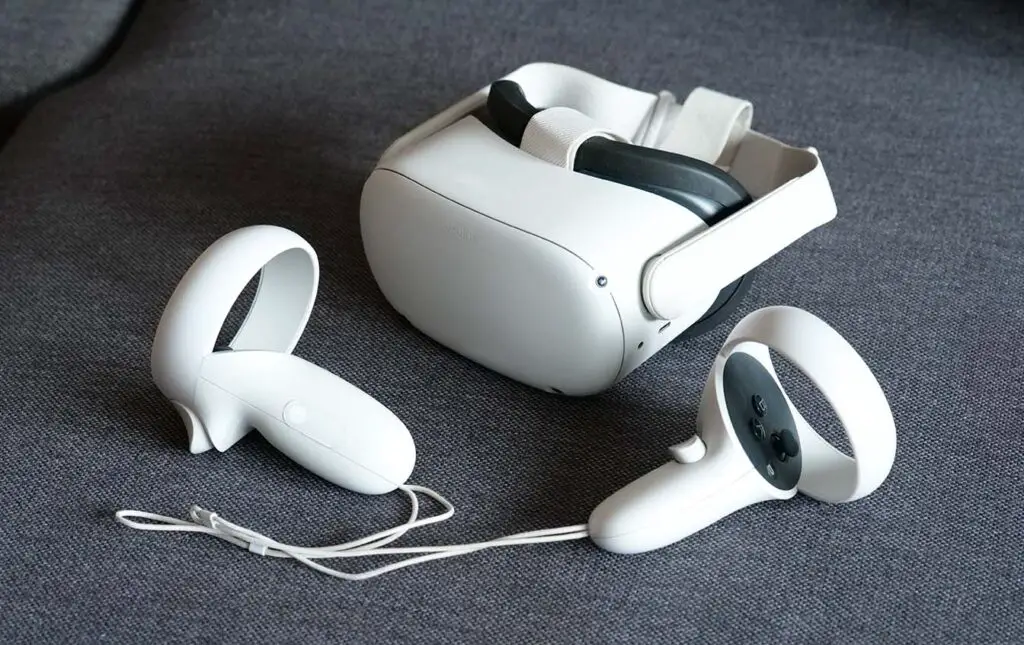
| Controllers: | Two controllers included. |
| Hand Tracking: | Yes. |
First Experience – Putting On The Goggles
I’ll get this straight – up to this point, the only VR headset I’ve actually used was the old and nowadays very much outdated original Oculus Rift – a device from the very first generation of modern VR headsets.
After I put on the Meta Quest 2 for the very first time and finished the initial play area setup I was really impressed. Considering the fact I’ve read a ton of online reviews before finally getting my hands on the headset I knew what to expect, but even then I felt slightly mesmerized both by the visuals and the smoothness of operation of the device – I guess that’s what you get with a polished and well designed product.
Anyways, no sugarcoating in this review – let’s get straight into the details. I’ll try to describe all the things exactly as I saw them, and hopefully this will make this whole article useful for you! Let’s begin!
The Display Resolution – In Practice

While the Meta Quest 2 doesn’t really offer the highest display resolution on the market, I’m happy to confirm that the infamous screen-door effect is not noticeable on this device – at least for me.
As the only comparison I had at the time of testing the device was the very first generation of the Oculus Rift devices, I have to say this – it’s a night and day difference.
The image is clear, crisp and very detailed – at least in the “sweet-spot” in the middle of the visible FOV.
Text in the native Meta Quest 2 UI is more than easily readable, and while browsing the Steam Client wirelessly streamed from a PC I had no trouble reading even the smaller text in the Windows Start Menu. Impressive, considering that the streamed monitor image wasn’t even covering the majority of my field of view in the virtual world.
What I’ve also come to notice is that many of the “through the lens” comparisons I watched online before buying the Quest 2, were focusing on largely magnified portions of the in-built headset displays. When you’re experiencing VR in person however, you won’t look that much into the fine detail of the image.
In my experience, even when pixel-peeping the display with the headset on, the perceivable quality of the image was very solid!
What’s the most important, and what we’ve already mentioned – the pixels were almost unnoticeable. Bye bye screen-door effect!
Lastly, yes, I’ve tested the device with the 120 hz refresh rate mode enabled. I had a buttery smooth experience and I can safely say that the high refresh rate mode is definitely one of the most important strengths of the Quest 2.
With that said, I will get into much more detail on both field of view and the lens distortion artifacts which still are there and are still the part of the modern virtual reality experience, so read on if you’re interested in that!
Did you know? – Meta Quest 2 Memory Upgrade? – Is It Possible?
User Interface And UI Experience
One of the very first things you need to do while setting up your Quest 2 for the first time is configuring the play area. And that is exactly when I noticed how refined and nicely designed the whole user interface really is.
I had no trouble either using the virtual keyboard, mapping out the play area and navigating through the system menus. In terms of user experience I’d give it a straight 10 out of 10.
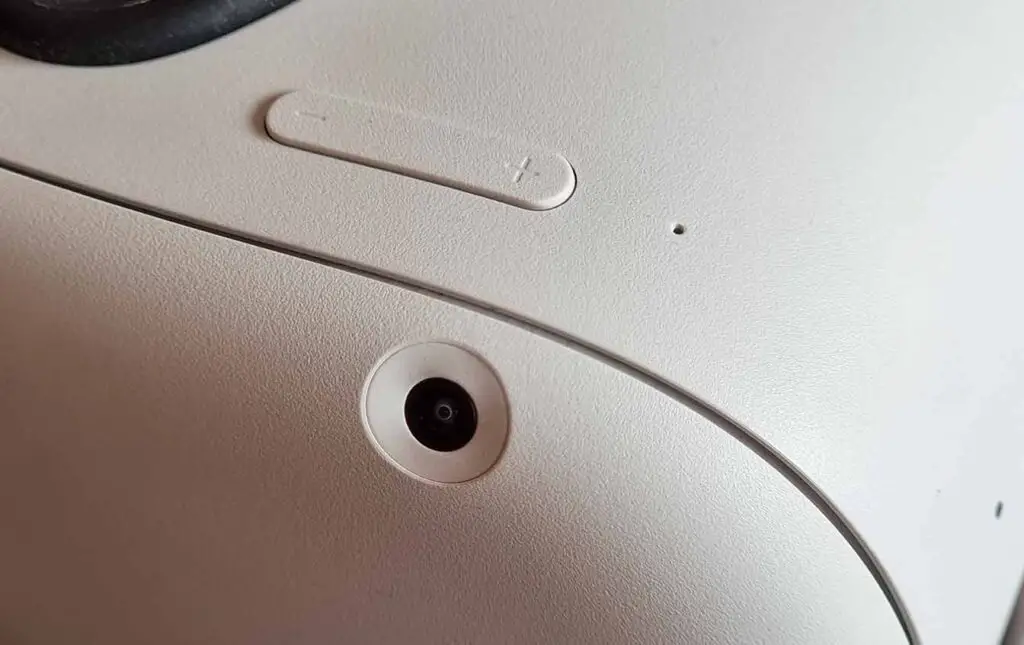
The pass-thorugh camera image is of decent quality, although it’s still a black and white and depth-less image meant only for quick “reality-checks” when you approach the game area safety border, or when you switch to the passthrough view manually.
When it comes to the play area safety features though, the Meta Quest 2 does many great and reassuring things to keep your unharmed even during fast paced gameplay. Let’s hear more about this, shall we?
Safety Features – Play Area Setup
You set up the play area by first placing your controllers on the floor to register the floor level, and then drawing out the border on your floor with the help of the passthrough camera image. Your playspace area can be edited at any time.
What happens when you approach the play area border? Well, whether you try to move your head, or just one of your controllers out of the secure play space, first a slightly visible safety grid appears to notify you that you’re nearing the limits of your play area, and if you move even more towards the border, the whole border will light up.
What if you attempt to move even further and outside of the game border? A rather interesting thing really – the border will light up red and a small circle will appear, through which you’ll be able to see the passthrough camera image.
The closer to the actual border you’ll move, the larger the circle will get, and upon crossing the border fully, the headset will fully switch to the passthrough cameras fully, revealing the real world around you.
All this works really well in practice and I quickly got quite confident with my movements, even with my much limited small apartment playspace. I never felt like I’m going to hit something in the room I was in, and the set border actually gave me quite a lot of “safety buffer” if I ever had moved too swiftly and crossed it by accident.
How much space do you need to use the Meta Quest 2 comfortably? The official value stated by Meta is 6.5ft by 6.5ft, so about 2m by 2m. In practice, I personally feel like once you get into most of the fun experiences available on the Quest 2, you might want to have at least 10-15 square ft of free unobstructed play space around you for best comfort.
Fresnel Lenses – Reality Check
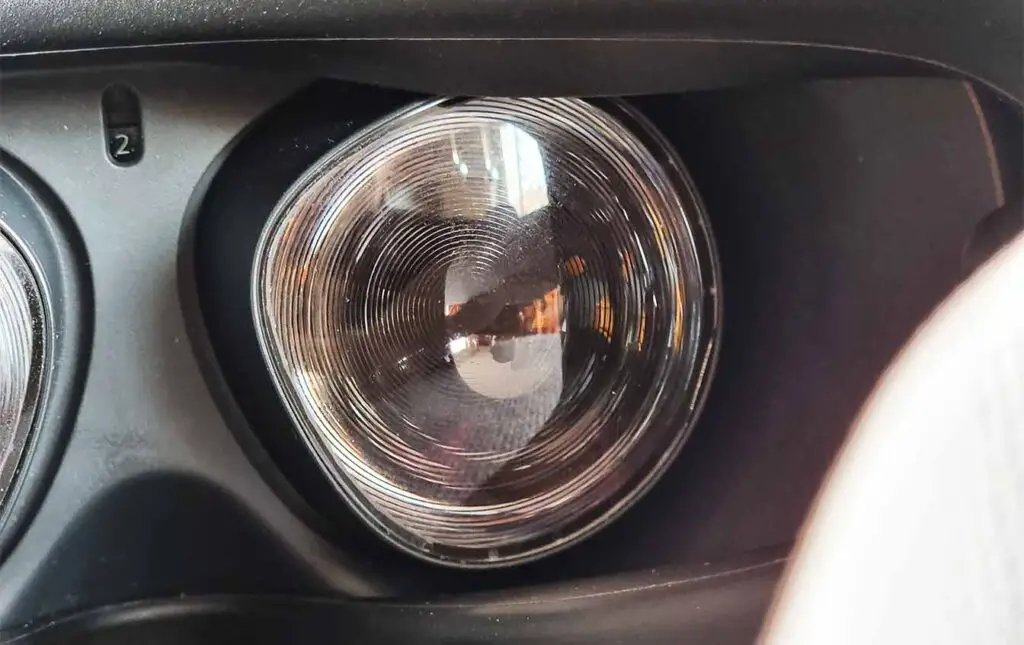
Yes, as almost all types of magnification lenses used in VR do, Fresnel lenses used in the Meta Quest 2 also suffer from phenomena such as chromatic aberration and lens distortion, particularly on their very edges.
There is a “sweet spot” located more or less in the middle/bottom middle of the visible image in the headset, in which the image is the most sharp and detailed. The farther from the center you look, the “softer” the image will get, and the less detail you’ll be able to see.
When you get very close to the edge of the visible field of view, you might for example have trouble reading smaller on-screen text. This however, is not a big issue, as there really aren’t many situations in which you need to look around using your eyes only in most of the currently popular VR world contexts.
In my personal experience, the lens distortion was noticeable when you looked at the edges of the visible FOV directly, however it wasn’t immersion breaking at all.
I’m sure that it could bother some people, but I really didn’t think much of it after I noticed it for the first time. During the next minutes of gameplay it slowly became nearly unnoticeable.
But, what does the Quest 2 FOV really feel/look like? If you’ve ever heard a “swimming mask” field of view comparison when it comes to VR headset experiences of people online, it’s pretty much valid for the Quest 2. However, the key here is that reading all these user testimonies I was pretty much 100% sure that it’ll bother me enough to convince me not to continue using the device. My biggest surprise was that it really didn’t!
You really stop noticing the screen edges when you automatically focus on what’s happening inside the VR world. At least that was my experience with the ~90 degrees FOV on the Meta Quest 2.
Now let’s elaborate a little bit more on the Quest 2 field of view.
FOV – Field of View and The Immersion Factor
Many people stress about the differences in FOV between different commercial VR headsets on the market, especially when they are planning the purchase of their very first virtual reality device – and so did I!
Having read much about the FOV issues and experiences online I finally got the chance to test it by myself. What surprised me the most here was that while almost all the things I read online came to be true, I wasn’t disappointed at all!
To put it together well, the FOV experience on the Quest 2 is really decent and for me my experience with the advertised 90 degrees field of view on the device went like this.
Once I’ve put on the headset for the very first time, I did first inspect the FOV range by looking around with my eyes and without moving my head. The very first thing that was noticeable was surprisingly not the limited FOV, but the natural characteristics of the Fresnel lens edges we already went through in the previous paragraph.
As we’ve already said, while the field of view of the Quest 2 isn’t really close to the “real-life” FOV experience, you really stop noticing the limitations after a few minutes of being immersed in the virtual world.
The overall FOV, as you’ll learn in the next paragraph, largely depends on your chosen IPD setting – or rather, one of the three available IPD presets.
Quest 2 IPD Settings – Where & How
On the Meta Quest 2 you have access to 3 IPD settings, and if you’re searching for a button or switch to adjust them – there isn’t one. The IPD is set by moving the lenses by hand – just remember not to touch the actual transparent surface of the lenses so as not to dirty them.
Yes, on the Quest 2 you have only 3 IPD setting presets available. The settings labeled “1”, “2” and “3” correspond to 3 increasingly higher IPD values – 58 mm, 63 mm and 68 mm.
To set your desired IPD, simply try and move the lenses closer together for lower IPD value, or farther apart for higher IPD presets. The lenses will snap to one of the three IPD preset positions, and the preset choice will be reflected on the small IPD indicator that is located in between them.
The main rival of the Quest 2 – the Pico 4 standalone VR headset is way ahead on Meta in terms of IPD adjustment, enabling you to set your desired IPD with accuracy up to 1 mm using its built in motorized lens mechanism. On Pico 4, you can set your IPD anywhere in between 62 and 72 mm – all without taking off the headset.
I personally found the second preset to be most comfortable for me, the first one offering a noticeably smaller FOV than the second, and the third one giving me the best FOV, albeit also making me notice a lack of overlap of the two lenses in the middle of the visible image, in turn messing with the stereoscopic depth perception effect during gameplay.
Keep in mind that your IPD setting will depend on your own interpupillary distance – there are a few ways to measure it by yourself at home!
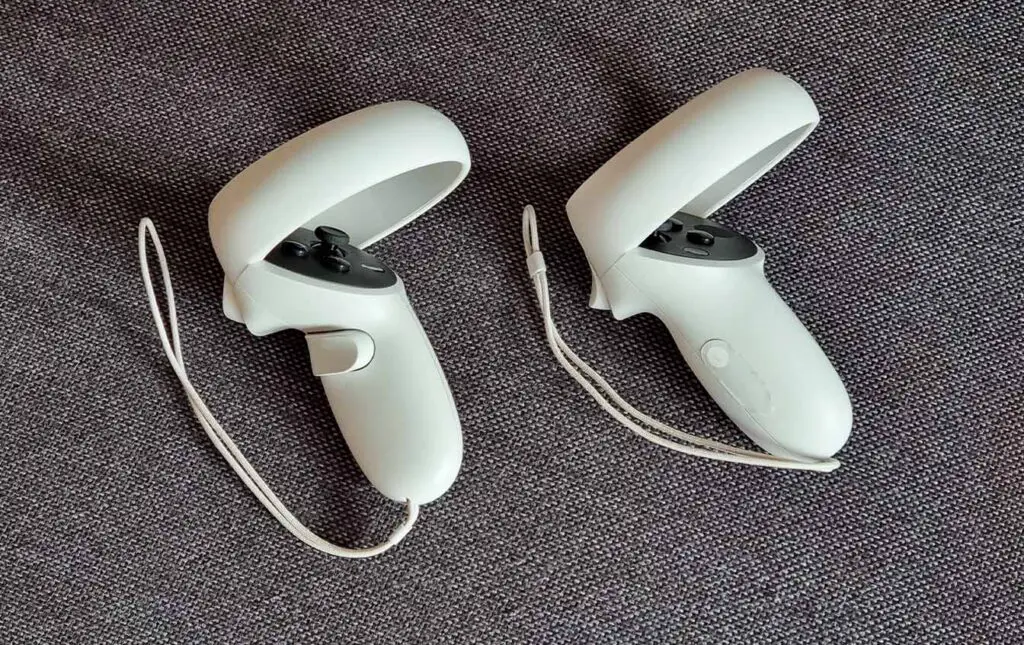
The Controllers – A Closer Look
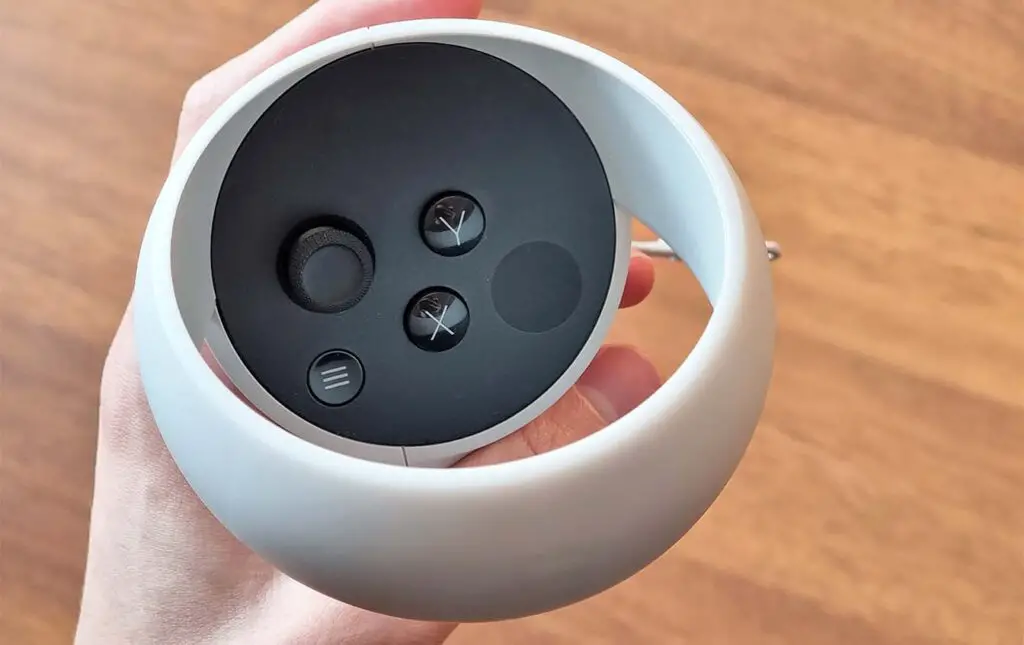
First of all, the Meta Quest 2 controllers in my honest opinion are really well designed. They are light, easy to hold on to, and the controls themselves are well positioned and intuitive.
Despite that though, learning the positions of the smaller function buttons (namely the settings button and the Oculus/Meta menu button) was a process – albeit a pretty short one!
Both controllers do have capacitive touch features, meaning that some apps and games will detect whether or not your fingers actually are touching the controller’s buttons or not.
The controller battery life was really good. In fact, the battery levels haven’t really dropped throughout all of our tests! This is really good news, knowing that many times over VR headset controllers are really power hungry (yes, we’re looking at you HP Reverb G2!).
Finger tracking was also pretty fun to use, although as of now still not many games and experiences actually make use of it. Nevertheless it’s a great extra feature to have on board!
Games & Experiences – Quest 2 In Practice
Having tested quite a few games and experiences already including Epic Roller Coasters, Keep Talking and Nobody Explodes via PCVR Air Link and YouTube VR I soon had an even better image on what the Quest 2 experience really is like. And quite frankly it’s really impressive for a device at this price point!
Here is the summary of the few chosen apps I tested:
- Epic Roller Coasters & Other Native Quest 2 Experiences – The native standalone Quest 2 experience was really good, and just about what I expected. There were no performance issues along the way, most loading times were blazing fast, and the graphics were pretty good all throughout the apps and games I played (albeit nowhere on the level of games streamed from a PC via Air Link). There were a few issues here and there including visible aliasing on some texture edges, although nothing major did come up during the tests.
- Keep Talking And Nobody Explodes (Steam Version, PCVR via Air Link) – This was the place where the Quest 2 really impressed me! With the right quality of Wi-Fi connection the wireless Air Link capabilities were really something. More on that in a short while!
- YouTube VR – Here is the only part where I was only slightly disappointed. While this is by no means an issue with the headset itself, the 360 videos on YouTube for me just didn’t cut it. For some reason, even the true 4k-8k videos I chose for the tests seemed rather low quality when viewed in VR. Well, low compared to the actual game experiences rendered in real time, which really is to be expected from a pre-recorded and compressed video material. Again, not a real issue at all, just my honest opinion based on my expectations.
Moving on!
Quest 2 – Wireless PCVR Experience Without The Virtual Desktop App
The wireless PCVR experience was simply great. One of the games I tested and already mentioned was Keep Talking And Nobody Explodes. A rather simple game without many complex visuals, that still was really pleasant to go through together with my testing buddy.
To be exact, we tested the Meta Quest 2 connected wirelessly to a VR-ready PC via a fast 5 GHz connection using the Quest’s built in PCVR streaming utility – Air Link. Another way to get even better results is to use the Virtual Desktop App which is readily available to purchase on the Quest 2 App Store – albeit we haven’t tested that in this review.
When it comes to the actual PCVR experience, there was no trouble with image transmission and no visible latency that would bother me. I have to be honest I might have got too immersed in exploring even the simple game menu lobby area, which in VR made me want to take a closer look at each and every detail of the simplified interior design of the room.
The quality – great, latency – next to none, the experience – good enough to make me forget about the limited FOV and natural lens distortion that I both mentioned in the beginning. All in all, pretty impressive!
The only thing that I noticed is that in the main Air Link screen where you could control your PC using the Meta Quest 2 controllers (which worked great by the way) there were a few graphical glitches on the very edges of the visible field of view which appeared when I made faster head movements. I presume that this is a simple software bug, as this only happens on that very screen.
Battery Life And Other Concerns
Meta Quest 2 was advertised to work for up to 3 hours without being plugged in to charge. My experience was about 2-2.5 hours of battery life during my tests with the screen brightness turned all the way up and the sound volume somewhere around 50% (without using external headphones).
Keep in mind that you’ll most probably want to charge your Quest 2 before the battery falls into single digits, so in reality you’re looking at more or less 2 hours of uninterrupted gameplay and being fully immersed in the virtual world without worrying about your headset dying on you.
The battery life of the controllers I already mentioned, and to repeat it once again – it’s great. The AA batteries inside the controllers will last you for many gaming sessions and long hours of gameplay before they’ll need to be replaced. Very neat!
The Conclusion – Is the Meta Quest 2 Still Worth Getting?
Let’s get to the final verdict! After all these tests you most likely would like to ask whether or not the Meta Quest 2 is still worth it today, and my straightforward answer would be – yes, very much so!
If you’re searching for an affordable VR headset, your very first virtual reality device, or a great gateway into countless wireless PCVR gaming experiences the Quest 2 is definitely a good choice for you.
This is my conclusion after thorough tests, and all that’s left for me now, is to wonder where will the VR technology be in a decade from now. With that said, hope I was able to help you at least a bit!
Stay tuned for our other hands on reviews of different interesting and worthwhile pieces of tech! Until next time!
| Meta Quest 2 on Ebay: |