

Yes, you can install Windows 11 on most old laptops that Microsoft calls “unsupported”, and in fact, you don’t need Rufus to do it. The TPM 2.0, Secure Boot and “supported CPU” checks can all be skipped, and the free tool Ventoy does it all for you automatically, without any need for ISO file editing. There is one wall you can’t get past, though. Since version 24H2, Windows 11 does need a CPU with the SSE4.2 and POPCNT instructions present, which rules out, for instance, Core 2 Duo laptops, and also anything older than that (so most laptops sold before 2010), no matter which bypass you use.
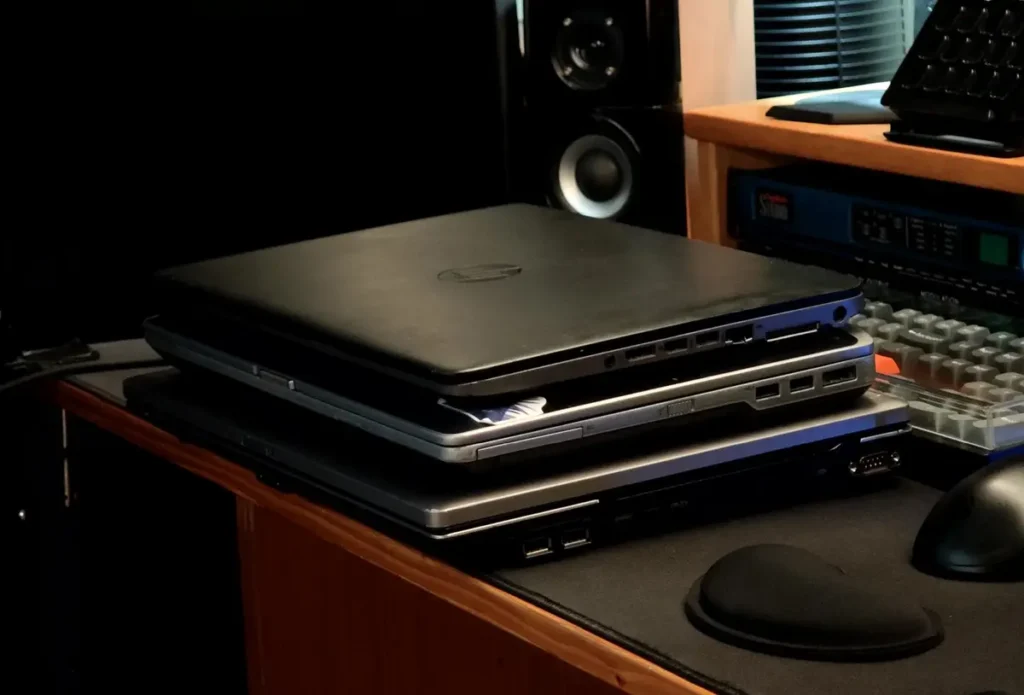
To show you how this looks in practice, for the sake of this article I went through the whole process on three old laptops I was able to get my hands on, each one older than the last. An HP EliteBook 840 G2 from 2015 took Windows 11 without any trouble, a Dell Latitude E6430 got there slowly, and a 2008 HP Compaq 6730b refused to boot the installer at all, so it got the Linux Mint treatment instead. Below are the exact steps I used, and the fix for every error I ran into during the process.
Methods last checked: November 2026 – I tested everything below on Windows 11 25H2 in July 2026, and re-checked each method against Microsoft’s latest changes in November 2026. The hardware bypasses should still work as shown, but Microsoft keeps closing the ways to skip the Microsoft account during setup, so that step below comes with possible fallbacks in case the main trick stops working.
You might also like: How To Install Windows XP in VirtualBox – Full Tutorial
Will Windows 11 Run On Your Old Laptop?
Most official Windows 11 requirements are only software checks run by the installer, and those can be switched off and bypassed. The real limits are the actual hardware requirements that the system needs to boot (and without them it will refuse to run at all).
| Requirement | Official minimum | Can you bypass it? |
|---|---|---|
| Supported CPU | Intel Core 8th gen or AMD Ryzen 2000 and newer (with a few exceptions) | Yes |
| TPM | TPM 2.0 | Yes |
| Secure Boot | UEFI with Secure Boot support | Yes |
| RAM | 4 GB | Yes |
| 64-bit CPU | Required (no 32-bit version exists) | No |
| SSE4.2 and POPCNT | Required since version 24H2 | No |
The quickest way to check is to find out the exact CPU model on the laptop you want to install Windows 11 on. Every Intel Core i3, i5 and i7, including the very first generation from 2008-2010, supports both SSE4.2 and POPCNT, so all of them can run Windows 11 once the checks are out of the way.
Core 2 Duo, Core 2 Quad, older Pentium Dual-Core and Celeron chips, and AMD’s Athlon II and Phenom II processors, on the other hand, mostly don’t, and on those, Windows 11 won’t start, no matter which software checks you bypass. If you’re not sure, the free CPU-Z app lists the supported instructions on its main tab, and if you see “SSE4.2” there, you’re good to go.
Don’t count on an older Windows 11 version as a way around this either. Technically, the older Windows 11 23H2 still boots on these CPUs, but its Home and Pro editions stopped getting security updates in November 2025, so there is no real point in installing it today.
As for RAM, 4 GB is the official minimum, but in my experience (and by general consensus) 8 GB is pretty much the minimum you’ll actually want for Windows 11 to feel usable, and having the system installed on an SSD instead of an HDD matters even more (more on that below).
Should You Do It? – Microsoft’s Stance On Unsupported Devices
Microsoft is clear on this. If you install Windows 11 on a PC that doesn’t meet the requirements, it “won’t be entitled to receive updates”, and Windows will remind you of that with a small “System requirements not met” note in Settings. In practice, my EliteBook did get its updates right during and after the setup, but there’s no guarantee this will last, and the upcoming larger yearly versions may need a manual install as time goes on.
If your laptop still runs Windows 10, there’s also no rush, at least for now. Microsoft extended the free Extended Security Updates for home users until October 12, 2027, as long as you enroll (for example by syncing your settings with a Microsoft account).
What You Need Before You Start
The only hardware you really need is a USB flash drive with at least 16 GB of space, as the Windows 11 ISO alone is almost 8 GB. Apart from that, you’ll need:
- Ventoy, free from the official Ventoy download page (the Windows version is a simple .zip file).
- The official Windows 11 ISO from Microsoft’s download page, under “Download Windows 11 Disk Image (ISO) for x64 devices”. I used the 25H2 ISO, but you’ll want the newest one available.
- A backup of anything you want to keep from the laptop, as in many cases you’ll have to wipe its drive to proceed with the full install.
- The laptop’s power adapter. You want to do the whole install and all of the updates connected to AC power, especially on older hardware on which the battery can give out at any point, risking file corruption, a failed installation and data loss.
Why Ventoy and not Rufus? Since version 1.0.86, Ventoy bypasses the Windows 11 TPM, Secure Boot, CPU and RAM checks by default, so you just copy the original Windows 11 ISO and boot it, that’s it – no additional complicated setting tweaks. This, in my opinion, makes it one of the absolute best tools for installing Windows 11 on unsupported hardware, at least for now. Not only that, but it also lets you copy as many ISO files onto one USB stick as you want and pick one from a menu when booting from the flash drive, which is a very neat bonus if you want to be able to quickly switch between different ISOs later on for one reason or another.
Step 1 – Prepare The Ventoy USB Drive
Note: Installing Ventoy erases everything on the flash drive, so copy any files you want to keep off it first.
To make the Ventoy USB, do the following:
- Download the Ventoy .zip for Windows, extract it, and run Ventoy2Disk.exe.
- Pick your flash drive from the “Device” list, and double-check that you have selected the right one.
- Click Install and confirm both warnings if you’re sure that you want to erase all the data from the selected device and set up Ventoy.
- Once the installer is done, open the new Ventoy drive in File Explorer and copy the Windows 11 .iso file onto it.
Hint: while you’re at it, you can also download and copy the Linux Mint ISO onto the drive. It’s a great lightweight Linux distribution that can help you revive many older computers and retro hardware that can’t support newer versions of Windows. If your laptop turns out to be too old for Windows 11, you’ll have a plan B ready on the very same USB stick.
A note on Secure Boot: none of my laptops needed any changes here, as laptops this old often have Secure Boot off or won’t have it at all. If yours shows a “Security Violation” error when booting Ventoy, either turn Secure Boot off in the BIOS, or enroll Ventoy’s key once with “Enroll key from disk” on the blue screen that appears, as shown in Ventoy’s Secure Boot guide here. Ventoy 1.1.14 switched to a new key, so enroll it again if you’ve used an older version on that laptop.
Step 2 – Boot The Laptop From The USB Drive
Plug the Ventoy drive into the laptop, make sure that your charger is plugged in as well, then turn the laptop on and open its boot menu. The boot menu keyboard shortcuts differ from device to device, so if you can’t figure yours out from the hints briefly visible on the startup screen, you’ll have to look them up online.
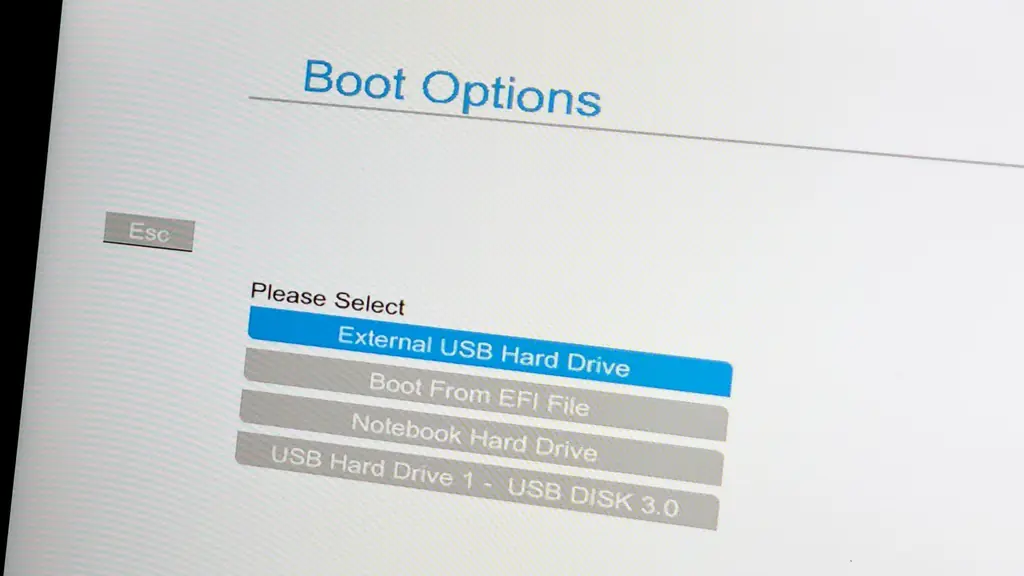
On my HP EliteBook, the right combination turned out to be the Esc key and then F9, which took me to the “Boot Device Options” menu. Then, in the boot device list I picked the external USB hard drive (Ventoy flash drives often show up like that).
On Dell, Lenovo, Acer and Toshiba laptops you can usually enter the boot menu using the F12 key, and on most ASUS laptops it’s simply Esc, but once again the boot prompt on the startup screen is the only thing that can tell you that for sure.
Can’t Boot From The USB? Switch From Legacy To UEFI
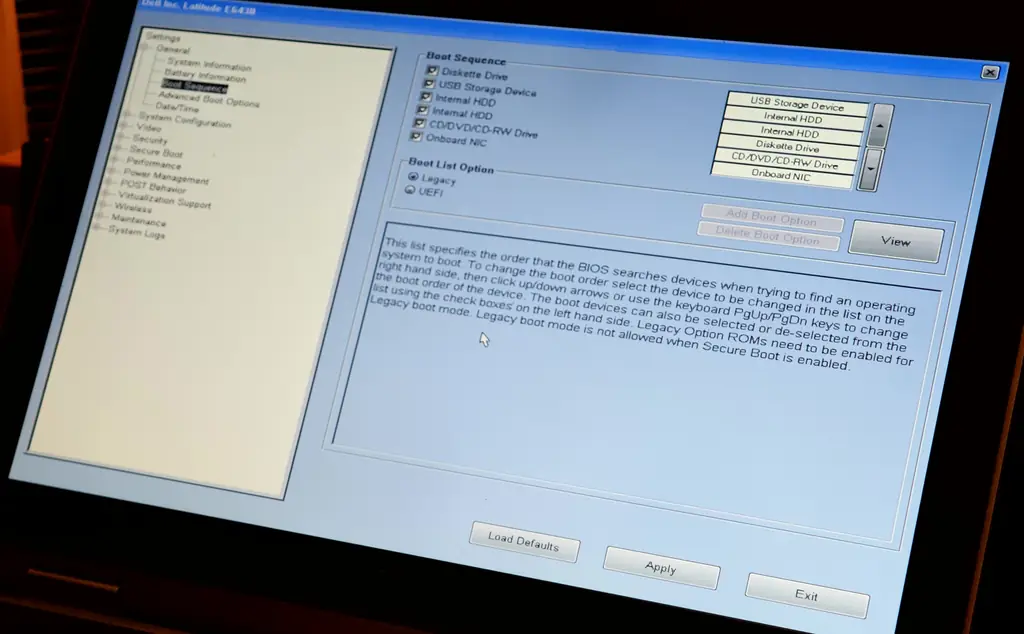
If the laptop won’t boot from the flash drive, or the Ventoy menu never shows up, check the boot mode in the BIOS first. Many laptops from the Windows 7 era are still set to the older Legacy boot mode, while Windows 11 officially requires UEFI. This was exactly the case with my Dell, which didn’t boot into Ventoy until I switched it over.
To do that, enter the BIOS setup using the key shown on the startup screen (F2 on Dell laptops, Esc and then F10 on HP business laptops like the EliteBook). Find the boot mode setting, which on my Dell was the “Boot List Option” on the “Boot Sequence” page, and on other laptops is often called “Boot Mode” or “UEFI/Legacy Boot”. Set it to UEFI, apply the changes, and restart, then open the boot menu again.
Even if your laptop boots Ventoy in Legacy mode, it’s worth switching to UEFI before you install, as that’s the mode Windows 11 is meant to run in. The old Windows 7 install on the drive most likely won’t boot in UEFI mode anymore, but that doesn’t matter for us here, as we will be wiping the drive in Step 4 anyway. That’s also where the UEFI switch shows up as the “GPT disks” error, together with its fix.
Step 3 – Pick The Windows 11 ISO In Ventoy
If the laptop boots from your flash drive, you’ll see the Ventoy menu with a list of all the ISO files you copied onto it. Select the Windows 11 ISO with the arrow keys and press Enter.
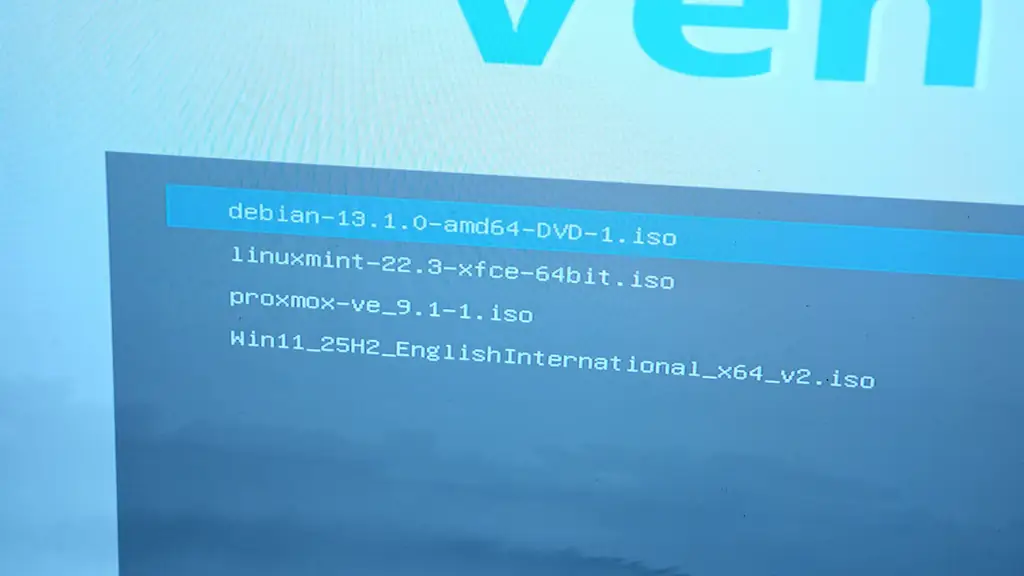
On the next screen, choose Boot in normal mode. If you then see the “Press any key to boot from CD or DVD” message, press any key quickly, and the laptop will start loading the Windows 11 installer.
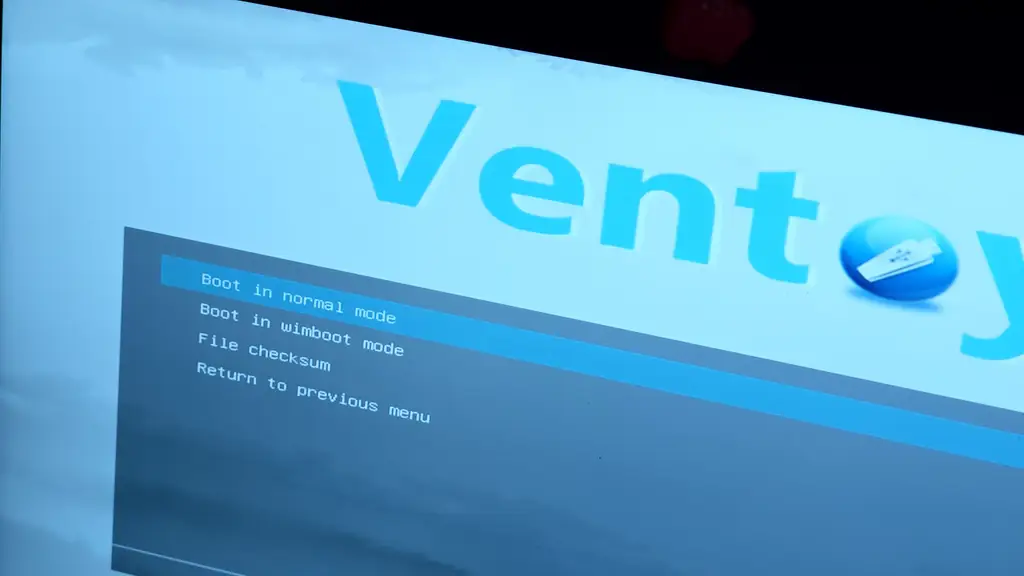
On an old laptop this process can easily take a few minutes (or more), so don’t worry if the logo stays on screen for a while. It’s better to wait it out than to interrupt the process and have to start over.
Step 4 – Run Setup And Fix The “GPT Disks” Error
From here on, it’s a standard Windows 11 installation. Pick your language and keyboard layout, choose “Install Windows 11”, and confirm that everything on the target drive will be deleted. When it asks for a product key, you can choose “I don’t have a product key”. Then select your edition (I went with Windows 11 Home) and accept the license terms.
If the laptop was activated on Windows 10 before, Windows 11 will usually activate itself once it’s online. When it comes to earlier versions though, Microsoft stopped accepting old Windows 7 and 8 keys for this back in 2023.
When you get to the “Select location to install Windows 11” screen, you might see a warning like “Windows 11 can’t be installed on disk X partition X”. Click “Show details”, and you’ll see the reason: Windows 11 can only be installed to GPT (GUID Partition Table) disks. Laptops that came with Windows 7 usually have their drive set up with the older MBR partition table, and Windows 11 in UEFI mode won’t be able to install onto it.
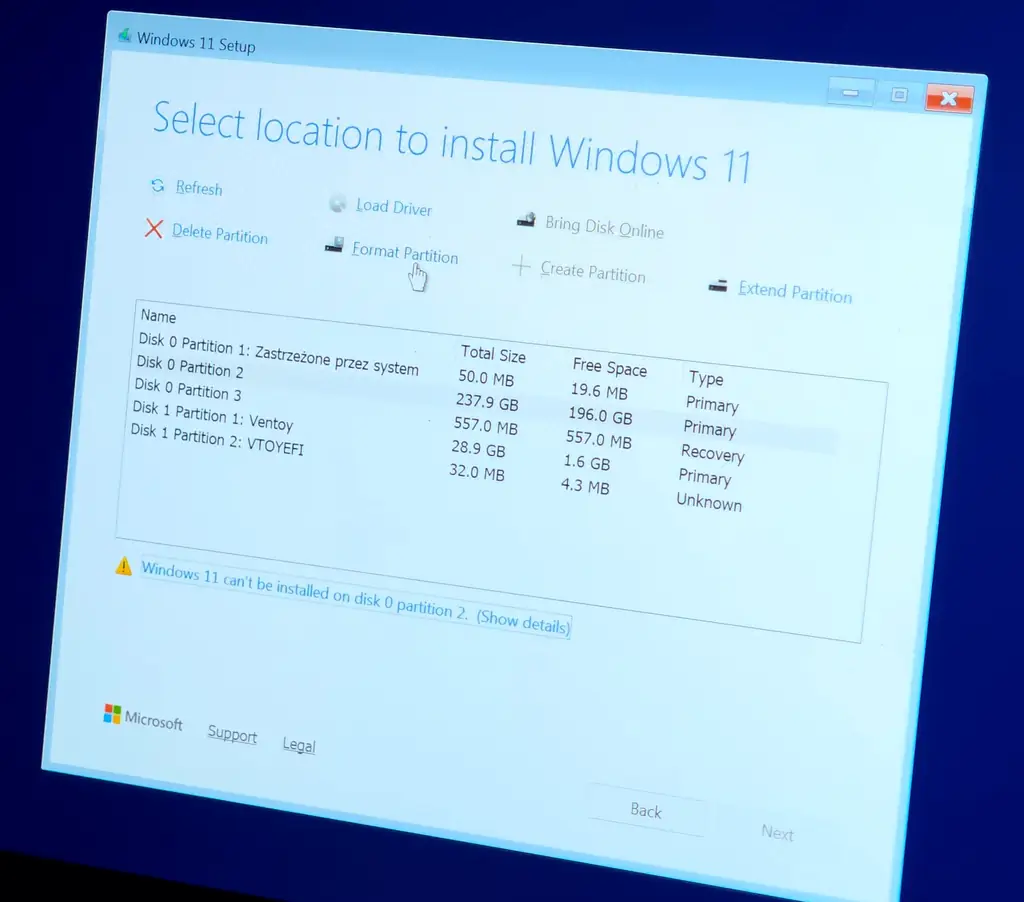
One easy fix here is to delete all partitions on the laptop’s drive (once you’re sure there’s no important data left on them, of course). Select each partition on Disk 0 (the laptop’s internal drive) and click “Delete Partition”, until the whole drive shows up as a single “Unallocated Space” entry.
The setup tool will then create a fresh GPT layout on its own, and the error will be resolved. Once again, this wipes all data on that drive, so do it only after your backup, and make sure you don’t delete any partitions on your Ventoy flash drive (in our case it displays as Disk 1, as you can see above).
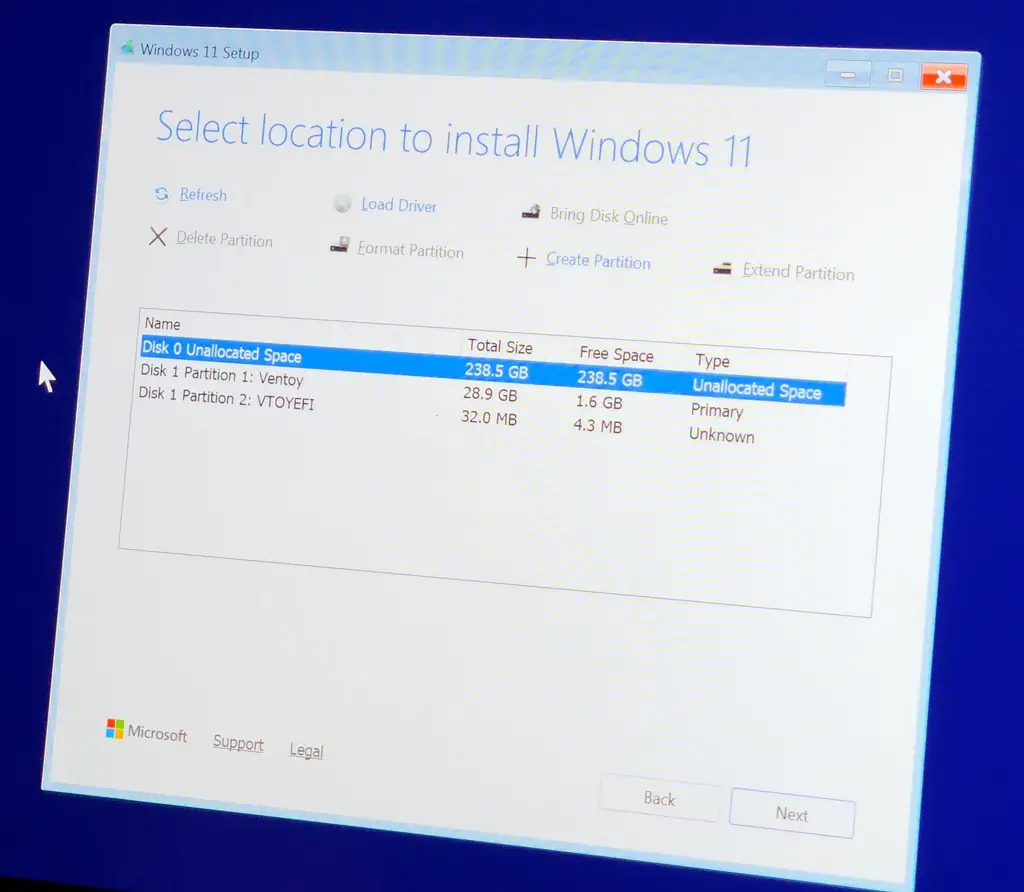
Select the unallocated space, click Next, and then Install. Now you just need to stay put until Windows 11 is installed on your machine, which took quite a while on my EliteBook and a lot longer on the Dell with its old and slow hard drive. This is a good time to grab a cup of coffee and wait for the installer to finish its work.
Step 5 – First Setup And a Local Account
After a restart, you’ll land in the familiar Windows 11 first-time setup menu. Choose your region and keyboard, connect to Wi-Fi, and name the device. Windows should then pull in the latest updates, which took about half an hour on my EliteBook. On the Dell, I chose “Update later” on that screen instead, because with its slow hard drive, it would have taken much longer than that. Feel free to do that on your machine as well, but remember to catch up on the security updates later on.
Hint: pull the Ventoy flash drive out before the next restart, or the laptop may boot into the Ventoy menu again.
Next, Windows will insist that you sign in with a Microsoft account, and there’s only a “Sign in” button on the screen, with seemingly no option to skip this step. The old trick of turning on airplane mode and clicking Retry did nothing for me, and setup simply sent me back to the network screen. Ventoy also tries to skip this account requirement on its own, but on my 25H2 ISO, that didn’t help either.
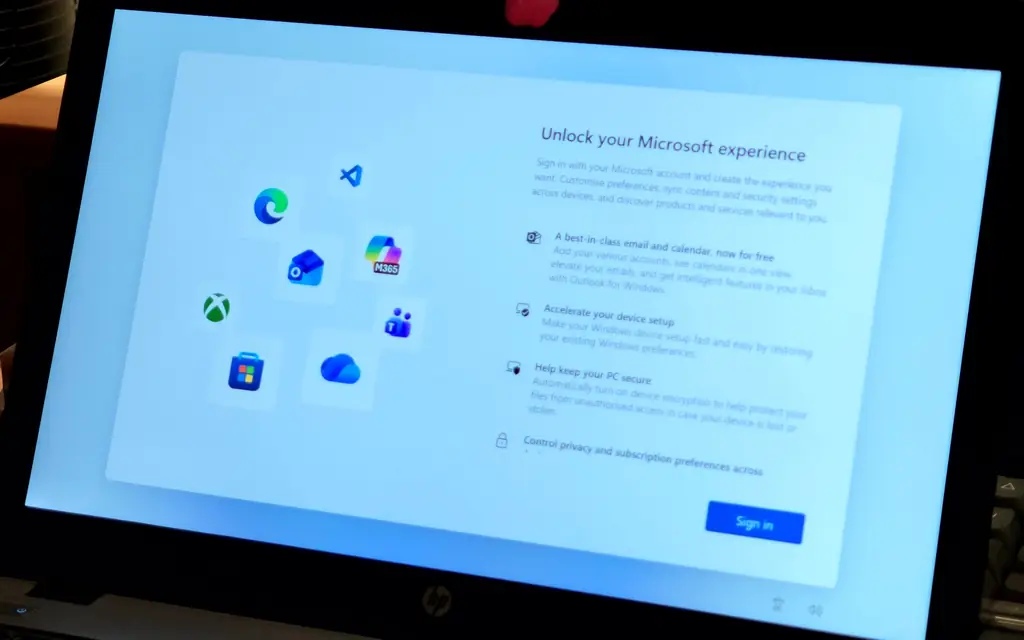
What worked on both of my laptops was this quick workaround:
- On the Microsoft account screen, press Shift + F10 (on some laptops, Fn + Shift + F10). A Command Prompt window will pop up.
- Type
start ms-cxh:localonlyand press Enter. - In the “Create a user for this PC” window, enter a user name, and optionally a password. This is a local account that lives only on this laptop.
- Click Next, and setup will continue without a Microsoft account.
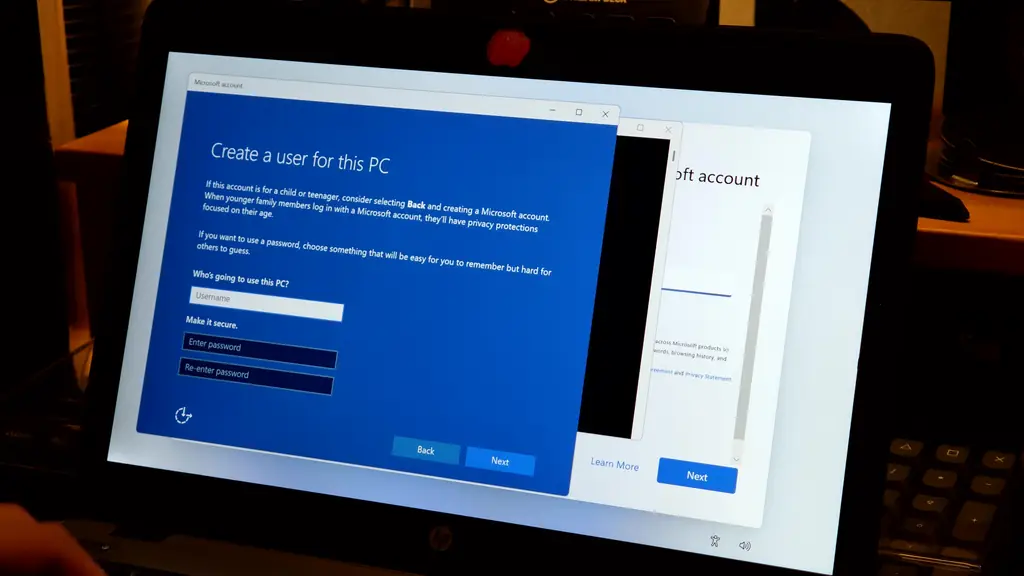
Keep in mind that Microsoft is actively closing these workarounds. This command worked on my 25H2 ISO in July 2026, but Microsoft already removed it in Insider test builds, so it may stop working with a newer ISO.
If the command does nothing for you, the most dependable fallback is to initially sign in with a temporary Microsoft account (you can create a new one just for the setup), and then switch to a local one in Settings -> Accounts -> Your info -> Sign in with a local account instead. A Rufus-made USB with its “Remove requirement for an online Microsoft account” option is another way around it (see the other methods section below).
A few minutes later, you’ll get the privacy screens. I said no to location, Find my device, inking and typing and personalized offers, and chose “Required only” for diagnostic data. And that’s it, if everything went smoothly, you should now land on the Windows 11 desktop.
My Results On All Three Laptops
HP EliteBook 840 G2 (2015) – “It Just Works”
This one still has its Windows 7 sticker on the palm rest, and it runs Windows 11 without any problems. Inside, it has an Intel Core i5-5200U (a 5th-gen dual-core chip with four threads), 8 GB of RAM and a 256 GB SSD, and apart from the rather common GPT error, the installation went through without a hitch.
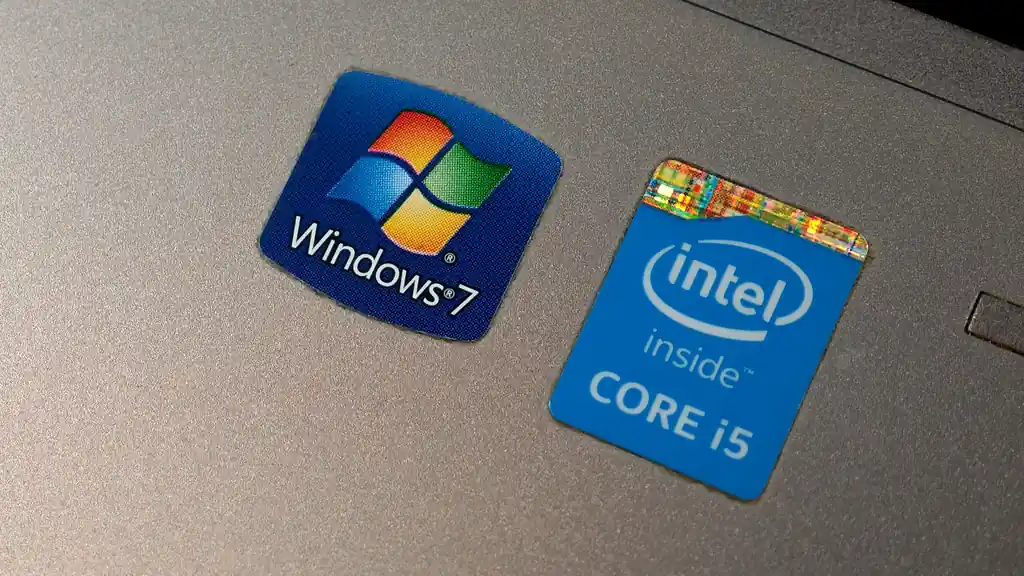
Right after the setup, Windows was already using almost half of the 8 GB of RAM, and the fan was working overtime, clearly calling for a CPU repaste. I’d say that after a repaste, this laptop would be perfectly usable for very basic office work and web browsing, as long as you don’t expect miracles from a decade-old dual-core CPU.
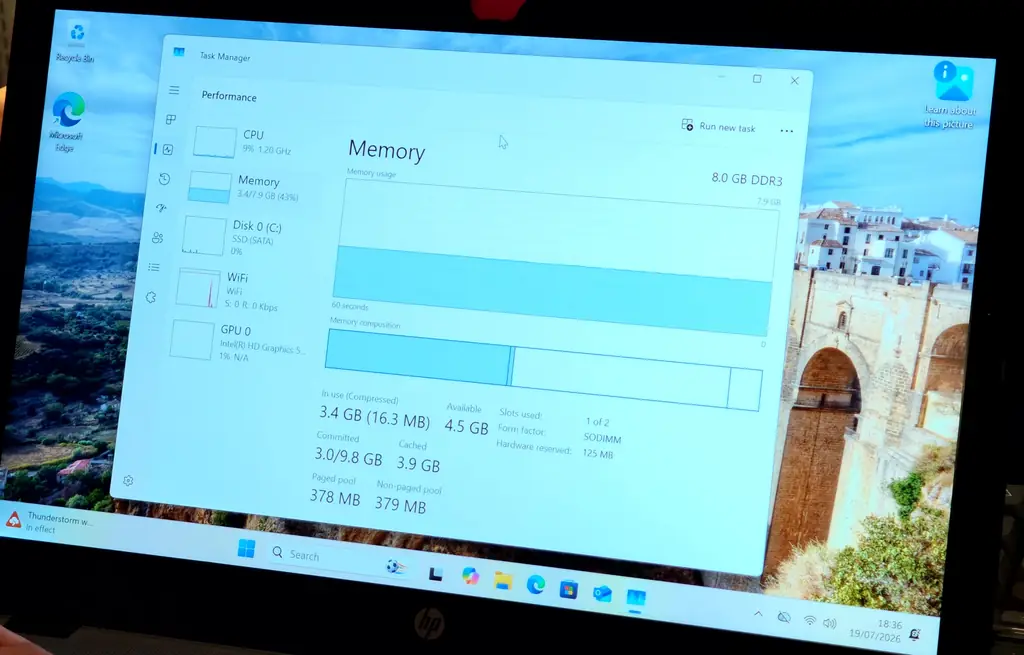
Dell Latitude E6430 (2012) – It Works, Albeit Slowly
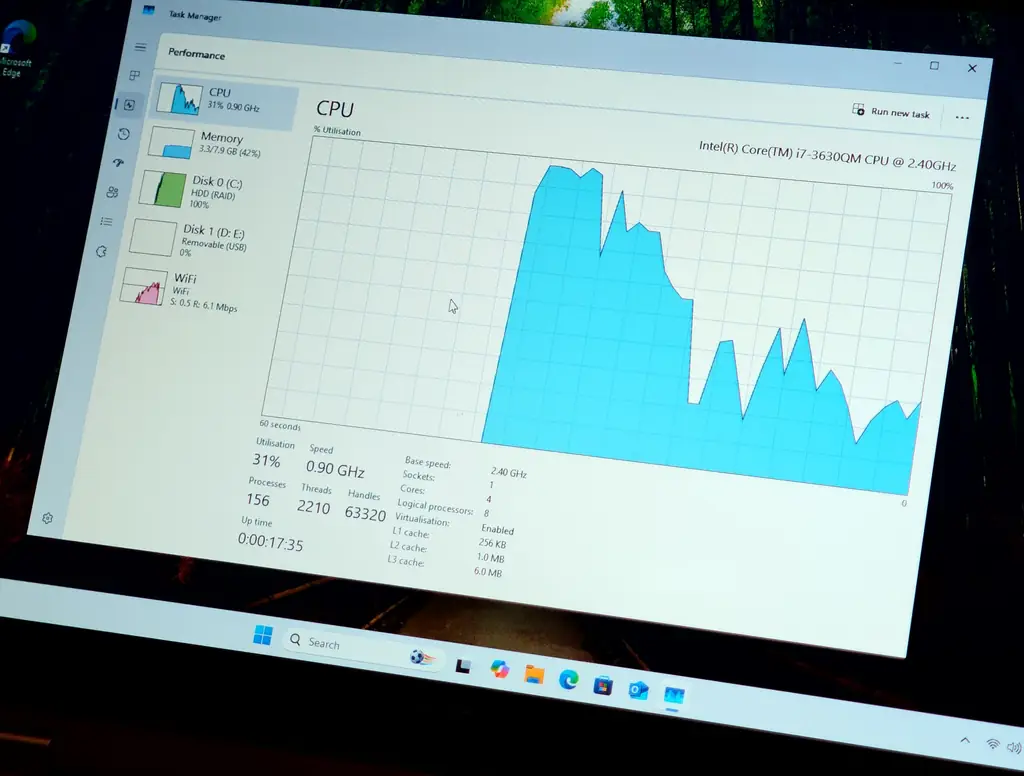
My second laptop was a Dell Latitude E6430 with an Intel Core i7-3630QM (3rd gen, 4 cores and 8 threads), 8 GB of RAM, a 500 GB hard drive, a dead main battery and a dead CMOS battery. On top of that, its hard drive made sounds that, at least to my ears, didn’t promise a long life, both during the Dell’s onboard diagnostics and later on during the setup.
To my honest surprise, Windows 11 installed and booted without errors. Still, every part of the setup was excruciatingly slow, and the desktop naturally stayed sluggish afterwards. As Task Manager shows below, the CPU might not be the main problem here. The hard drive sat at 100% activity all throughout the initial setup and tests. With an SSD instead, this laptop could certainly be much more usable for simple use cases.
HP Compaq 6730b (2008) – Windows 11 Doesn’t Boot
The third laptop, an absolute chunk of a mid-range business machine from 2008, booted into Ventoy just like the other two. As expected, though, the Windows 11 installer never got past the initial Windows logo. The fan spun up to full speed, then the laptop sat idle on the logo for something like 30 minutes, and that was pretty much it.
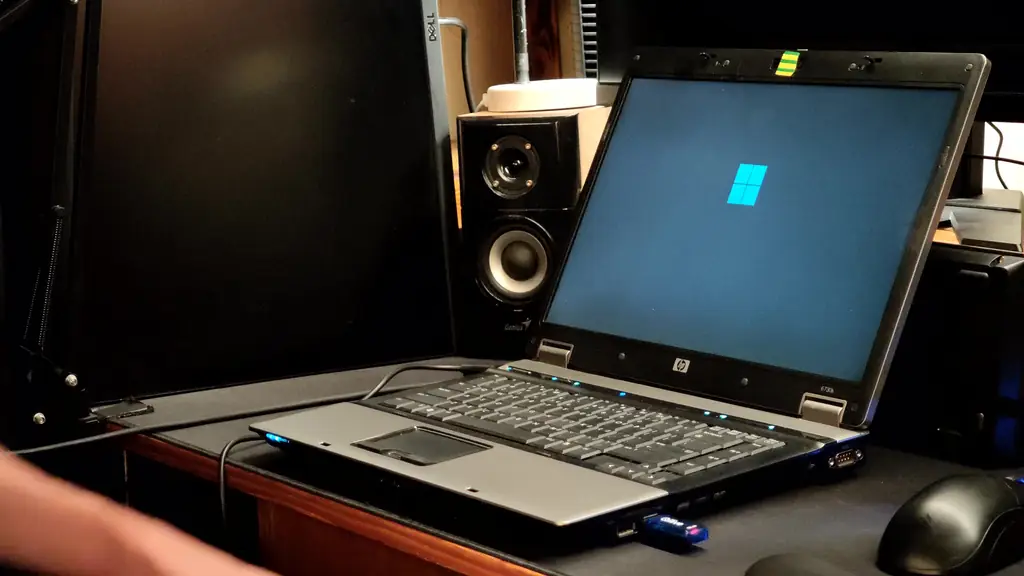
The reason for this, as we’ve already established at the very beginning, is the CPU. This laptop has an Intel Core 2 Duo P8600, which doesn’t support SSE4.2 or POPCNT instructions, and as of version 24H2, Windows 11 can’t be installed or run on CPUs like this. On top of that, this machine has just 2 GB of RAM. No Ventoy, Rufus or registry bypass can help in this situation, so naturally, I switched to plan B.
Plan B For Really Old Laptops – Linux Mint
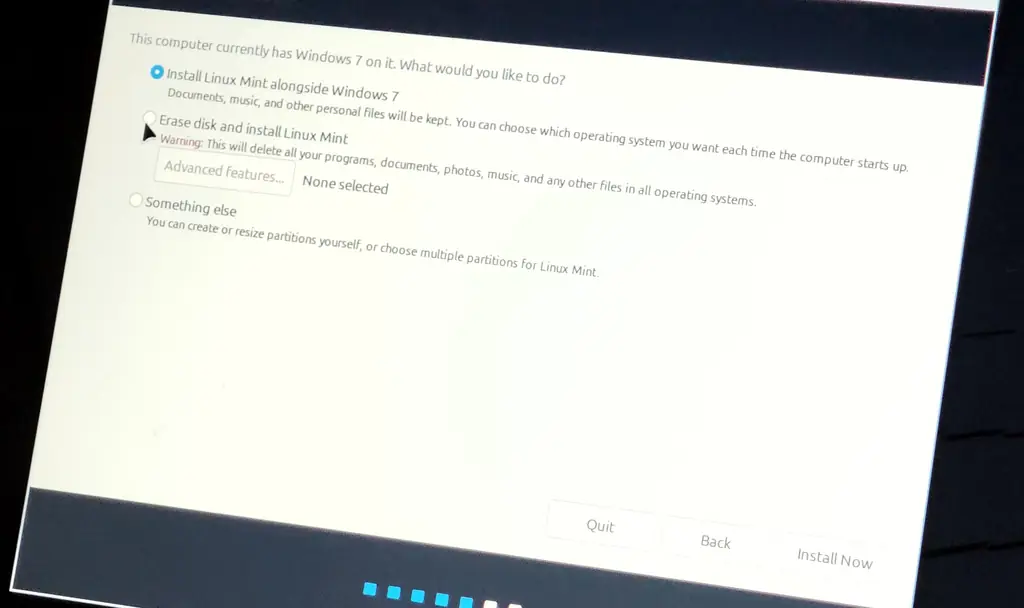
Since I already had the Linux Mint Xfce ISO on the same Ventoy drive, the process was almost the same, that is, select the Mint ISO in Ventoy, choose “Boot in normal mode”, and then “Start Linux Mint”. This runs Mint straight from the flash drive (slowly, but it got there), and from that live desktop, I promptly started the “Install Linux Mint” shortcut.
The Mint installer is rather simple, and you install it in a very similar way to Windows 10 or 11. You pick your language and keyboard, connect to Wi-Fi (or skip that part entirely), and then tick the option to install the most important multimedia codecs. Mint also detected the old Windows 7 install and offered to keep it alongside Linux. I didn’t need it anymore, though, so I chose Erase disk and install Linux Mint, picked the drive, set up a user name and a password, and waited for the installation to finish.
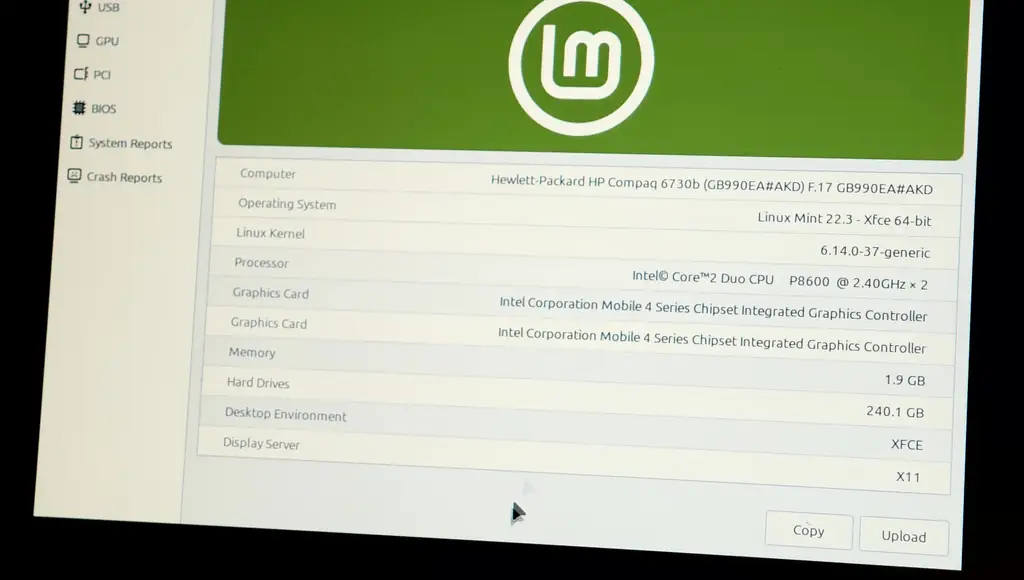
The result is a fully working, up-to-date system on a laptop from 2008, with security updates until 2029, when support for Mint 22.x ends. With 2 GB of RAM it’s not going to be fast, especially in a modern web browser, but simple tasks like text editing should work reasonably well. I picked the Xfce edition on purpose, as it’s the lightest of Mint’s three desktop editions.
And yes, you can do much more on Linux today than five or six years ago. Spotify and Discord have Linux apps, WhatsApp and Netflix work in the browser, and LibreOffice can stand in for Microsoft Office in most cases. If Windows 11 won’t even start on your laptop, Mint is definitely worth a try before it ends up in a drawer. Thus, our “Plan B” as well as the obligatory Linux rant conclude here.
Other Ways To Bypass The Windows 11 Requirements
Before we get to the alternatives, keep in mind that these methods switch off the very same checks as Ventoy, so they will hit the same SSE4.2/POPCNT hardware wall on the oldest CPUs.
Rufus is the best-known option, and one that’s recommended in most “Windows 11 on an old PC” tutorials. When you create a Windows 11 USB with it, a “Windows User Experience” window lets you tick “Remove requirement for 4GB+ RAM, Secure Boot and TPM 2.0”, “Remove requirement for an online Microsoft account” and “Create a local account with username” options, which essentially attempt to do the same things that Ventoy does with the Windows 11 ISO out of the box.
Then, the LabConfig registry keys are the manual way of doing what Ventoy does automatically. Boot from a regular Windows 11 USB, and when setup tells you that the PC doesn’t meet the requirements, press Shift + F10 and enter these four commands one by one:
reg add HKLM\SYSTEM\Setup\LabConfig /v BypassTPMCheck /t REG_DWORD /d 1 /f
reg add HKLM\SYSTEM\Setup\LabConfig /v BypassSecureBootCheck /t REG_DWORD /d 1 /f
reg add HKLM\SYSTEM\Setup\LabConfig /v BypassCPUCheck /t REG_DWORD /d 1 /f
reg add HKLM\SYSTEM\Setup\LabConfig /v BypassRAMCheck /t REG_DWORD /d 1 /f
Once you’ve done that, close the Command Prompt, go back one step in setup and continue, this time without the error.
Tips That Matter More Than The Install Method
An SSD is now pretty much a requirement for Windows 11 on old hardware. Our Dell example here showed this rather well. When Windows runs out of RAM, it moves data to the page file on the system drive, and on a hard drive, which is many times slower than an SSD, this slows the whole system down substantially and keeps an already old drive working nonstop. Even a small, cheap 2.5″ SATA SSD is the biggest upgrade you can give a laptop like this, and of course it’s best to fit it before installing the OS. Just make sure to get one from a known brand, as cheap no-name SSDs are a common target for fakes with less storage than advertised.
8 GB of RAM is the realistic minimum. Windows 11 will run with 4 GB, but it will lean on the page file all the time, which brings us right back to the SSD point above. Many business laptops from the early 2010s have two RAM slots and take cheap DDR3 sticks, so it’s worth checking yours.
Expect a few missing drivers. Windows Update usually covers the basics on business laptops like these, but older card readers or fingerprint scanners may have no Windows 11 drivers available. Keep that in mind if you rely on any of these.
So, Is It Worth It?
In my eyes, definitely, as long as your laptop has a Core i-series CPU or newer, 8 GB of RAM and an SSD. My EliteBook, a laptop that shipped with Windows 7, can now easily run Windows 11 25H2 well enough for everyday office work, and the whole process needed nothing more than one flash drive and less than an hour in total. The Dell, if anything, proved that on these machines, the hard drive is the weak point far more often than the CPU. For anything older, like the 6730b, Linux Mint gives the laptop a second life that Windows 11 simply can’t.
And that’s pretty much it. Thanks for reading, and see you next time!