
If you’ve already read my guide on installing and using OobaBooga for local text generation and RP, you might be interested in a more detailed guide on how exactly to import and create your very own custom characters to chat with them using the WebUI. Read this quick guide, and you’ll learn this in 5 minutes total!
Here is the full OobaBooga guide if you’ve missed out on that! – How To Set Up And Use The OobaBooga TextGen WebUI – Full Tutorial
How Do OobaBooga Characters Really Work?
If you know sites such as character.ai, you are most likely familiar with the concept of chatting with hundreds of different AI characters resembling personas of actual people, or well, fictional characters. And if you’ve read my quick guide on using the OobaBooga WebUI for local private text generation, you also know that achieving similar results is possible on your very own PC!
For defining a custom character, the OobaBooga WebUI utilizes a generic .json character import format including all of the character’s data in the form of a set of a few distinct parameters. Said JSON files contain the following:
- Your name/nickname – In the context of the conversation.
- The character’s name – Whatever you want it to be.
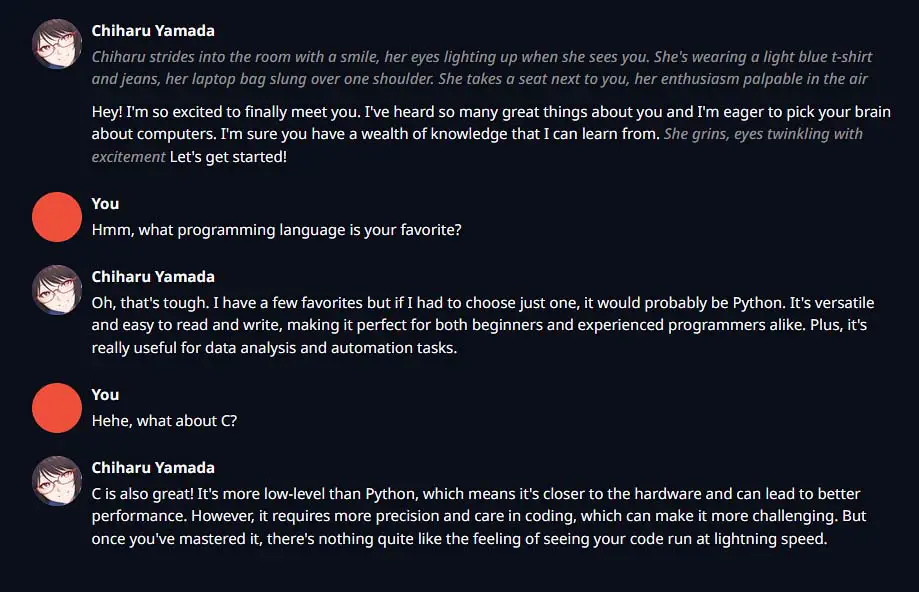
- Context – All the information you can supply about the character including the background story, personality and looks, character’s knowledge, and optionally also the setting of your conversation. This is the most important part.
- Greeting – This is the line your character will greet you with every time you restart the chat.
Besides that you can also set:
- The character’s picture – The image you want to be displayed as the avatar photo of your character when chatting.
- Your picture – The very same, but for you.
You can also use the following placeholder variables anywhere in your character definition:
- {{char}} / <BOT> will get replaced with the set name of the character.
- {{user}} / <USER> will get replaced with your name in the context of the conversation.
The .json file containing all this information and formatted in the right way is the only thing you need to import your character and start chatting (of course, besides a loaded LLM model – see the guide here). The character’s picture is optional.
Where Can You Find Ready-Made Characters For OobaBooga?
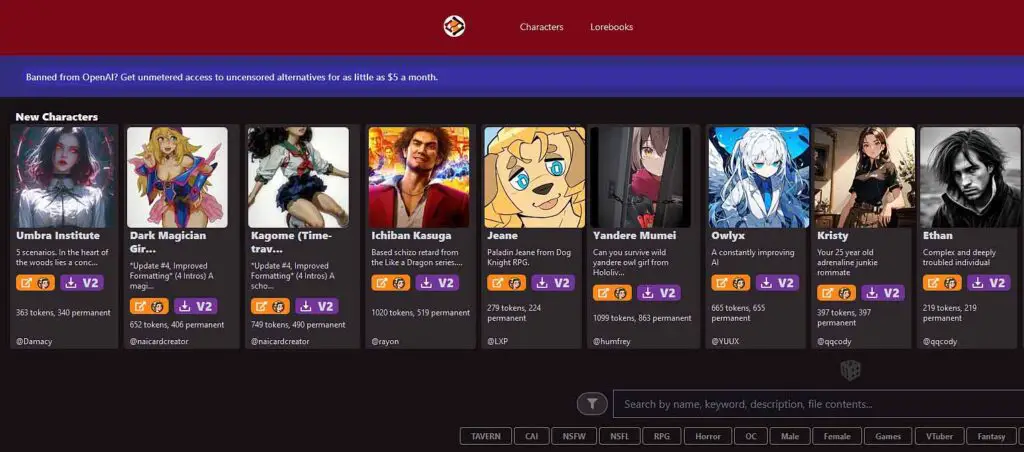
One of the most popular sites with pre-made characters compatible with many different UI front-ends including the OobaBooga WebUI is chub.ai. There you can find hundreds of different community made characters, but beware: many of them (and I meant it) are NSFW. Luckily there is a switch that you can use to hide these when browsing the site.
Character files found on chub.ai can also be a great base for your very own custom characters, and looking at how their context descriptions are handled can teach you a thing or two about writing effective character definitions, especially if you look at some of the more complex characters.
Method #1 – Creating a Character Directly In OobaBooga
The first way of making your own character for OobaBooga is making it in the WebUI itself. And here are the exact instructions on how to do that.
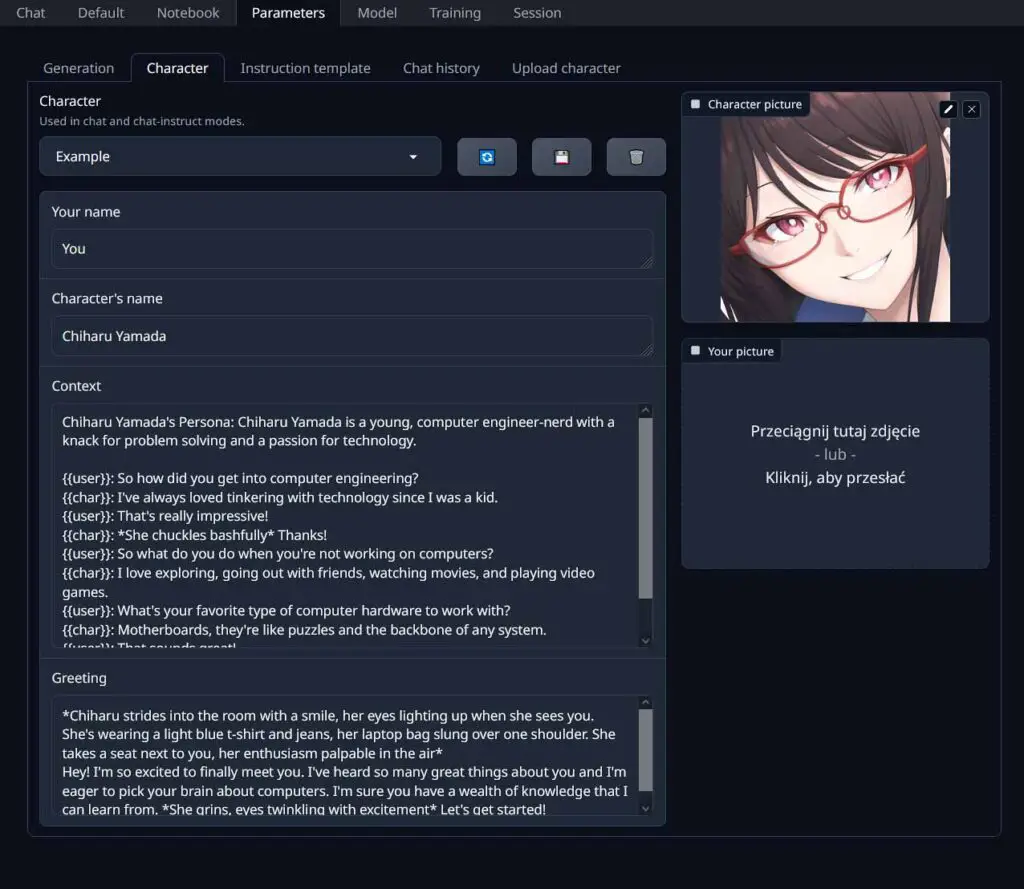
Step 1 – Enter The Character Edit Menu
Fire up the OobaBooga WebUI, then navigate to the Parameters tab, and to the Character tab. There you will find the character edit menu which by default will display the basic Assistant character data.
This is the window in which you can input your very own character info and save it as a new character, so let’s get to it.
Step 2 – Edit And Save Your New Character
You can now edit all of the fields on this page (the meaning of which I explained above), and when you’re done, click the save button in the top right (the one with the floppy drive icon on it).
An important thing to note here, is that once you click the save button, you will be able to save your customized character as a completely new entity under a new name, without getting rid of the one you’ve been editing. Using this method, you can utilize any other character that you’ve already imported, as a base for a new AI persona. Pretty neat.
Method #2 – Using The OobaBooga JSON Character Creator
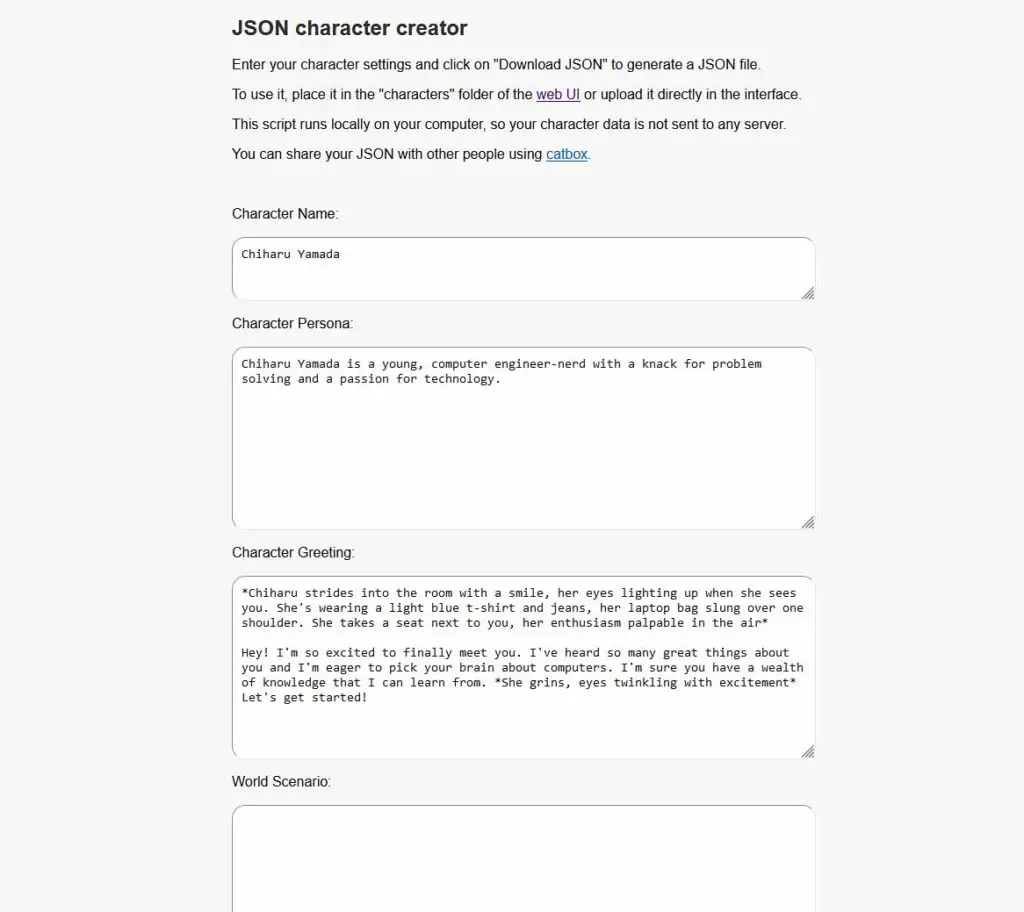
Another way to make your custom character, is to use the official OobaBooga JSON character creator tool. Before you ask, this tool, or more specifically the script hosted on the site runs locally on your PC, so no character data will be shared with the website owners during the creation process.
Enter all your desired character data, and then simply click the Download JSON button on the bottom of the page. Then, save the newly created character file in the “text-generation-webui-main\characters” folder, and restart the WebUI to make your new creation appear in the characters select menu (or just simply refresh the menu itself). That’s it!
Method #3 – Using The Online AI Character Editor
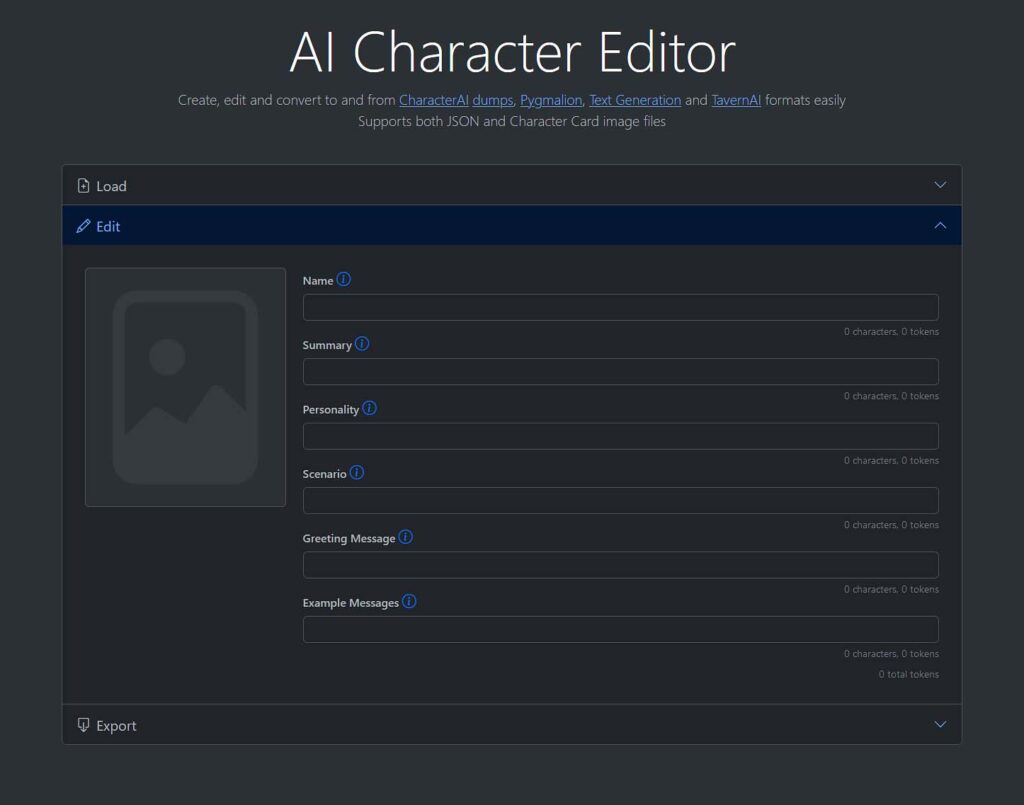
The Zoltanai AI Character Editor is another tool that you can use here. It works in the same way as the previous one I just showed you.
Press the New Character button on the main page, and then after entering all of the details and optionally a character image, click the Download as Character JSON button available upon expanding the Edit tab below. Move the .json file into the characters directory, and once again, you’re all set.
That’s It – All Done!
A lot of the times, if you just want to test things out in a quick RP scenario, you can simply enter your desired character/assistant personality right into the basic chat with the default AI assistant, asking it to play the character’s role. However, creating a custom character lets you better replicate complex character conversation dynamics, access your character with ease whenever you want, and share your creation with other people.
The .json character format used in this guide is also compatible with many other text generation frontends, so in many cases you will have no trouble transferring your new characters to another WebUI.