
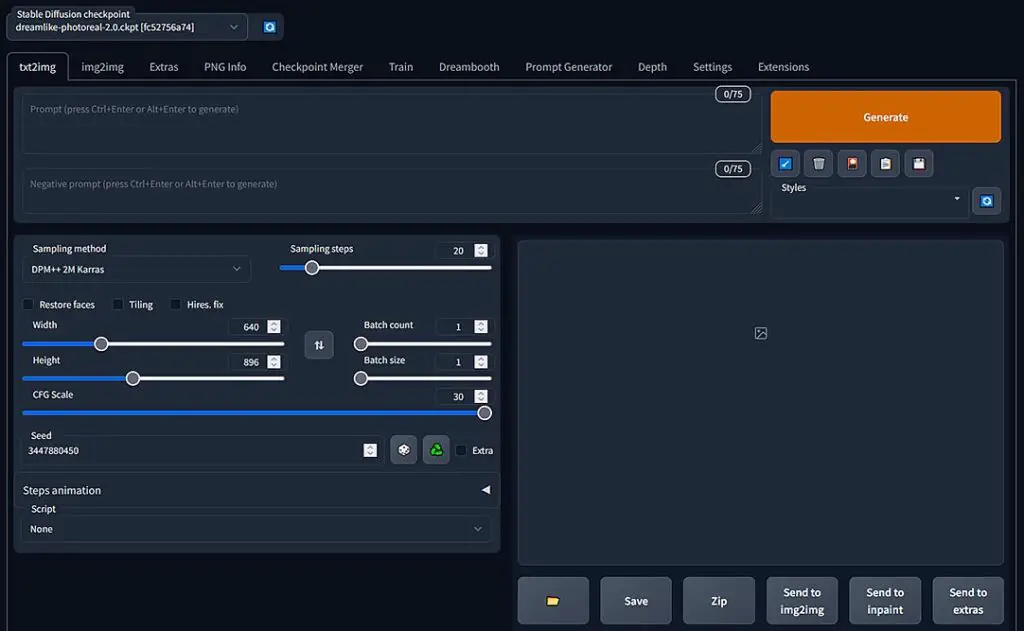
What do all the settings in Stable Diffusion do and how to use them? How to load, swap and merge your newly downloaded SD models and where to actually get them? In this guide we’ll quickly teach you all the ins and outs of text2img functionality based on the AUTOMATIC1111 WebUI. Soon you’ll be able to generate hundreds of breathtaking pictures, both surreal, anime-style and semi-realistic, all completely for free.
There is a newer, updated version of this guide available! You can find it here: Automatic1111 Stable Diffusion WebUI All Basic Settings Explained [UPDATED]
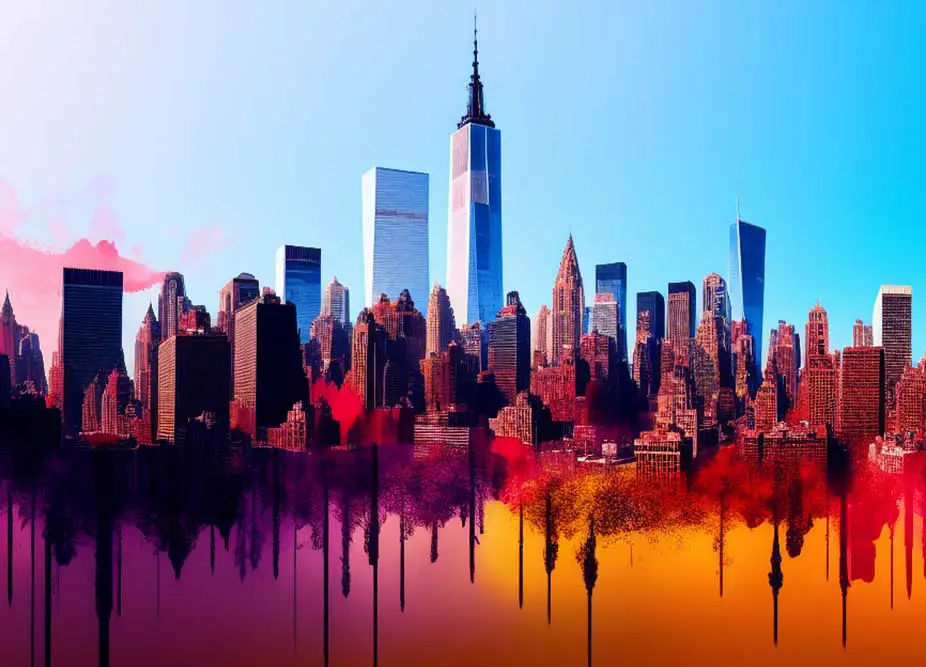
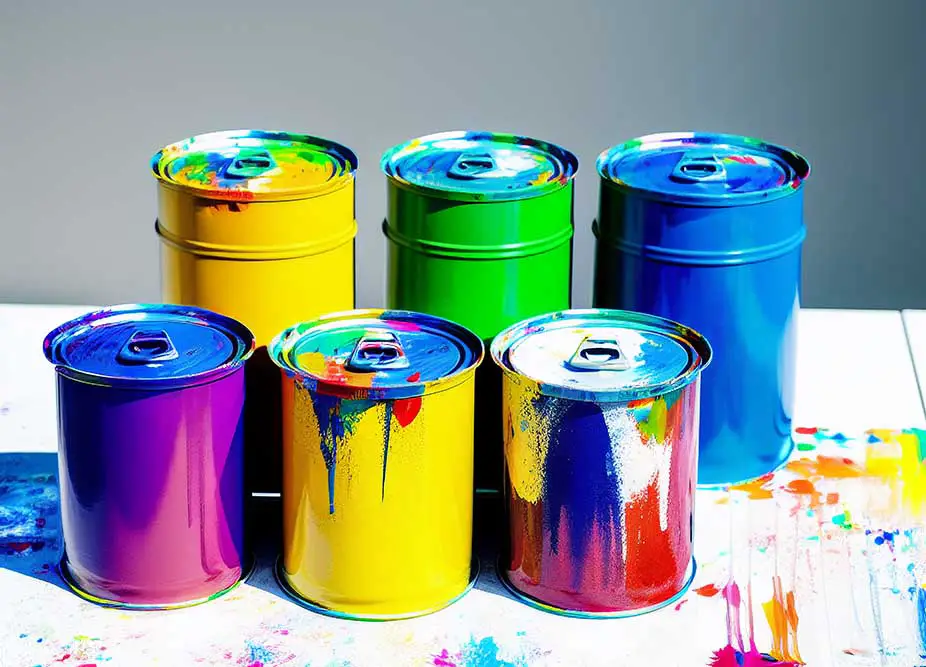
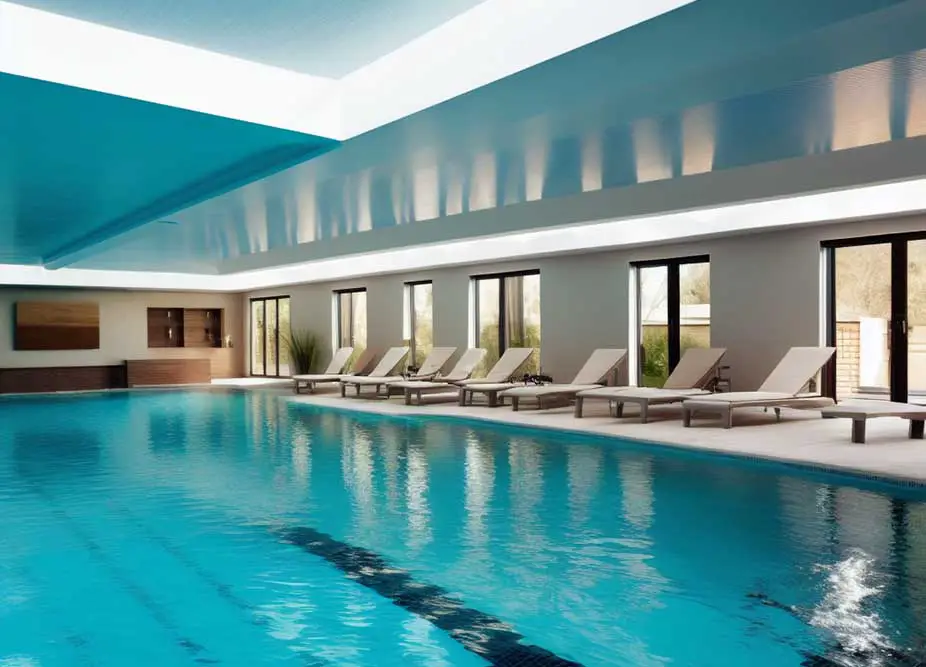
As a nice treat and bonus we have also added quite a few nice generated images with the prompts we used to generate them. Let’s begin!
Note: This guide is based on the AUTOMATIC1111 Stable Diffusion WebUI, and all the settings and parameter descriptions will be using the terminology that this particular implementation of SD and the associated user interface incorporates. You can learn more and download it for free from its official GitHub repository here.
This guide is pretty basic, and it doesn’t go in much detail on some of the more advanced options and features that aren’t exactly vital to the basic SD operation, including the webui setup process. Some of the topics, such as the built-in image upscaling capabilities, the tokenizer, custom model training or the img2img functionality might be omitted partially or fully. These will be the topic of our next guide so stay tuned!
First things first – how to import new models
Having your Stable Diffusion webUI local instance up and running is one thing you need to begin generating images. The second one is a trained model that you need to import. How exactly do you do that?
Note: What we call “models” here are actually “model checkpoints”, but here for the sake of simplicity we will use the terms “model” and “checkpoint” interchangeably while meaning the very same thing and omit the technical differences between the two terms as it’s often done in various places online anyway.
How to use and import custom models/checkpoints into the AUTOMATIC1111 WebUI? Well, it’s just a matter of few clicks. First, you have to download a compatible model file with a .ckpt or .safetensors file extenstion. If both versions are available, it’s advised to go with the safetensors one.
One you have downloaded your model, all you need to do is to put it in the stable-diffusion-webui\models directory. It can be put in a subfolder if you would like to organize your model files that way.
Once you’ve done that, the only things you need to do is to open up your webUI, refresh the models list in the top left corner of the screen by pressing the small refresh button and select your newly imported model from the list. It will be loaded automatically right after selection and this can take about ~30 seconds depending on the model size and the hardware you’re using.
What do different models do? Well, each model you can find online is trained on different types of image sets, containing different photos and pictures. To simplify things, if a model is trained on a large amount of cat photos made with a quality DSLR, it will be able to be used to generate accurate and realistic unique cat photos which will look like actual DSLR pictures. If a model is trained on a set of paintings by a certain artist and that paintings only, you will be able to use only it to generate imagery similar to that which was entered as the training material.
There are models out there trained on various image sets. Models for photorealistic images, anime-style pictures, analog camera style human portraits and much much more.

Where to find different models for Stable Diffusion? Two most popular sites for free SD models are both huggingface and civitai. Explore their collections to find a model that suits you best!
Later on, you’ll be able to learn how to merge two of your favorite models together in different proportions. Doing this you can make a model retaining qualities from two entirely different training sets. This can yield very creative results with some experimentation!
Bonus: Here you can learn more about LoRA models and how to use them to invoke your favorite styles in your generations in 2 simple steps (3 minutes approx.) – How to Use LoRA Models with Stable Diffusion WebUI – Quick Tutorial
.vae files – why do you need one
When searching for various SD models online, you may also come across the .vae files distributed alongside the model downloads. These files are used for post-processing, after the image is generated from your supplied prompt.
VAE is actually an abbreviation for variational autoencoder which is an integral point of image generation based on latent diffusion. VAE’s are responsible for encoding the optional input image before the diffusion process begins and decoding a generated image when the process is finished, outputting it to the user.
How to use .vae files? Without using a VAE file dedicated for your chosen model, the webUI will default to a default SD VAE. With some models your images using the default VAE might seem full, discolored, non-vibrant or highly desaturated. If that’s the case, you should make sure that your .vae file designated for the model you’re using is placed inside your models folder right beside the model file. Both the model file and the .vae need to be named the same way to work properly.
Different VAE files can generally be used across various models without trouble. This means that you can supply the .vae file from one model and use it with another and the only thing that will be affected by this is the way the image is processed after it has been generated.
VAE files can also be merged into a model, for example during checkpoint merging (more on that later). With that said, you can find some models with VAE files already merged into them. In that case, you don’t need to copy an additional .vae file alongside your model to your models directory.
The prompt box + negative prompts
So, how do Stable Diffusion prompts work? A prompt in SD terminology is basically a language representation of what you want the model to generate.
A very simple and bare-bones example prompt for the Stable Diffusion v1.5 could very well be: “astronaut floating in space, stars, realistic, sharp, detailed, stock photo, photography”.
Without getting into too much detail on how the text tokenization works in detail, both prompts and prompt tags can differ between differently trained models.
What this means for you, is that for each model you use, in most cases you will have to re-evaluate your prompts, and it’s unlikely you will be able to re-use the same prompt across multiple models and get similar results, even if the models ultimately seem similar to each other. Another case are merges of two or more models, which will make use of shared text embeddings.
A good example for that is comparing the Anything 3.0 anime-style model trained with danbooru tag embeddings, to say the original Stable Diffusion v1.5 model which utilizes CLIP embeddings. Prompting language and techniques will vary greatly between these models because of the different visual material and text embeddings used for training.
Now, the negative prompts. These are essentially things that you don’t want to appear in your image. A good example of a negative prompt for generating human images would be “deformed, missing limbs, blurry image, extra hands” – you don’t want that in your image after all!
Now the last important thing: you can make some words or phrases in your prompts more important by using parentheses. If for example you’d like the generator to focus on generating a baroque style painting, you can add more weight to the baroque painting keyword in your prompt by writing it with parentheses around it like this: (baroque painting), the more parentheses stacked, the more important the keyword will be: ((baroque painting)). Alternative syntax for modifying keyword weights goes like this: (baroque painting:1.40) – you simply supply the weight as a number after a colon.
In general finding out the right combination of main prompt and negative prompts might be quite a challenge. With certain image topics and certain models lots of experimentation is required to achieve good results. That’s why some people even go as far as calling the art of coming up with valuable prompts “prompt engineering”.
If you’re looking for some example prompts to get started with your generations, there are quite a few good sites for just that. One of them is civitai which besides hosting many quality model checkpoints available for free download, also lets users post their works with all the generation data attached!
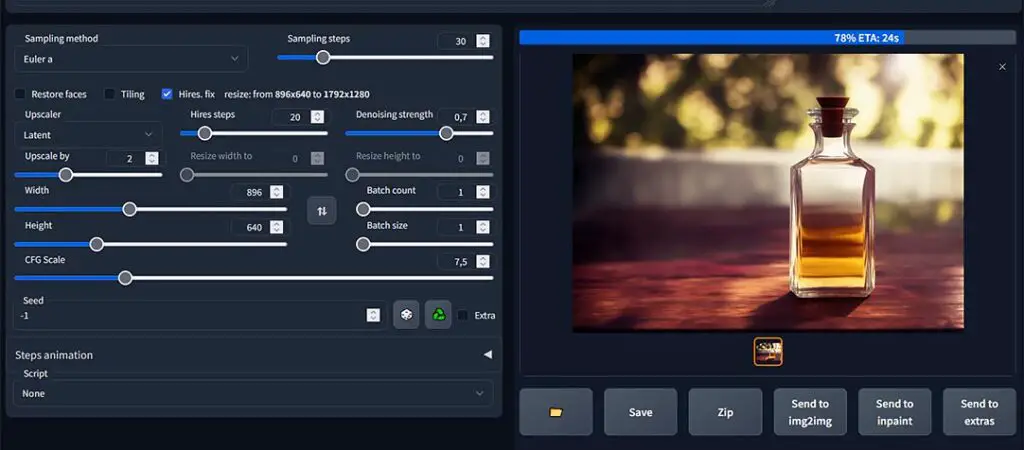
Sampling methods and sampling steps
The sampling method selection menu gives you quite a few options to choose from. While we won’t get into much detail here, the gist of it is: different sampling methods yield different generation results with the same text prompt supplied generator initialization seed (more on that in a while).
Different sampling methods also require a different number of steps to generate a coherent and usable image.
We advise you to start with the “Euler a” algorithm at anywhere between 24-40 steps. This has potential to yield the best results the fastest when you’re just starting out. As always, experiment with different samplers and different step amounts for each of them to find out a sweet spot for your current prompt/model combination.
There are no rights or wrongs here, but keep in mind that: the higher the step count, the longer will the sampler take to do its job, and more sampling steps do not necessarily mean getting a better quality image. In fact, this can often be the opposite as you pass the sweet spot and go for higher step counts with some of the samplers.
So, are more steps always better with all sampling methods? Yes – but only up to some point, until the difference is quality is negligible.
Note: Your chosen sampler/sampling method and step count are after the image size the variables that affect the image generation time the most.
Image size settings
Not much to say here. The larger the image size the longer the generation of one image will take. Also, keep in mind that with less than 8GB of VRAM (your GPU internal memory), you might not be able to generate larger images. You need to find out your hardware limits during your first few generations. If an image fails to generate, the webUI will simply stop the generation and let you try again.
Another thing to keep in mind is that the optimal generation size is also affected by the model you’re using. If for example a model was trained using 1:1 512×512 px images only, It will generally do best generating images of similar size or its multiples. Same with models trained on for instance 512×768 image samples. You get the gist!
CFG scale – and what does it do
CFG scale is another important parameter you’re able to control. It’s responsible for telling the algorithm how close it should adhere to the prompt you gave it in the prompt input window.
If the CFG scale is set low, the model has quite a lot of “freedom” and the things you wished to appear in the image might not be that noticeable in favor of things the algorithm has come up with. When you set the CFG scale higher, the probability of your desired elements described in the prompt appearing in the image rises. If you use a very high CFG scale value however, your image might appear distorted. As always, experiment starting with the default CFG value that is proposed by default.
Batch count vs. batch size
Your VRAM (or your video card/GPU memory) limits can constrain you in various ways. One that you already know is the max generated image size. The second one is how many images you can generate in one batch. But there are two settings that are responsible for the amount of images that is generated, what does each of these really do?
The truth is there is a substantial difference between the two.
- Batch size – how many images to generate in one batch – batches are processed in parallel – higher batch sizes can increase performance and generation speed at cost of higher VRAM usage.
- Batch count – how many batches of set size to generate, one batch will be generated after the other – doesn’t impact performance, generation speed of single batch or VRAM usage at all.
Your goal should be to find a combination that will allow you to generate the highest amount of images in one go without running out of VRAM during the process.
Seeds – and how to utilize them
Seed is essentially the randomly generated number which serves as a basis for the image generation process. It shouldn’t really concern you in the beginning, as changing the seed manually doesn’t have any effect on the creative process of generating new images.
As the seed is used to initialize the whole image generation process, when you use the very same prompt, exact same settings and the same model with the same seed, the very same image will be generated. On the other hand, if only one number in the seed is changed and the settings and the model remain the same, the generated image will be different.
If someone gives you their exact settings and seed and you know which model they used, you will be able to generate the same image as they did in your local instance of Stable Diffusion webUI.
Changing the seed value is completely optional, as by default it will be randomized with every new generation. If you notice that your seed input box displays the value “-1” this simply means that every time you initialize image generation a random number will be generated and used as the generation seed. If the number in the box changes with every generation it’s the same situation.
Style selection and management settings
On the top right side of the screen right beside the “generate” button you can find the style management controls.
In short, here you are able to save different “styles” of images – that is different prompt presets you can append to your main prompt anytime using the saved styles list.
This is purely a quality-of-life feature, so you don’t have to worry about it early on.
One step further – checkpoint merging
Checkpoint merging is literally putting at least two existing models A and B together in a chosen proportion to achieve a new single model with qualities derived from both the starting models.
How to do a checkpoint merge in Stable Diffusion webUI? You can merge your models in the Checkpoint Merger tab in the webUI. There you are able to merge up to 3 different models in one go. For a simple merge, leave all the settings on default and manipulate just the Multiplier slider to set the appropriate proportions of the merged models.
Next, if possible it’s advised to bake in the VAE of the model that is most prevalent in your mix to your merge. If your merge is a 50-50 merge, choose the available VAE you deem the most appropriate. To do that, simply select the chosen VAE from the Bake in VAE drop-down menu.
Now, simply click the Merge button. Wait a bit and refresh your checkpoint list in the top left of the screen. Your new model merge should appear on the list!
The script selection menu is where it gets fun. Here you can make use of various scripts you are able to freely import to the AUTOMATIC1111 WebUI using the Extensions tab.
There are many great scripts available, the ones that we’ve personally tested allowing you to make prompt matrices, automatically generate depth maps and depth map based animations or X/Y/Z plots for various parameters. Lots to play around with!
Once you take a deep dive into the world of various SD feature extension scripts, you will be surprised how much more can be done with this powerful tool!
Stable Diffusion by AUTOMATIC1111 WebUI essential settings recap
Here are the most important basic and essential Stable Diffusion AUTOMATIC1111 WebUI settings quickly summarized to get you going right away. Use this list if you can’t bear to read through all of our guide and need to start generating images right now!
- Sampling method – different sampling methods / samplers will yield different results even if all the other settings remain the same.
- Sampling steps – some sampling methods require more sampling steps to generate a quality image than others. In general the more sampling steps, the more time will the generation of one image take.
- CFG Scale – how strongly the model will take your text prompt into account, 0 generating an image seemingly unrelated to the prompt.
- Image size – the image size in pixels. Generating larger images requires more VRAM (GPU memory).
- Batch count & batch size – see batch count vs. batch size.
- Seed – a random number used to initialize the image generation process. If you use the same model, same settings and same seed, you will always generate the very same image. By default it’s generated randomly with each generation so you don’t have to worry about that in the beginning.
Please refer to the descriptions above for more information on each of the settings mentioned.
Bonus: How to find out an image prompt and generation settings used
This one is really simple! If someone has generated an image using stable diffusion and they (or the site they’ve posted the image on) haven’t removed the metadata from the file, you will be able to know the exact model, settings and seed they used to make it.
To do this, simply download the image, ensure that its metadata hasn’t been stripped and then import the image into the PNG Info tab in the webUI. All the important info will be displayed right next to the image!
As we mentioned, this method sadly won’t work with images which metadata has been removed (so, for example with many SD generated images you can find on various social media like Facebook or Twitter).
img2img – even more possibilities
Next to the txt2img tab you will find the img2img tab. Although this short basic guide is already over, we strongly advise you to give the image to image feature a try. It basically allows you to use an existing image from your drive and use it as an input (a starting point if you will) for the image generation process. The img2img functionality, although somewhat different from the txt2img part of the webUI shares with it many of its settings. Be sure to play around with it after you’re comfortable with the basic image generation process!