")
Start generating SDXL anime style images in minutes, with only 8GB of VRAM on your GPU, without getting into overly complicated multi-node workflows, and with no custom nodes involved. In this guide we will be using ComfyUI with an Illustrious XL family Stable Diffusion XL model to create and reproduce high quality anime characters, as well as easily modify existing images. Let’s begin.
Note: All of the workflows we will be using in this guide can be easily downloaded using the links which you can find below. If you’re just interested in a full set of basic ComfyUI SDXL workflow presets, as well as some extra info on how to use them, you can find it all here: Basic ComfyUI SDXL Workflows – No Custom Nodes
Interested in using Automatic1111 WebUI instead? – This might also interest you: Automatic1111 Stable Diffusion WebUI All Basic Settings Explained [UPDATED]
Illustrious XL Models and SDXL Anime Checkpoints
Today we will be working with an SDXL model from the Illustrious XL family, and more specifically, with the Diving Illustrious XL Anime checkpoint.
This model can be easily run on 8GB VRAM systems with blazing fast generation speeds, and for the purpose of this guide I will be using my old RTX 2070 Super 8GB which on my system can generate a single 896×1152 px image in ~35 seconds on average.
Illustrious XL models developed by Onoma AI are among the highest quality SDXL checkpoint available to this day, especially when you’re aiming at generations that are more geared towards anime/cartoon/illustration style rather than towards photorealistic imagery (which by the way can also be achieved using these with some effort and prompt-jutsu).
The Anime Illustrious XL checkpoint was trained on a massive amount of anime style imagery from various sources including “booru” imageboard sites, which makes it a perfect choice when it comes to generating various anime characters.
As you will learn in just a bit, when using this model you can compose your prompts using both the booru tag system and natural language (or ideally, a mix of both).
You can download this exact model from tensor.art, or use another compatible checkpoint from the Illustrious XL family (mind that you’re going to have to tweak your node settings if you’ll decide to use another one).
If you want to know more about the Illustrious models, you can also visit their official website here.
ComfyUI Quick Install
The ComfyUI installation process is really simple. The only thing you need to do is to ensure that you have a sufficiently powerful GPU to efficiently run image generation software on your PC (once again, for this tutorial I’m running the software on my RTX 2070 Super), download ComfyUI from its official GitHub repository here, and run the installation file.
After that’s done, use one of the two start files in the main ComfyUI directory, depending on whether or not you have an NVIDIA GPU in your system. If you do, select the “run_nvidia_gpu” file. If you don’t, you’ll have to settle with “run_cpu”, which is generally going to run much slower on most systems.
After a brief initialization process the ComfyUI interface should open up in your default web browser. Don’t close the console window underneath for as long as you don’t want to end working with the software.
How To Import The Illustrious Anime Model In ComfyUI
To use the Diving-Illustrious Anime model with ComfyUI you’ll first have to download it, for instance from tensor.art.
Then, simply move your downloaded checkpoint file into the ComfyUI SDXL checkpoint directory (ComfyUI\models\checkpoints), and then restart/refresh the ComfyUI software interface (this can be done by pressing F5 while in the main interface window).
Once you have all of your models in place and the UI is refreshed, you will be able to select your models from the drop-down menus in the “Load Checkpoint Base” node located in the top left of all of our supplied workflows.
Depending on your system specs and software setup, the model loading process can take quite a bit. In some extreme cases, your model might be loading for up to a few minutes, but don’t get discouraged – after the model is moved to your GPU memory on first load, all of the following image generations will be much faster.
LoRA models as well as image upscaling models can be imported in a very similar way, as you will see in a short while.
Anime Prompting With Illustrious XL Models
Positive Prompts In Illustrious XL & Booru Tags System
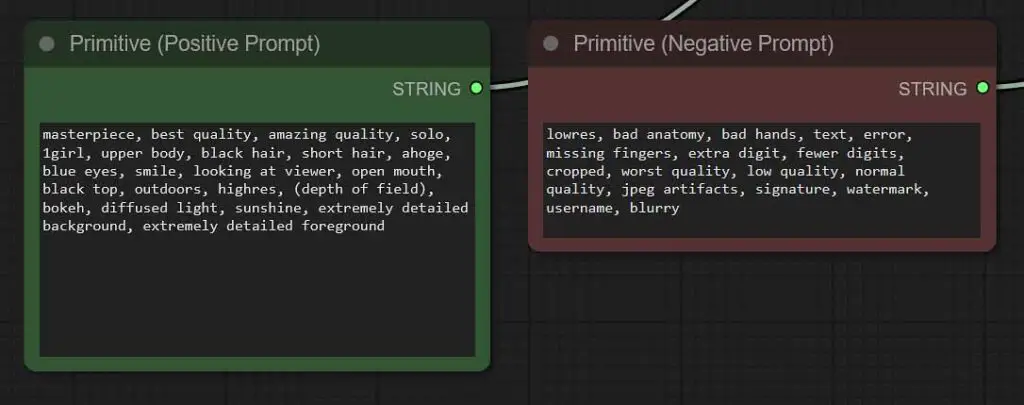
Here is an example of the prompting style that works very well with Illustrious XL models. You can use it as a starting point for your new generations:
masterpiece, best quality, amazing quality, solo, 1girl, upper body, black hair, short hair, ahoge, blue eyes, smile, looking at viewer, open mouth, black top, outdoors, highres, (depth of field), bokeh, diffused light, sunshine, extremely detailed background, extremely detailed foregroundIllustrious XL models are essentially Stable Diffusion XL checkpoints further trained on a massive amount of images coming mainly from “booru” sites containing thousands upon thousands of anime style art keyworded using a distinctive tag system consisting of a fixed set of pre-defined phrases such as “full body”, “1girl”, “black jacket” and such.
These models are therefore very easily guided towards a satisfying results using this very set of tags, which you can further explore both on many booru type sites such as safebooru.org (caution: most of them aside from this one do contain a rather hefty amount of NSFW material).
Here is a quick trick on getting high quality eyes, faces and hands in any of your ComfyUI workflows: ComfyUI FaceDetailer Simple Beginners Guide
Your prompts however don’t necessarily have to contain just the aforementioned tags, although it’s very important to use these when aiming for a high quality anime output style. You can also use the traditional SDXL prompting style which consists of natural language descriptions of the scenes you want to see in your outputs. The SDXL 1.0 checkpoint which is the base for all Illustrious models was trained primarily using such descriptions after all.
A Generic Negative Prompt Template For Illustrious XL Models
When it comes to the negative prompt, the rules are exactly the same. Here is an example of what a generic negative prompt for Illustrious XL family model can look like. Feel free to copy it over to your workflow, but remember to adjust it to your needs once you change the main topic of your generation:
worst quality, low quality, bad quality, bad details, oldest, bad anatomy, artistic error, lowres, bad hands, multiple views, jpeg artifacts, anatomical nonsense, bad perspective, bad proportions, bad reflection, ugly, poorly drawn face, deformed eyes, deformed handsWhile the Illustrious XL models are trained with images containing various anime characters in mind, you can also use them to generate many high quality illustration style backgrounds and simple objects.
To steer the model towards these kind of outputs you’ll have to get creative with your prompts and utilize negative keywords to minimize the chance of people appearing in your outputs.
With all that said, the bottomline is: for best results use prompts which consist both of booru-style tags, and from natural language scene descriptions. This is the prompting style that works the best with the Illustrious XL family SDXL models.
And one more thing: as the Illustrious XL models have been trained on a rather large amount of anime content, you can generate many well-known and fairly recent anime characters without using LoRA models, which in many cases would be necessary with older SD 1.5 checkpoints. Use that to your advantage!
You can read a bit more about different examples of Illustrious XL prompting techniques here, over on seaart.ai.
The Basic SDXL Anime Workflow (With a LoRA Toggle)
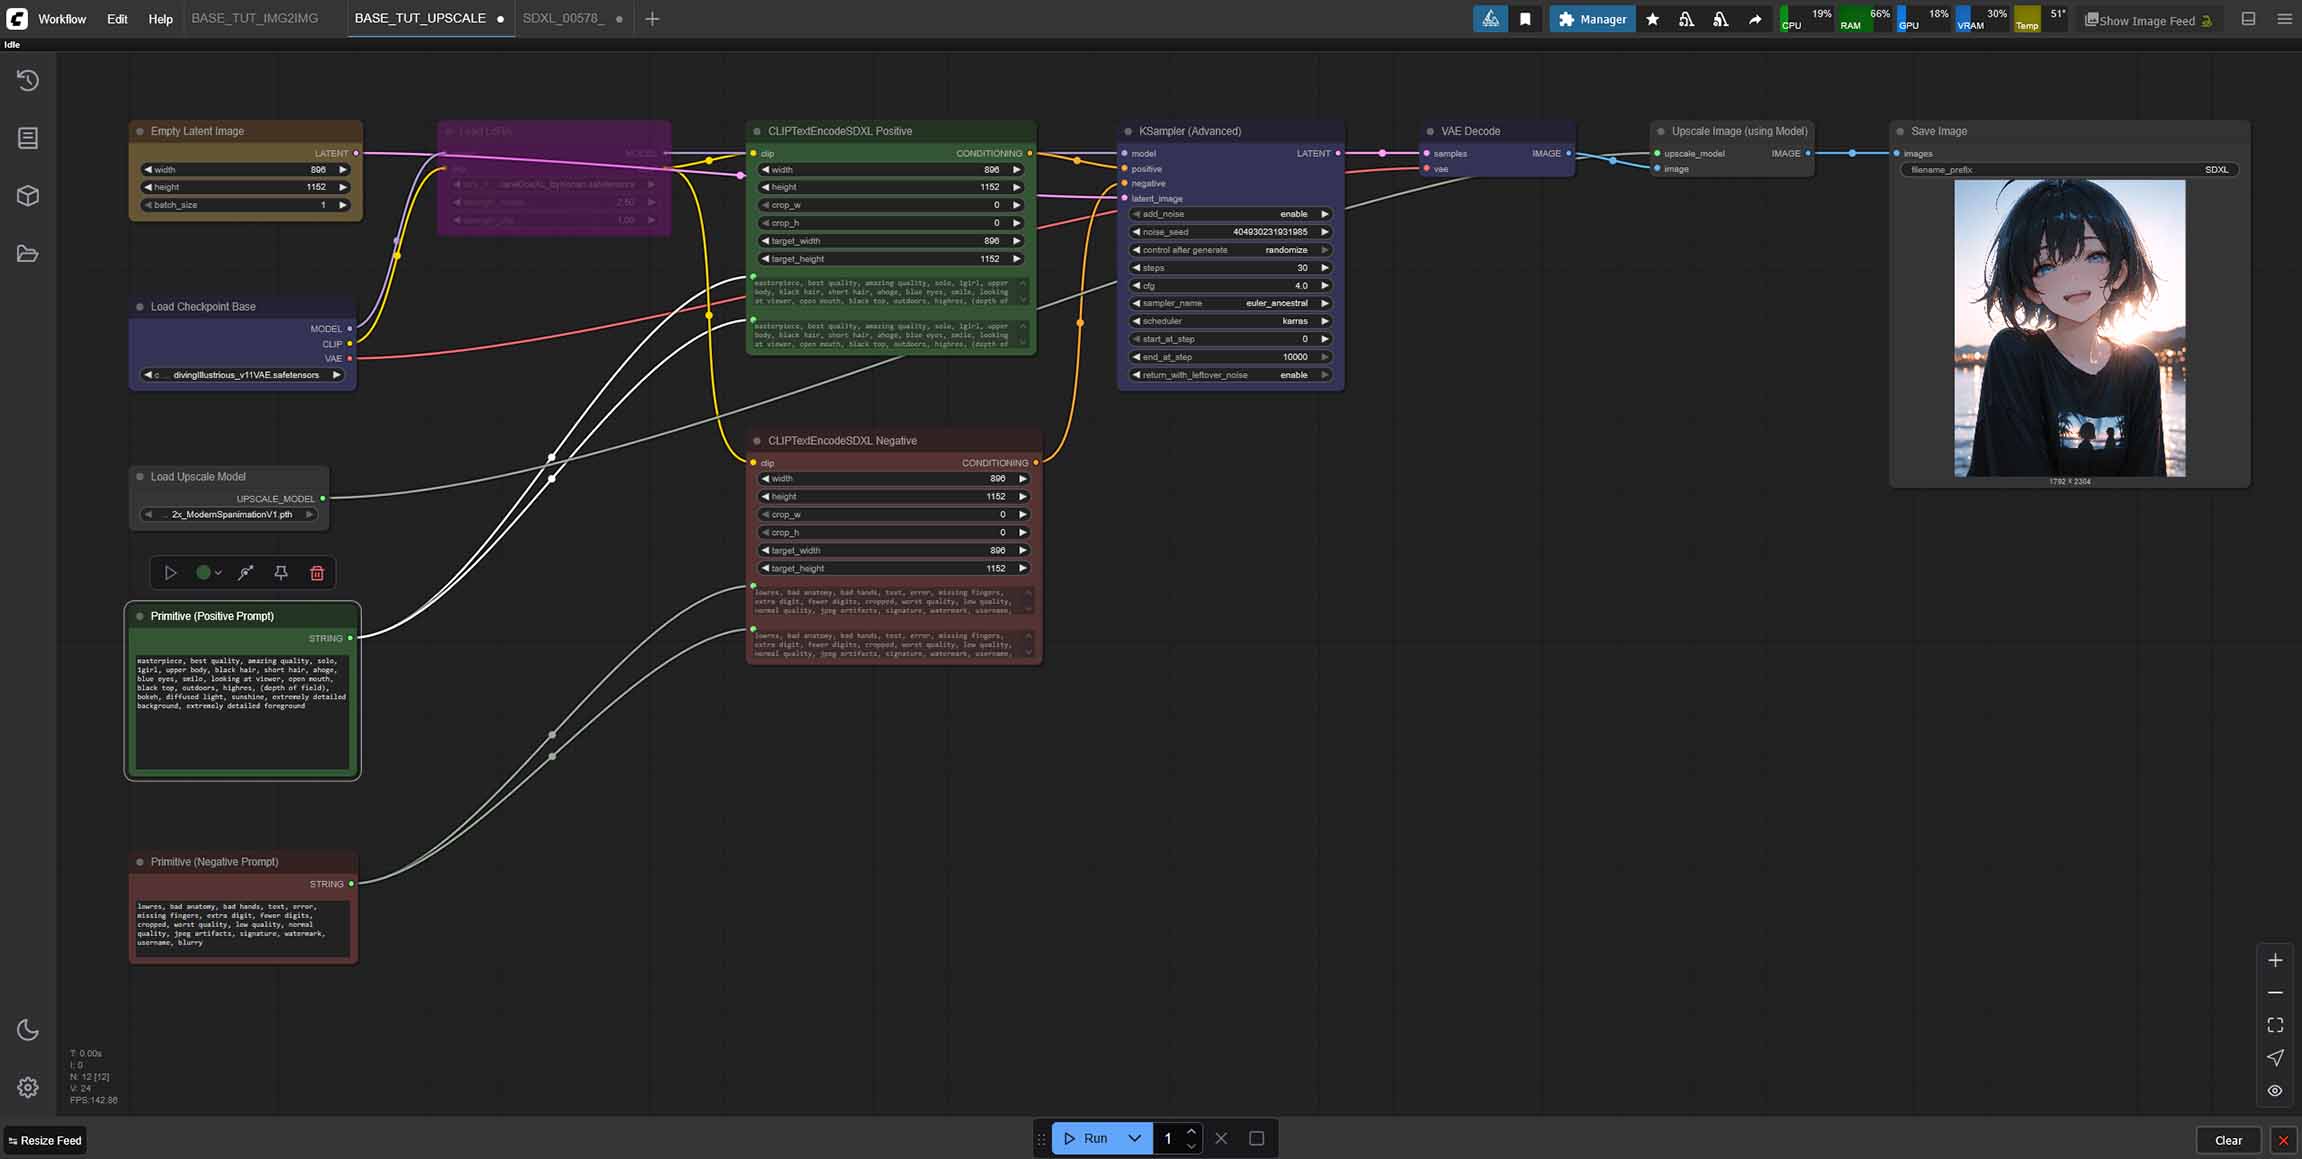
Here is a basic workflow for generating anime style images using ComfyUI and our Diving Illustrious XL Anime checkpoint (or any similar SDXL model, with some setting tweaks).
To instantly import this entire workflow into ComfyUI, simply download the .json file using the link above, and load it using the workflow menu (“Workflow -> Open”), or drag-and-drop it into the main ComfyUI window.
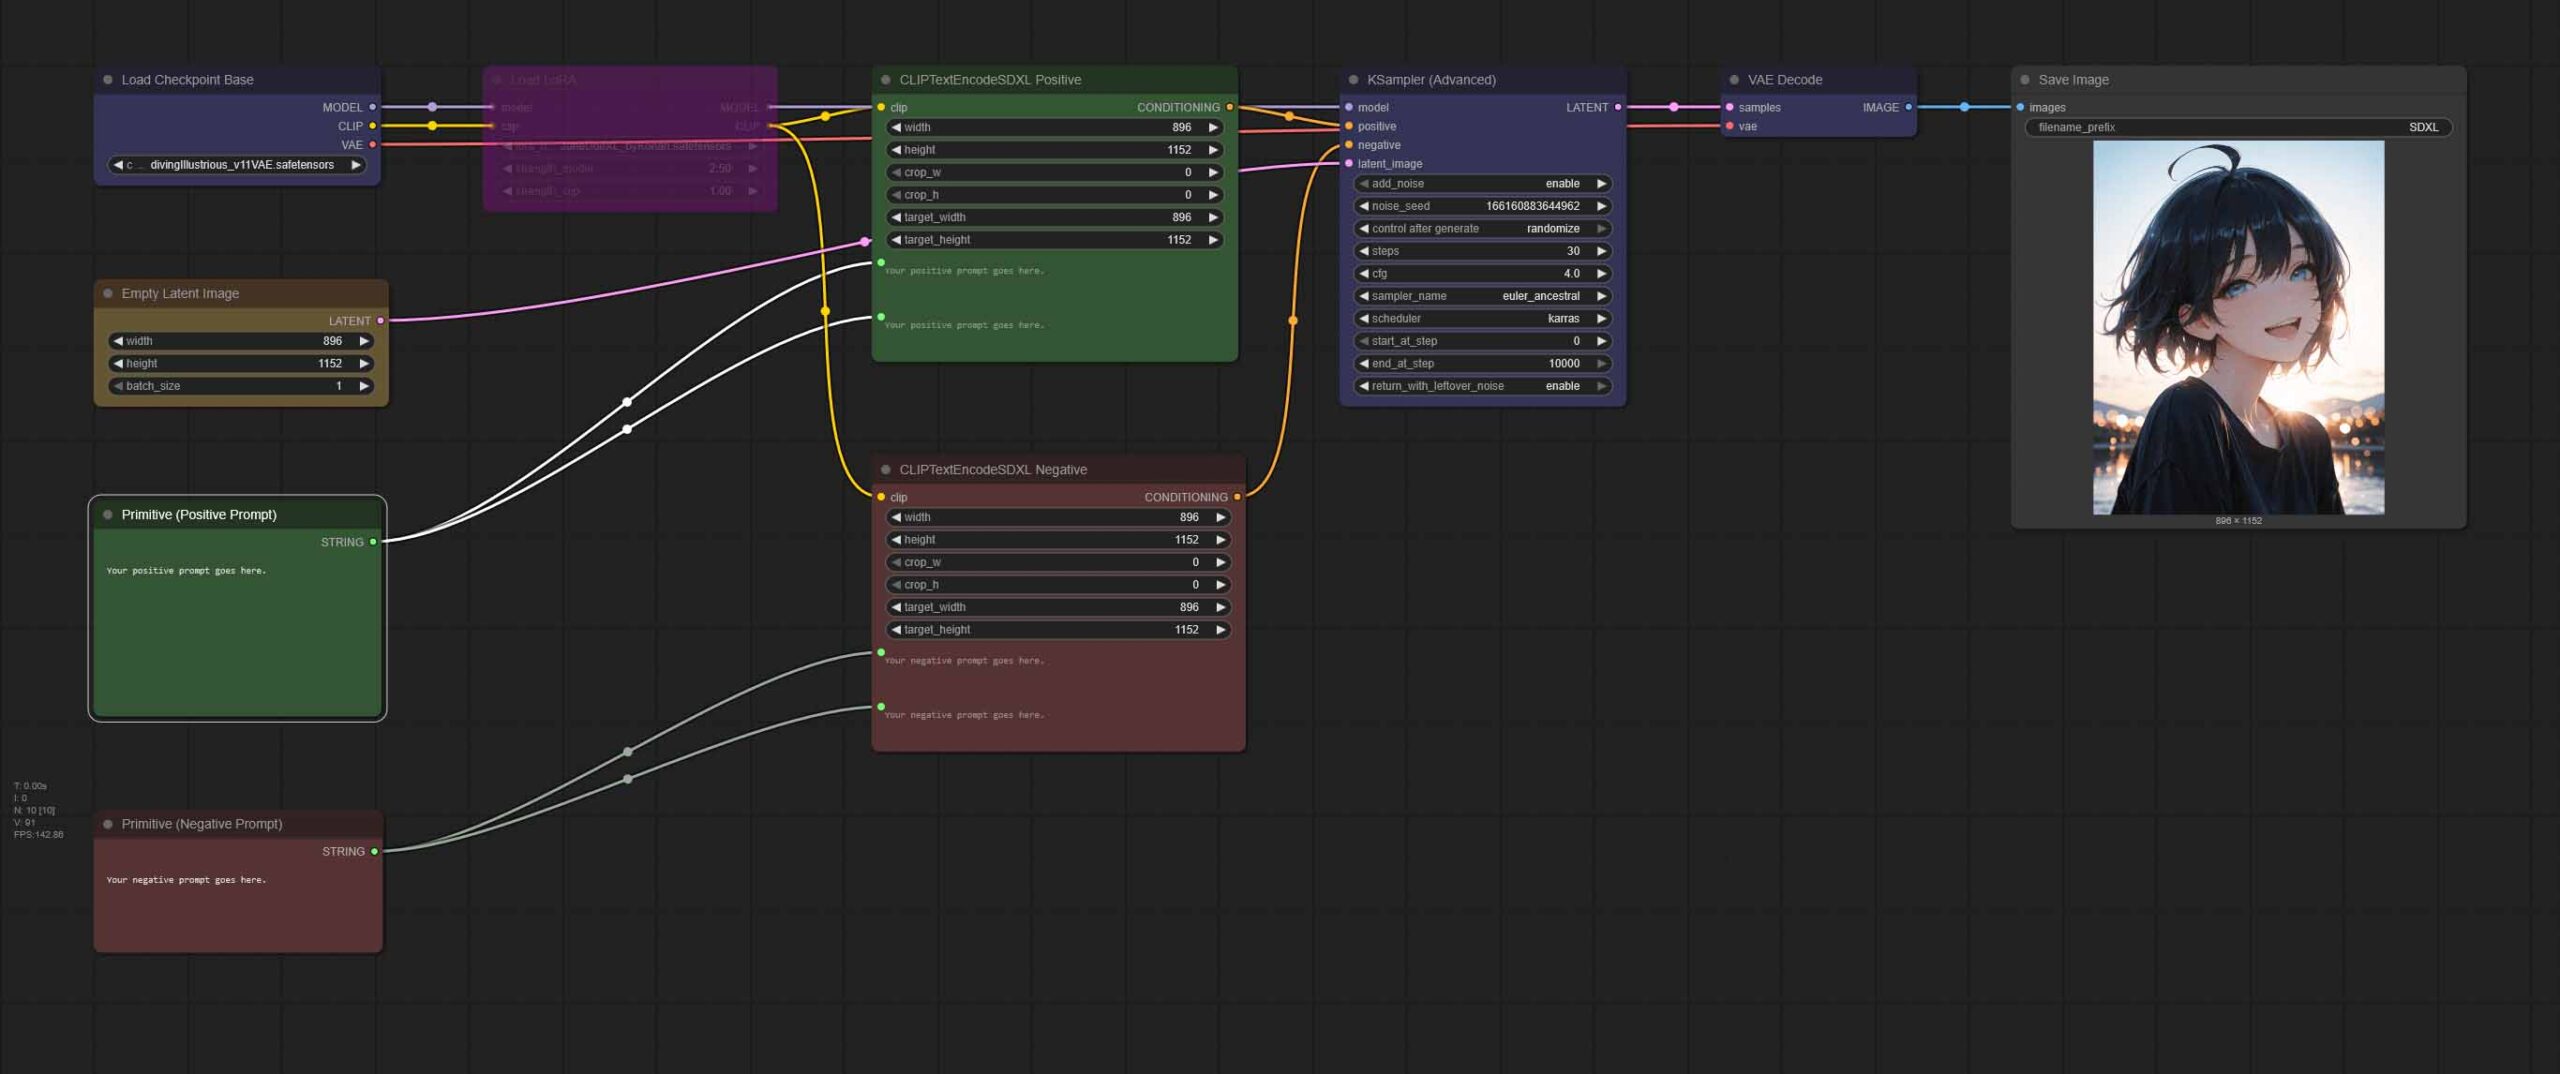
This simple node chain first loads your chosen SDXL model (you’ll have to select it from the drop-down menu), and then upon receiving both a positive and a negative prompt in the designated green & red boxes below proceeds to generate your image with the default KSampler settings tweaked specifically for Diving Illustrious XL Anime.
The size of the output image is defined in the “Empty Latent Image” node, but when changed, has to be adjusted in “CLIPTextEncodeSDXL” nodes as well.
The larger the image you want to generate, the more time it will take, and the more VRAM the process will use. For SDXL models, it is best to keep the image size close to 1024 pixels on each side (around 1 million total pixels) and ensure that both the image width and height are divisible by 8 (or ideally by 64) to achieve the best results without edge artifacts or deformations.
Note: Our workflow, as it was already mentioned a few times, is made to work with the Diving Illustrious XL Anime checkpoint. To use it with other models, you will have to experiment with tweaking the Classifier-Free Guidance (CFG) setting in the KSampler node. Typically used values will range from 2 to 7. If your images look too washed out, increase the value. If they are extremely vivid, deformed and incoherent, decrease it.
A Simple Anime Img2Img Workflow
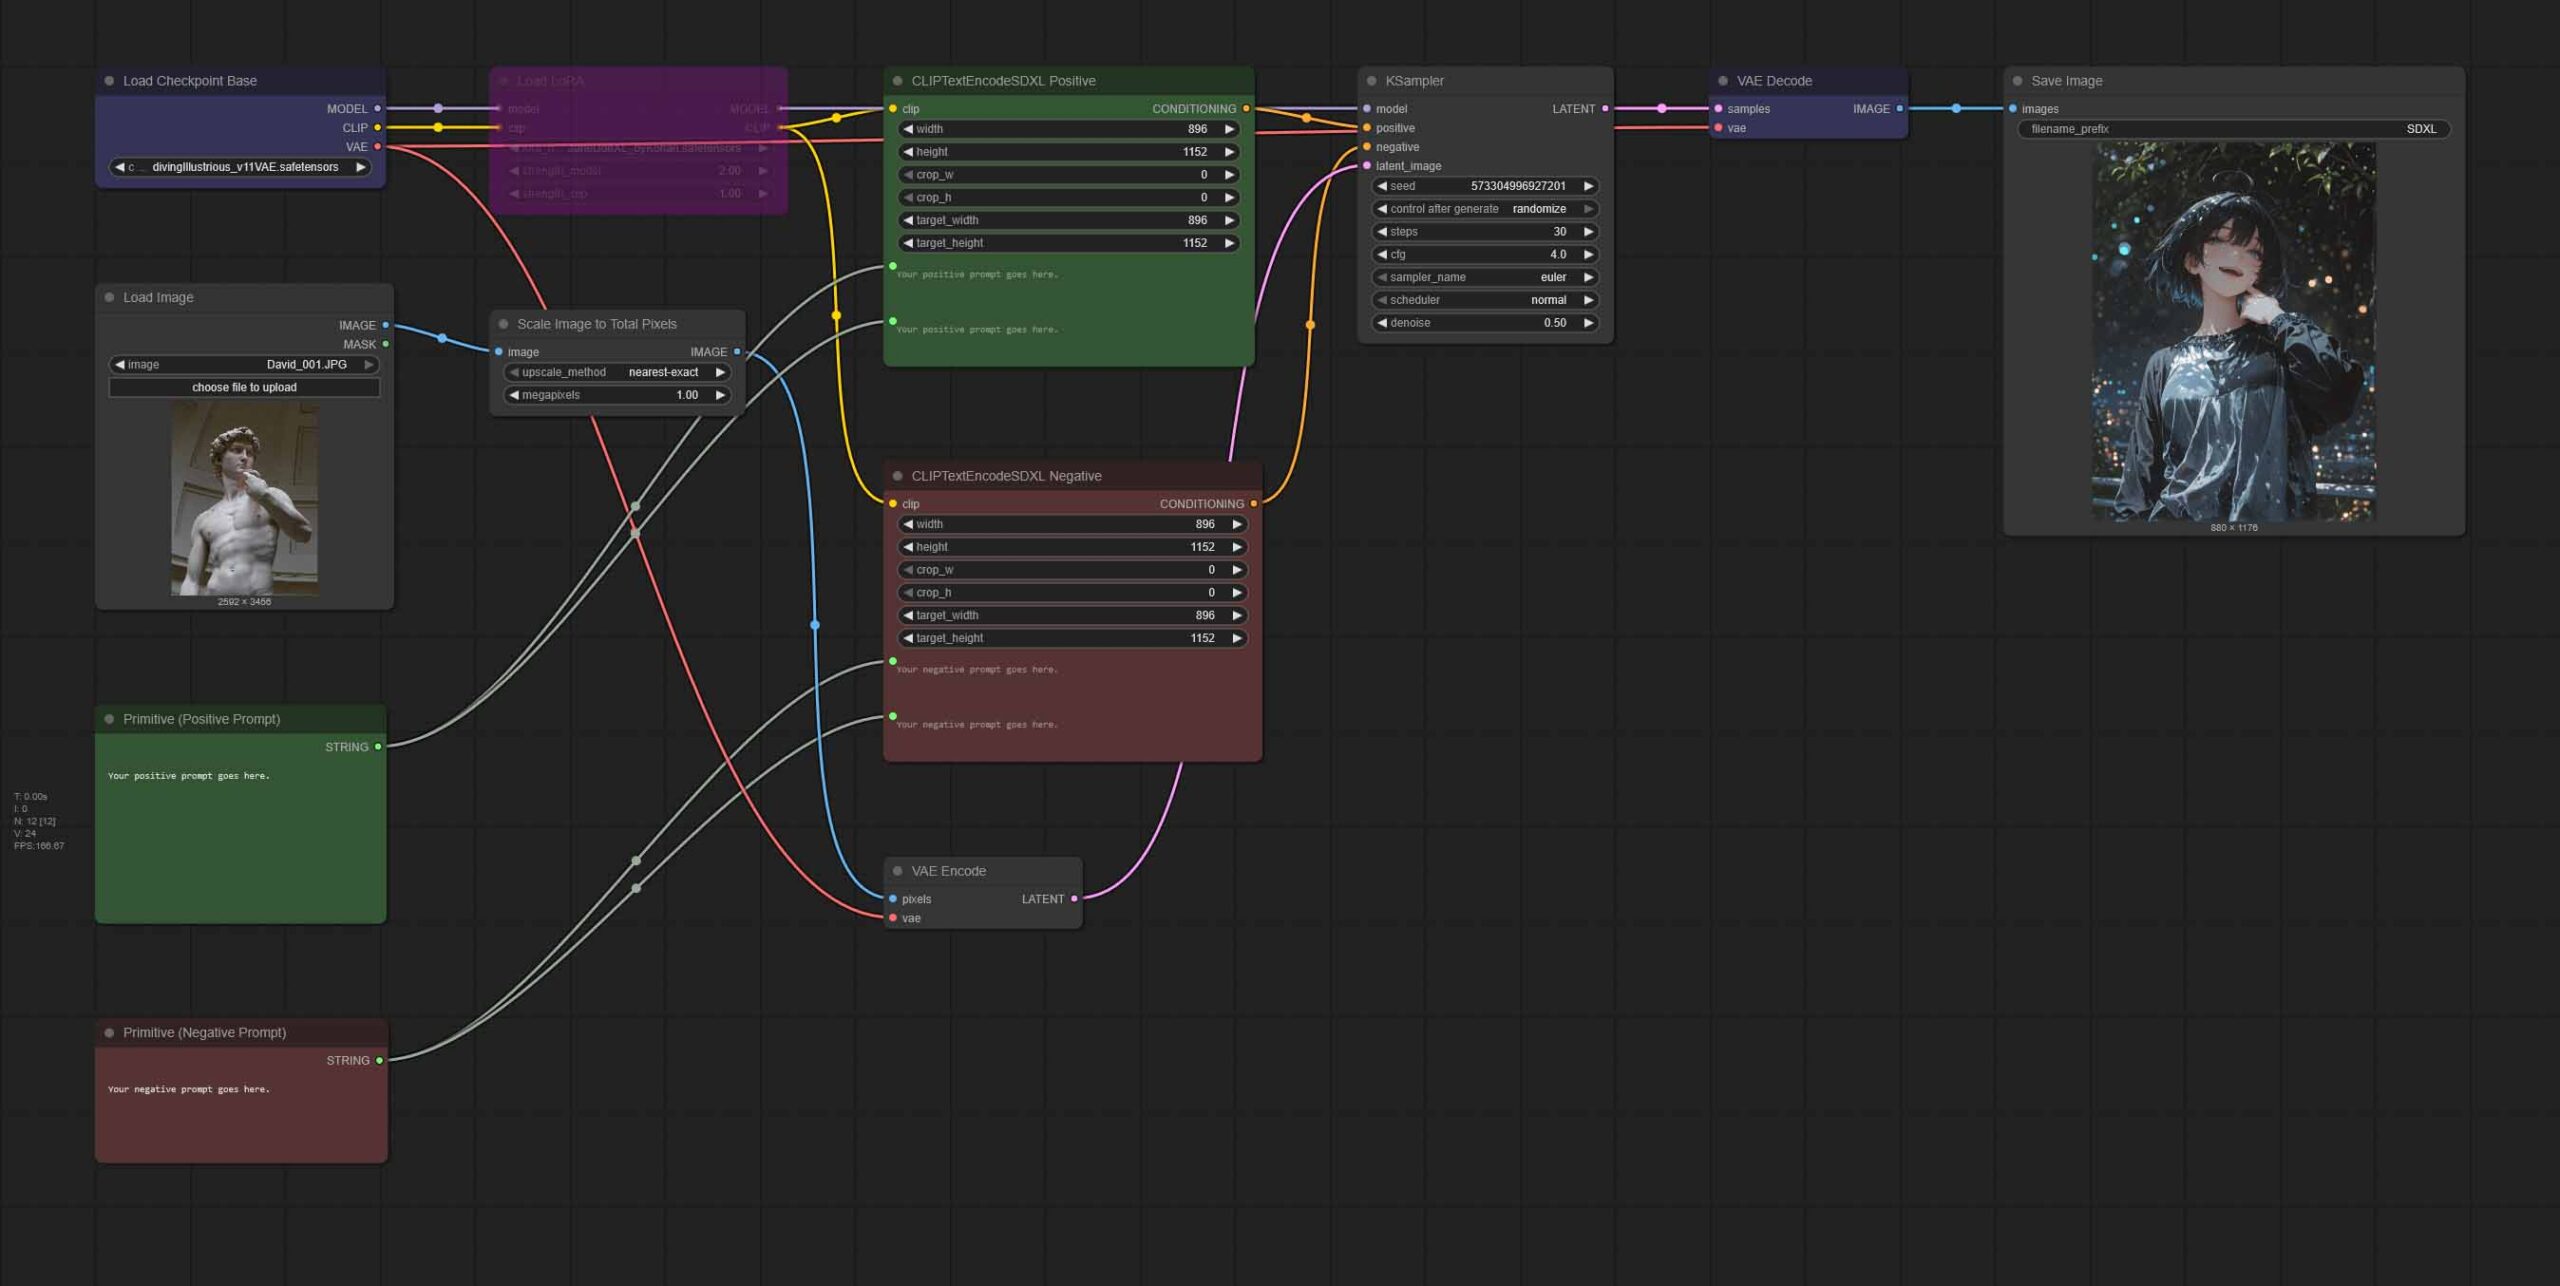
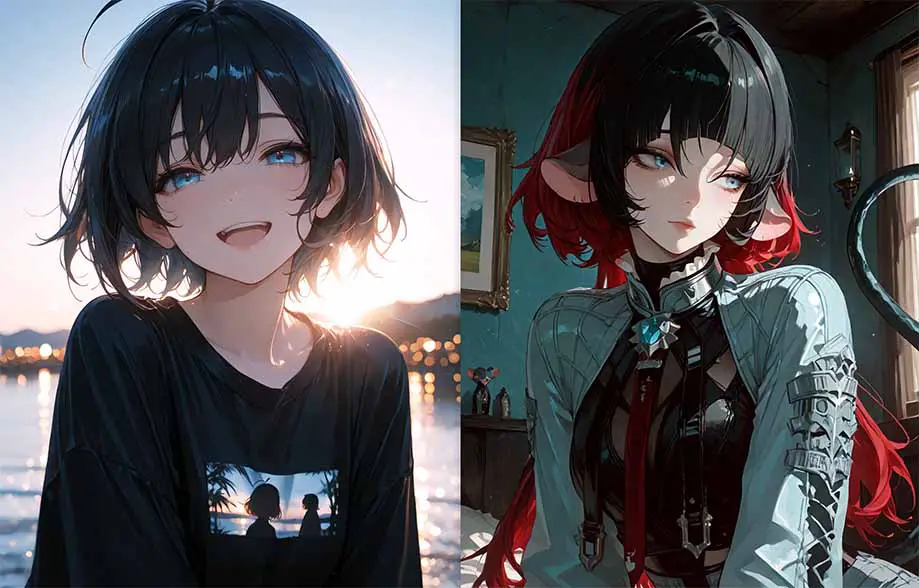
After we’ve covered the basic image generation pipeline, let’s get to something even more interesting – an image to image workflow. It’s very similar to the previous one, but it allows us to import any image and make it the base of our newly generated output.
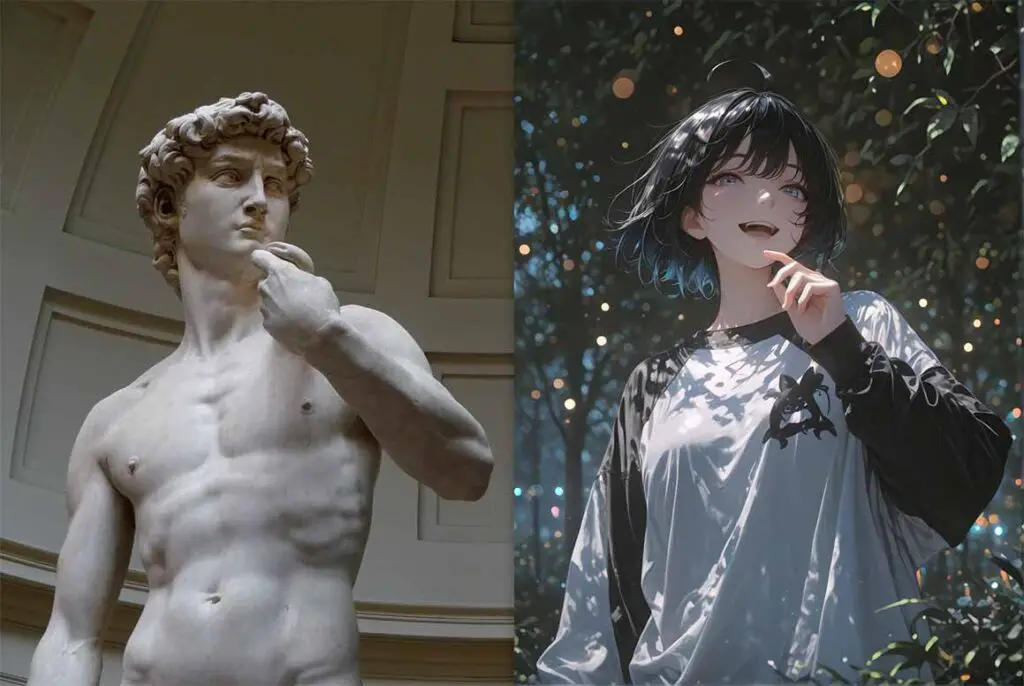
You can use this workflow for character posing, scene styling and much more. Below is a great example of what can be achieved with even the most basic img2img pipeline like the one you can find above. It’s a really powerful tool!
Here, the only difference is the additional image load node alongside the image resize node, which will let you upload your chosen picture that you want to edit using SDXL, and then will resize it so that it can be processed in reasonable time.
The image, once it goes through the resizing process is pushed straight to the “VAE Encode” node to then be mixed in with the newly generated material specified in your prompts according to the “denoise” setting in the “KSampler” node.
The denoise setting is the most important one here. Adjusting it controls how much the generated image relies on the original input image versus new content created by the model, effectively determining how much of the imported image influences the final output.
Low denoise values (0.10-0.40) will leave most parts of your uploaded image intact, while higher values (0.60-0.80) will often make your creations deviate noticeably from the original input material.
Extremely high denoise setting values such as 0.90 and up in most cases won’t preserve much of the input material composition or style. 0.50 is a good place to start in most cases.
You can adjust the image size within the “Scale Image to Total Pixels” node according to your preferences, specifying the overall size of your image output in megapixels. This node will always preserve the aspect ratio of your input image material.
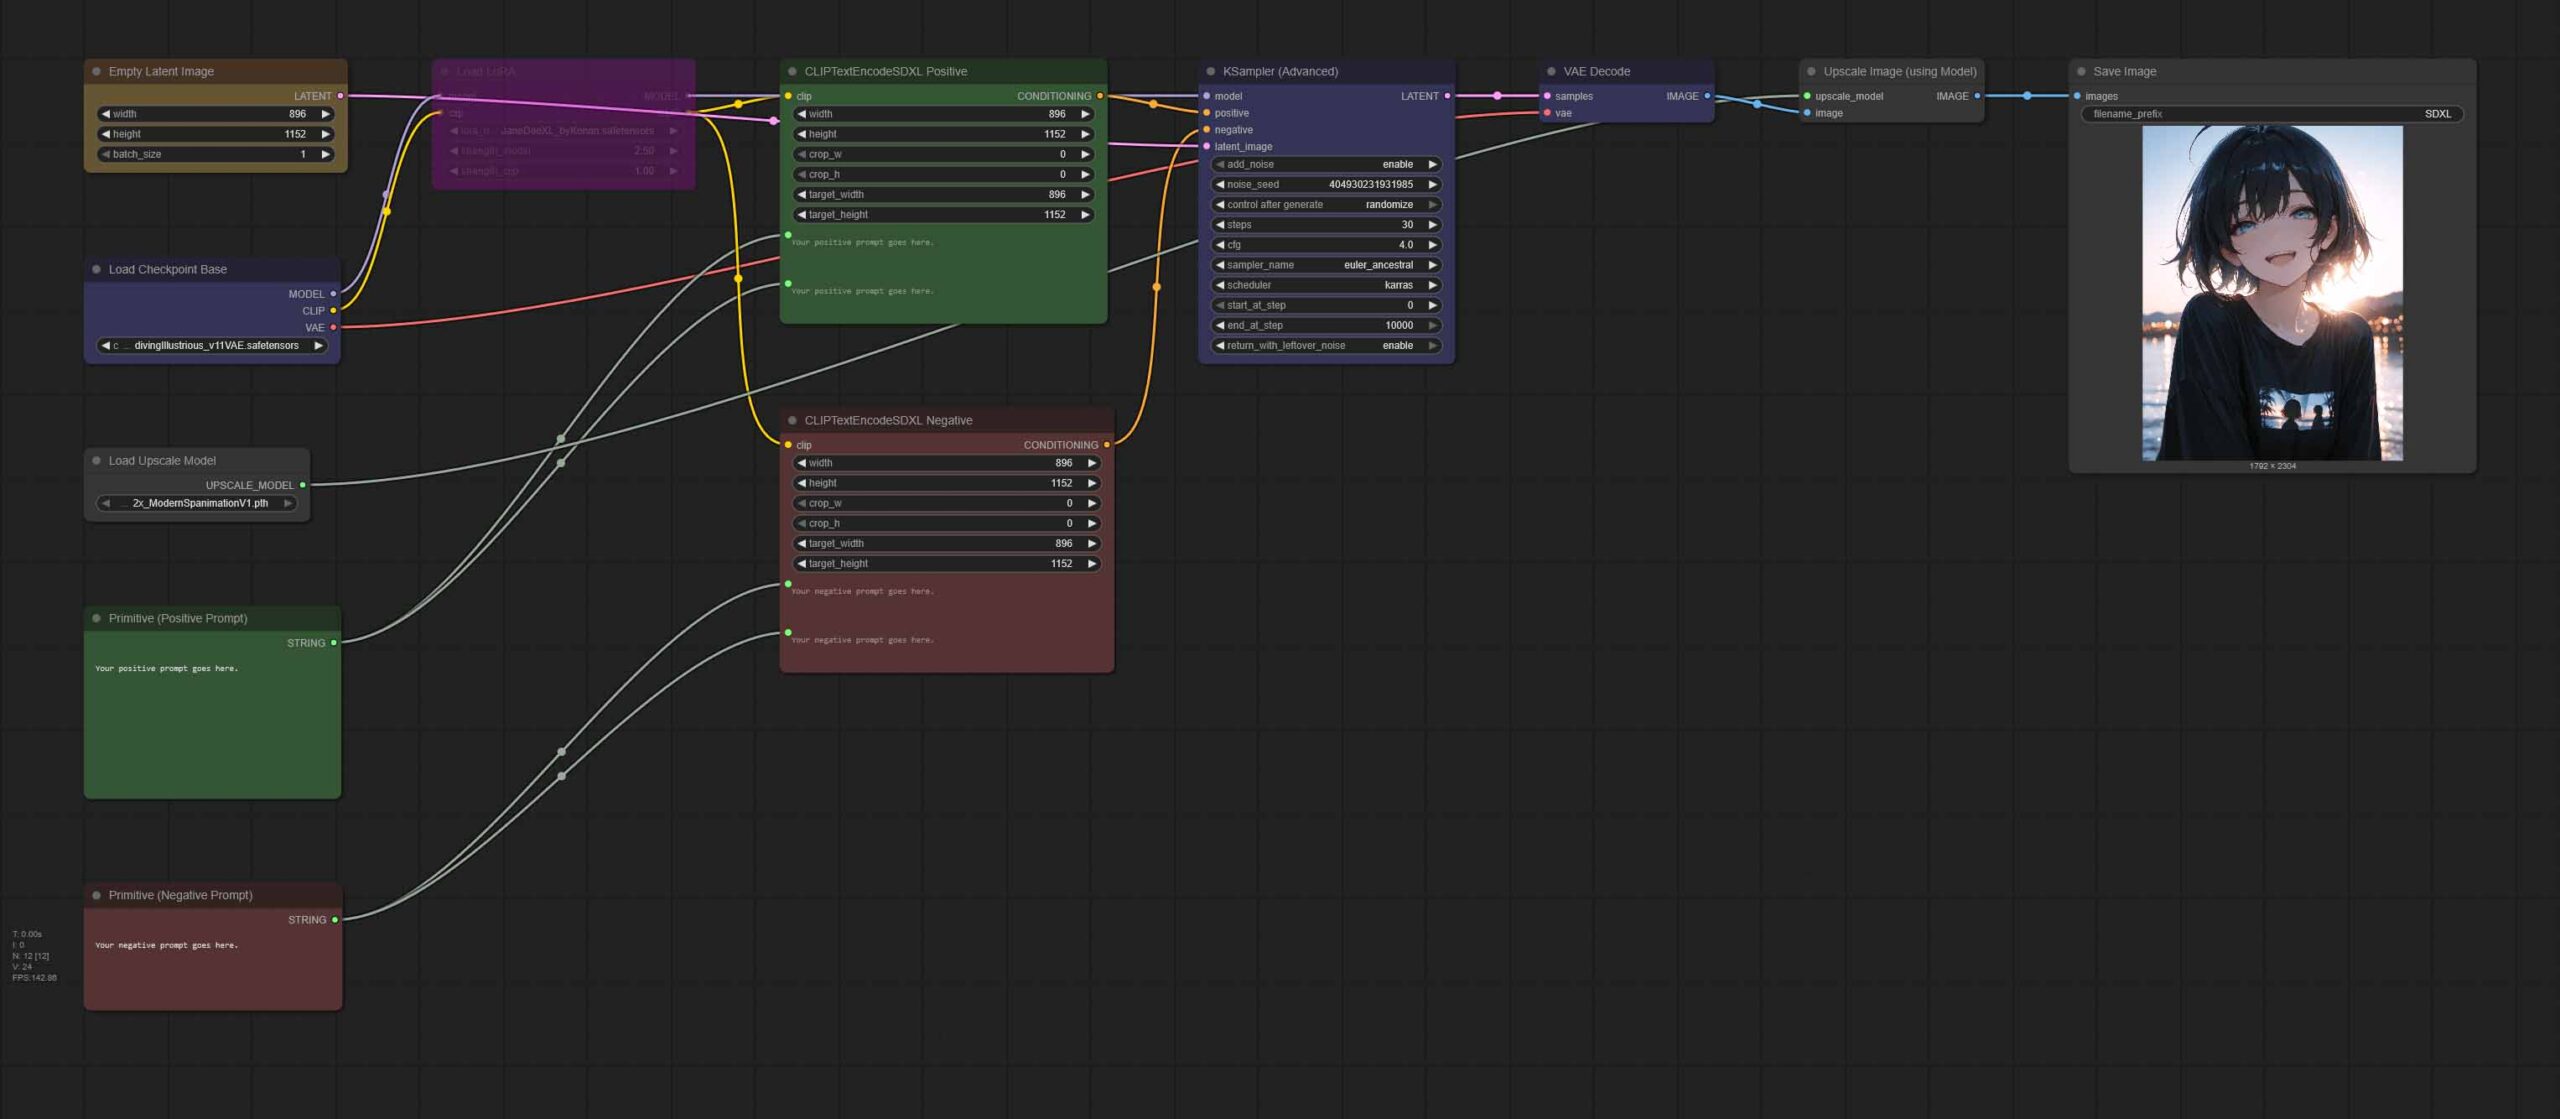
More Workflows With Built-In Image Upscaling
- SDXL Single Image Workflow With Upscaler (With a LoRA Toggle) – Google Drive
- SDXL Img2Img Workflow With Upscaler (With a LoRA Toggle) – Google Drive
Both the simple single image generation workflow and the img2img one can be used with image upscalers, which are invoked into our pipeline by first loading the upscaling model into memory with the use of the “Load Upscale Model” node, and then upscaling the output image at the end of the line using the “Upscale Image (using Model)” node.
Your output will be enlarged to the size defined by your chosen upscaler’s scale parameter. There exist 2x, 4x, 8x upscaling models, and so on.
Upscaler models, typically seen in .pth file formats can be found in many places online, but one of the best websites containing a rather large number of these alongside some usage example is openmodeldb.info.
Once you have downloaded an upscaling model, simply put it in the (ComfyUI\models\upscale_models) directory, and refresh the ComfyUI interface. Now it should become accessible from the “Load Upscale Model” node in any of the workflows above.
Once the workflow finishes doing its job, you should end up with a higher resolution image at the very end. Simple as that!
To generate detailed high resolution images with much more details right away without the need for upscaling, you can also try out a different technique, namely “Hires fix”, or “latent upscaling”. You can learn more about it here.
Check out my latent upscaling/Hires. fix guide, it’s a great place to go from here: Latent Upscaling in ComfyUI – Hires Fix Without Custom Nodes
Using LoRA Model’s With SDXL In ComfyUI

At this point you are approximately two clicks away from using LoRA models for introducing additional characters, elements or styles into your SDXL generations.
LoRA models are essentially relatively small model files which when used alongside compatible SDXL checkpoints, can help you introduce new unique elements, characters, and styles into your generations—even those not present in the SDXL/Illustrious XL training dataset.
Remember that you can’t use a Stable Diffusion 1.5 LoRA with an SDXL model. Trying to do so will result in an incoherent or broken image output. Only LoRA models trained specifically for select SDXL models can be used here. You can find many of these on sites like Civit.ai.
In ComfyUI the only thing you need to do to start using LoRA models in your workflow is to load them in between the main model load node and the CLIP nodes containing your prompts. Our workflow presets have already taken care of that for you!
To use a compatible LoRA model with any of the workflows above, simply click on the deactivated “Load LoRA” node (the purple one in the top left of your ComfyUI viewport), right click it, and select the “Bypass” option.
This will deactivate the LoRA node bypass which is set in all of our workflows by default, and allow you to select a LoRA model from the drop-down menu provided you have one already downloaded and moved into the ComfyUI LoRA directory (ComfyUI\models\loras). You can find many SDXL LoRA models over on civit.ai.
Remember that some LoRA models have to be activated using a combination of “trigger words” added to your main positive prompt to fully affect your image outputs. If that’s the case for your LoRA model, it will be explicitly stated somewhere on the page you’ve downloaded it from.
For instance, for the LoRA model we’re using in our example workflows, the set of trigger words is as follows:
1girl, janedoe, bangs, black hair, blue eyes, red hair, long hair, mouse ears
To modify the effect a LoRA model has on your final generation you can change the “weight” parameter in the LoRA model node. Different weight values will work for different LoRA models, with the most commonly used weight values are somewhere between 0.8 and 2 (again, that will largely depend on the model you’ll decide to use).
For starters, you can try experimenting with different “strength_model” parameter values, while keeping “strength_clip” at the default value.
You can freely add up as many LoRA models as you like, chaining them together one after another. Experimentation is key!
Where To Go From Here?
Congratulations! With these simple workflows you have literally hours of fun ahead of you if you want to experiment with creative generations and image modification using SDXL. ComfyUI is a great piece of software which is much easier to get hang of than many people paint it to be.
The first thing I would do after finishing this tutorial is to go and experiment with more advanced prompting techniques. The best way to do that is to search for images generated using your chosen SDXL model on sites like Civit.ai or Tensor.art and try and copy and modify the prompts that the other users are sharing. This way you can learn what works and what doesn’t work for the particular model you’re using, and perhaps as ChatGPT would say “take out the guesswork” out of the process.
You can also learn more about the Illustrious XL models family, for one in this short guide which includes some more prompt examples.
From here, you can go and learn about inpainting using custom image masks, outpainting, utilizing ControlNet to pose and style the characters in your generations, experiment with local video generation and much more.
Aside from the collection of local AI how to’s and guides available here on TechTactician there are also many other resources you can use to learn more about advanced ComfyUI workflows and techniques. Such resource is the official ComfyUI documentation, where you can read much more about more advanced image generation pipelines. Until next time!