The Ultimate Vocal Remover is one of the best free and open-source AI song stem separation programs I’ve come across. You can use it for separating and removing vocals from music tracks, exporting individual instruments, and more! Here is how to quickly set it up.
Ultimate Vocal Remover – How To Install
Ultimate Vocal Remover features a neat one-click installer which you can download from their official UVR GitHub repository here. Here is how to get it working on your machine in about 3 minutes total.
This software has really low requirements, and can work using either just your CPU, or your graphics card. The minimum recommended GPU model is the NVIDIA RTX 1060 with 6GB of VRAM.
For the purpose of this guide, I’m using it with my older RTX 2070 SUPER 8GB, and the conversions take just about a few seconds for most 3/4 minute songs.
If you have an older graphics card, don’t worry! You will still be able to convert your tracks using just your CPU, it will just take a little bit more time.
Step 1 – Download An Appropriate Version of UVR
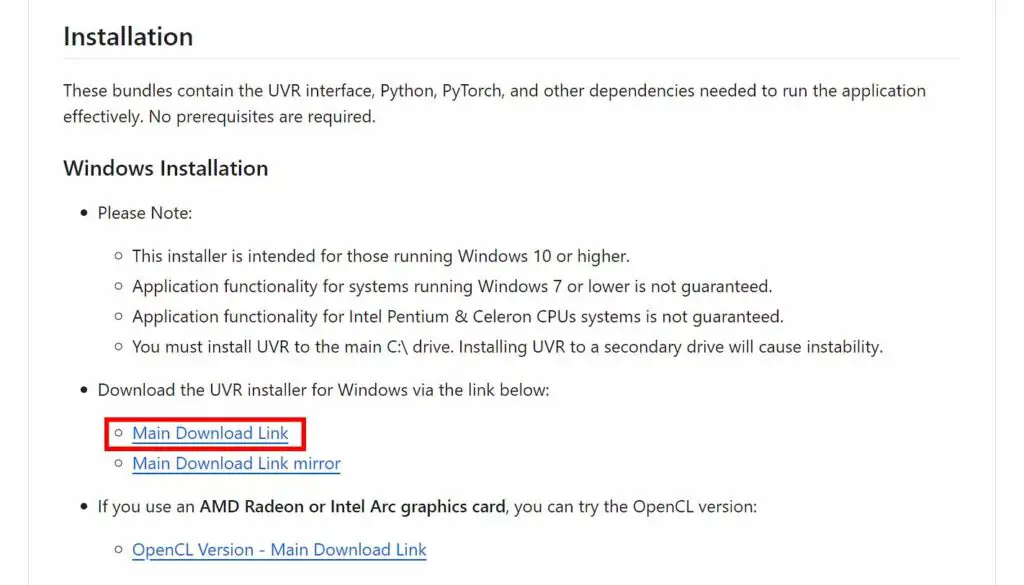
Right there on the main repository page you will notice the link to the Windows package download. Go ahead and click it.
Important note: if you’re using an AMD or Intel Arc graphics card, rather than one from NVIDIA, you need to download a different package, which is linked below the Windows ones. Still, note that the support for the AMD version of the software is limited, at least for now.
If you’re not using Windows, but rather Mac or Linux, there are also appropriate versions of the software available for your OS, and once again, the links for those are located on the main page of the GitHub repository below the main installer download, alongside the detailed system-specific installation instructions.
Step 2 – Run The Software Installer

Once you have downloaded the .exe installer file, simply double click it to run it. If it doesn’t start, or it starts and then it closes immediately, make sure that it’s added to your Microsoft Defender exclusions list, so that Windows doesn’t stop it from running.
Accept the agreement, select your preferred installation path, and optionally, create a desktop shortcut for the tool. Click “Install”, and once the installation process is finished, you will be able to start the software right away.
Ultimate Vocal Remover Main Settings
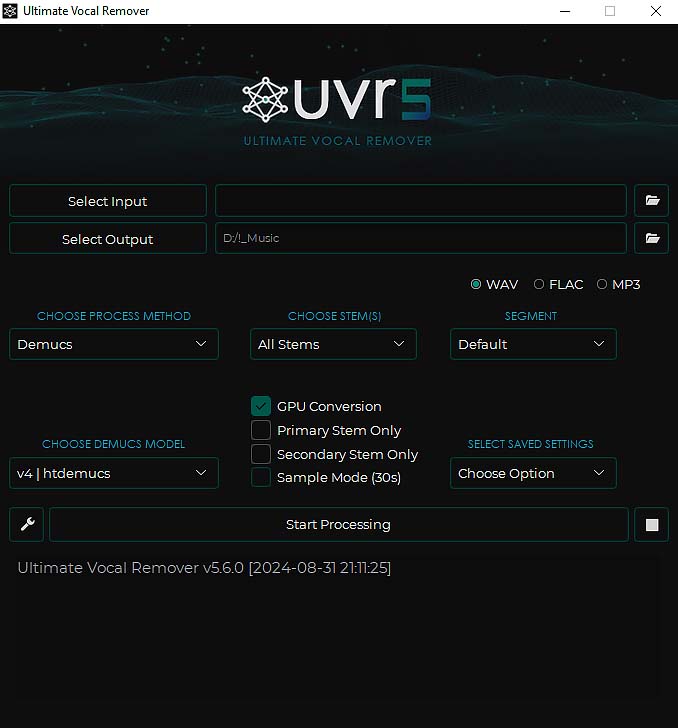
And here, on the image above, you can see the main software interface. Let’s do a quick rundown of the settings you can change here, because some of these are really important.
Input/Output Audio Files

On the very top, you can find the input and output fields. The input should be the full song that you want to divide into stems or make an acapella or instrumental from, and the output should be the folder in which you want to save your newly generated audio files.
Processing Method/Model Selection Menu
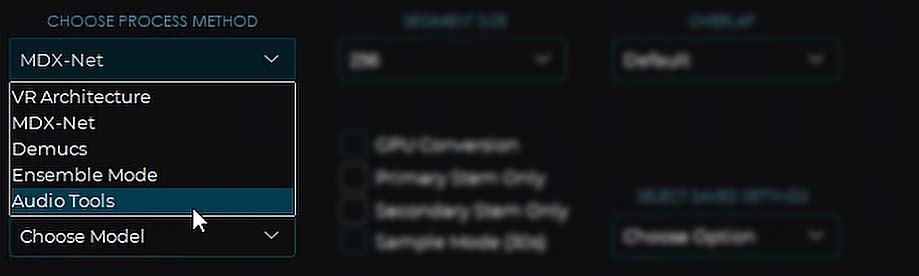
Further down, in this drop-down menu, you can choose between quite a few processing methods, each of which will let you utilize different stem-separation models.
Depending on the model you’ll choose, you will be able to export different stem combinations, and choose different secondary options.
Different track conversion models can give you drastically different results with some tracks, so if your first separated track doesn’t sound quite alright, you should pick a different model
to handle the process and see if the results are better.
You can read more about the model-specific settings below!
The Ensemble Mode
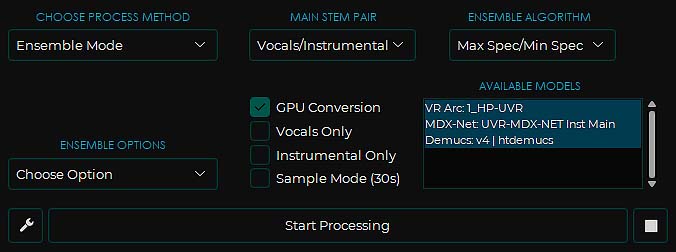
In the processing method selection menu you can also find the “ensemble mode”, which lets you run the track conversion process with a few different chosen models at once, if you’d like to.
When using the ensemble mode, you can select the models in the “available models” window on the right side of the UI, as shown above.
GPU Conversion Switch
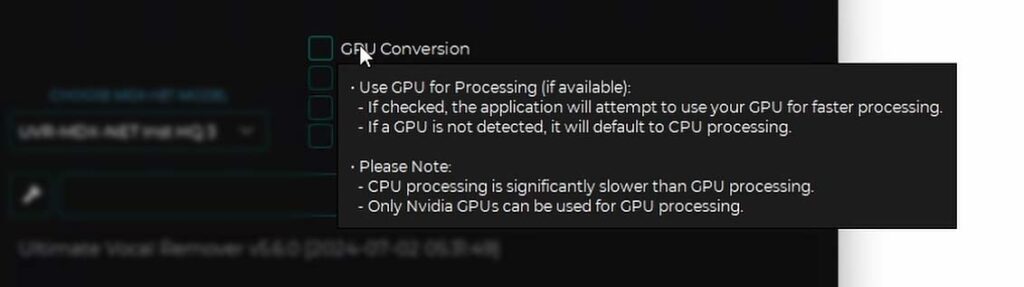
If you want to use your GPU for the conversion process, and you really should if your graphics card is relatively recent and has the minimum amount of 6GB of VRAM on board, be sure to check the “GPU conversion” box here.
If you want to use your CPU, leave this box unchecked, but be warned – the stem separation process can take much longer if the software is not utilizing your graphics card.
Additional Settings Menu
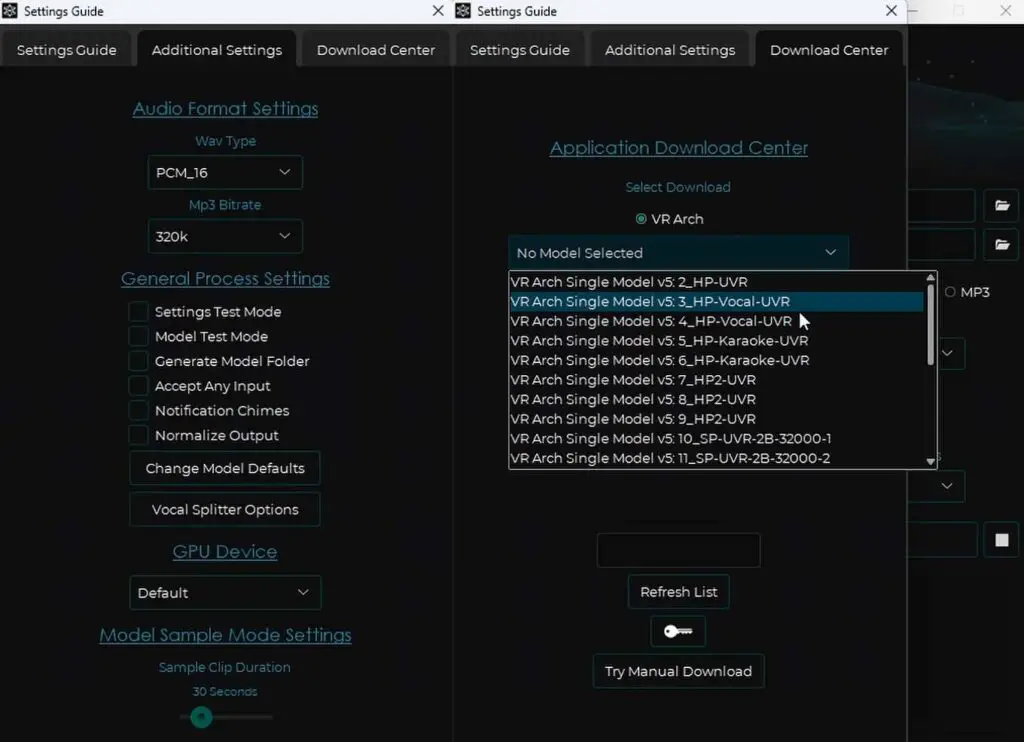
In the additional software settings menu shown above, and available by clicking the little cog button in the main interface window, there are much more options available.
These include more options for the models the software uses, and more output file format settings. When doing your first conversion you can safely leave these at default.
There are also some more vocal splitting options available here, including automatic removal of reverb from the sample vocals, and a vocal-split mode which is able to
export lead vocals and the backing vocals to separate files.
In the last section, which is the “Download center”, you can download a lot of different models that you can use for your conversions. The models listed here are mostly either very specific versions of the main line models, or models made to be stem-specific, for example optimized for exporting drum tracks.
For casual usage, you don’t need to worry about these at all, however if you’d like to experiment later on, these are here for you.
Model-Specific Settings
Now, there are also a few important settings that are applicable only to specific models. Although for basic conversions these are best left at their default values, if you want higher quality results in certain specific conditions, or want to have more control over the software’s performance, you can tweak these to your liking.
VR-Architecture Models
The VR-Architecture models let you adjust both the window size and the aggression setting.
Window Size
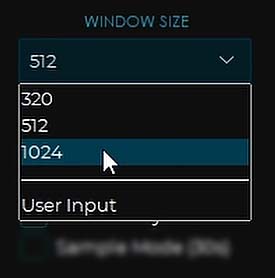
The Window size setting is a speed-quality tradeoff – the larger the window value, the faster the conversion process and higher resource usage with lower output quality, and vice-versa.
512 is the default setting for an average conversion quality, and balanced resource usage.
Aggression
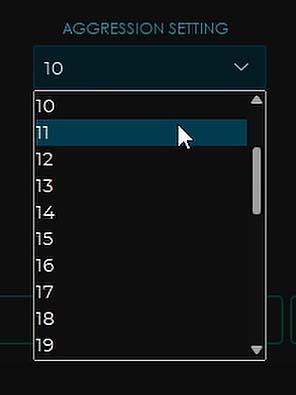
The aggression setting, allows you to set how “strong” the vocal removal will be. 10 is the default here for most of the models separating vocals from the instrumental track.
The higher values are able to ensure deeper vocal extractions with higher voice separation quality, however setting aggression to any value over 10, can easily introduce muddiness into your instrumentals. Keep that in mind.
MDX-Net Models
The MDX-Net models let you modify two main settings: segment size and overlap.
Segment Size
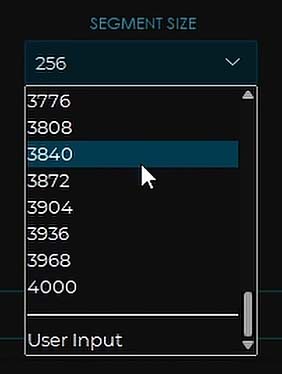
The segment size setting controls how much data will be processed at once—in one segment. The larger the segment size, the more system resources the conversion
process will use, but the higher the quality your output can be. This setting is called “chunks” in the older versions of UVR.
Overlap
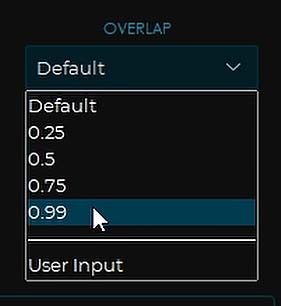
The overlap setting controls the overlap between the so-called prediction windows. The higher you set the overlap, the higher the quality of your output can get, but the conversion time will increase accordingly.
Once again, if you’re doing your first test conversion, it’s best to leave these at their default values.
Demucs Models
Finally, the Demucs model family is the one you want to use if you don’t just want to split the vocals and the instrumental, but you also want to have the bass, drums, and other instruments in separate audio files once the conversion finishes.
Stems Selection & Segment Size
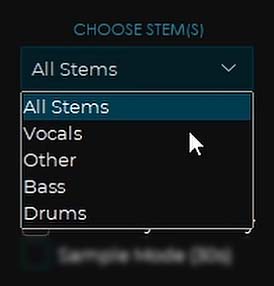
This model also has two settings, one of which tells the software which stems you want to export, and the other – the segment setting which works exactly the same as the segment setting in the MDX-Net models.
If you need even more information, all of the settings are explained rather nicely in floating tooltips which appear once you hover over a certain option within the software.
Lastly, you can of course select which file format you want your stems to be exported to. You can choose between wave, flac and mp3.
Another important note: if you don’t have ffmpeg installed on your system, the software will throw an error if you attempt to convert a track into a non-WAV file.
If you need a quick 3-minute guide on installing ffmpeg on Windows 10 and 11, you can find ti here. If you don’t plan to export your tracks to non-WAV files however,
you don’t need to worry about that.
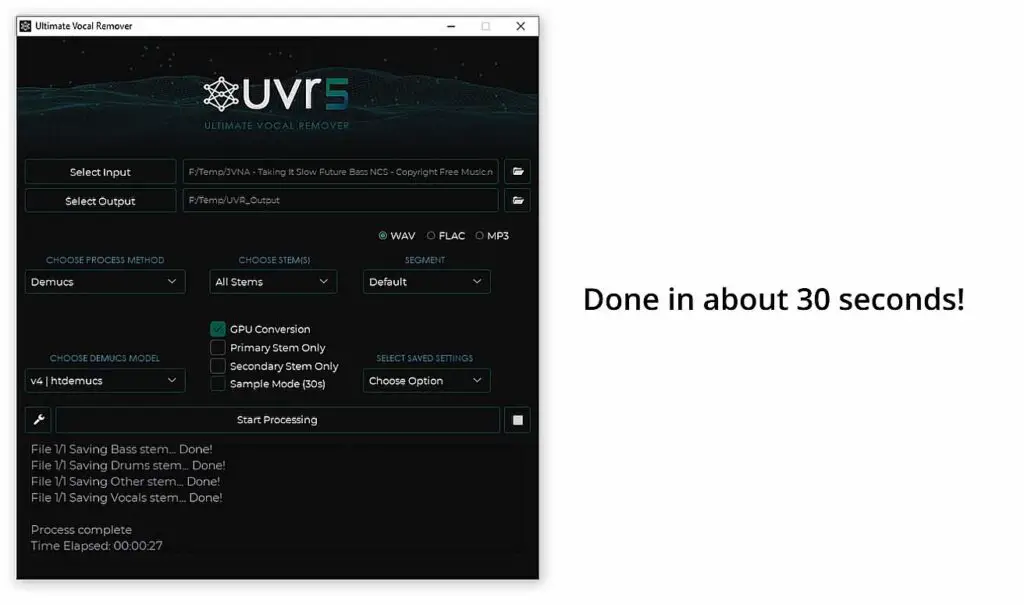
Quick Conversion Speed Test & Example Stem Outputs
Let’s do a quick test to see how fast a full 4-stem export will be on an average-spec system. Here is how long this example conversion took on my RTX 2070 SUPER with 8GB of VRAM.
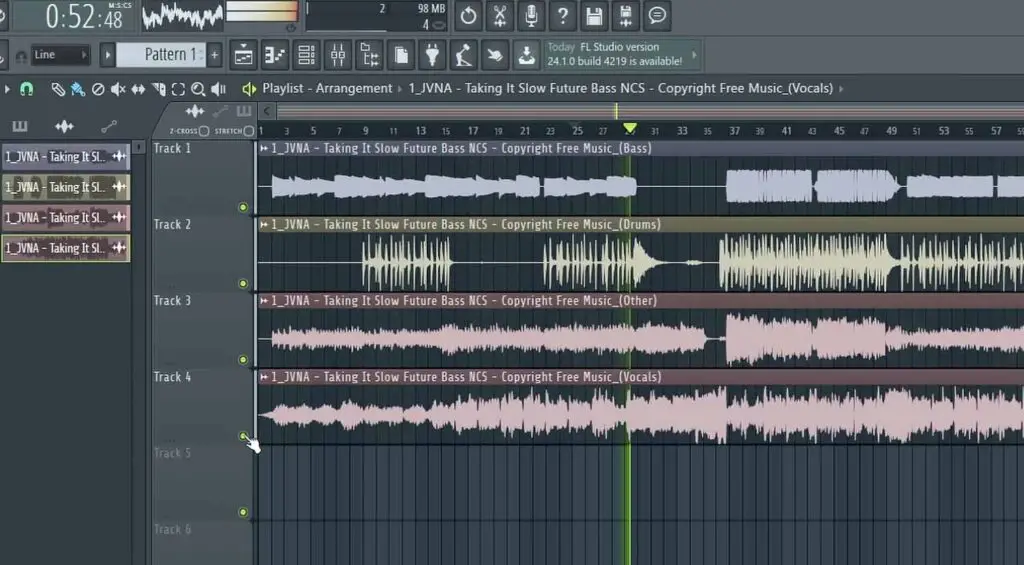
And here are some example stem conversion results (Vocals, Drums & Bass samples exported from a relatively complex audio track). The song used is JVNA – Taking It Slow from NCS (NoCopyrightSounds). See (listen) for yourself!
The Full Song:
Note: The example might not load correctly if you’re visiting the site using the private mode in your browser / have AdBlock turned on.
Vocals:
Drums:
Bass:
That’s it! It was quite simple, wasn’t it. As always, consider donating to the developers of this software if you’d like to support open-source projects like this, I’ll leave
a link to their buymeacoffee profile here in case you’d like to do so!
The results will vary depending on the model you’ll choose, the conversion settings, and most importantly – the song you’ll decide to export the stems from. In general, most modern electronic tracks with vocals will be the easiest to get clear and high quality stems from.
Older tracks, or songs with lots of different instruments, complex track structures or sub-optimal mixdowns may still pose a challenge for the software and require more experimentation to get the conversion right. In general though, if you mostly care about separating a vocal track from the song, there aren’t many cases in which this program will let you down.
I hope this guide was helpful to you! If it was, feel free to check out our other guides for various AI software and see you next time!