In this quick guide, we’ll quickly go through the installation process of the Stable Diffusion Focus Web UI to let you run Stable Diffusion XL models locally on systems with as little as 4 or 6GB of GPU VRAM.
When you’re done with this quick installation tutorial, feel free to check out the second part of this guide: Basic Settings & Image Generation – Fooocus WebUI Guide [Part 2]
Wanna learn Automatic1111 instead? – Then hop on here: Automatic1111 Stable Diffusion WebUI All Basic Settings Explained [UPDATED]
Stable Diffusion Focus Web UI is a streamlined, open-source client designed for AI image generation. Unlike other complex UIs, it focuses on simplicity, offering users an intuitive interface that minimizes distractions while still offering plenty of interesting in-built tools. Whether you’re a beginner or an experienced user, this tool makes generating AI images easier than ever. Check out the full video tutorial on my TechAntics YouTube channel too!
Minimum System Requirements
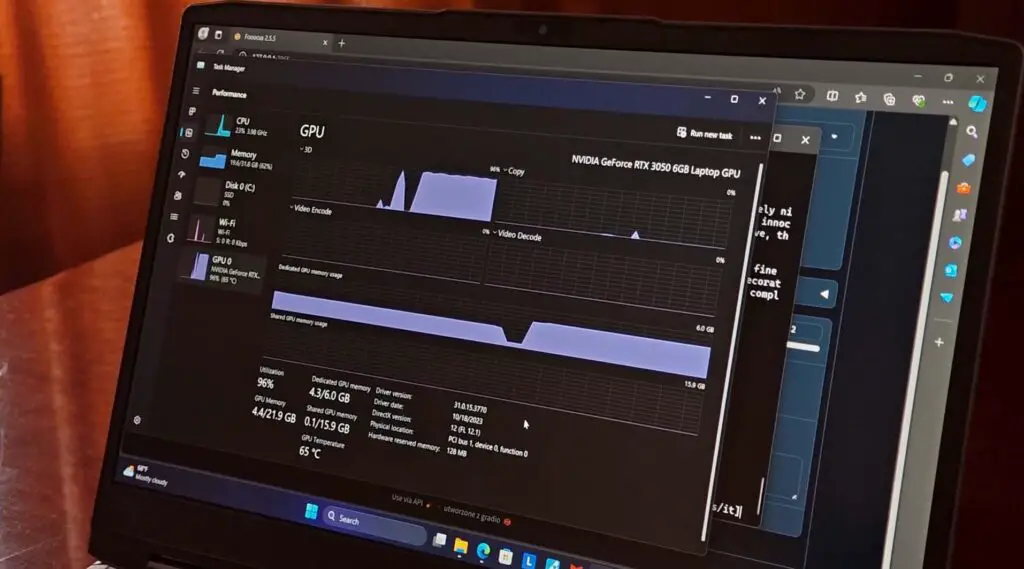
Before we start, let’s check if your system meets the minimum requirements to run the software. And you might be in luck even if you only have a lower-end laptop on hand.
To successfully install and run the Fooocus WebUI, in our configuration you need the following:
- Windows 10 or 11.
- 4GB of VRAM if you have an NVIDIA GPU, (6GB or more recommended for optimal image generation speeds).
- 8GB VRAM or more if you have an AMD graphics card in your system.
If you’re using an AMD GPU the support is still in the beta stage as of now, but you should still be able to use the software, albeit with fewer optimizations compared to NVIDIA cards. In general, the generation speeds on AMD graphics cards will be much lower than the ones on NVIDIA GPUs, at least as things are now. For AMD users, the installation step will also involve one more simple step.
Performance Benchmarks – SDXL Generation Speeds
Here is my quick performance benchmark I did on a Lenovo LOQ 15 laptop with an NVIDIA RTX 3050 6GB, and on my testing rig with an NVIDIA RTX 2070 SUPER, using all of the performance presets available in the WebUI.
| 1152x896px image size | RTX 3050 6GB (Laptop) | RTX 2070 SUPER 8GB (Desktop PC) |
|---|---|---|
| Quality | 70.04s | 50.25s |
| Speed | 38.04s | 27.36s |
| Extreme Speed | 11.45s | 7.49s |
| Lightning | 9.51s | 6.14s |
| Hyper-SD | 10.16s | 6.80s |
In the tests with the mentioned Lenovo laptop, I was able to hit ~1.32 s/it (seconds per iteration), which is quite efficient given the hardware. In comparison, the developers report speeds of about 1.35 s/it on a system with 16GB RAM and the RTX 3050 6GB.
As you can see, in both cases the image generation speeds are pretty good considering that we’re talking about SDXL models here. The desktop 2070 does perform just a little bit better than the 3050 on the Lenovo LOQ.
Step-by-Step Installation Guide
1. Downloading and Unpacking the Software
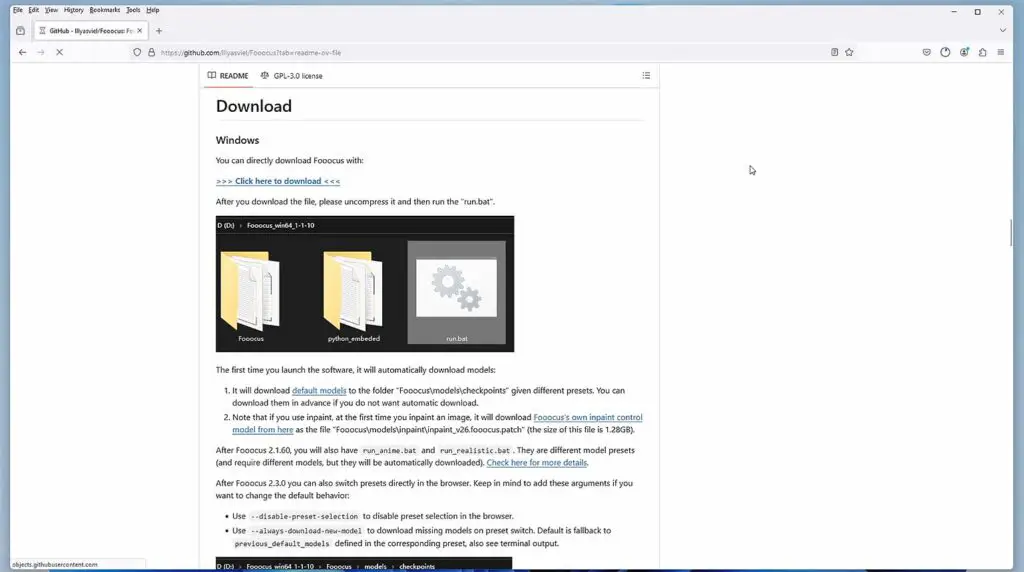
- Visit the official Stable Diffusion Fooocus Web UI GitHub Repository here.
- Download the Windows zip file from the repository by clicking the download button on the main page.
- Once the file is downloaded, unpack it in your desired location.
2. Installing the Required Dependencies
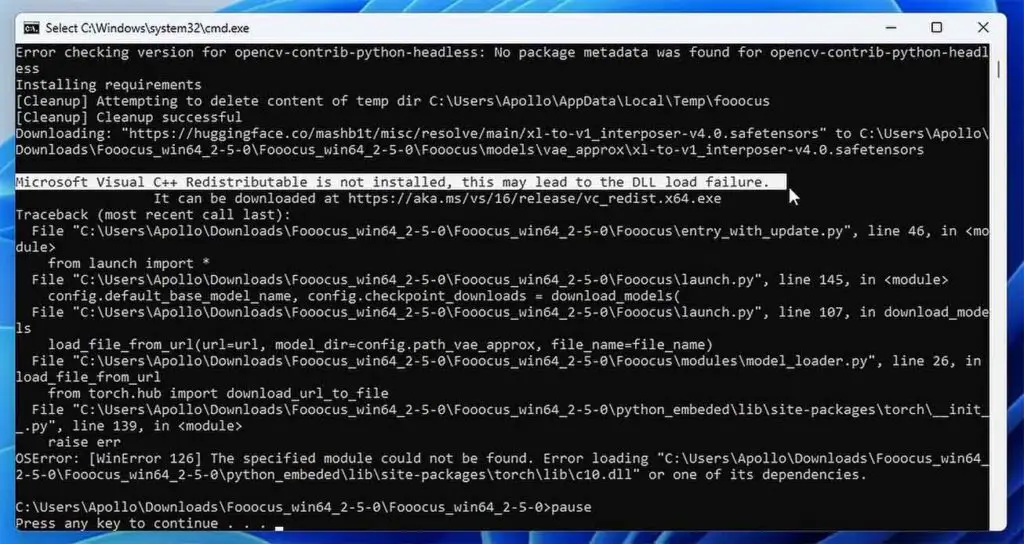
There is only one dependency to be installed here. The Fooocus WebUI requires the Microsoft Visual C++ Redistributable to run. Without this, you may encounter the Microsoft Visual C++ Redistributable is not installed, this may lead to the DLL load failure. It can be downloaded at (...) error when trying to start the program.
In many cases, you will have this software package already installed. If you don’t however, you’ll need to download it from the official Microsoft website, and go through the quick installation process.
- Download the Visual C++ Redistributable from here, or using the link provided by the Fooocus WebUI in the error log (as shown above) .
- Run the one-click installer for the redistributable and follow the on-screen instructions.
If you’ve done that, you can now proceed to the next step.
3. Running the run.bat File to Install & Run the WebUI
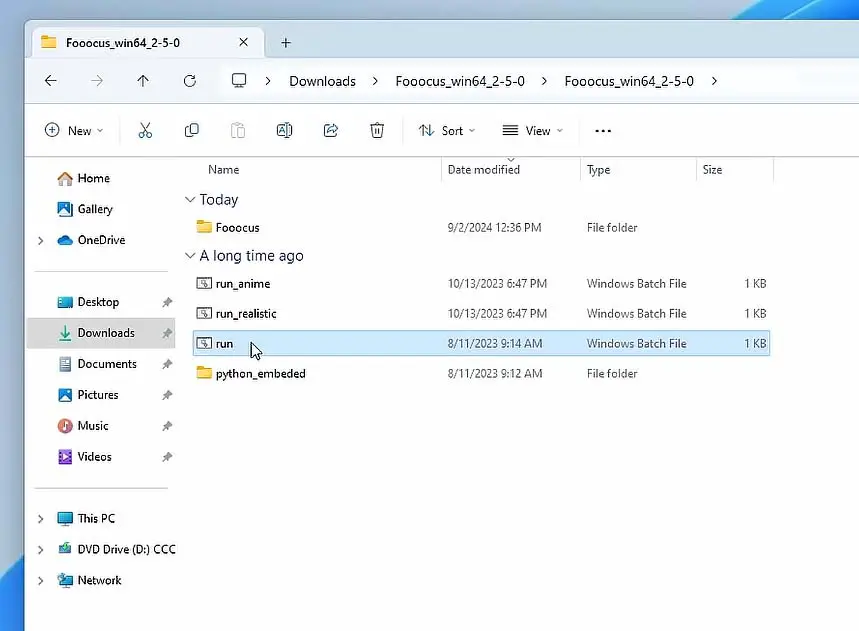
- Inside the unzipped folder containing the WebUI files, double-click the run.bat file to launch the software. You might need to click “yes” on the UAC (user account control) Windows popup, or add the WebUI folder to your antivirus exceptions list if the .bat file refuses to start.
- If you’re using an AMD GPU, you will need to edit the
run.batfile with the following lines:
.\python_embeded\python.exe -m pip uninstall torch torchvision torchaudio torchtext functorch xformers -y
.\python_embeded\python.exe -m pip install torch-directml
.\python_embeded\python.exe -s Fooocus\entry_with_update.py --directml
pause
A terminal console window will open, and the WebUI will start downloading the base model it requires to run. The actual web interface won’t open until this process is finished.
This might take a while, depending on your internet speed, as the model files are pretty large. Once the download process is finished, the WebUI should open automatically. If it doesn’t copy the local WebUI address from the console window to your browser to access the program.
Don’t close the system console window if you don’t want to exit the WebUI. The program process is running within it, so once you close it, you will terminate the program. If you do that and you want to start the WebUI again, simply run the “run.bat” file again.
That’s it! The installation process is complete!
Note: If you have an AMD GPU, you will also have to change the contents of the run_anime.bat and run_realistic.bat files accordingly, if you plan to use them in the future: .\python_embeded\python.exe entry_with_update.py --directml --preset anime or .\python_embeded\python.exe entry_with_update.py --directml --preset realistic.
4. Enabling Dark Mode (Optional)
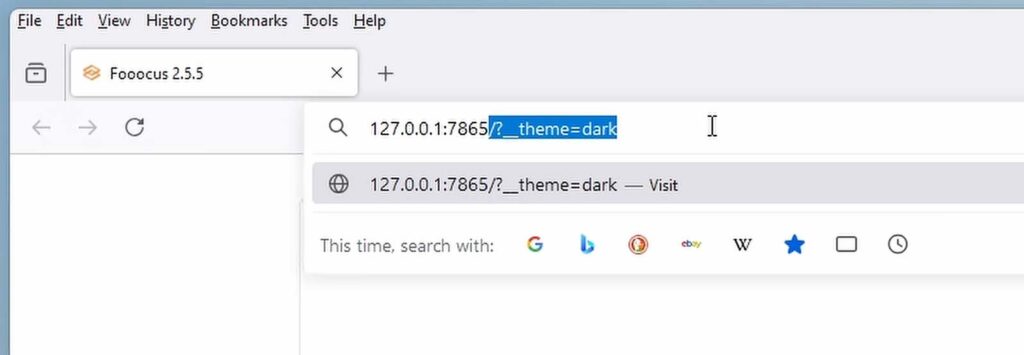
As the Fooocus WebUI is based on Gradio, the default display mode is based on the display mode of the browser you’re opening the program in. The same is true for the Automatic1111 WebUI.
If the interface opens in “light mode” and you prefer a dark theme instead, simply append ?theme=dark to the address bar (as shown on the image above) and press Enter. The WebUI should refresh, this time in dark mode.
The WebUI Is Installed – What Now?
Congratulations! Now you have access to one of the best and most straightforward free tools for local image generation available online. All thanks to the developers of this magnificent piece of open-source software.
Now, it’s time to learn how to use it!
In the second part of this guide, we will follow up with explaining all the basic modes, settings and parameters you can tweak to:
- Upscale your images to resolutions even higher than photos taken with professional cameras.
- Introduce more details into your creations.
- Outpaint any given images as many times as you want.
- Use any imported image as a part of your prompt using the “image prompt” feature.
- Import custom checkpoints and LoRA models.
- …and much more!
Check out the second part of the guide here: Basic Settings & Image Generation – Fooocus WebUI Guide [Part 2]
If you want to know even more about all the image generation parameters, you can also check out the other “Stable Diffusion Automatic1111 WebUI Settings Explained – Beginners Guide” tutorial I have here, which goes in-depth on more basic settings available in other popular SD WebUI software – Automatic1111.
