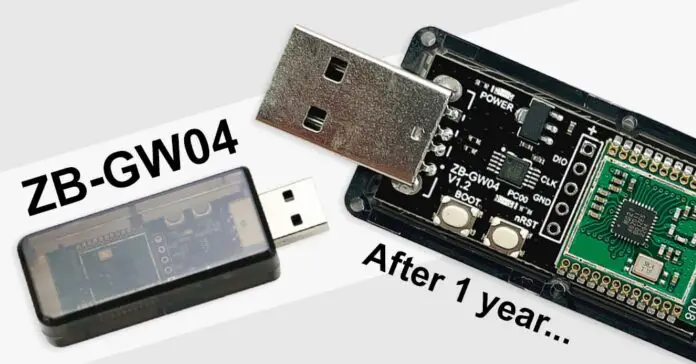
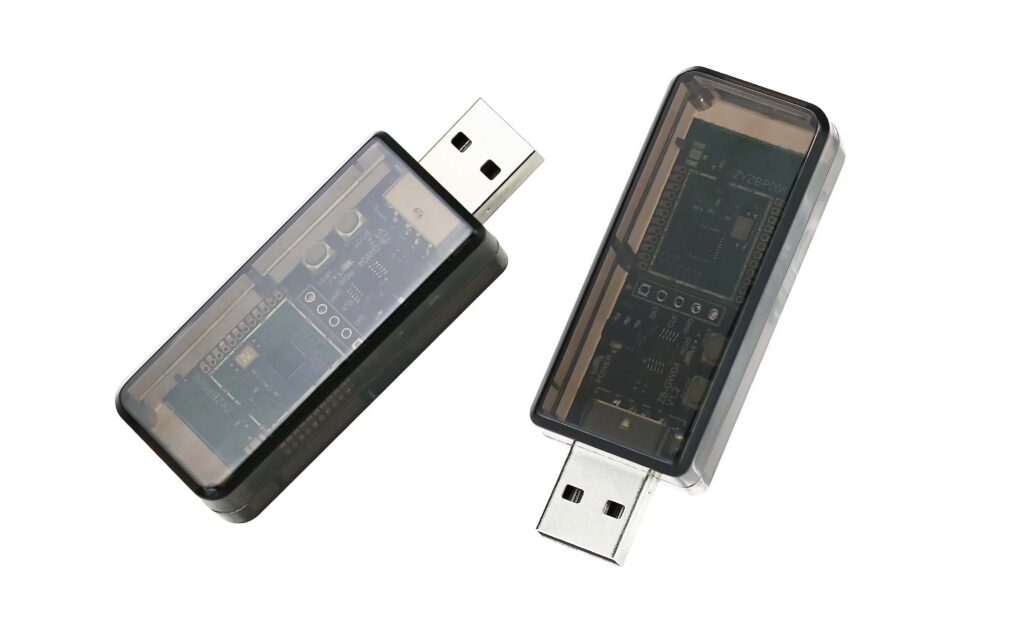
It’s been more than a year since I’ve set up my very first Home Assistant server on a finely aged Fujitsu Futro s720 terminal, and I’ve been using this cheap little dongle as a Zigbee coordinator in my smart home setup ever since. And, frankly speaking, it’s been doing a great job with my rather small collection of approximately 10 different smart devices.
Anyway, let me tell you more about this thing, and follow through with a quick ZB-GW04 dongle setup guide for Home Assistant, both for ZHA, and for Zigbee2MQTT users.
Learn how to control your HA smart home setup using customizable LCD buttons! – Stream Deck With Home Assistant – Quick Tutorial
Why you can trust us: We test all of our products according to the TechTactician consumer usability benchmark methodology which evaluates all of the product characteristics that matter to the user in day to day use. Enjoy the review!
This web portal is reader-supported, and is a part of the Amazon Services LLC Associates Program, AliExpress Partner Program, and the eBay Partner Network. When you buy using links on our site, we may earn an affiliate commission!
The Specs – What Do You Get For $10
For the curious, and also all people still searching for their first Zigbee coordinator dongle let’s quickly decipher all the component names from the specification table above to see what’s hidden inside this little device.
- ZB-GW04 – The name for one of the most popular budget Zigbee dongle based on the EFR32MG21 chipset, featuring a USB interface connected via the CH340E serial converter chip.
- EFR32MG21 – It’s the wireless System-on-Chip (SoC), so the integrated circuit which is the main part of the ZB-GW04 dongle. It’s based on the ARM Cortex-M33 chip. It’s also widely used in many similar Zigbee coordinators like the SONOFF ZB Dongle-E.
- CH340E – This is a USB to serial converter chip which the device uses to be able to send data from its serial connector on the board to its USB port, and the other way around.
- EZSP v8 (EmberZNet Serial Protocol Version 8) – this is the communication protocol that this device uses. Depending on the setup and configuration, this protocol can support devices acting like Zigbee coordinators as well as routers.
Most Zigbee dongles based on the EFR32MG21 chipset will have very similar specifications and provide you with nearly the same user experience as this one, sharing the identical setup process. This is why the setup guide below can be useful even if you choose to get another dongle based on the same SoC (System-on-Chip).
Using the Dongle in Practice, After 1 Year
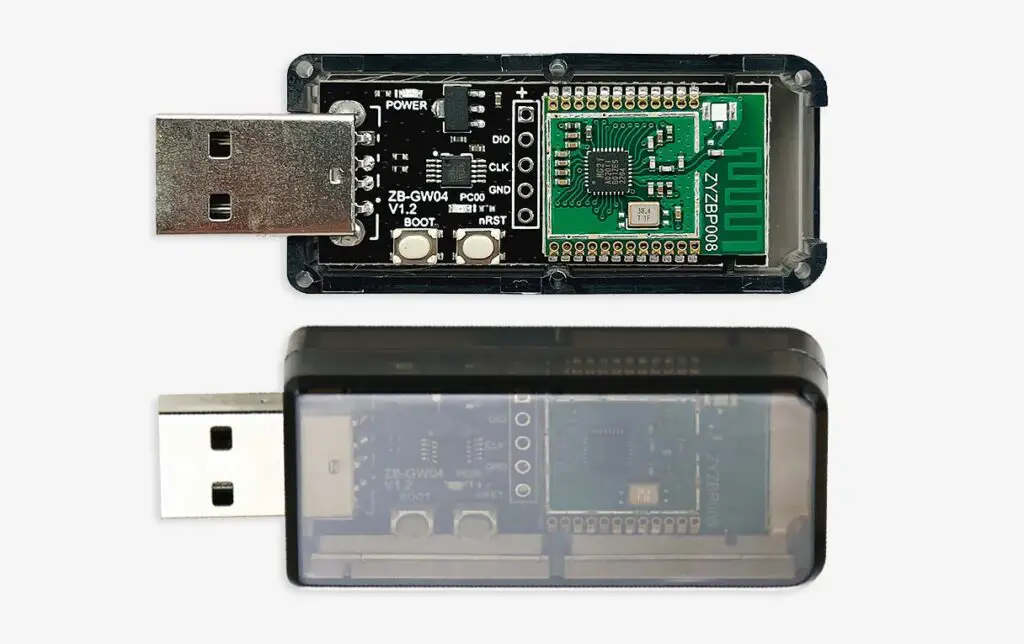
My experience with the ZB-GW04 dongle has been quite a pleasant surprise, and as you will see shortly, the coordinator setup process both for Zigbee Home Assistant (ZHA) and for Zigbee2MQTT was fairly simple considering I was able to easily complete it in less than 10 minutes in both cases.
Initially, in my smart home setup, the dongle acted as the coordinator for the basic ZHA add-on, which is the default option to manage and control Zigbee devices when you install Home Assistant OS on your system.
Later on, feeling that I’ve outgrown the ZHA ecosystem, I’ve decided to migrate my Zigbee network to Zigbee2MQTT. After the migration process, the dongle has served me as the Zigbee2MQTT coordinator, and it still does so to this day.
While this is undoubtedly one of the cheaper ways to quickly get a coordinator for your new Zigbee network, it doesn’t really have much downsides to it. If I were to be nitpicking, the ZB-GW04 dongle doesn’t feature an external antenna (like many of the other EFR32MG21-based models do), so if you need it to be able to directly communicate with devices that are farther away, or behind some obstacles you might want to invest in a slightly more expensive model which has an external screw-in antenna port.
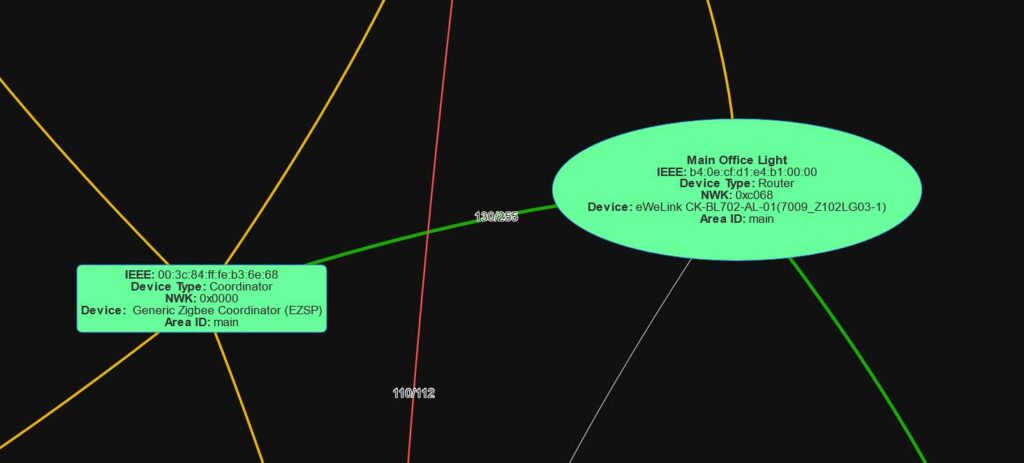
The 32 directly connected devices limit mentioned in the specification isn’t really a problem, as all your Zigbee devices that aren’t battery powered (like most temperature sensors for example), but rather are connected to your mains (think smart lightbulbs), will automatically act as routers in your Zigbee network further increasing the total limit of Zigbee devices that can be present in your entire smart home setup, as you can see on the image above.
The ZB-GW04 dongle be used both as a Zigbee coordinator and a router, depending on the firmware you flash on it, but as all Zigbee devices, it cannot work as both at the same time. When acting as a router, it can be used to expand your Zigbee network range and extend the limit of 32 directly connected devices. By default, it comes with the coordinator firmware and it can act as a Zigbee gateway without any additional tinkering.
The OTA Via Uart functionality on the ZB-GW04 dongle is accessible by pressing and holding the BOOT button, then quickly clicking the nRST button, and finally releasing the BOOT button. While the dongle is in this mode you can flash it with the compatible firmware of your choice, should you ever need to do this.
Other Types of Zigbee Coordinator Dongles Based on the EFR32MG21 Chipset
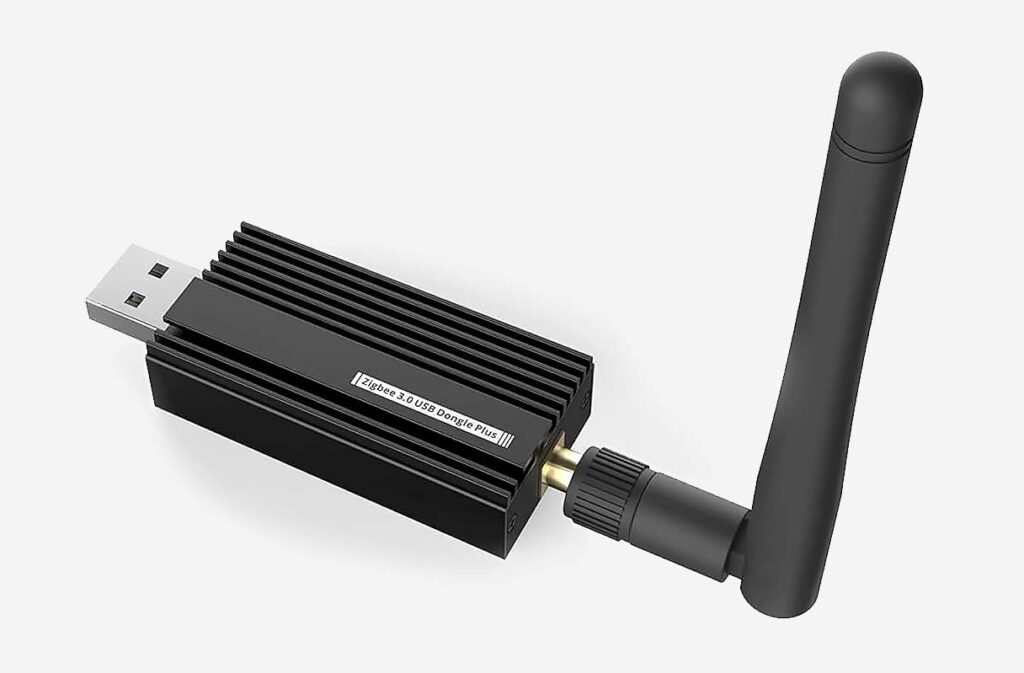
As I have mentioned before, there are a few different types of Zigbee gateway dongles based on the EFR32MG21 SoC. One of the most popular alternatives to the ZB-GW04 is the SONOFF ZB Dongle-E, which while being a little bit more expensive, has a built-in external antenna. Provided good positioning, this small addition enables it to cover larger network areas.
Rest assured that in most cases, the functionality and the setup of dongles with EFR32MG21 as their main chipset will be the same. As long as the dongle comes pre-flashed with the coordinator firmware (as most of them should), you’re good to go.
ZB-GW04 EFR32MG21 Dongle Home Assistant Connection Guide (ZHA & Zigbee2MQTT)
First Step (Only for Proxmox Users)
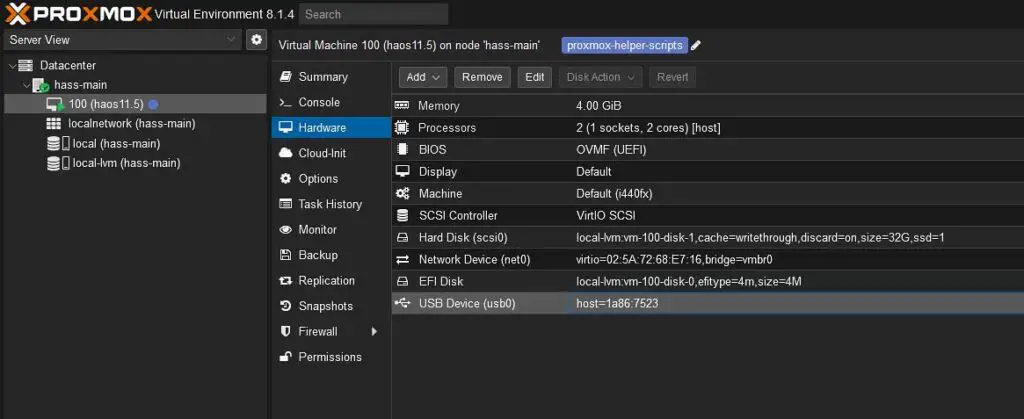
If you have your Home Assistant instance installed on Proxmox, there is one crucial step you need to do before the dongle will be visible to your virtualized HAOS setup. If you’re running Home Assistant on bare metal, or you don’t know what Proxmox is, you can safely skip this step.
If you want your Proxmox Home Assistant VM to be able to “see” the ZB-GW04 coordinator connected to your HA server, you need to enable passthrough for the USB port the dongle is connected to. Luckily, this is extremely simple. Here is how to do it:
- Open your Proxmox interface.
- On the left hand side, locate the node you’ve installed HA on, and enter its drop-down menu.
- Click on your Home Assistant virtual machine in the node drop-down menu.
- Now, in the virtual machine options which will show up on the right, select the “Hardware” menu.
- Once in the Hardware section, navigate to “Add -> USB Device”.
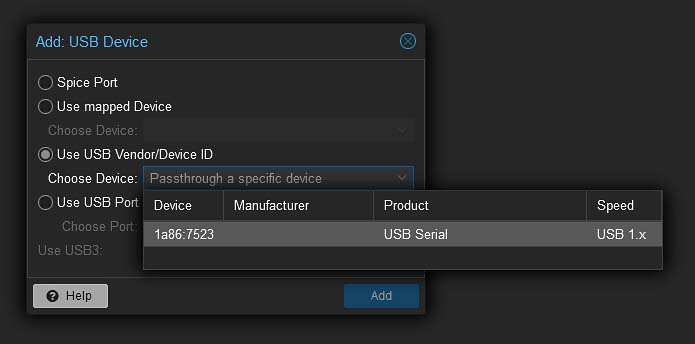
- In the “Add: USB Device” menu, select the “Use USB Vendor/Device ID” option, and select the USB port your ZB-GW04 dongle is connected to. If you don’t have any other USB devices connected to your server, there will be only one option to choose.
- Now the USB device you chose from the list should be visible to the Home Assistant VM. If it’s not, make sure that you chose the correct device, and reboot your HA virtual machine.
If you have trouble finding the Hardware menu for your VM, refer to the screenshot above.
Once that’s done, you’re ready to proceed with the configuration. Here is how to set up the ZB-GW04 dongle both for ZHA, and for Zigbee2MQTT.
ZB-GW04 ZHA (Zigbee Home Automation) Setup Guide
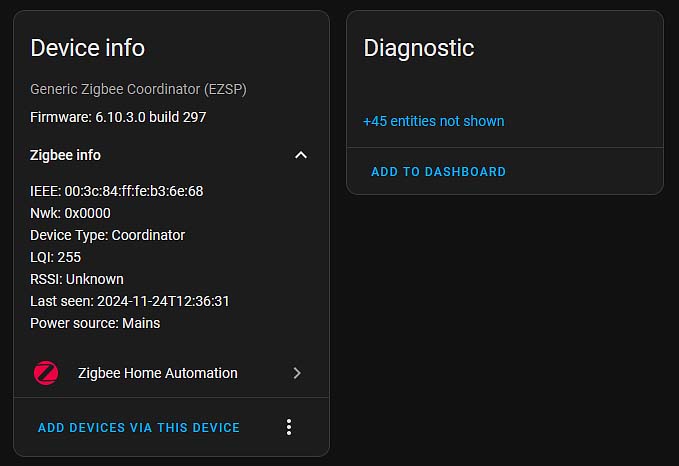
The ZHA (Zigbee Home Automation) integration is one of the most user-friendly ways to get started with Zigbee on Home Assistant.
Here is how to set it up with our ZB-GW04 coordinator with ZHA in a few short steps:
- Make sure that your coordinator dongle is plugged into a USB port your HA server.
- If you’re using Proxmox, make sure that you have configured passthrough for the dongle (see above).
- If ZHA isn’t installed by default, use the HA integrations menu to add it to your HA instance. You can check if it’s present in the “Settings -> Devices & Services” menu.
- Go to your Home Assistant settings.
- Navigate to Integrations and click the “Add Integration” button.
- Search for Zigbee Home Automation and click on it.
- Right after you select the ZHA integration, you will be asked to select your dongle from the devices list.
- Identify the dongle in the list of serial devices (it can be named things like:
/dev/ttyUSB0,/dev/serial/by-id/usb-1a86_USB_Serial-if00-port0, etc.). In your case, the path identifying the dongle might differ. - Select the correct device/port from the list.
- Identify the dongle in the list of serial devices (it can be named things like:
- That’s it! Now you’re ready to pair your Zigbee devices with Home Assistant.
- Put your new Zigbee devices in pairing mode, if you have any on hand.
- Use the ZHA integration interface to discover and add devices to your network.
ZB-GW04 Zigbee2MQTT Setup Guide
For those who prefer a more feature-rich integration, Zigbee2MQTT offers some more advanced configuration options, better community support and more extensive device compatibility.
Configuring the ZB-GW04 dongle and setting it up to work with Zigbee2MQTT can be a little bit more complicated than the ZHA setup, but if done right and according to instructions can also take as little as 10 minutes to get it working.
Before you begin the configuration process, you should quickly locate and grab the device ID of your coordinator dongle.
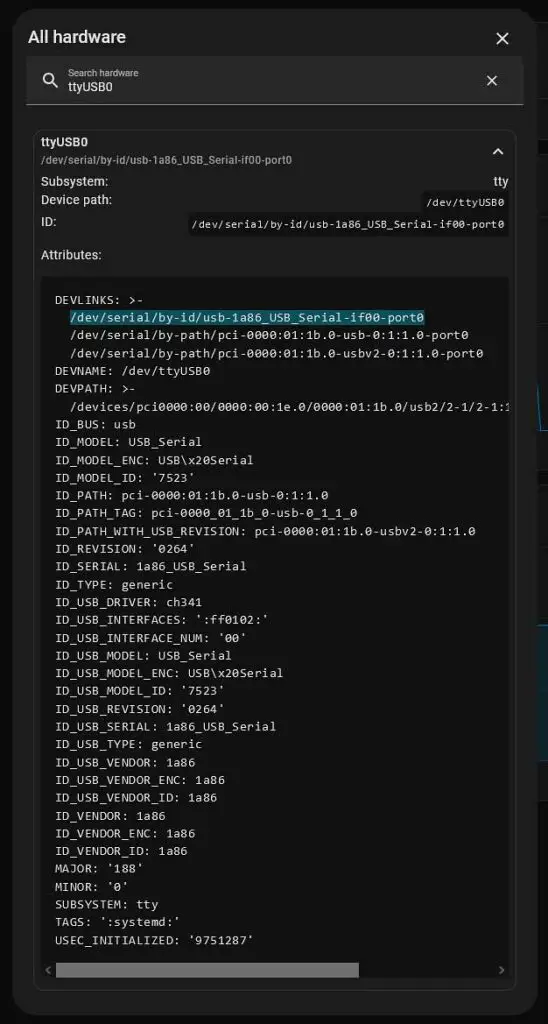
Plug in your dongle to your HA server, navigate to “Settings -> System -> Hardware”, select “All Hardware” and search for your dongle there. Take note of its “ID” value. You will need it in a short while.
And here is a short written setup guide:
- Ensure that the coordinator dongle is plugged into a USB port your Home Assistant server.
- If you’re using Proxmox, make sure that you have the USB passthrough properly configured for the device.
- Install the Zigbee2MQTT add-on using the Home Assistant add-on store.
- You can search for the add-on by name under “Settings -> Add-ons -> Search Add-ons”.
- Once the Zigbee2MQTT add-on is installed, enter the “Settings -> Devices & Services” menu and click on the add-on to proceed with the configuration.
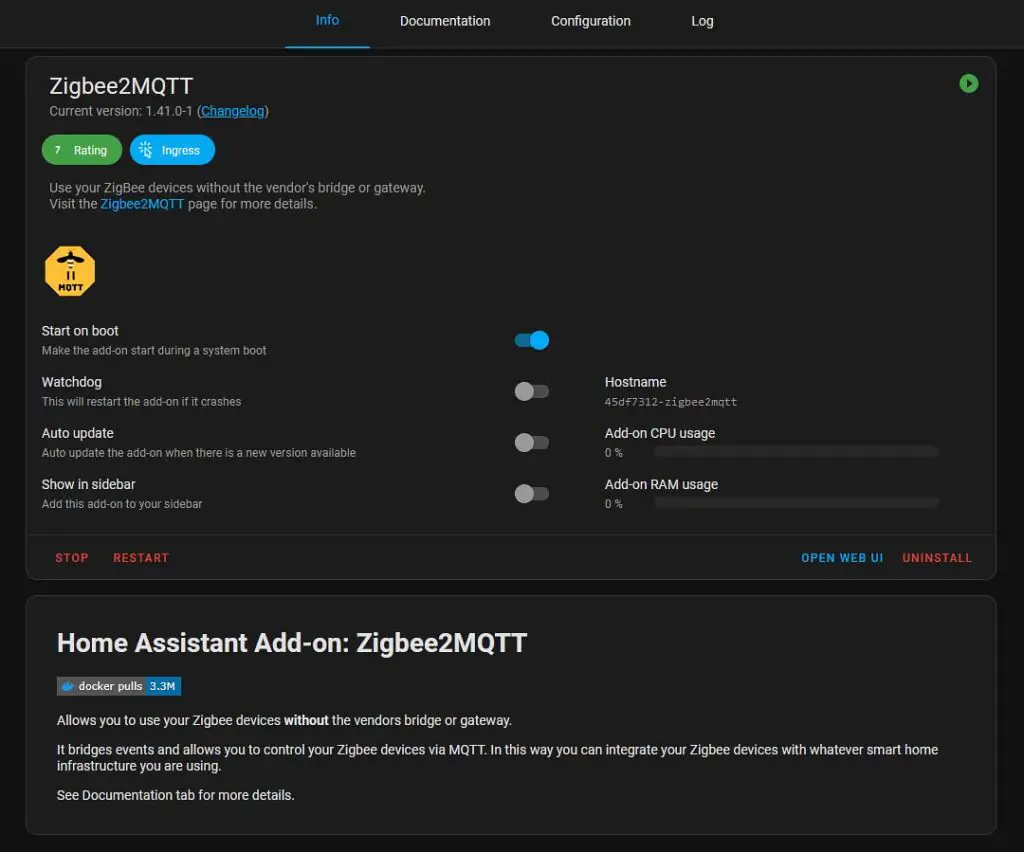
- In the “Info” tab in the add-on menu, select the “Start on boot”, “Auto update” and “Show in sidebar” options. In the very end, when you’re sure everything is up and running, you should also select the “Watchdog” option to make the add-on restart after an unexpected crash.
- In the Home Assistant interface navigate to “Settings -> System -> Hardware”, and click on the “All Hardware” button.
- There, you need to search for your USB coordinator dongle. In our case, this will be “ttyUSB0”, but in your case, the name might differ.
- Select the port that your dongle is connected to and copy the device’s ID which should look something like this:
/dev/serial/by-id/usb-1a86_USB_Serial-if00-port0. Again, in your case, this name can differ slightly.
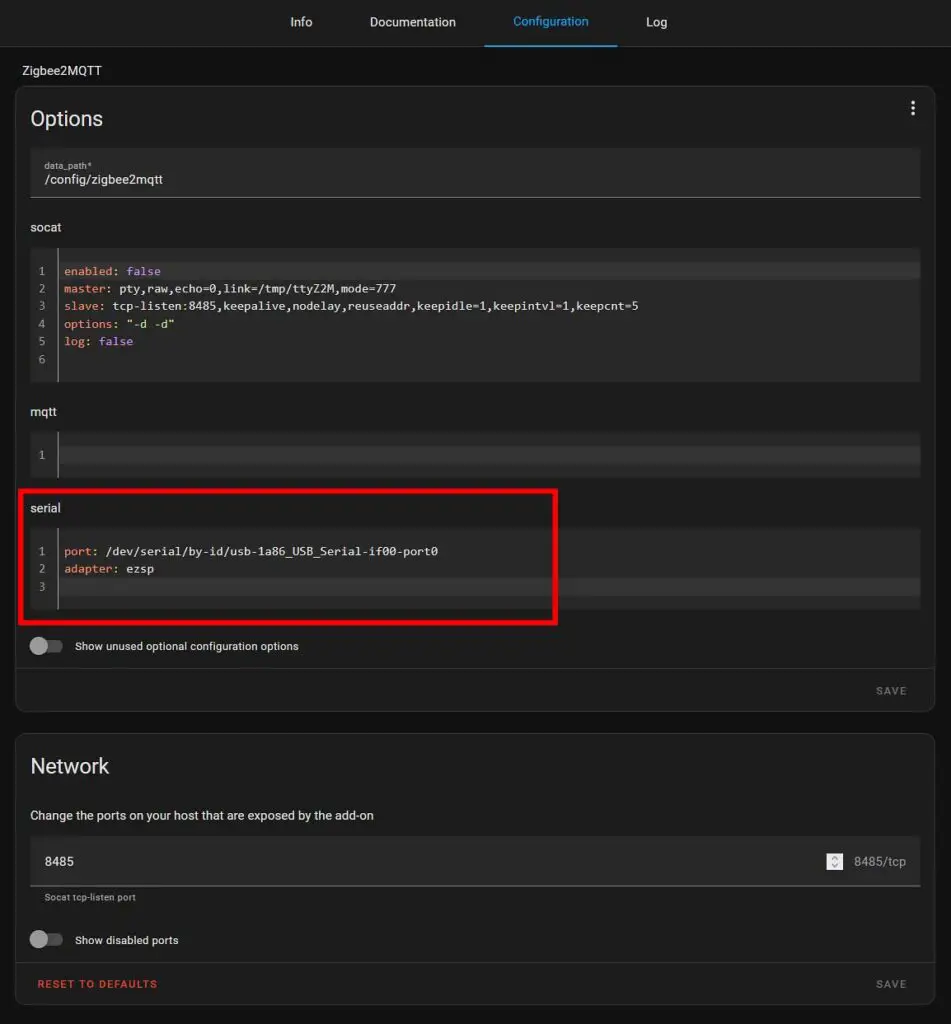
- Navigate to the “Configuration” tab in the add-on menu.
- In the “Serial” input window, paste the serial port to your dongle that you’ve copied in the previous step. Underneath, input the adapter type, which in our case should be “ezsp”. In the end, the “Serial” window should look like this, line by line:
port: /the/device/id/of/your/coordinator/dongleadapter: ezsp
- In the “Serial” input window, paste the serial port to your dongle that you’ve copied in the previous step. Underneath, input the adapter type, which in our case should be “ezsp”. In the end, the “Serial” window should look like this, line by line:
- Start the Add-on
- Start Zigbee2MQTT by clicking the “Start” button in the “Info” tab, and monitor the “Log” tab for successful initialization messages. If there are any errors, the logs will tell you the exact things that went wrong.
- Pair Your Devices
- Once the Zigbee2MQTT add-on is running, you can click the “Open Web UI” button in the “Info” tab, put your Zigbee devices in pairing mode, and use Zigbee2MQTT’s UI to add them by clicking the “Permit join (All)” button on top of its interface.
- Once everything is working, you can finally flip on the “Watchdog” switch in the “Info” tab.
For more information and visual reference for the step 5, see the image below.
If you’re facing any issues with Zigbee2MQTT add-on not starting even with seemingly correct configuration, you’re not alone. Refer to this official help article made solely for the people having trouble with launching the add-on, to pinpoint and resolve your issue.
Note that the Zigbee2MQTT add-on cannot function together with the ZHA add-on that already has the same coordinator dongle assigned to it. If you try to make Zigbee2MQTT use a coordinator that’s already being used by ZHA, the add-on will refuse to start. If you want to be absolutely sure that there is no conflict between the two add-ons, remove the ZHA integration completely and restart your Home Assistant instance before attempting to set up Zigbee2MQTT.
Important note: If you’re migrating your smart devices setup from ZHA to Zigbee2MQTT like I was just a few weeks back, keep in mind that you should back up your Home Assistant instance first, then remove and unpair all of the smart devices from your current ZHA setup (including the gateway). Only then, you can remove the ZHA integration from your HA installation completely, install and setup the Zigbee2MQTT plugin, and upon restarting HA, re-add and re-configure all of your devices again. Otherwise, you might encounter unexpected errors, mainly when trying to get Zigbee2MQTT to initialize while your coordinator is still assigned to ZHA.
So, Is it Worth Getting?
As you might infer from this very review, I personally think that there are no real downsides to picking up the ZB-GW04 dongle as your first Zigbee network coordinator. If you’re a more advanced user, you can also get another one to configure it as your Zigbee network router by flashing it with the appropriate EZSP router firmware.
After over one year of using this specific model in my Home Assistant smart home setup, first with ZHA, and then with Zigbee2MQTT I have no real reason to criticize it for anything else than the lack of an external antenna. It does exactly what it’s supposed to do, and I presume that’s just enough to give my verdict. Get it if you can, and don’t overpay. It’s lowest price without factoring in seasonal discounts, at the time of writing this article should be just about $10. If I got you interested, this is the store I got mine from.
