
The battery replacement process on the Miyoo Mini (V2-V4) and Miyoo Mini Plus is just as simple as on the R36S handheld, and it’s really all about correctly handling a small 2-pin JST plug which connects the battery to Miyoo’s motherboard. Here is how to do it, and which type of battery you need for your handheld.
Why you can trust us: We test all of our products according to the techtactician consumer usability benchmark methodology which evaluates all of the product characteristics that matter to the user in day to day use. Enjoy the review!
This web portal is reader-supported, and is a part of the Aliexpress Partner Program, Amazon Services LLC Associates Program and the eBay Partner Network. When you buy using links on our site, we may earn an affiliate commission!
Miyoo Mini Battery Types & 3rd Party Replacements (All Models)
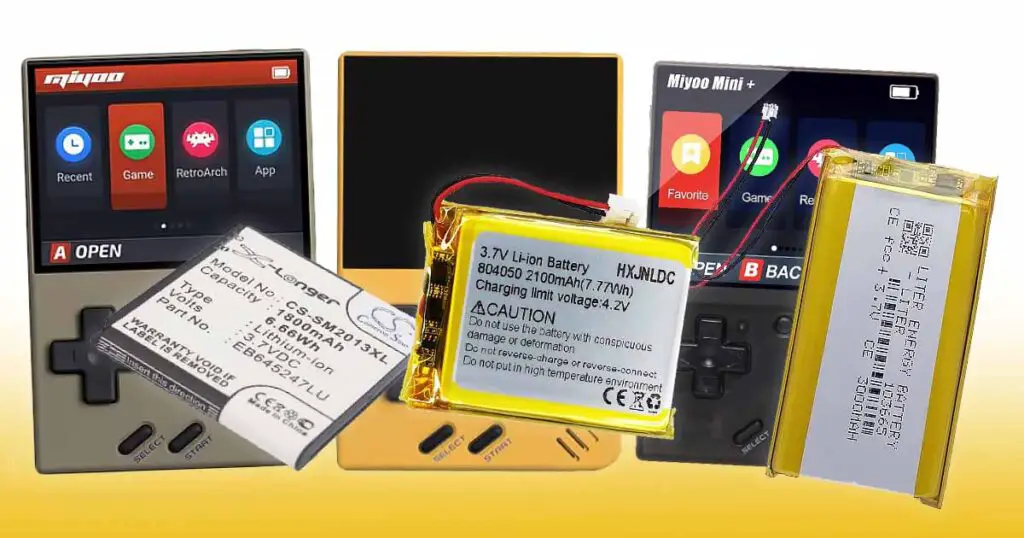
Here are all the battery types that the different versions of the Miyoo Mini handhelds use alongside with the links to their direct replacements. Further below, I’ll get to the exact instructions on how to swap your old battery for a new one in both your MM and MM+.
If your Miyoo Mini is not charging, in most cases it’s either simply because you’re using an incompatible charger (more on that below) or, less likely, because your stock battery might have reached the end of its life. In many cases, replacing the battery is the first thing you should do to try and revive your retro handheld.
A quick note: While as you will learn below the battery voltage, size and its connector type have to be compatible with your particular handheld, you can freely choose between different available battery capacities (for instance the 103665 batteries can come in 2000 and 3000 mAh variants – the larger the better) and different battery types (Li-Ion vs. Li-Po – depending on your preference).
Let’s get to the batteries compatible with each console from the Miyoo Mini lineup.
The Original Miyoo Mini V1 Battery Type
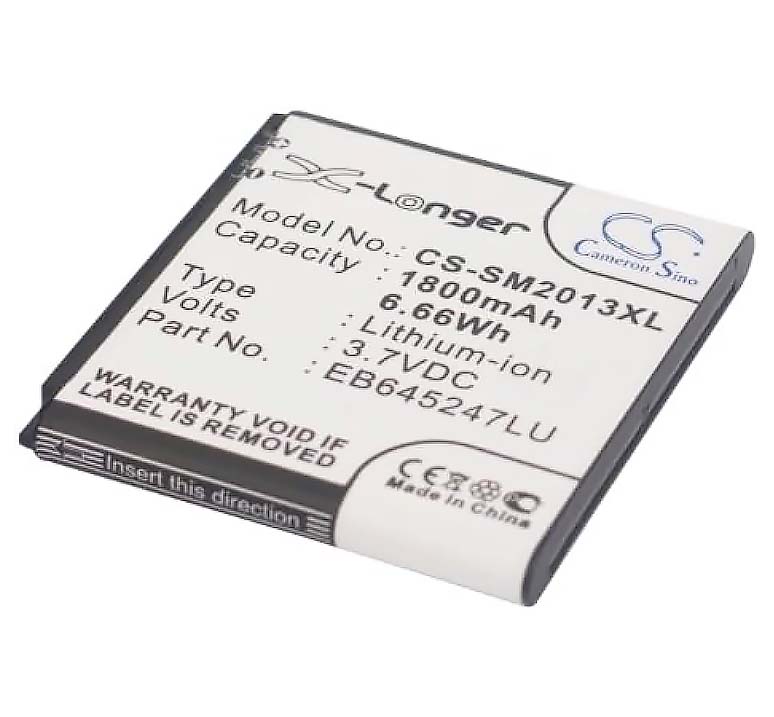
The original Miyoo Mini V1, the very first version of the handheld from a few years back uses a 3.7V EB645247LU battery which used to be commonly found in older mobile phones and smartphones with replaceable batteries.
Unlike the other, newer versions of Miyoo Mini, the battery doesn’t utilize a JST standard for the motherboard connection, which makes the replacement process extremely simple. Open the case, take out the old battery, put a new one in. No messing around with the small connection plug, and easy battery swaps on-the-go.
With the other Miyoo Mini models, the situation is a little bit different. Let’s now move onto the more recent versions of the MM and the batteries that they use.
Miyoo Mini V2, V3 and V4 Battery Type
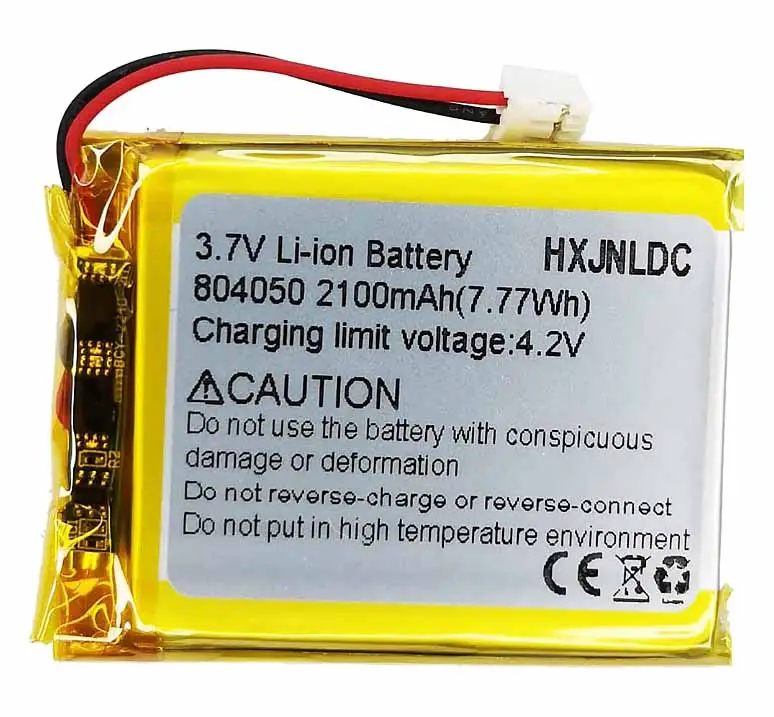
The Miyoo Mini V2, V3 and V4 all use a standard 3.7V 804050 battery type with a 1.25mm JST plug. The numbers in the battery name simply denote its size meaning that the battery is exactly 8×40×50mm and can fit in the back compartment without any trouble.
Note that while the replacement batteries linked here all come with the wires and the JST plug already soldered on, there are many stores which sell them without those. If you do purchase a replacement battery without the wires and the plug, you will need to solder them on by yourself, which is not really recommended if you have no prior experience with that.
Moving on, as you will learn below, the only difference between this battery used by the “standard” size Miyoo Mini consoles and the battery on the Miyoo Mini Plus is its physical size and overall capacity.
Miyoo Mini Plus Battery Type
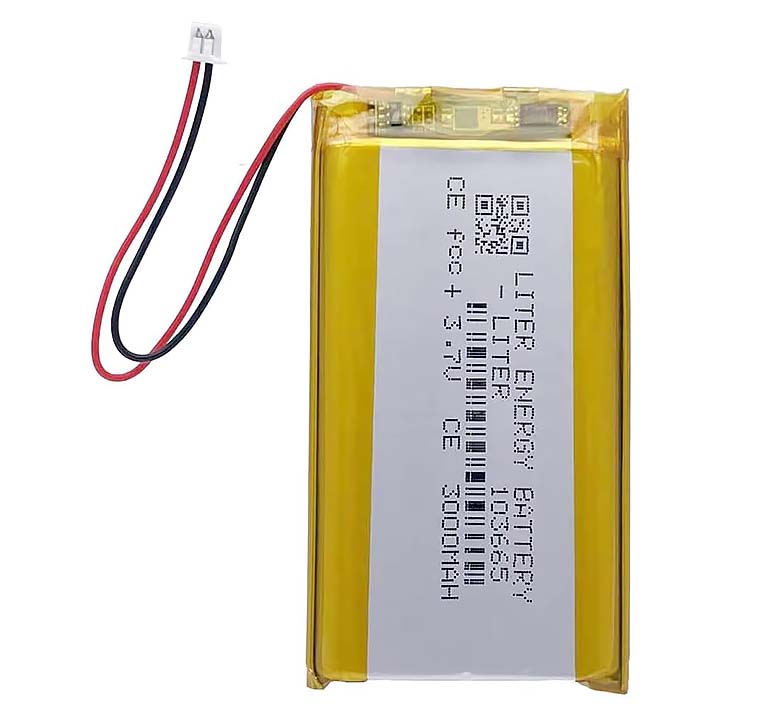
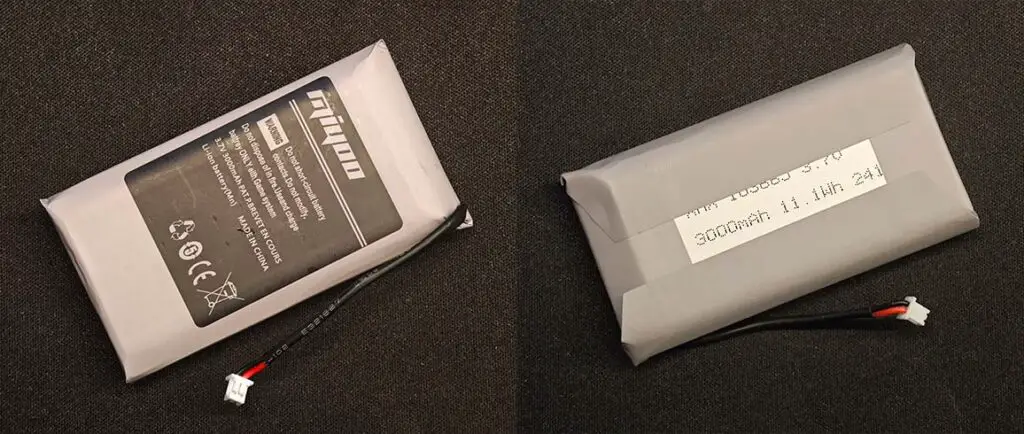
The Miyoo Mini Plus uses a 3.7V 103665 battery with the very same 1.25mm JST connector. The capacity of these batteries is usually either 2000 or 3000mah. In case of a brand new MM+, it’s always the latter.
The size of the 103665 battery should always be, you guessed it, 10×36×65mm. In theory you can use any smaller 3.7V battery with a JST connector in your Miyoo Mini Plus, however this wouldn’t really make much sense as smaller batteries also naturally tend to have smaller capacities, and you’d have to somehow fix the smaller cell inside the MM+ case.
A brand new replaced battery should last you for up to a few hours of gameplay on most of the Miyoo Mini models, depending on the games you’ll choose to play. So now let’s get to the exact replacement instructions which are almost exactly the same for all of the Miyoo Mini handhelds which make use of the 2-pin JST connector we’ve already talked about.
How To Replace The Miyoo Mini V4/Plus Battery – Step by Step
Here is the whole battery replacement process on the Miyoo Mini V2, V3 and V4, and the Miyoo Mini Plus. It will be almost exactly the same on all of these consoles, but as you have learned above, you will have to get an appropriate battery size for your particular Miyoo Mini model.
Step 1 – Disconnect and Remove the Old Battery
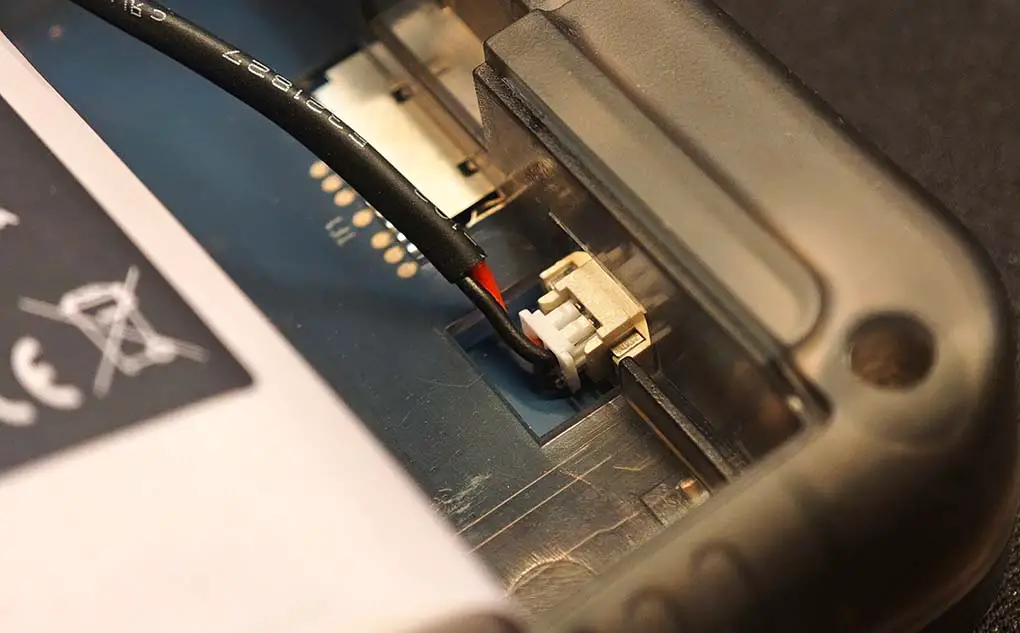
The battery in your Miyoo Mini V1-V4 and Miyoo Mini Plus will be connected to the motherboard with the 2-pin 1.25mm JST plug as shown on the picture above.
On the Miyoo Mini V1-V4, the connector will be positioned differently, but it works exactly the same.
Note and remember the positions of the red (positive) and the black (negative) wires before you unplug the old battery. You’ll have to plug in the new connector in the exact same way.
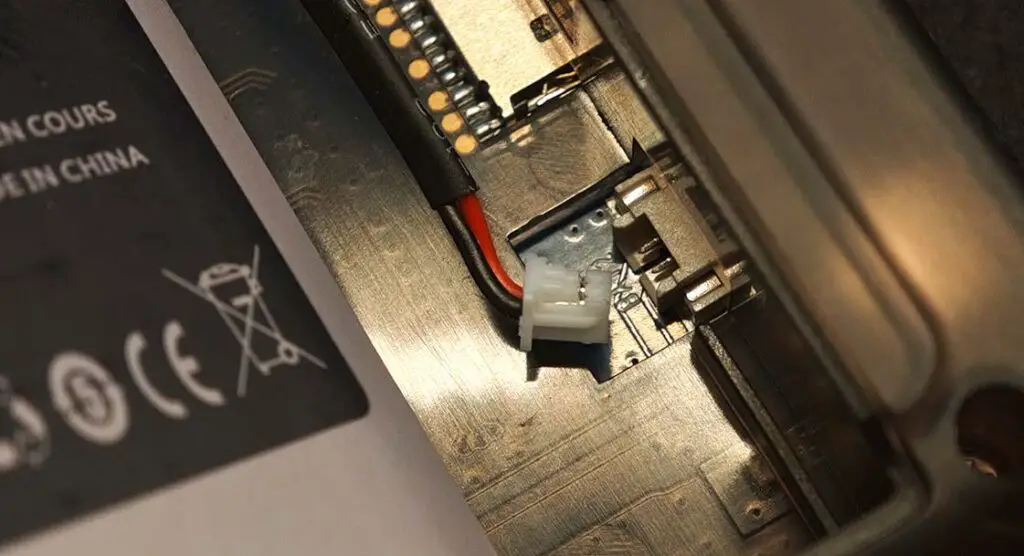
Once you’ve taken note of the positioning of the wires on the old battery connector, it’s time to remove it. Grab it with your fingers and slowly wiggle it out of the socket. If it doesn’t move with ease, you can use a little bit more force.
If you have small hands like me, this shouldn’t be much of a problem. If however for any reason you find it hard to remove the plug, you can use a tool such as small tweezers to help you.
Once the plug is out, set the old battery aside, and prepare the new one. It should come with the wires with a JST connector already attached.
Step 2 – Connect the New Battery and Place
Now the only thing you need to do is to connect the new battery to the very same 1.25mm JST socket. The process is quite obviously exactly the same as when disconnecting the old battery, only in reverse.
Make sure that the little plug retains the correct polarity when you’re connecting the new battery. What this means is that the red wire (positive) and the black wire (negative) should align with their corresponding positive and negative terminals in the socket on the board.
While in theory the connector should make it impossible to let you plug in the battery in the wrong way and that’s why the plus and minus routes aren’t marked anywhere on the board, I’ve seen things. You can refer to the images above to get your wiring correct. If you attempt to plug the wires in reverse, you risk damaging your handheld.
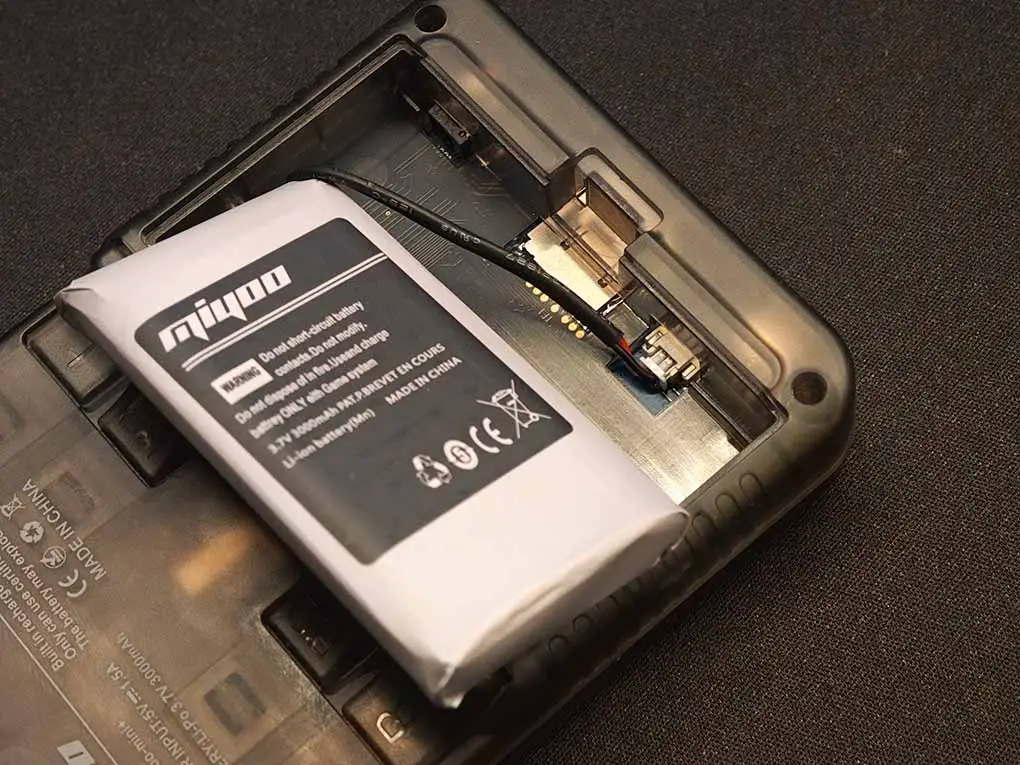
Align the plug with the connector on the motherboard, and push it in to lock it in place. Once again, as the spacing is tight here, you can use small tweezers to push the plug back into the socket.
Once you’ve done that, you can place the battery pack alongside with the connection cable inside of the Miyoo Mini and close the lid you removed in the very beginning. That’s it!
Step 3 – Turn On Your Miyoo Mini
Now it’s time to verify if your Miyoo Mini works correctly with the new battery. Turn on the console and if everything is in order, there is nothing more to be done here.
Note that the battery meters on most Linux-based handhelds can be pretty inaccurate especially right after swapping an old battery for a new one.
If you’re seeing any abnormalities in battery reporting (jumping percentages, incorrect readings), I would advise you to charge the new battery to 100%, go through a semi-full drain (down to around 20% and only then, on the second cycle see if the battery percentage meter is returning the correct values).
If your handheld doesn’t turn on, remove the battery cover again and ensure the plug is connected correctly and fully pushed into the connector socket. If the console still doesn’t work, you likely have chosen the wrong battery type, or that sadly either your new battery or your console is damaged.
Compatible Safe Ways to Charge the Handheld
You can safely charge your Miyoo Mini and the Miyoo Mini Plus with 5V 1A, 5V 1.5A or 5V 2A chargers, or virtually any other 5V charger you choose.
As you might have come here after having read the rather ominous note printed on the back of each Miyoo console which says exactly “The battery may explode in the fire”, rest assured that provided you use your handheld correctly, you won’t have to worry about that.
While on the back of the handheld you can see the dedicated power input value as 5V 1.5A, as long as your charger is outputting stable 5 volts, the console will only draw as much power as necessary no matter the amperage.
Can You Use a Fast Charger With the Miyoo Mini?
Most if not all modern commercial “fast” chargers with PD (Power Delivery) standard support default to a 5V output when they cannot negotiate a higher power level with the connected device, making them safe for your Miyoo Mini regardless of its model.
As Miyoo Mini handhelds do not support the Power Delivery standard and will not “talk” with PD compatible chargers, that’s exactly what’s going to happen when you attempt to charge your Miyoo Mini using for instance a Steam Deck charger.
In some rare cases, depending on the specific charging protocol implementation, a PD compliant fast charger might refuse to charge your handheld at all.
Still, if you’re using an old charger, a damaged power brick or another charging device that does not properly fall back to 5V when fast charging is unsupported by the target device, that can pose a risk of causing damage to your handheld.
If you want to be absolutely sure that you’re not going to fry your handheld by accident, either use only the chargers with the specs mentioned above, or be like me and buy a simple USB power meter like this and never again worry that you don’t know how much power your chosen charger is pushing to your console.
Are Power Banks an Option?
Yes, and the rules are exactly the same as with the chargers. All power banks which support 5V 1A or 5V 2A power output will work for charging your Miyoo Mini on the go, and all PD compliant power banks with higher maximum power output should default to 5V once you connect your Miyoo Mini to them.
There are really no more caveats here, and you’ll be happy to hear that almost every modern power bank you can get will safely charge your Miyoo without risking any damage to your device according to the all information mentioned above. This is an example power bank that you can use when gaming on-the-go.
Quick Battery Drain? – Disable the Wi-Fi Module
In general, the things that drain your Miyoo Mini battery the fastest are: the Wi-Fi module, the display (more so on high brightness levels), and the in-built speaker.
One Reddit user (unalive3) after conducting a few tests has come to a conclusion that the thing that affects the battery life the most on this device is the Wi-Fi module, and all of the other settings including the speaker volume don’t really affect the battery life in a significant way. You can check out the results of these tests above.
If you want to make sure that your Miyoo Mini doesn’t use up too much juice when you’re gaming, simply disable Wi-Fi in the system settings. There is only one downside do this – you won’t be able to access multiplayer features in select games, or make use of the RetroAchievements integrations.
That’s pretty much it. Until next time!