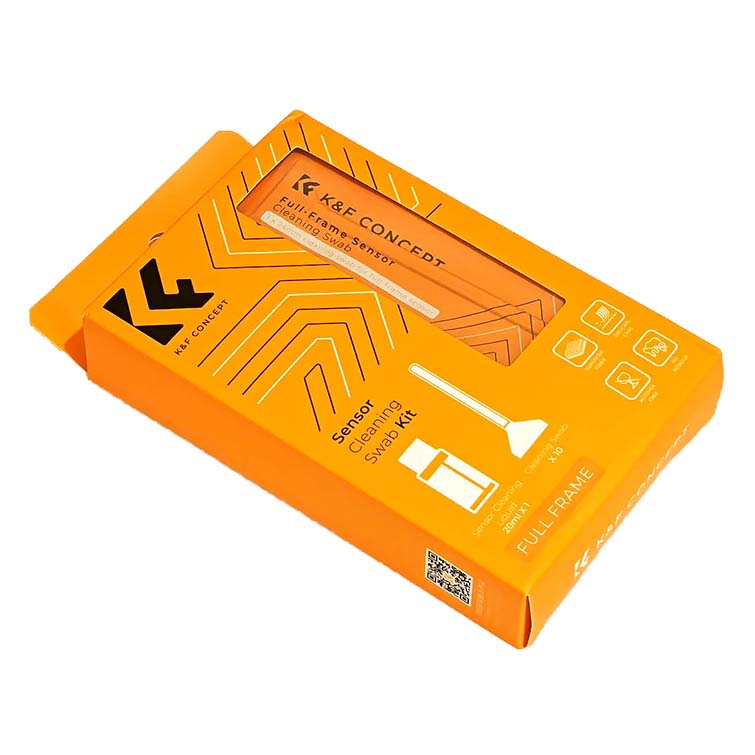
After just cleaning my trusty Lumix S5 mirorrless camera’s sensor using the K&F sensor cleaning set, I’m ready to show you exactly how to use it while avoiding unwanted smudges and sensor damage. And the best thing? You can do all this in less than 10 minutes.
Why you can trust us: We test all of our products according to the techtactician consumer usability benchmark methodology which evaluates all of the product characteristics that matter to the user in day to day use. Enjoy the review!
This web portal is reader-supported, and is a part of the Amazon Services LLC Associates Program, AliExpress Partner Program, and the eBay Partner Network. When you buy using links on our site, we may earn an affiliate commission!
Cleaning your sensor can be a scary thing, mostly because it is arguably the most important part of your camera. Still, it’s important to note, that in the vast majority of camera models, the sensor is covered by a thin layer of glass, which is made to protect the sensitive electronics underneath, so you’re never really directly touching the sensor during the cleaning process.
The only major difficulty with cleaning a camera sensor is first, not leaving any smudges on the sensor after you’re done cleaning it, and second, not damaging the glass cover’s surface, for example by scratching it during your cleaning attempts. So, let’s get to how to safely go through the whole process without risking damage to your camera.
What Do You Need To Safely Clean The Sensor?
To clean your camera’s sensor properly, you will need a sensor cleaning kit. I’ve decided to use the one from K&F, as it’s one of the most popular ones out there.
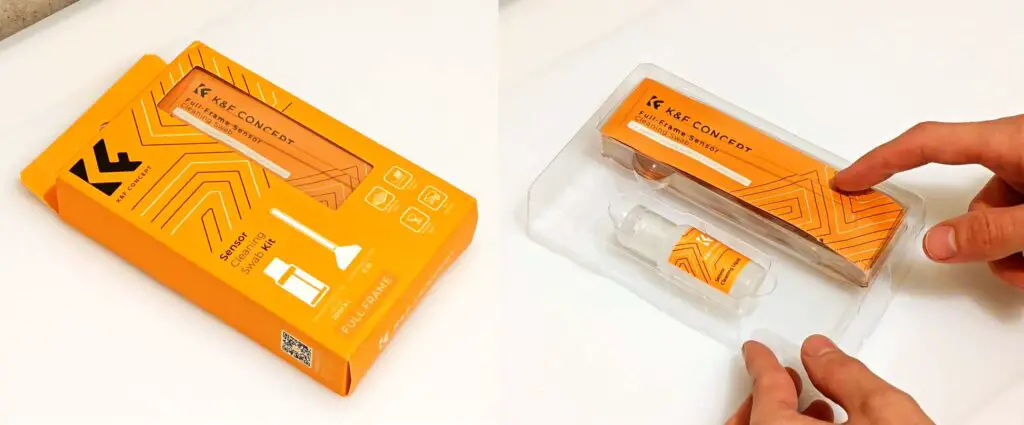
The set consists of a bottle of sensor cleaning liquid, and 10 vacuum sealed soft swabs which can cover the whole area of your camera’s sensor. There are versions available both for full frame cameras, and the ones with smaller, APS-C sensors. Even if you’re doing this for the first time, these should last you for at least three cleaning sessions, or up to five if you’ve practiced enough!
All in all, compared to the average prices of sensor cleaning services, this is a pretty cost-effective solution, even if you only get two cleans out of your set.
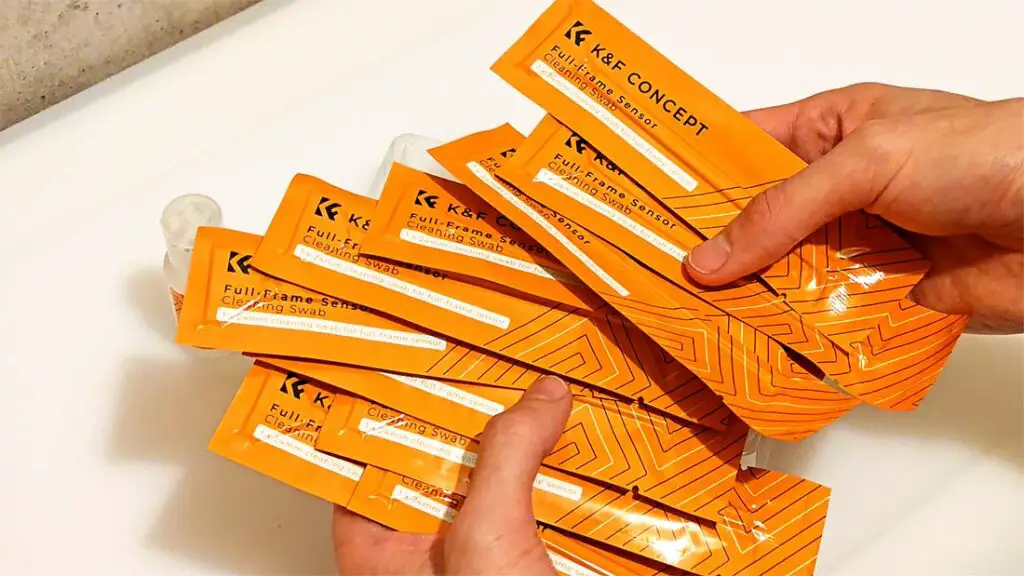
Again, note that if you don’t have a full frame camera like I’m using here, but rather one with an APS-C sensor, you will need to get another kit, with differently sized swabs.
You will also need something to blow air on the sensor to remove the largest dust particles and possible small debris that can be stuck in its surface.
Don’t blow on the sensor with your mouth. It’s not worth getting spit or grease onto the glass protection surface. It can only further complicate the cleaning process.
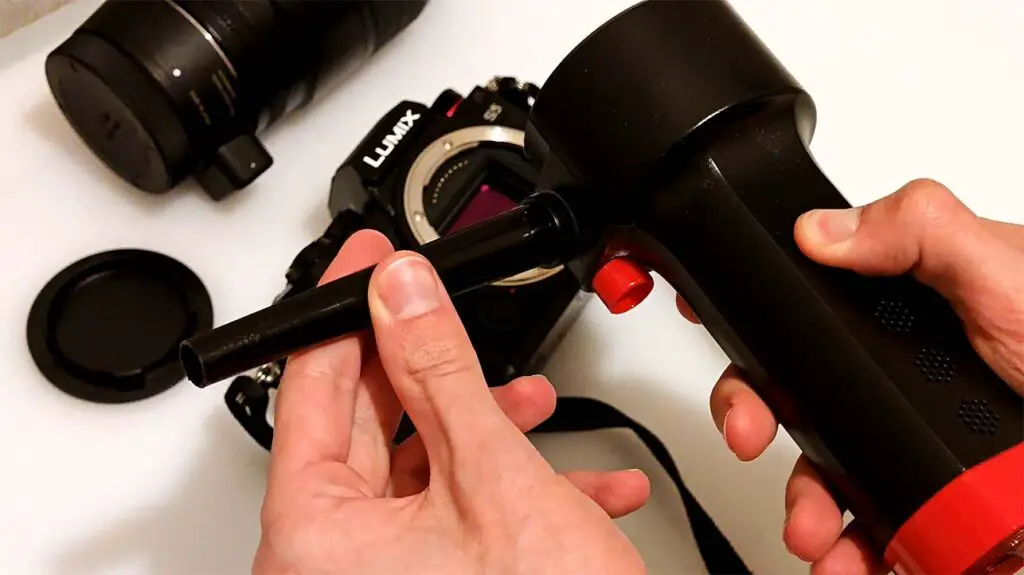
For that you can use either a blower bulb like this, or a low-pressure electric air blower, like this. It’s also a great tool for dusting your PC if you don’t want to spend a fortune on cans of compressed air.
Using a can of compressed air is generally not advised, both because of some cans containing propellant liquids, and the moisture condensation. Now, let’s prepare our workspace.
Cleaning Your Camera’s Sensor Using The K&F Kit – Step By Step
Once you have all the necessary tools mentioned above at hand, we can begin. Follow the instructions below, and you’ll have your sensor clean in no time.
Step 1: Prepare a Relatively Dust-free Workspace
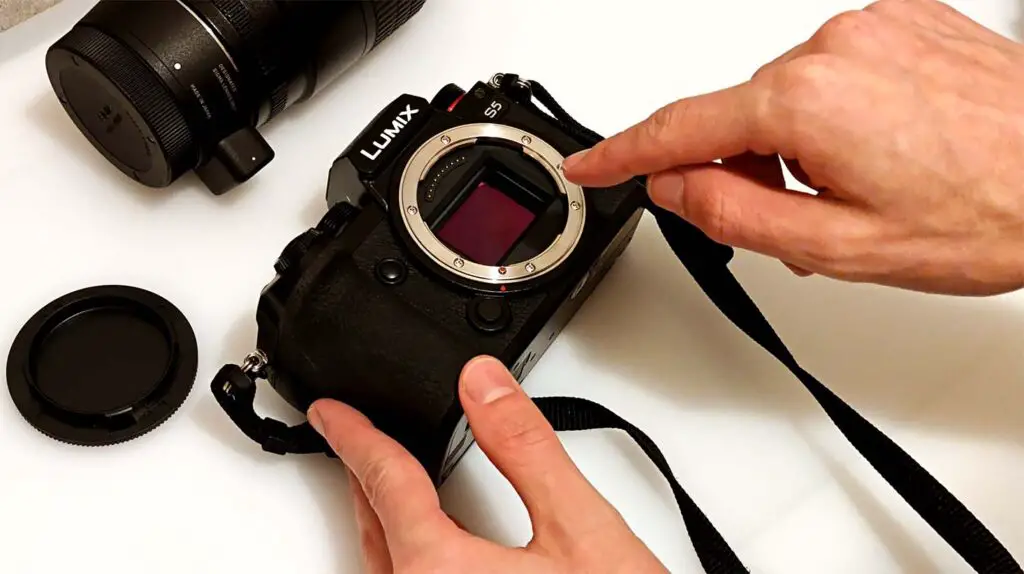
Do all of the following in a relatively dust-free room. This is very important. As we will be detaching the lens from the camera for a longer period of time, make sure that the surface on which you’re working is clean, and that there is no excessive dust floating around in the air around you.
You can pre-wipe your desk and all the adherent surfaces with a moist cloth before proceeding to remove all the dust from around your workspace. Once you’ve done that, we can get to it. Grab your camera, your sensor cleaning kit, and your air blower, and we can begin.
Sensor Cleaning on DSLR vs. Mirorrless, and IBIS
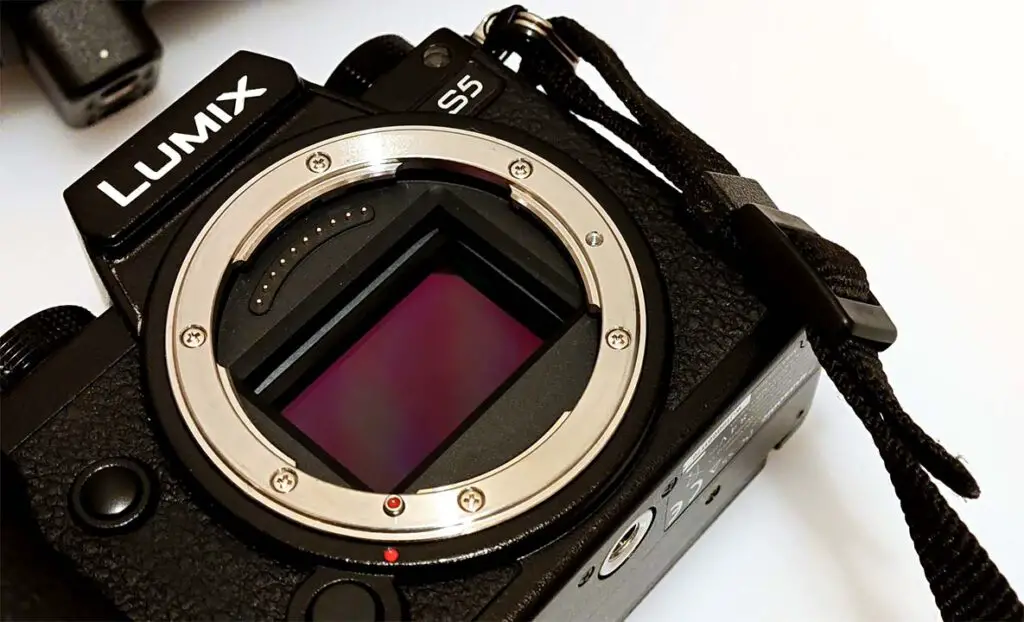
As I have a mirrorless camera here, the sensor becomes visible just after removing the lens. If you own a DSLR camera however, what you will see upon removing the lens is the mirror. To lift it up, in most cameras you will have to enter a “lens cleaning mode” that will hold the mirror up for you and keep it lifted when you’re cleaning the sensor hidden underneath.
If you cannot find such mode in the settings menu on your camera, or you don’t know whether you should clean your camera while it’s turned on or turned off, refer to your particular camera model instruction manual to see how to proceed. This will depend both on your camera type, and on the type of in body stabilization it uses, if such mechanism is present in your device.
Remember that if you’re cleaning a DSLR camera that’s on, you should always start the cleaning process with battery level at least at 75%. Otherwise, if the battery dies on your during the process, you’ll risk the mirror suddenly coming down while you’re cleaning the sensor, which can easily cause some major damage. There is no such risk when it comes to mirrorless cameras.
Important IBIS note: If your camera features an in-body image stabilizer, you need to check if you’re supposed to clean the camera while it’s on, or off, in your camera’s user manual. With IBIS disengaged and the camera being turned off, the sensor will move around when you apply pressure to it, which can potentially cause damage to the stabilizer depending on the type of stabilization mechanism involved. If there is no such info available in the manual, you can search for such info in other places online. Better safe than sorry!
In the case of the Lumix S5 camera that I’m cleaning here, due to the limited official information on the in-body stabilization mechanism and manual sensor cleaning, I’ve decided to clean the camera while it was off, with the IBIS mechanism disengaged. Doing so, I was able to clean the sensor without causing any damage, however keep in mind that this is neither an official, or authorized solution. Now, moving on.
Once you know whether you should clean the sensor in your camera model while it’s on or off, we can continue.
Step 2: Use The In-built Camera Sensor Cleaning Mechanism (If Available)
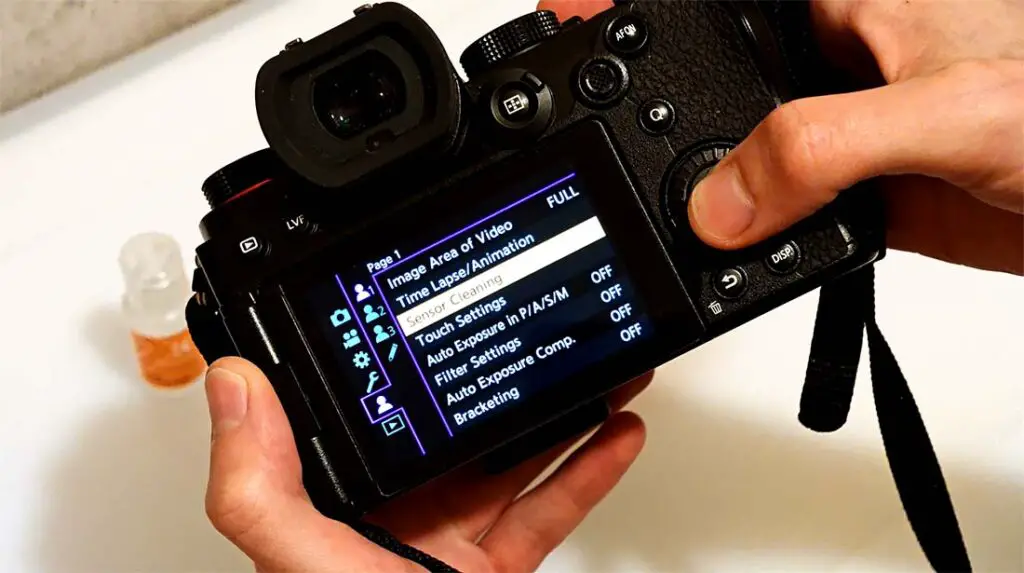
Before we start the actual cleaning process, it’s always good to use your camera’s in-built sensor cleaning option to loosen up some larger dust particles that may be stuck to the sensor.
The automatic sensor cleaning option, if it’s present on your camera, most of the time simply vibrates the sensor to attempt to remove larger dust particles that may be attached to it. If you have such an option available in your camera menu, it may be worth to run it at least once before you begin.
Step 3: Remove The Lens
The first step of the actual cleaning process, is to remove the lens from the camera body. Again, make sure that the area you’re doing this in is relatively clean, without any dust floating around.
Set the lens aside in a safe place, and cover its end with a safety cover to prevent any dust from entering. If you don’t, the dust coming into the lens when you’re busy with the sensor cleaning can easily undermine your efforts when you’ll be reattaching the lens at the very end.
Step 4: Use The Air Blower
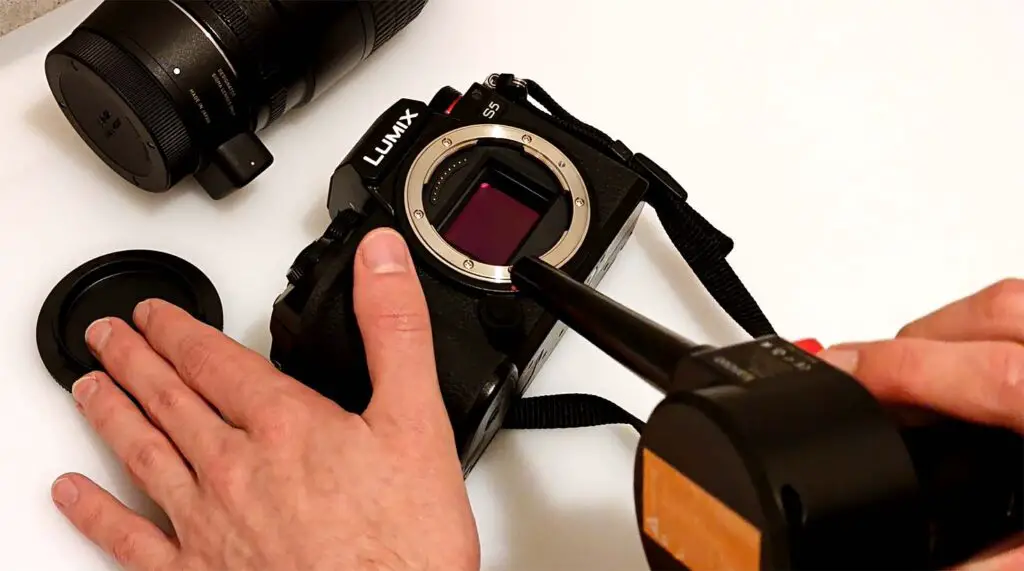
Now, beginning the cleaning process, you will have to blow the largest dust particles away form the sensor and the camera’s body using your selected tool. I’m using the low-pressure electric air blower I got from Aliexpress, that I’ve mentioned a while back.
Gently bow the air around the area the sensor is located in, as well as inside the lens that was attached to the camera (upon briefly uncovering it), to remove all of the larger dust and dirt that can be stuck inside. If at any point later during the process you’ll see a visible speck of dust land on the sensor, you can attempt to safely remove it using your air blower.
Make sure that you don’t touch the sensor directly and don’t use high pressure air blowers, especially if your camera features an in-body stabilization mechanism (IBIS). To ensure that you got all the dust out, you can also hold the camera facing downwards during the process, to let the largest particles out of the camera body.
If you’re extremely lucky, chances are, that this is the end. Oftentimes, the larger pieces of dust can be rather easily blow away by the air in this first part of the process. In most cases however, you will need to move over to the next step. And the next step finally involves using our sensor cleaning kit.
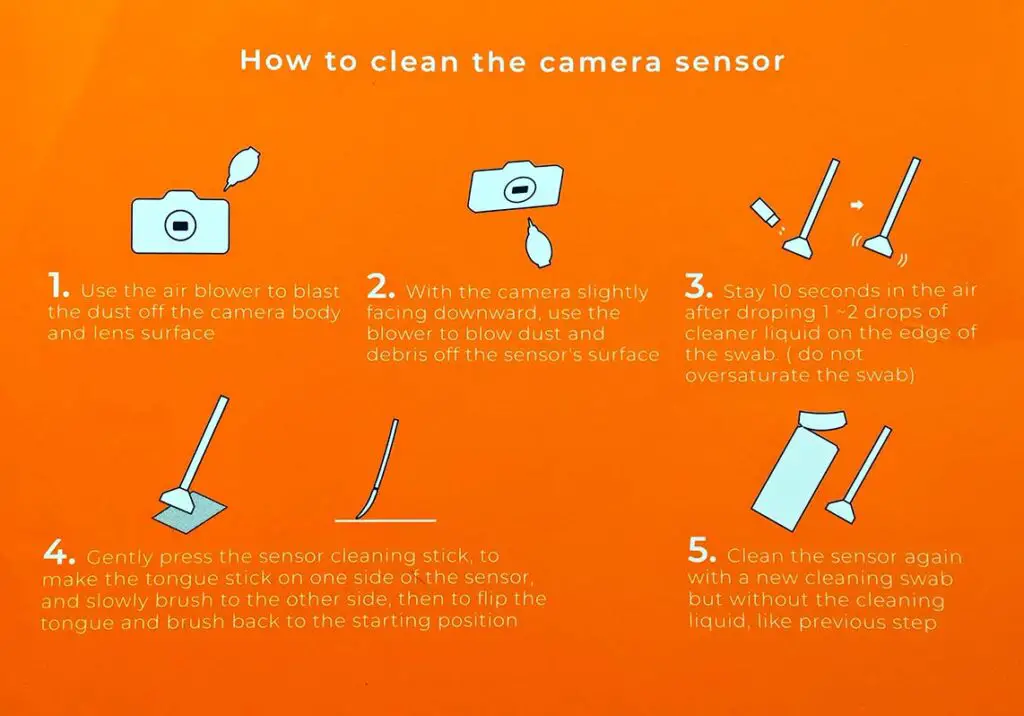
The K&F cleaning kit does come with rather simple instructions on the back of the packaging, which are missing a few important remarks, so I’m going to explain a few additional things as we go.
Step 5: Prepare The Cleaning Solution & The Swabs
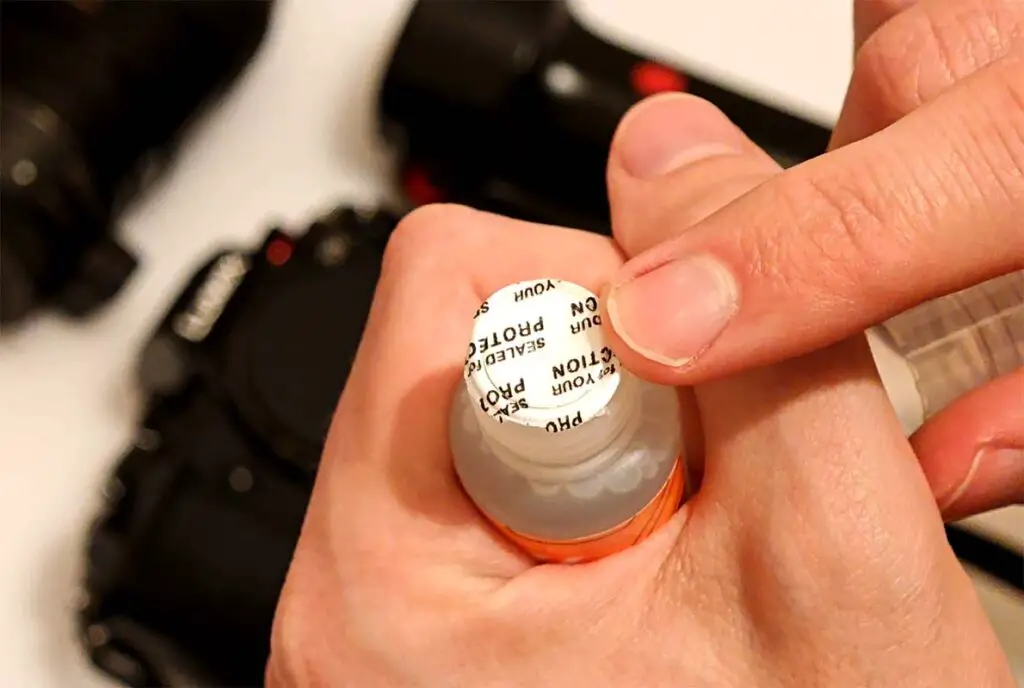
Grab the sensor cleaning solution bottle. Typically, these solutions are a mix of ethanol, methanol, and isopropyl alcohol, however in this case, the bottle label doesn’t reveal the actual composition of this particular liquid.
Remove the protective cap from the bottle. To do this, you’ll have to unscrew the top. After you’re done with that, screw the top part back on.
Now comes the part when you apply the cleaning solution onto one of the clean swabs. Unpack one of the ten swabs that come with the cleaning set. They should be vacuum packaged and perfectly clean.
Make sure that you don’t touch any dirty surface with the cleaning end of the swab before you use it to clean your sensor.
An important thing here is that this particular bottle doesn’t really make it easy to measure one or two drops of the solution which is what should be used for the cleaning process, especially if you’re doing this for the first time.
What can further complicate things is that the solution is transparent, so you can easily overdo it and soak the swab too much, which can introduce smudges on your sensor. Here is how to go about it.
Step 6: Clean The Sensor Using The Swabs
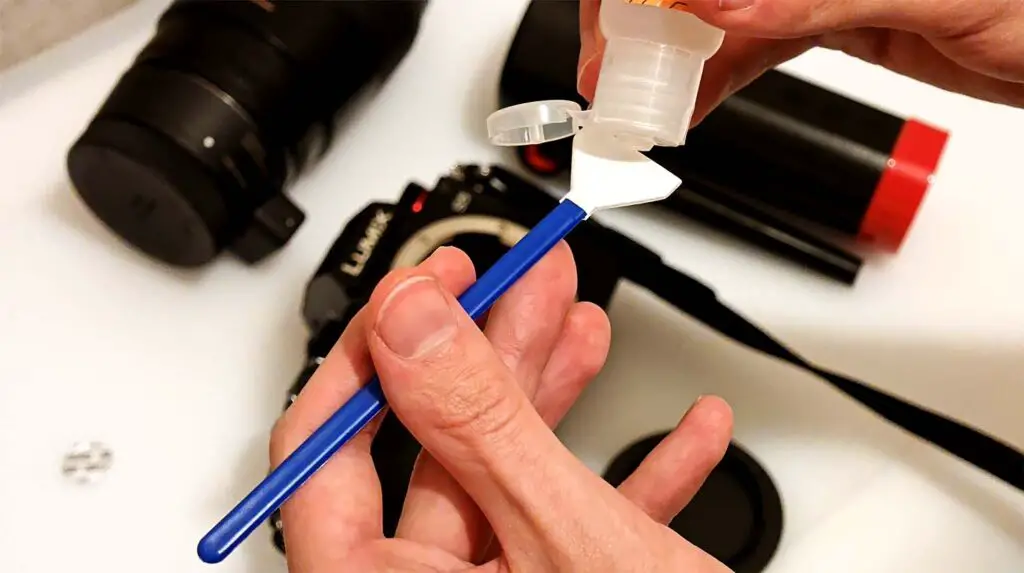
Apply one to two drops of the solution evenly on one side of the swab. Then, wipe the sensor from left to right using that side of the swab, and from right to left using the other side.
The point is to apply the cleaning solution with the first pass, and then wipe the sensor with the dry side of the swab with the second pass to remove the unwanted residue. After that, you can use another fully dry swab to dry off the sensor. If you’re skilled enough, this could be enough. If not, you can safely repeat the process again using a new set of swabs.
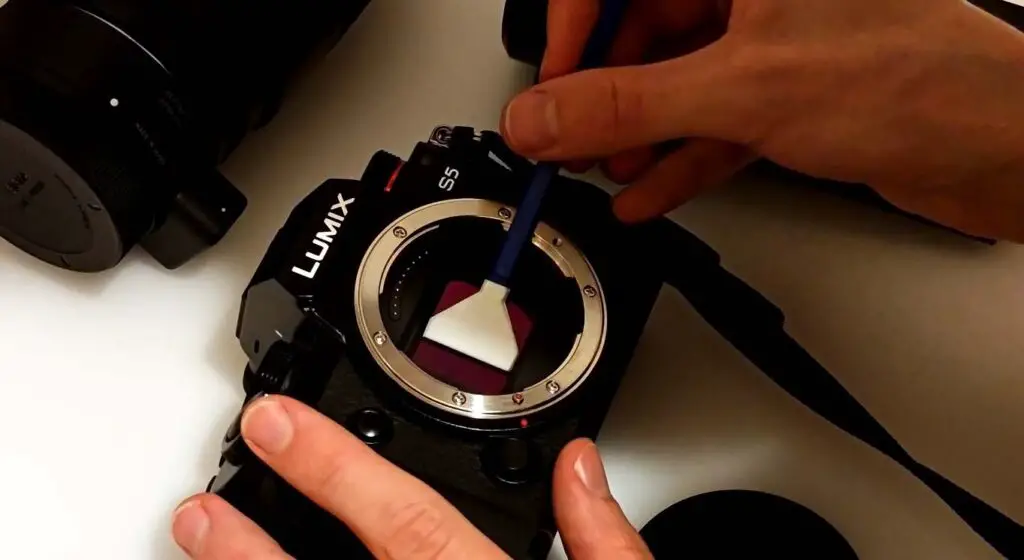
Don’t be afraid to apply some light pressure on the glass surface, and make sure that you’re using the flat sides of the swab to wipe the sensor’s area, rather than the tip. Use as many new swabs as you need to, and don’t get scared if you see smudges after your first try.
What if Some Smudges Show Up?
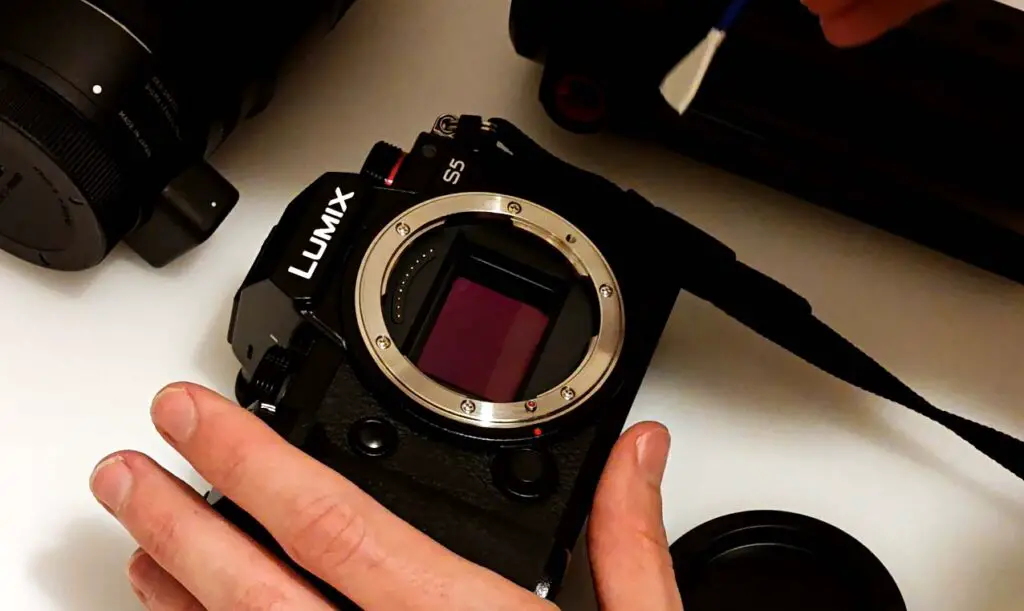
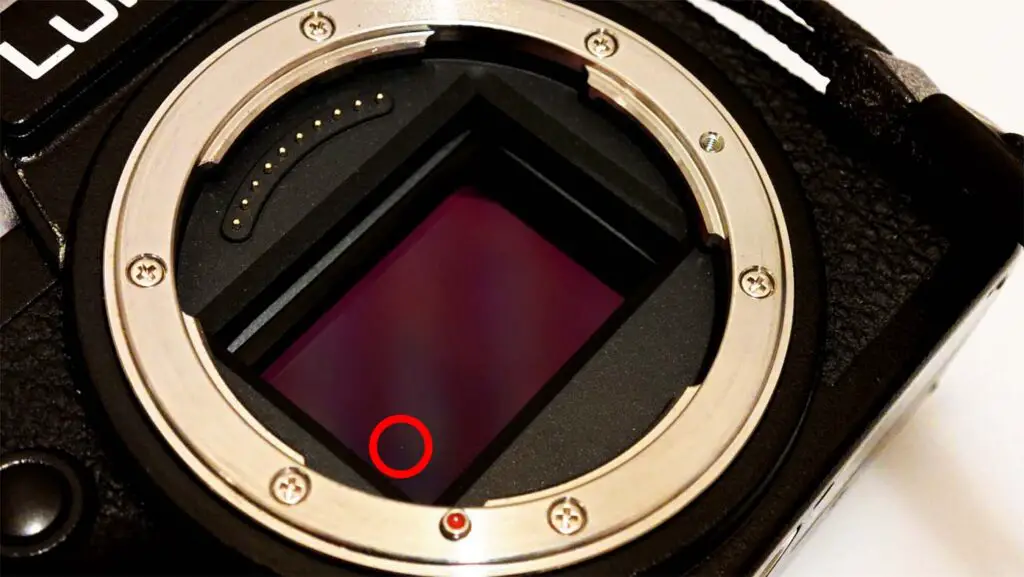
If you use too much of the cleaning solution and get smudges as I did here, you can simply wipe the sensor clean with a new dry swab in the same way as if you were applying the solution (left to right, then right to left) and start over using a smaller amount of liquid.
Although the packaging says to not reuse the swabs under any circumstances, I will add to that. If your swab is perfectly clean after first wipe of the sensor, and it doesn’t have any visible particles attached to it, most of the time you can carefully reuse it for a second and third iteration after a few seconds pass.
Discard the used swabs after you’re done with cleaning your camera and don’t use the same swabs next time you’re cleaning the sensor! The microscopic dirt particles accumulating on the swabs overtime could easily cause damage to the sensor’s glass cover, which is exactly why they come vacuum sealed, and should be thrown away once you’re done.
You can purchase the swabs separately, without the cleaning solution, if you find that you need more tries than you anticipated.
Once the sensor is clean and dry, and there are no smudges or dust particles visible, it’s time to reattach the lens.
Step 7: Reattach The Lens
Now, if there are no smudges visible, and you can visually confirm that there are no dust specks on the sensor’s surface, you can carefully reattach the lens.
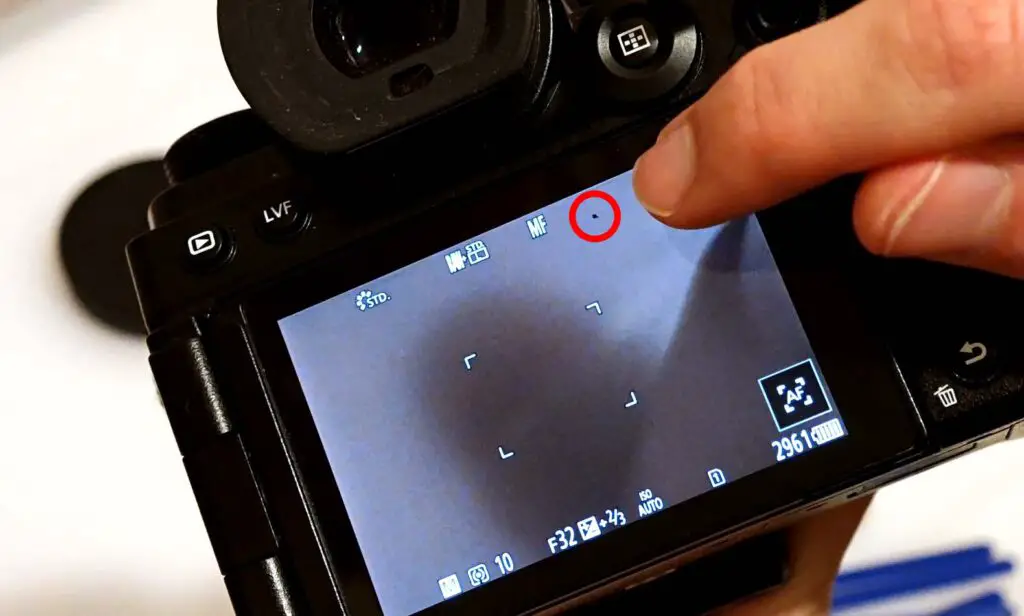
It’s at this point, that if you’re unlucky, and you haven’t blown away all the dust from your workspace or from the inside of your lens, some additional dust can get into the camera body and stick to the sensor while you’re putting the lens back on.
As mentioned, it can be the dust from the lens, your desk, or simply a speck of dust that’s just been floating around and decided to ruin your first clean. No worries though, although it might be frustrating, you can safely repeat the whole process as many times as you want using new swabs.
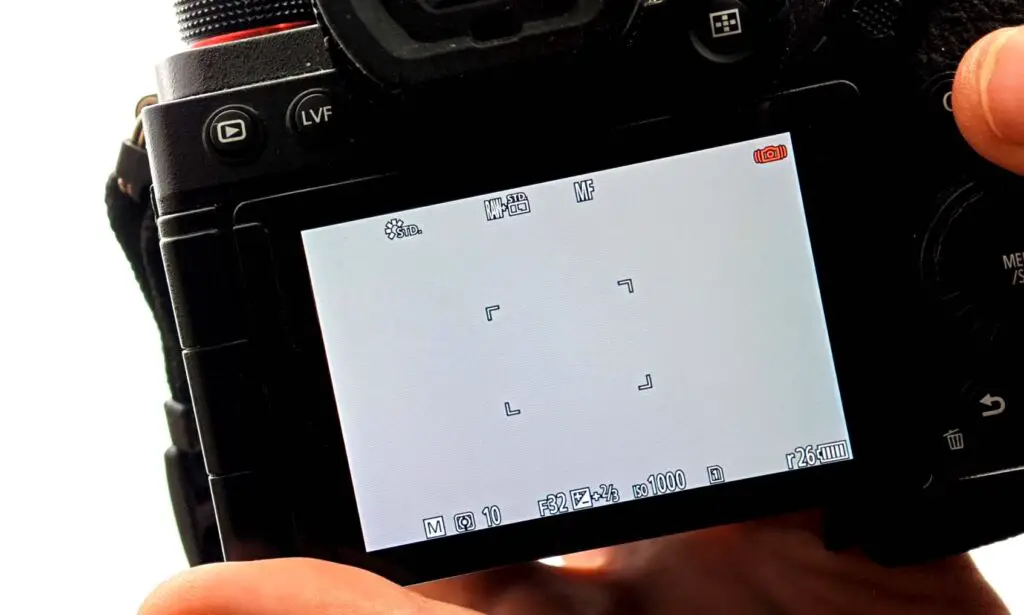
If after reattaching the lens, turning on the camera and taking a reasonably bright photo of a blank clean white piece of paper with aperture set to the highest numerical value you can still see some major dust specks on the sensor, you can repeat the whole process again, or, if the sensor is clean enough for your liking, leave it at that. At least now you know how to do it!
That’s pretty much it. Remember to always use safe and tested accessories for sensor cleaning, as it really is the most important part of your camera. If you’re ever unsure about certain things about your particular camera model, it’s always best to first check the user manual (there are many sites on which you can find camera manuals in PDF format), and then simply search some online forums and communities for more info.
Hope that guide was helpful to you! Until next time!

