")
Here is how I build simple modular ComfyUI prompts with reusable text boxes, merge them cleanly, and then easily toggle optional prompt modules containing different parts of the prompt on and off using the rgthree Fast Groups Bypasser. It’s one of the easiest ways to implement prompt concatenation and toggles, although it requires custom nodes.
Note: Throughout the whole tutorial, you can click on the images to enlarge them.
The Solution I Use In 3 Short Steps
Splitting prompts into multiple nodes and later in the pipeline automatically merging them into one prompt with the possibility of toggling optional prompt parts (for instance separate ones for style, realism, character/LoRA descriptors) is what were talking about here. Here is how I do it:
- Write separate prompt “modules”, so the individual parts that will make your final prompt, in separate nodes (you can do this for both the positive and negative prompt).
- Merge positives and negatives with Text Concatenate.
- Optionally toggle entire prompt modules by grouping them and using Fast Groups Bypasser.
On the short video above, you can see how the switches work in practice (with one optional negative prompt box being out-of-frame).
The setup I’m going to show you below, does exactly that with the use of rgthree and WAS nodes.
Custom Nodes That You Need:
- Power Prompt – Simple (rgthree): your prompt-part boxes (outputs text variables that can be merged). From rgthree-comfy.
- Fast Groups Bypasser (rgthree): a control-panel node that flips whole groups into the “Bypass” mode so your prompt modules can be enabled/disabled quickly. From rgthree-comfy.
- Text Concatenate (WAS Node Suite): merges up to 4 text inputs with a delimiter + whitespace cleanup. From WAS Node Suite. Note: the main WAS repository is not updated anymore, however there exists a fork of the original project meant to be kept up to date that you can find here: WAS Node Suite (Revised).
How To Set It Up (My Exact Workflow Pattern)
1) Make Your “Partial Prompt” Boxes
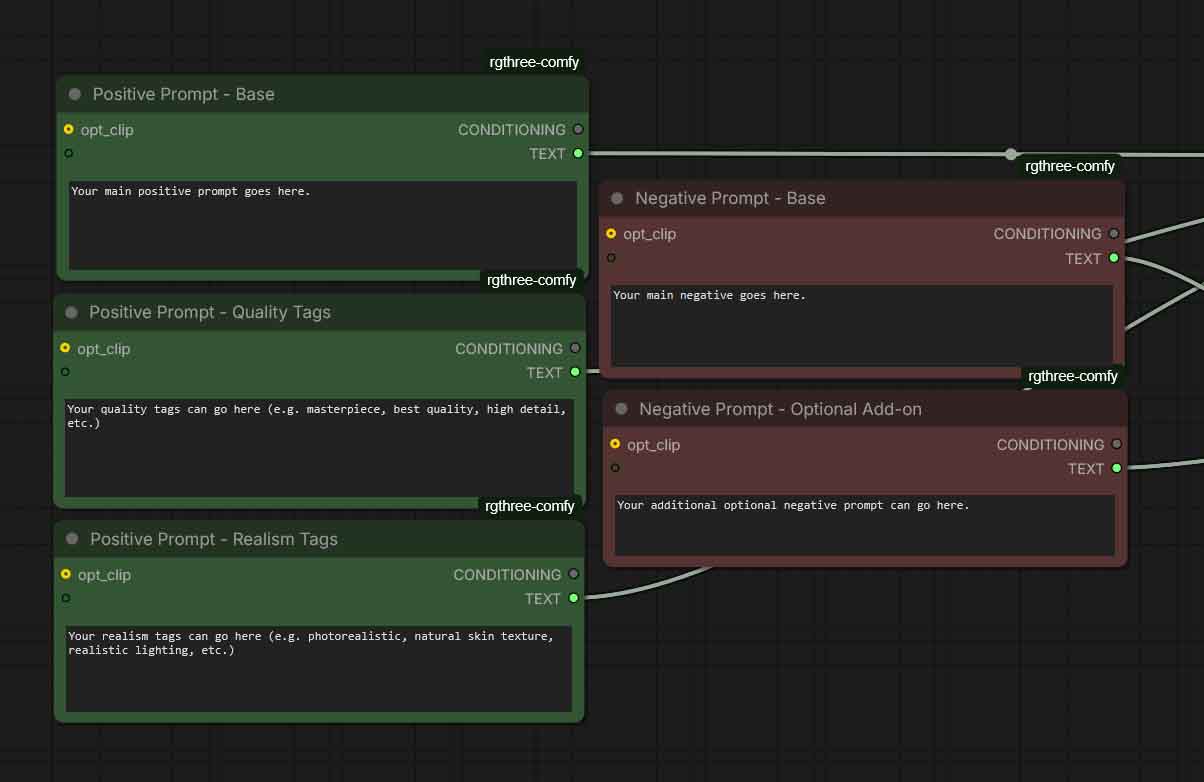
Create separate Power Prompt – Simple (rgthree) nodes for parts of your prompt that you want to keep separate/modular, for example:
When it comes to positive prompts, here is what I like to do:
- Keep the base subject + composition in your main prompt box, made a little bit bigger and easier to edit.
- Put quality/style tags for the model I’m using in a separate box, as these usually don’t change much and are reused from generation to generation, even when the scene descriptions change substantially.
- Move optional prompt addons (like certain image style descriptions) to separate text prompt nodes. These can include, in separate Power Prompt boxes:
- “Realism” tags. Having a set of “realistic image” style keywords/descriptions on hand, that you can quickly add to your main prompt or disable at will is really handy!
- All of the other style tags, like for instance a keyword/descriptive prompts for an origami image style, baroque painting style, and whatever you might need to be able to quickly activate and bypass when generating images.
- LoRA related prompts: character tokens, LoRA trigger words, etc. When it comes to these, as you’ll see in a while, you can also put them inside the same node groups as the corresponding LoRAs, and toggle them using the prompt switches from the Fast Groups Bypasser.
When it comes to negative prompts:
- Put base negatives that you use with your model in your main negative prompt box as per usual.
- Optionally, if needed, place additional extra negatives (style-specific, artifact-specific, and so on) in other new Power Prompt nodes.
A neat trick here is that you can also use a combo of double Power Prompt boxes when for instance a certain style you want to invoke needs to come with its own negative prompt. In that situation, put two Power Prompt boxes next to each other, one containing the positive prompt for that style, and the second with a negative one. In the following steps you’ll learn how to quickly group, activate, and bypass these together.
In the next step, you’ll use the TEXT output of each Power Prompt node (not the CONDITIONING output) to assemble one clean final prompt string from all of your nodes. In the step following that, we will put the corresponding style nodes in separate groups, and set them to be easily toggleable using the Fast Groups Bypasser node.
Want to learn more about efficiently prompting anime-style models using booru tags for the best output quality and prompt adherence? Check this out: Booru-Style Tagging, and How To Use It With SDXL Anime Model Prompts
2) Merge Positives With The Text Concatenate Node
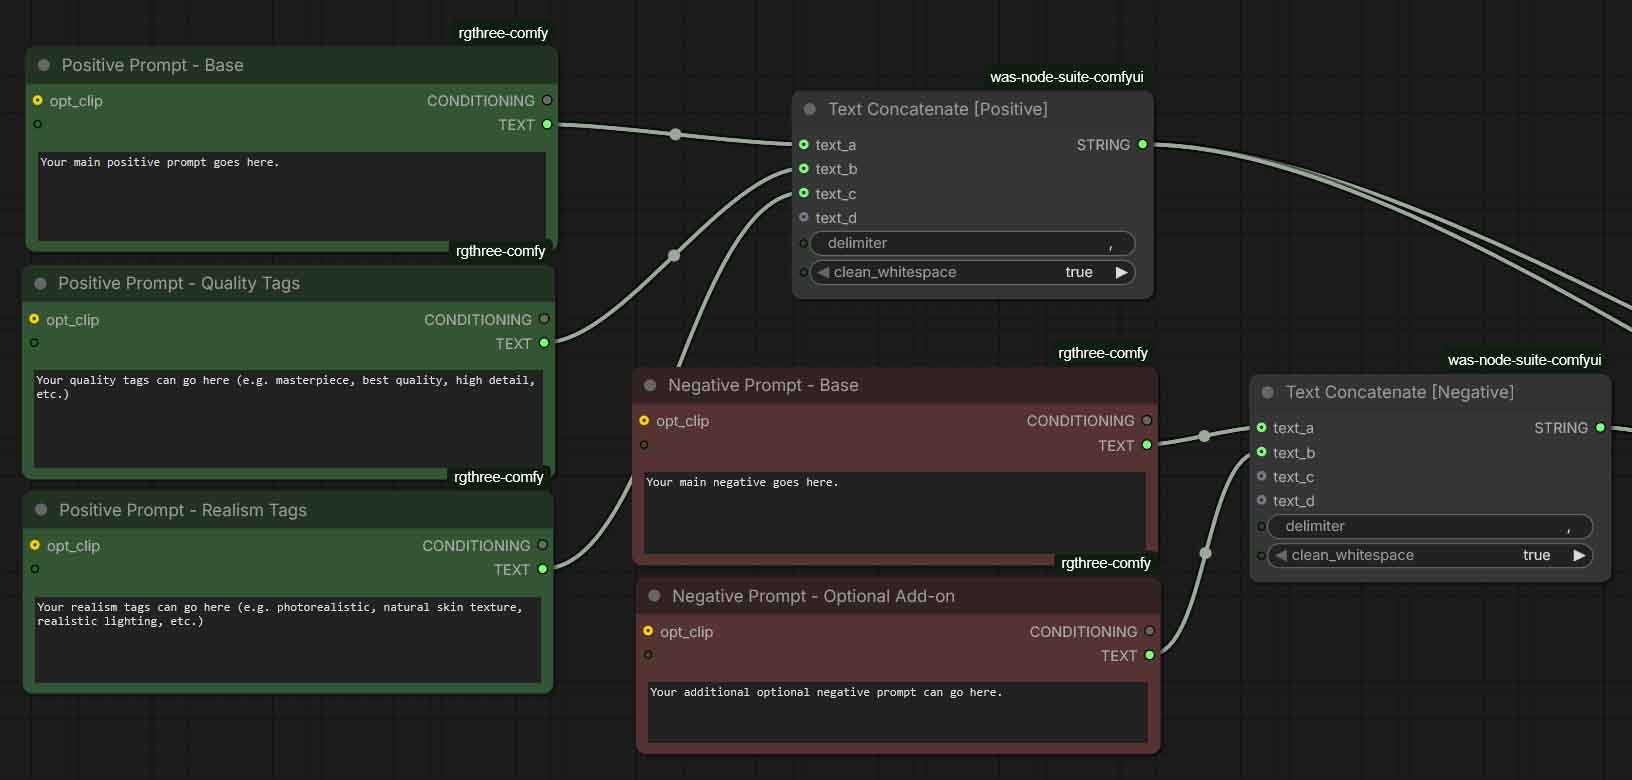
Add the Text Concatenate node and connect the positive prompt modules that you’ve just created to text_a … text_d. Set:
delimiter:,clean_whitespace:true
This reliably prevents prompt formatting junk (double commas, uneven spacing) and produces one final string that you will, in a second, push through to the text encoder and the KSampler.
If you need more than 4 parts: chain multiple Text Concatenate nodes (e.g., concatenate A–D into one, then merge that with more parts).
3) Merge Negatives (The Exact Same Idea)
If you use multiple negative boxes, run them through a second Text Concatenate node with the same delimiter/cleanup settings.
4) Feed The Final Strings To The Text Encoder
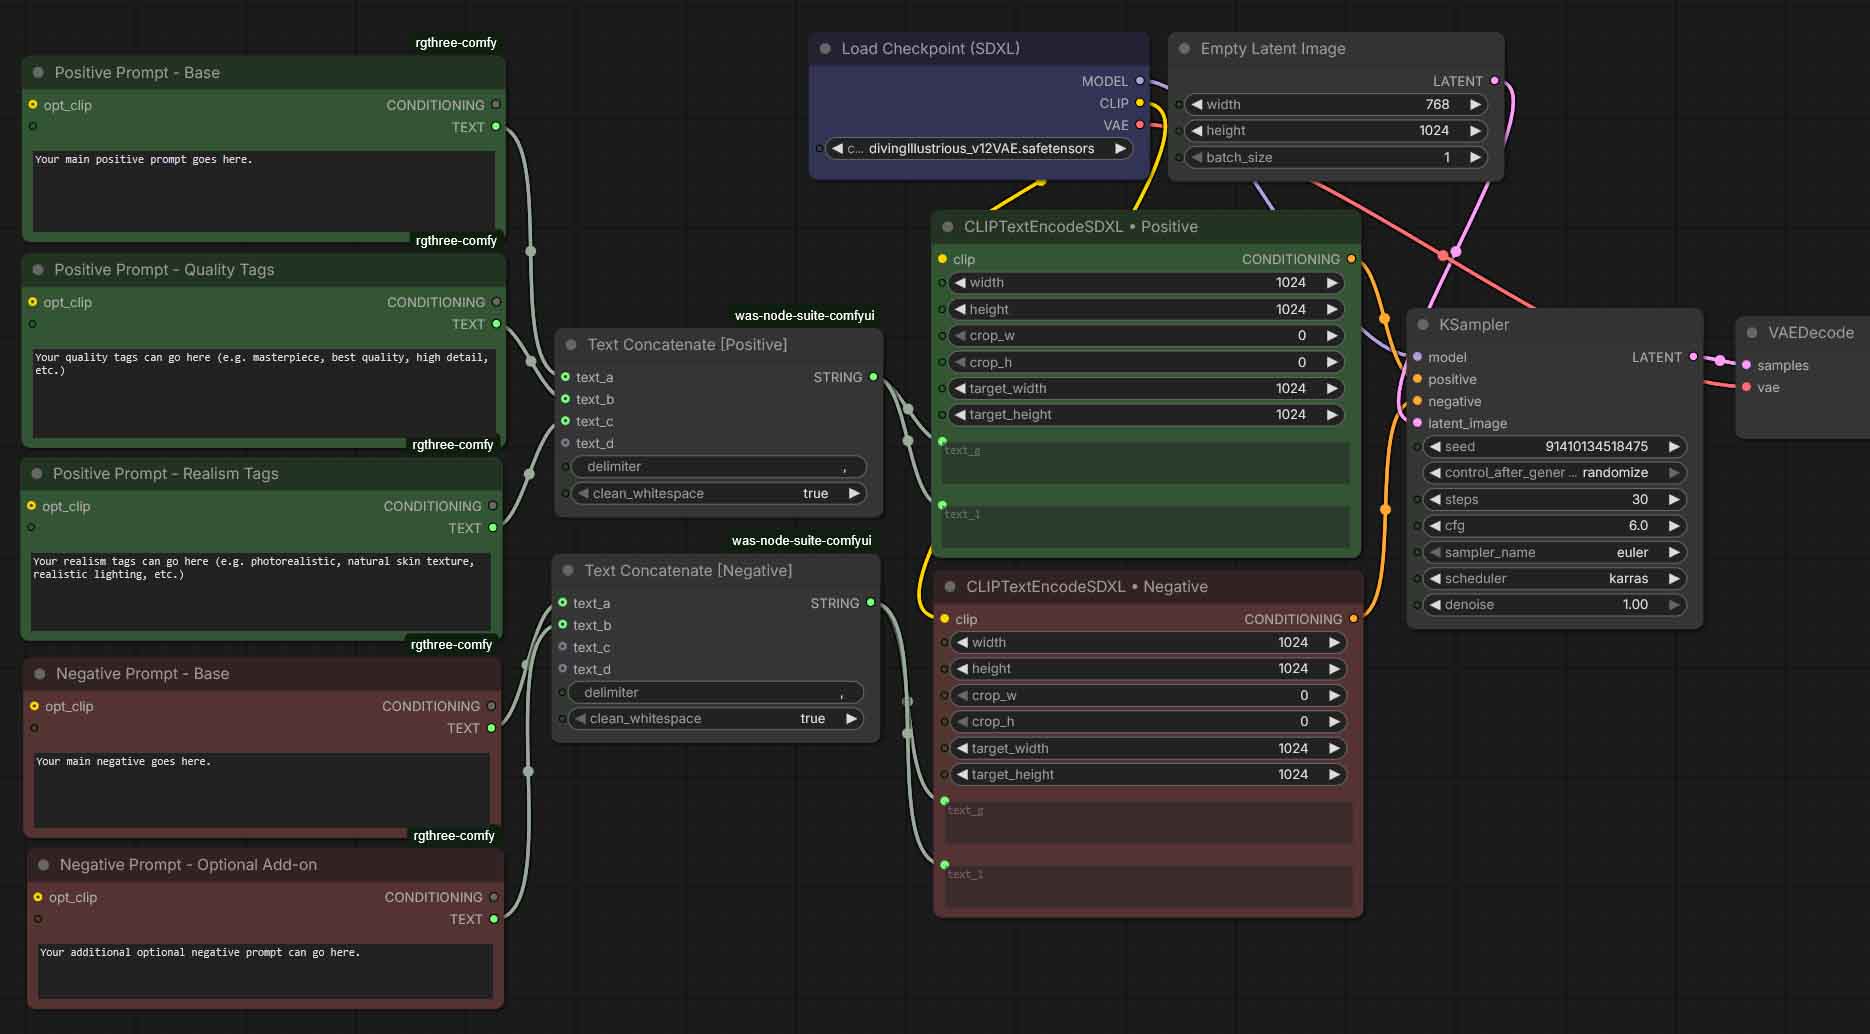
Now, you simply have to push your prompt that’s composed using all of the text inputs to the text encoder, so it can actually affect the sampler node, and thus, guide the image generation process. We will take care of switching the individual boxes on and off to activate and deactivate them in the next step.
- SDXL: pipe the merged positive STRING parameter from your Text Concatenate node into both
text_gandtext_lon your Text Encoder node. If you’re merging a negative prompt from parts too, do the exact same for the Text Encoder handling the negative prompt. - SD 1.5: feed the merged STRING parameters from the Text Concatenate node into the single text input on your Text Encoder. Once again, do the same for the negative prompt if you’re also constructing it from different parts.
Now your sampler will see a single coherent positive/negative prompts, built from your modules. Now let’s see how you can quickly switch your separate prompt modules on and off.
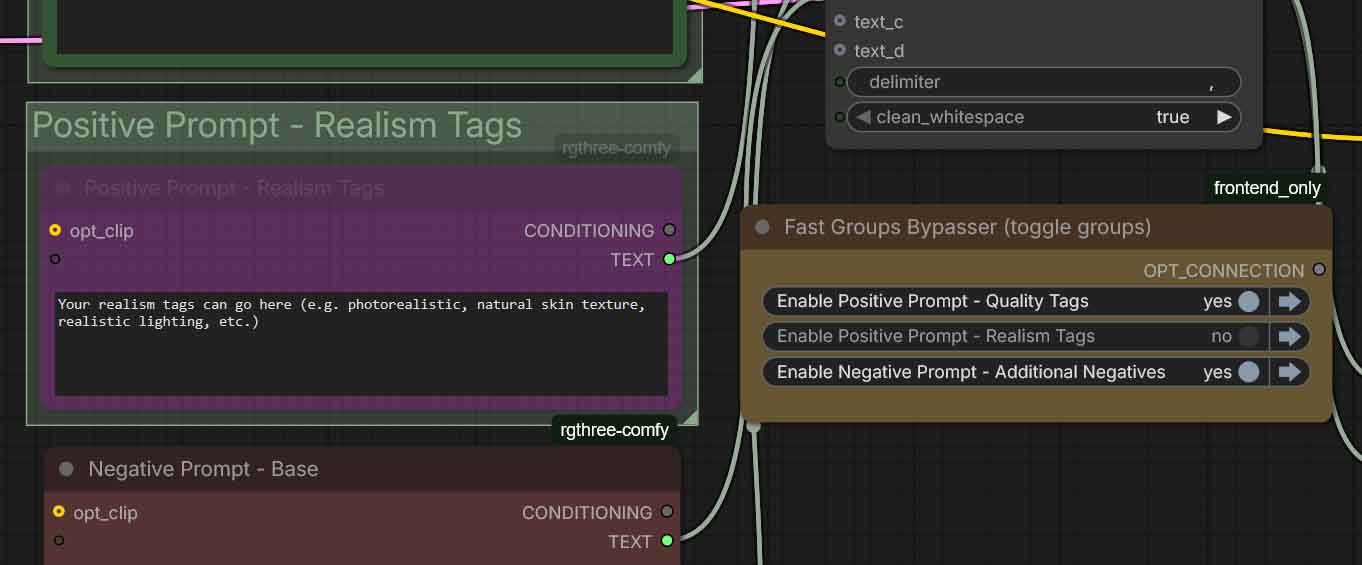
Switches: Toggle Prompt Modules With Node Groups + Fast Groups Bypasser
Now comes the switching part.
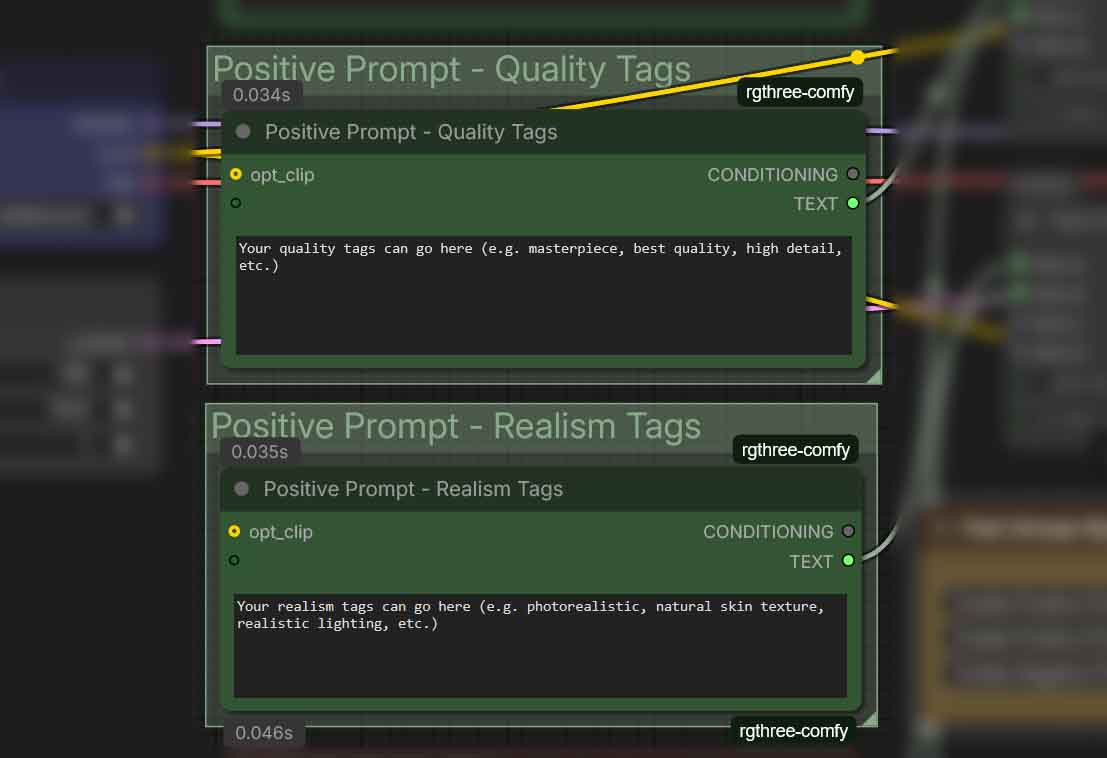
- Put each optional prompt module in its own Group. These will be 1-node groups each containing just the Power Prompt node with the part of the prompt you want to be able to quickly switch on and off.
- Reminder: to group nodes in ComfyUI, select the nodes you want together using ctrl+click, and then use the ctrl+G shortcut to group them together. Note that you don’t want any other nodes to enter the group’s rectangular overlay if you don’t want them to be included in the group.
- Name groups clearly, as these names will later display on the switches that we’re about to make, e.g.:
"Positive Prompt - Realism Tags""Negative Prompt - Additional Tags""Additional LoRA Prompt"- …and so on. The best practice here is in most cases to leave the group names the same as the prompt nodes.
- Add the Fast Groups Bypasser (rgthree) to your workflow. The individual groups will appear in the node with a bypass switch next to them.
- Use the toggles to bypass/un-bypass the groups that contain your prompt modules.
That’s it! Now you can easily A/B test styles, on/off character/LoRA triggers, and apply different customized prompt parts without disconnecting node connections or maintaining multiple prompt variants.
Don’t forget to check for doubling if you’re using a modular prompt structure like this. It’s easy to forget that you’re already using some phrases or tags in your switchable prompt additions and use them again in your main prompt box. This can often be detrimental to your output image quality, or yield unexpected results.
Quick Ready-To-Import Template (SDXL, Includes Example Toggles)

If you’d like to see how such quickly put together mechanism works in an example workflow, I have an example SDXL workflow with prompt parts switching that you can get from my Google Drive here. After you’ve downloaded the JSON file, drag-and-drop it onto the canvas in ComfyUI, or use the Load menu option. That’s it!