
GameNative lets you play many titles from your Steam, Epic Games, GOG and Amazon libraries on your Android phone. Alongside GameHub and Winlator, it’s a significant step forward in x86-64 to ARM translation and emulation, making many PC games relatively easily accessible on mobile devices without streaming. Here is how it works and how you can quickly set it up.
GameNative Quickstart and Steam Library Connection
In GameNative you have two ways to connect your Steam account to access your games. The first one is using your actual login and password (and a one-time code if you’re using two-factor authentication), and the second one, using a QR code and the Steam app on your smartphone.
If you are not comfortable typing your Steam password into a third-party client, the QR-code login route is the more reassuring option. It also tends to feel smoother when Steam Guard is already set up on your phone, since the approval flow stays inside the official Steam ecosystem.
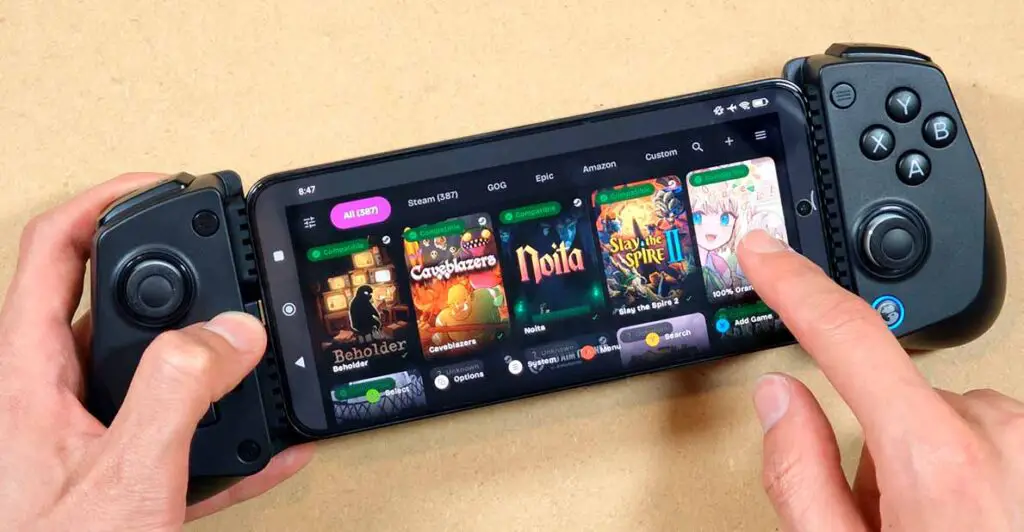
Once you log into Steam, you will have access to your full game library from the main GameNative menu. Connecting your Epic Games, GOG and Amazon game libraries can be done in a similar way. Of course, the games showing up in the library browser does not mean that every game will install, launch, or run well.
Remember that because GameNative is a third-party app, although it’s free and open-source, connecting a store account can still carry some account-security risk. Use the official download source, keep Steam Guard enabled, and avoid unofficial APK mirrors of the app.
If you don’t want to connect any of your game libraries with the app, you also have the option to run non-Steam games from local storage. All you have to do is point the app to the folder containing your game files, and it will appear in the “Custom” tab ready to run.
Downloading Your Games
Downloading games in GameNative from the supported storefronts is pretty straightforward, and the download interface looks very similar to what you might find on Steam. For Epic Games, GOG and Amazon, the process is also very similar.
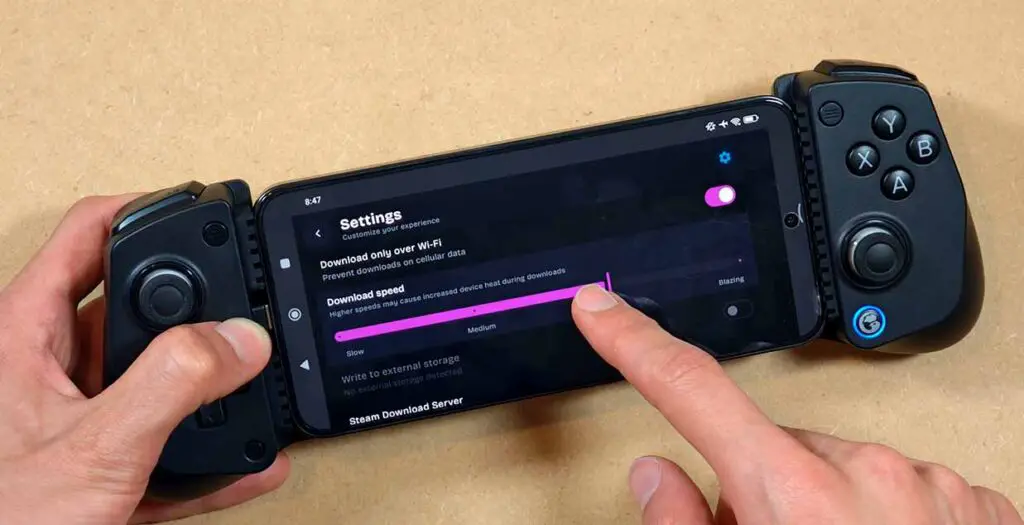
By default, the download speed is significantly reduced to avoid performance issues on older phones.
You can (and in most cases should) increase the download speed in the part of the settings menu shown in the image above, to take full advantage of your fast internet connection.

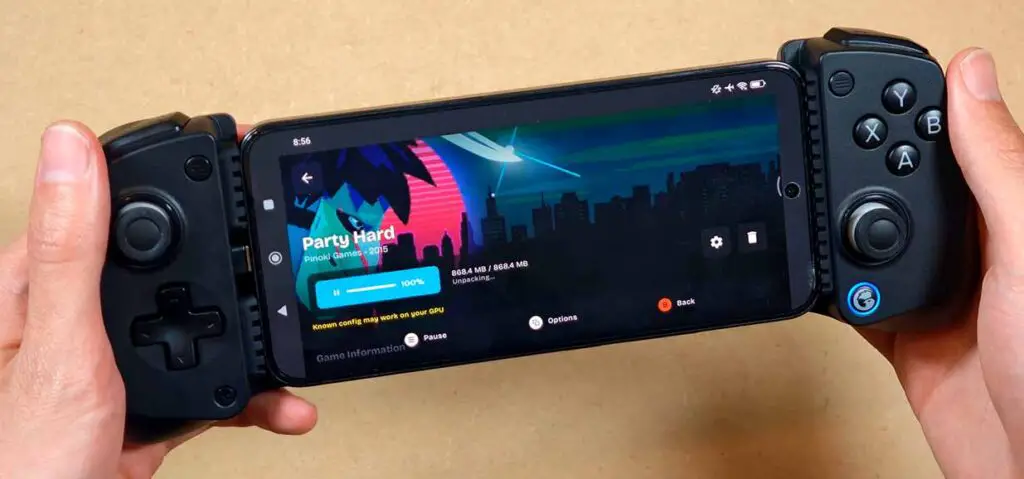
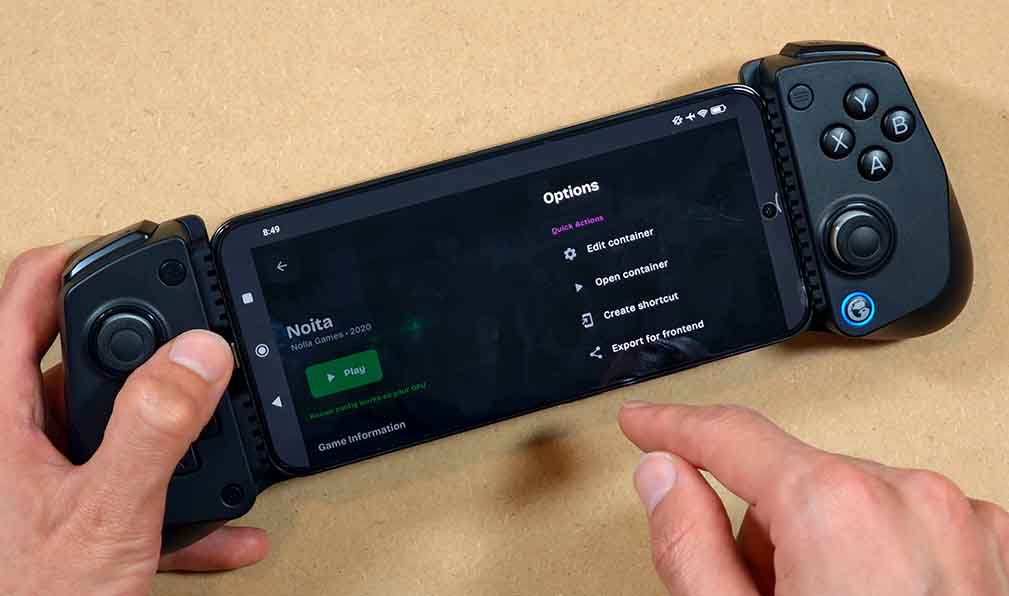
Launching the games, although it’s done with a single tap of a button, is a bit of a process. GameNative, on the first game launch, will set up the emulation environment and pull in the most appropriate settings for the game, which can often take up to a few minutes.
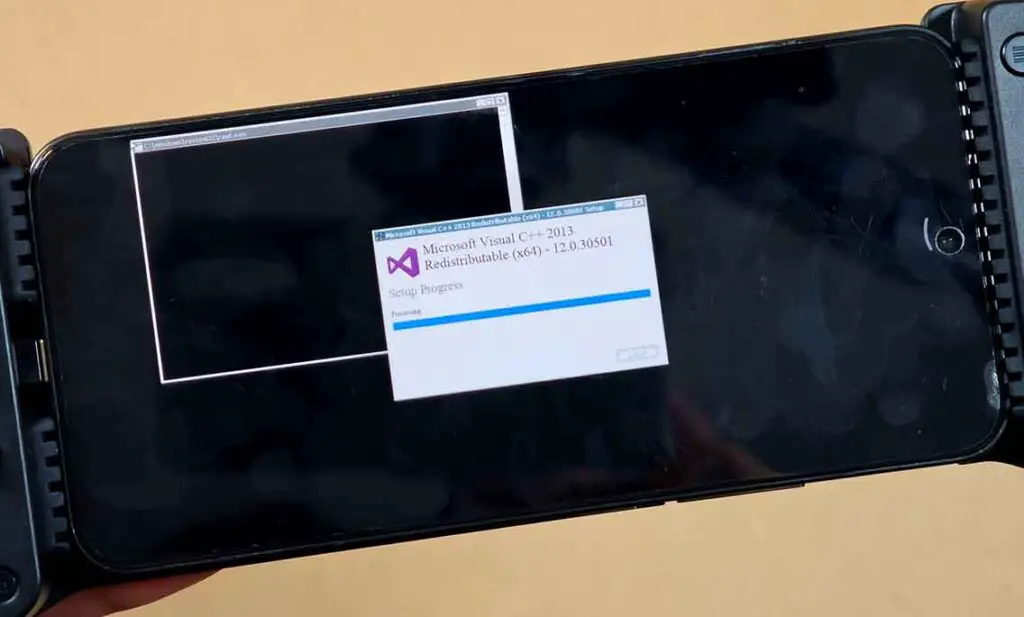
If your game does require any kind of additional components to work, their installation should be handled automatically inside the container. This was the case with games that required the usual Microsoft Visual C++ redistributables in the case of the titles I’ve tested. These installations seem to be per-container, so they will be repeated for each game that requires them.
That also means changing major container settings later can sometimes force parts of that setup process to happen again. So if a game suddenly takes longer to boot after you switch runtime-related options, that is not necessarily a sign that something went wrong.
After all of the automatic initial setup is done, your game will either start ready to play, or go back to the game launch screen, in which case you will have to manually adjust the correct emulation/container settings for it to work.
Keep in mind that while many simpler titles do work on GameNative without any major problems, there are many games that are incompatible with most available emulation environments and setting combinations, or very hard to run even on more recent devices.
In short, for now, GameNative is best suited for lighter 2D games, older 3D games, and titles without heavy anti-cheat or complicated external launchers. Newer AAA games, games with strict DRM, anti-cheat, always-online checks, or launcher dependencies may fail to launch or require extensive tweaking.
Also, cloud saves are of course a major advantage when they work (and they worked for me for most games I tested), but they should not be treated as guaranteed for every game. If your existing saves matter to you, it’s another thing to keep in mind.
The On-Screen Buttons & Controller Compatibility
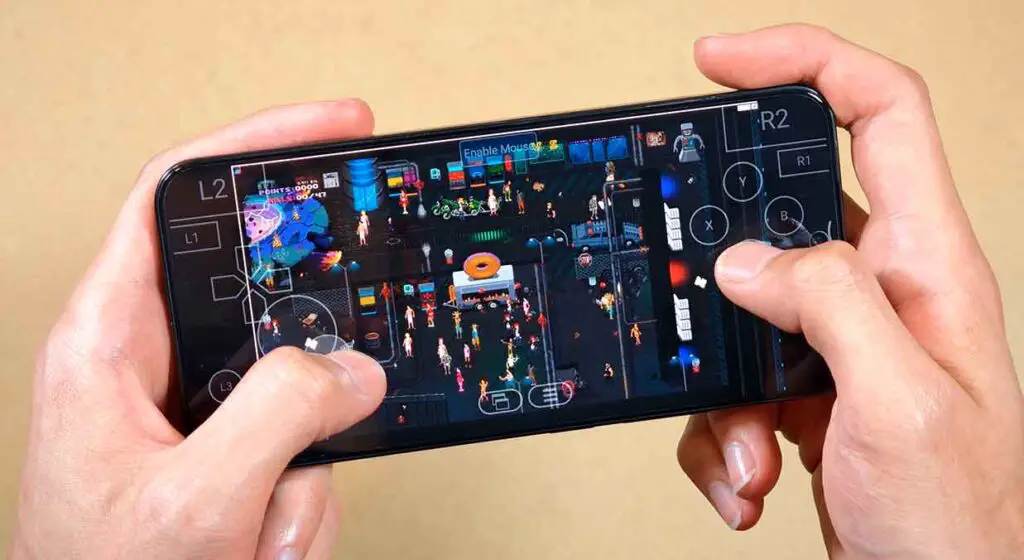
As you can see in the image above, the basic on-screen controls are fairly standard and resemble what you get in emulators like PPSSPP. While I prefer to game using either wireless Bluetooth controllers, or telescopic clip-on controllers like the GameSir X5 Lite you can see on most images in this article, the built-in controls are perfectly serviceable if you don’t mind sacrificing some display real-estate.
You can find the standard transparency settings to adjust the opacity of the on-screen buttons, as well as change the positions of separate buttons in the app settings. Still, for me, the best experience you’ll have with GameNative emulation is with utilizing external controllers. GameNative is, as you might expect, compatible with most controllers you throw at it.
You might also like: 14 Best Clip-On Controllers for Retro Mobile Gaming (Android/iPhone)
Practical Gaming Experience – And Game Compatibility Tests
Having a Xiaomi 15 Ultra on hand, I’ve decided to do most of my testing on an older Xiaomi 14, to get a good idea of how well simpler PC games can run on a high-end, but not the latest hardware.
So, my testing conditions were exactly:
- Device: Xiaomi 14
- Chipset: Snapdragon 8 Gen 3
- GPU: Adreno 750
- Memory/storage class: LPDDR5X RAM and UFS 4.0 storage
- Test resolution: 720p
- Controller used: GameSir X5 Lite
I decided to settle on four titles, namely Caveblazers, Noita, Slay the Spire 2, and Trackmania Nations Forever.
There is one main reason why I did not attempt running more complex 3D titles. The more “hardcore” configurations for emulating older AAA titles are already explored in many different articles and YouTube videos, and I, as always, prefer to focus on more realistic and more common use cases than pushing the emulation setup to the max.
All of the tested games were run with default configurations and in 720p resolution.
Caveblazers, being a great, but visually simple roguelike worked without any problems with the default configuration. Fully playable and enjoyable.
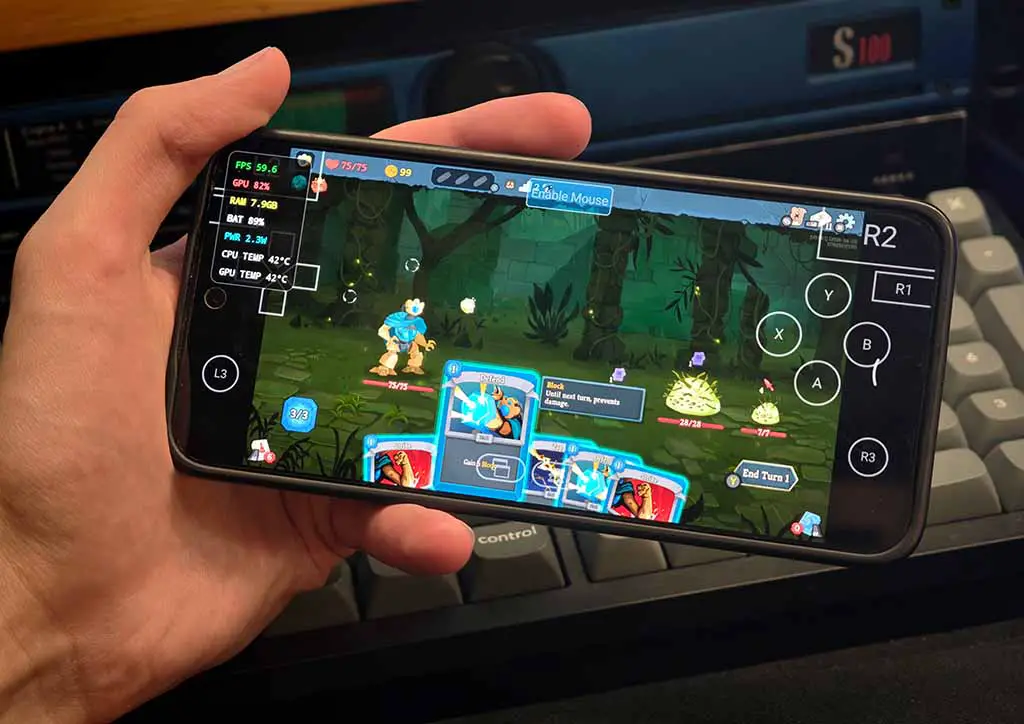
Slay the Spire 2, which I expected to run without many problems, initially refused to launch at all. However, after visiting the GameNative website and downloading one of the community STS2 configs for the Samsung Galaxy S24 Ultra which uses the same Adreno 750 GPU as the Xiaomi 14, it launched and ran without any trouble and was completely playable as well.
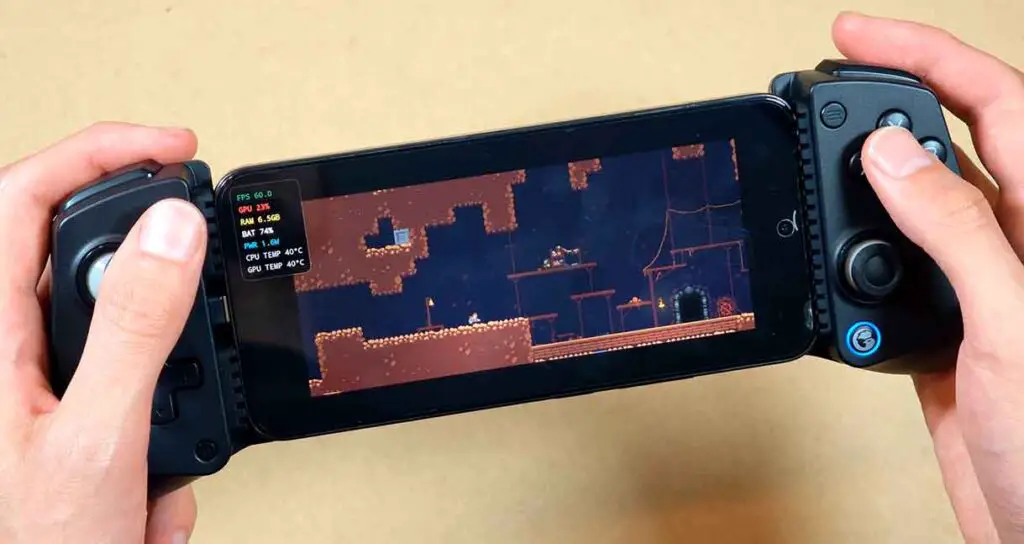
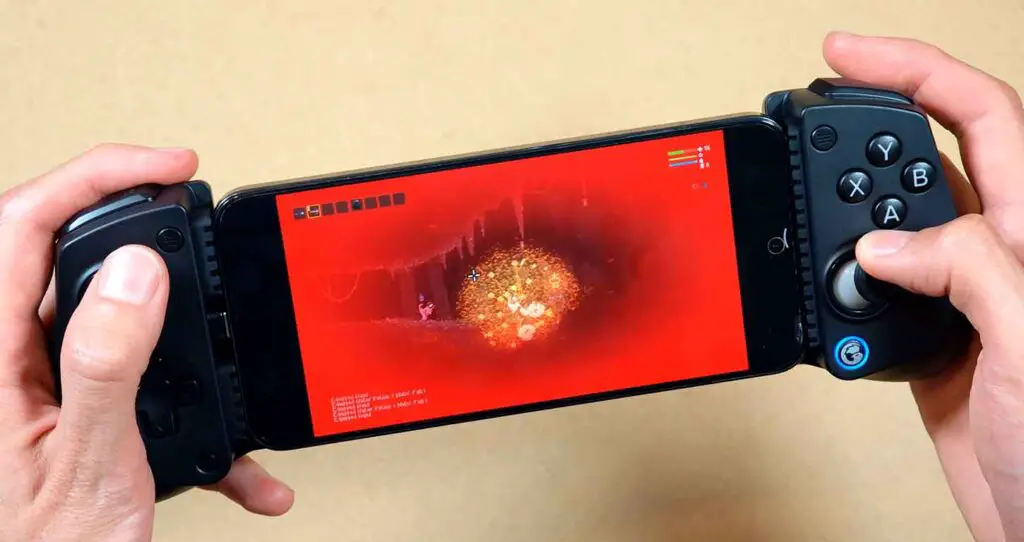
Noita, although it also launched just fine without any setting tweaks was losing a lot of frames, presumably because of its rather complex environment simulation engine constantly running in the background. I wouldn’t consider it playable without additional setting or resolution tweaks because of the critically low framerate.
Lastly, Trackmania Nations Forever, being a much older title worked very well, with some minor slowdowns and audio glitches along the way. Playable and possibly even more enjoyable with some setting tweaks.
GameNative lets you rate your experience after both successful and unsuccessful game runs. This data is used to build their game compatibility list that, in theory, is the source of the recommended per-game configs.
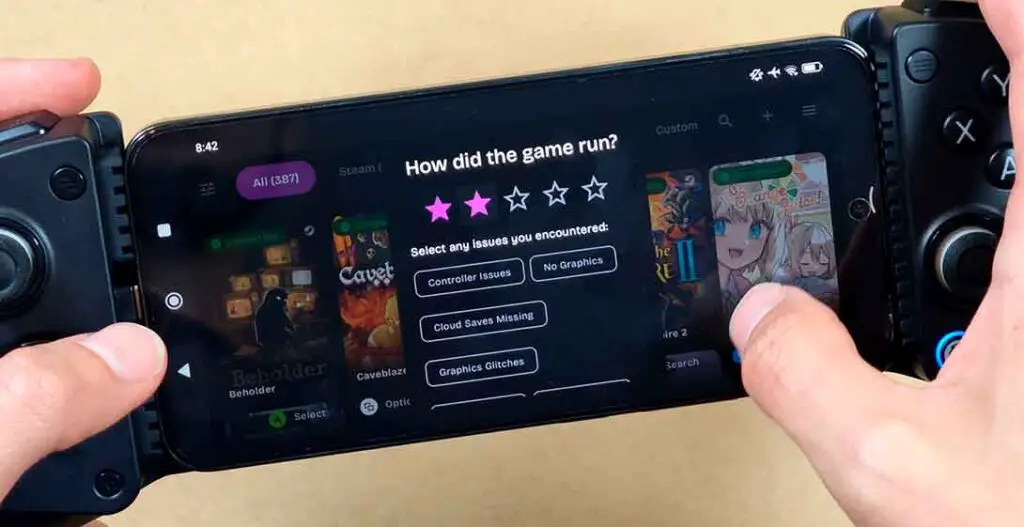
Still, at times, the default configs chosen by the app will be less than optimal, and you will be much better off consulting the list and copying the exact recommended setting values for your device yourself.
What to Tweak First When a Game Will Not Launch
Talking about the setting tweaks, there are a few main tweaks you can do even with limited knowledge of how the emulation process works under the hood.
If your chosen game doesn’t work, you can try and change the following settings that can have the most impact on your games in many “doesn’t run at all” scenarios:
- Container variant – switches the base runtime or wrapper stack the game boots with. If a title refuses to launch at all and crashes immediately, the proton version used by the container is usually the first setting worth changing.
- Wine version – changes the compatibility layer version used by the container. Newer builds can fix launch problems or input issues, while older ones can sometimes be more stable with specific games.
- Graphics driver – chooses the GPU translation backend. This is the main setting to test when you get a black screen on game launch, broken lighting, missing textures or weird color artifacts in-game, heavy stutter, or when you’re dealing with a game that technically launches but renders its graphics incorrectly in any other way.
- Graphics driver version – lets you try different revisions of the same driver. This is similarly mostly useful when a game almost works already, but still has visual glitches, random crashes, or unusually bad performance.
In general, a sensible troubleshooting order is by changing the container variant first, then the Wine version, then the graphics driver, and only after that the specific driver version. Changing one setting at a time makes it much easier to tell what actually solved the problem.
You might also like: GameSir X5 Lite Hands-On Review

Remember that you can always refer to the compatibility list to find settings most appropriate for your device for a given title. In many cases, consulting this list will save you a lot of trial and error. Also, if the game launches but runs poorly, lowering the resolution from 720p to 480p is usually the quickest performance tweak before digging deeper into more advanced options (although it certainly is a significant quality-speed tradeoff).

How Does GameNative Compare to Other Android PC Gaming Apps?
Having tested the GameSir GameHub app, as well as Winlator, the one thing I can say for sure is that for most practical purposes, both GameNative and GameHub are very similar in terms of user experience, and differ slightly in terms of out of the box game compatibility.
Winlator, on the other hand, is more of a tool than a finished user-facing platform, which is not necessarily a bad thing, but it does mean the experience is far less streamlined and a lot more dependent on how willing you are to tinker.
If all you want is something that gets you into your games with the least amount of setup, GameNative and GameHub are the more approachable options. If you care more about flexibility, manual control, and squeezing compatibility out of edge cases, then Winlator still has the advantage, as the most “raw” solution of them all.
The “Steam Client Instance Must be Connected” Error in GameNative
The “Steam Client instance must be connected” error often points to a broken or expired Steam session rather than the game’s graphics/container config. Recent GameNative updates specifically fixed Steam WebSocket disconnects, unexpected auth loss, and Steam sign-in state problems, so the first thing to do is update the app.
If the error is still there, sign out of Steam inside GameNative and sign back in. If the sign-in option does not appear, restart the app once and try again. If GameNative opens in offline mode, switch back online before launching the game.
If none of that works, in some cases clearing GameNative’s app storage and logging in again from scratch can work too. Before doing that, remember that it will remove your local app settings, container tweaks, custom entries, and possibly local save-related data, so back up anything important first.