
This is all about the Lonsonho ZB-RGBCW, also known as the eWeLight ZB-CL01 LED Strip. I’ve bought it, tested it, and now it’s in my office for good. Here is my detailed review of one of the best Zigbee-controlled addressable RGBCCT LED strips with adjustable white light temperature control that I could find on AliExpress, along with the setup process, Home Assistant details, and many photos. Enjoy!
This web portal is reader-supported, and is a part of the AliExpress Partner Program, Amazon Services LLC Associates Program and the eBay Partner Network. When you buy using links on our site, we may earn an affiliate commission!
The Specs Table
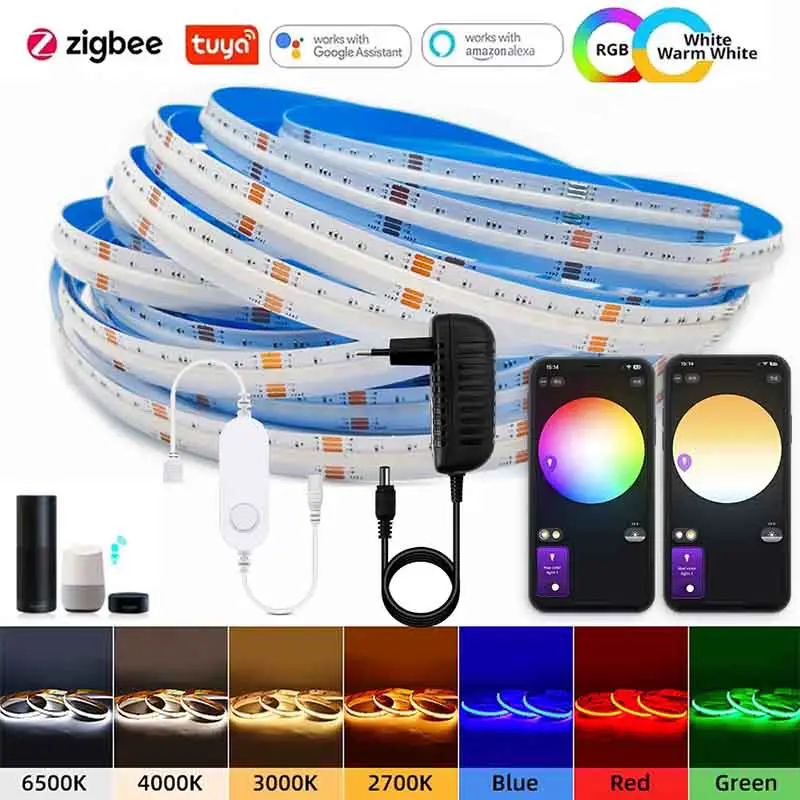
Important notes: Although this LED strip is advertised as addressable, it is most likely addressable in clusters, which is common for most 24V strips at this price point. Since the bundled controller is used here, this distinction does not really impact our review and is therefore not a part of the tests. Additionally, although the product’s official name ends with “RGBCW”, the strip does support adjustable white light color temperature, which would more accurately classify it as an “RGBCCT” device.
Unboxing & First Look

IInside the package, besides the LED RGBCCT strip (which I’ve purchased from this AliExpress store), you will find a 24V 2A power supply, and a compatible Zigbee controller with a 6-pin female connector on one end, and a round female barrel connector on the other.
The strip itself is lined with blue tape that protects the adhesive layer, which is designed to help you easily fix the entire strip inside your chosen LED profile or mounting channel. It’s a very useful feature and definitely made the setup process much easier, as you will see shortly.
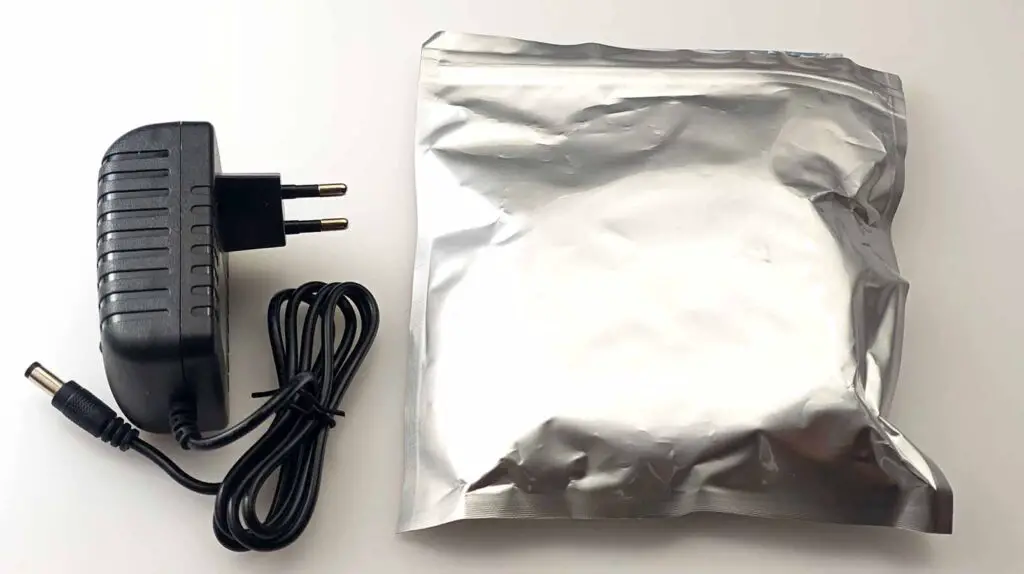
The power supply is, as expected, pretty lightweight, with the writing on its back identifying it as “Model JCY-2420”. It accepts AC 100-240V input at 50/60Hz and outputs 24V at 2A, as already stated. Not much more to say here. It still works after a few months, and my apartment hasn’t gone up in flames (yet).
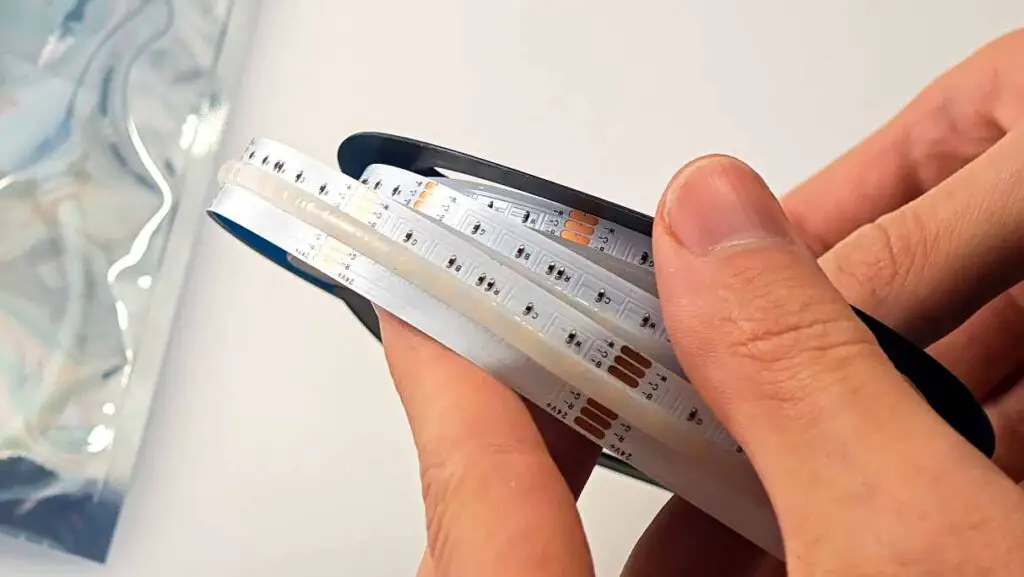
The LED strip itself is very well made, and the LED spacing is excellent, as you can almost see in the image above if you look closely for the tiny orange dots hidden under the cover (you should be able to click on the photo to enlarge it).
Of course, it goes without saying that you can cut the strip at any of the marked places, as usual. That’s exactly what I did to fit two of the strips I had into my LED profiles, which were shorter than 2 meters. For those who need longer strips, there are also 3, 4, and 5-meter versions available.
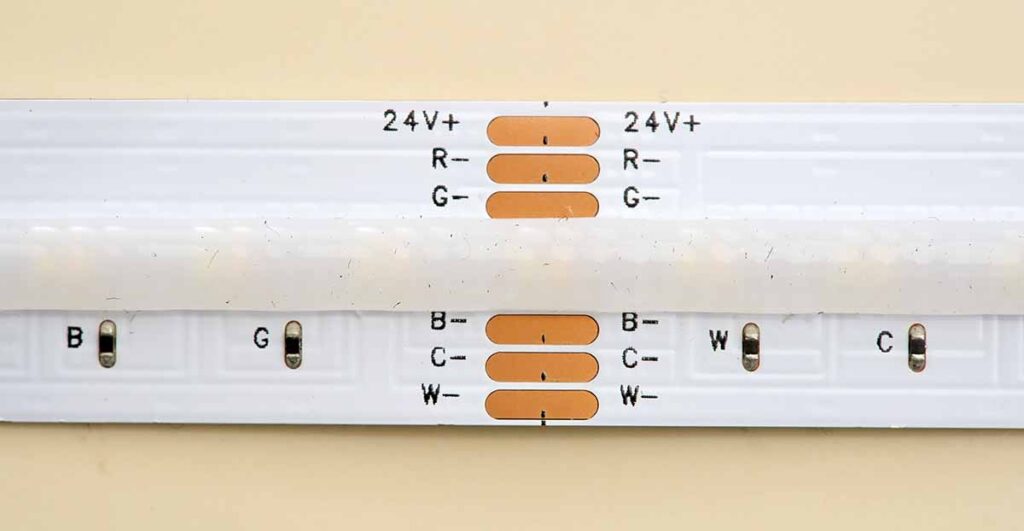
The 6-pin Connector and Bundled Zigbee Controller
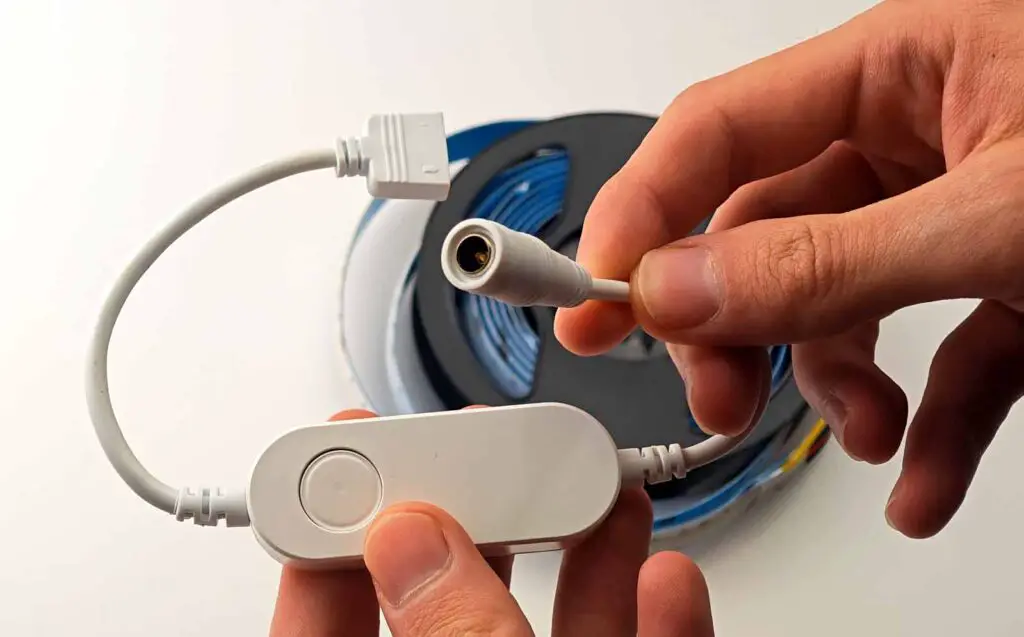
The Zigbee controller is a generic 6-pin YSRSAI YSR-MINI-01_rgbcct model, commonly bundled with most RGBCCT light strips purchased from AliExpress that require a non-USB power supply.
The entire setup process involves plugging the LED strip’s 6-pin connector into the 6-pin port on one side of the controller, and connecting the power supply to the 5.5 mm x 2.5 mm barrel connector on the other side. That’s it.
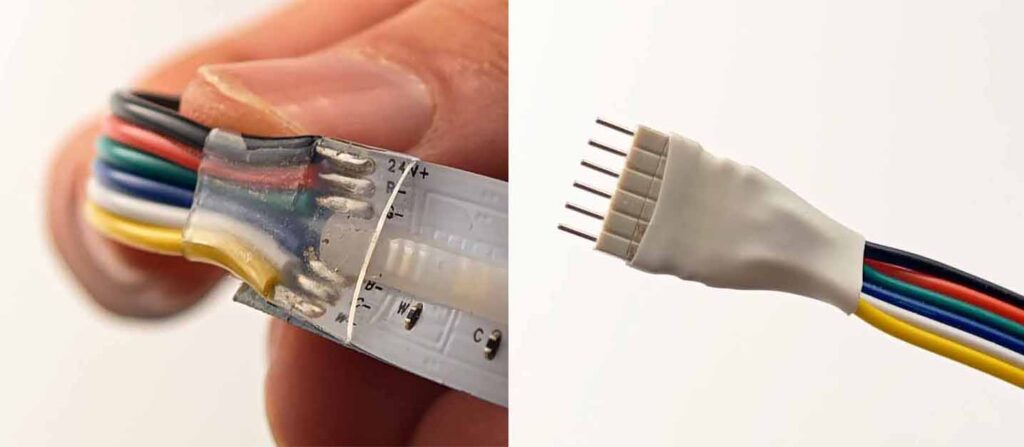
Although I praised the quality of the strip itself, my only point of critique concerns the connection of the color-coded cables to the strip. While they are soldered neatly and protected by small pieces of heat-shrink tubing, on one of the strips I ordered, the connection was faulty on one of the paths. This forced me to cut and reattach the cables using a clip-on LED strip connector (since I’m terrible at soldering).
This appears to be more of a quality control issue, which, to be honest, is quite common with many inexpensive products from AliExpress, as one might expect. I just found this to be important to mention.
Home Assistant Setup (In a few Clicks)
After the LED strip was connected to the controller, and the controller to the power supply, it was time to pair the device with my Zigbee network.
Once you provide power to the LED strip, it will start flashing slowly, indicating that it has entered pairing mode. If it does not enter pairing mode automatically, simply press and hold the button on the controller for about six seconds.
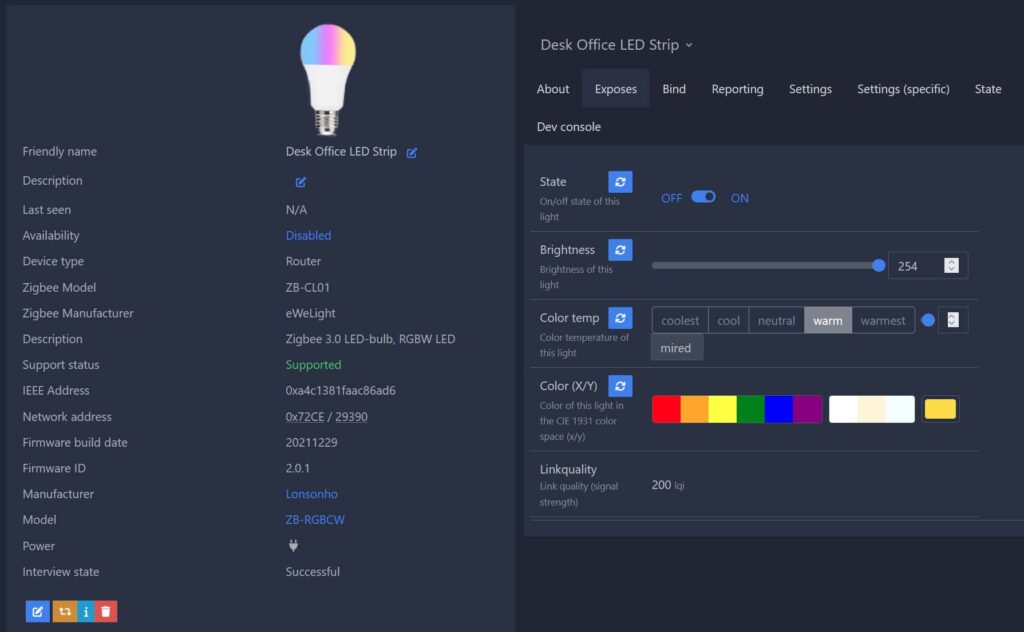
Zigbee2MQTT has quickly recognized the device as follows:
- Manufacturer: Lonsonho
- Model: ZB-RGBCW
- Zigbee manufacturer: eWeLight
- Zigbee model: ZB-CL01
A quick glance at the official Zigbee2MQTT devices documentation shows that this device seems to really be the Lonsonho ZB-RGBCW, although the naming convention seems quite strange as the light strip supports white light warmth adjustment, which technically classifies it as an RGBCCT device (with adjustable color temperature), rather than an RGBCW device, as reflected in the official name.
Control over the light’s warmth, brightness, and various colors is available, and you can input custom color values, which may work better or worse depending on the color combination you choose.
One minor issue I noticed with the controller for one of the strips I got is that sometimes, when it is switched on and off rapidly in quick succession, it hangs for a few seconds before catching up with the sent inputs. This can in turn sometimes disrupt time-sensitive automations. I suspect that this could either be due to a faulty controller (which would be easy to replace) or an issue with my ZigBee network routing, which would be a local problem unrelated to the product itself. However, I have not been able to confirm this yet.
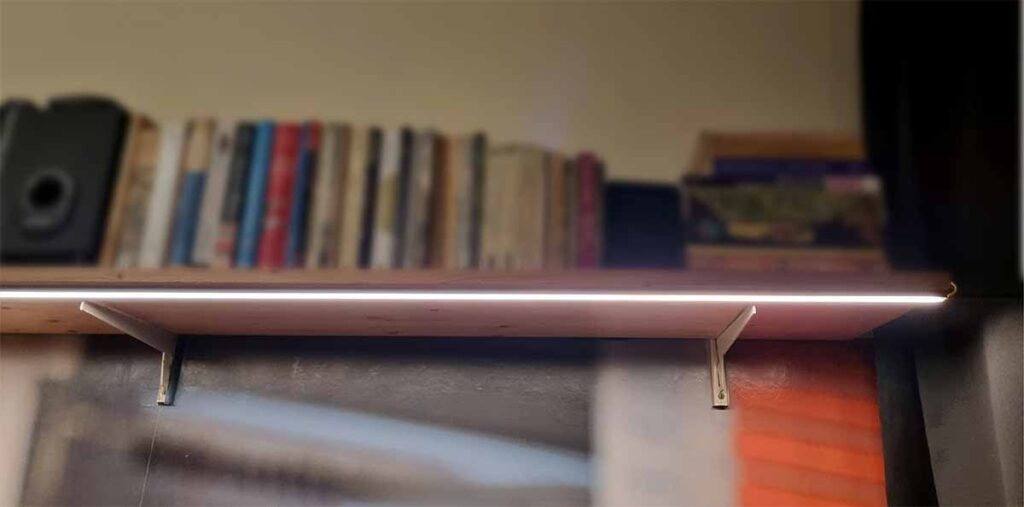
What Does it Look Like in Practice?
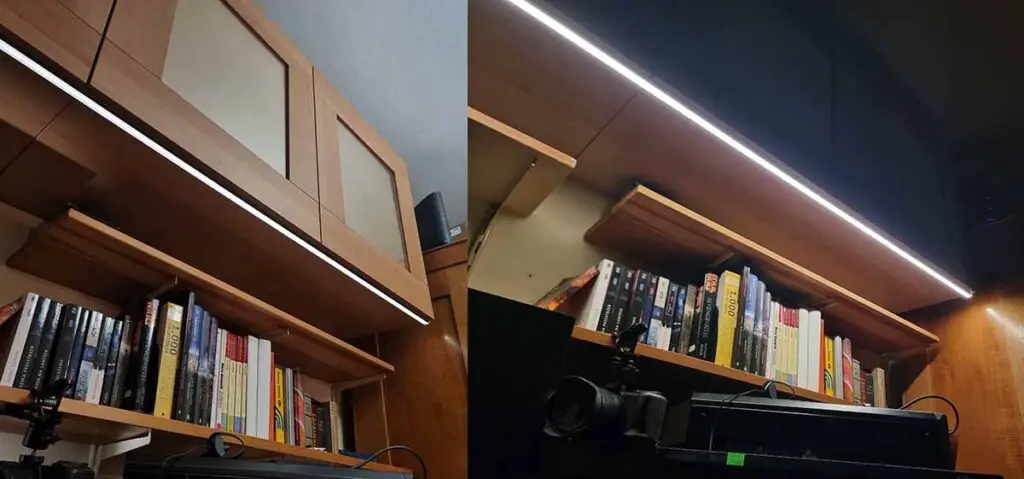
After purchasing a neat black LED channel with a diffuser cover (I got mine from a local store, but I also found a nearly identical one on Amazon), I cut it to size and placed the LED strips inside.
Then, I fixed one profile to one end of my office and the other to the opposite end using another neat gadget from AliExpress, a double-sided tape that I have a lot of faith in, mainly because it has not failed me yet (the LED profiles are still up after more than half a year).
On the image above, you can see what cold LEDs look like in practice, both when the room is well-lit, and in the dark. Pardon my photography skills.
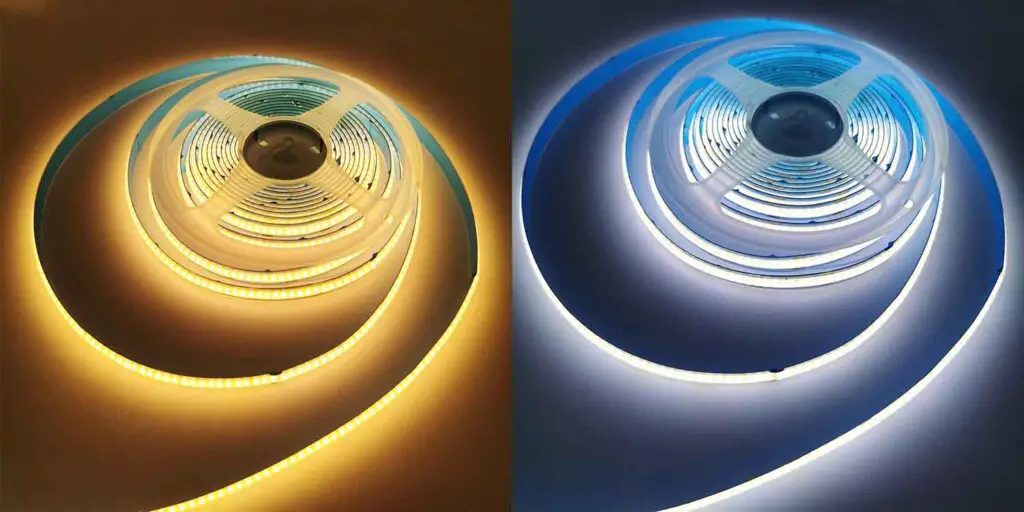
As I found it pretty difficult to catch the difference between the warm and cold light options on camera (which look substantially different in person), I’ll blatantly reuse one product photo from the AliExpress listing here. It’s fairly close to the real thing anyway, aside from some noticeable saturation added in post by the sellers.
You get full temperature control within Home Assistant, allowing you to customize it to your liking. I found the light temperature adjustment works really well.
Overall, I’m really happy with how it turned out, and the controls that the HA Z2M integration provides for it work perfectly.
Quick Colors and Light Quality Test
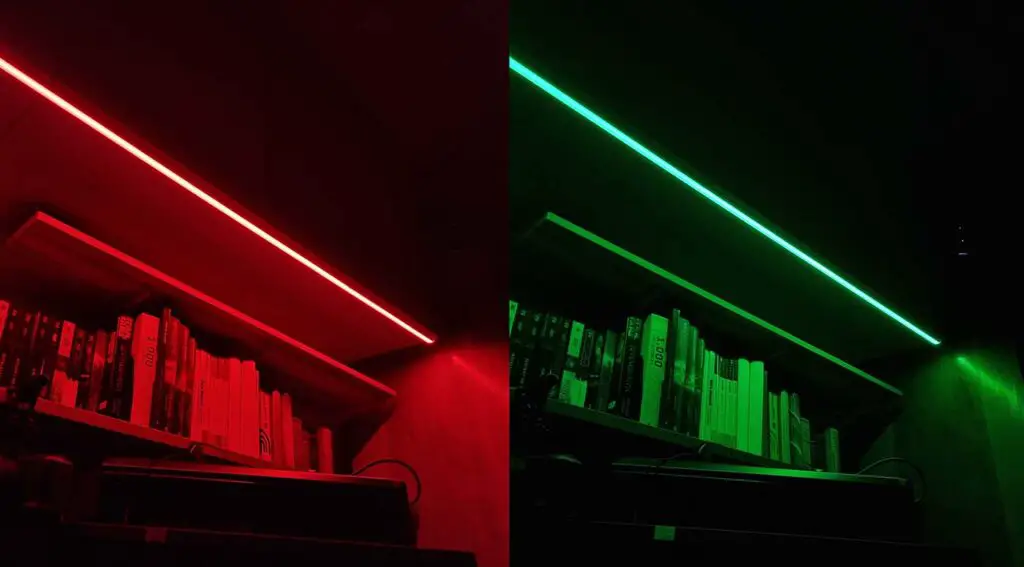
When it comes to the colors, I can’t really complain. The maximum brightness of each pure RGB color setting is comparable to the maximum brightness of the white light the strip can produce, and you can further mix RGB values to get the custom colors you want.
Of course, be prepared to notice individual LEDs blending colors to achieve custom RGB values that you can input in your smart home software. This phenomenon doesn’t bother me much, as I mostly use the preset solid colors, which are excellent in terms of consistency along the strip, as you can see in the image above.
My Final Verdict
In the end, the Lonsonho ZB-RGBCW (or the eWeLight ZB-CL01) LED strip turned out to be a great choice. Although I could potentially pay less by purchasing the strip, controller, and power supply separately, I really appreciated the convenience of having everything shipped together in one package.
Both of the LED strips I got have been in my office for a few months now, and honestly, despite some minor issues with the controllers, I think they are totally worth getting at this price. Yet another great find.
If you want to get it from the same store I bought it from, you can find it here. I hope you found this review helpful, and I look forward to seeing you next time, as there are quite a few more smart home hardware reviews coming!